


一、Playbook基础
1.1 Playbook定义
Playbook其实是Ansible服务的一个配置文件,Ansible使用Playbook的YAML语言配置编写成操作需求,实现对远端主机或策略部署,实现对远端主机的控制与管理。
1.2 Playbook组成
Tasks:任务,即通过 task 调用 ansible 的模板将多个操作组织在一个 playbook 中运行
Variables:变量
Templates:模板
Handlers:处理器,当changed状态条件满足时,(notify)触发执行的操作
Roles:角色
1.3 Playbook剧本详解
vim test1.yaml
---
#yaml文件以---开头,以表明这是一个yaml文件,可省略(但是如果两个YAML配置叠加的话,要以此为分割)
- name: first play
#定义一个play的名称,可省略
  gather_facts: false
#设置不进行facts信息收集,这可以加快执行速度,可省略
  hosts: webservers
#指定要执行任务的被管理主机组,如多个主机组用冒号分隔
  remote_user: root
#指定被管理主机上执行任务的用户
  tasks:
#定义任务列表,任务列表中的各任务按次序逐个在hosts中指定的主机上执行
   - name: test connection
#自定义任务名称
     ping:
#使用 module: [options] 格式来定义一个任务
   - name: disable selinux
     command: '/sbin/setenforce 0'
#command模块和shell模块无需使用key=value格式
     ignore_errors: True
#如执行命令的返回值不为0,就会报错,tasks停止,可使用ignore_errors忽略失败的任务
   - name: disable firewalld
     service: name=firewalld state=stopped
#使用 module: options 格式来定义任务,option使用key=value格式
   - name: install httpd
     yum: name=httpd state=latest
   - name: install configuration file for httpd
     copy: src=/opt/httpd.conf dest=/etc/httpd/conf/httpd.conf
#这里需要一个事先准备好的/opt/httpd.conf文件
     notify: "restart httpd"
#如以上操作后为changed的状态时,会通过notify指定的名称触发对应名称的handlers操作
   - name: start httpd service
     service: enabled=true name=httpd state=started
  handlers:
#handlers中定义的就是任务,此处handlers中的任务使用的是service模块
   - name: restart httpd
#notify和handlers中任务的名称必须一致
     service: name=httpd state=restarted
#Ansible在执行完某个任务之后并不会立即去执行对应的handler,而是在当前play中所有普通任务都执行完后再去执行handler,这样的好处是可以多次触发notify,但最后只执行一次对应的handler,从而避免多次重启。
1.4 Playbook命令
//运行playbook
ansible-playbook test01.yaml
//补充参数:
-k(–ask-pass):用来交互输入ssh密码
-K(-ask-become-pass):用来交互输入sudo密码
-u:指定用户
ansible-playbook test01.yaml --syntax-check    #检查yaml文件的语法是否正确
ansible-playbook test01.yaml --list-task       #检查tasks任务
ansible-playbook test01.yaml --list-hosts      #检查生效的主机
ansible-playbook test01.yaml --start-at-task='install httpd'     #指定从某个task开始运行
1.5 Playbook安装并启动httpd服务
cd /opt/
vim test01.yaml
---
- name: install httpd
  gather_facts: false
  hosts: webservers
  remote_user: root
  tasks:
    - name: connection ceshi
      ping:
    - name: disable firewalld
      service: name=firewalld state=stopped
    - name: install apache
      yum: name=httpd state=latest
    - name: install config file
      copy: src=/opt/httpd.conf dest=/etc/httpd/conf/httpd.conf
    - name: start httpd service
      service: enabled=true name=httpd state=started
    - name: write html
      copy: src=/opt/index.html dest=/var/www/html/index.html
      notify: "restart httpd"
  handlers:
    - name: restart httpd
      service: name=httpd state=restarted
echo 123 > index.html
cat index.html 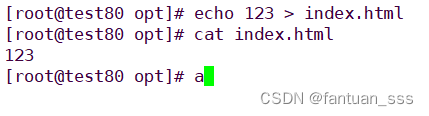
ansible-playbook test01.yaml --syntax-check
ansible-playbook test01.yaml --list-task
ansible-playbook test01.yaml --list-host
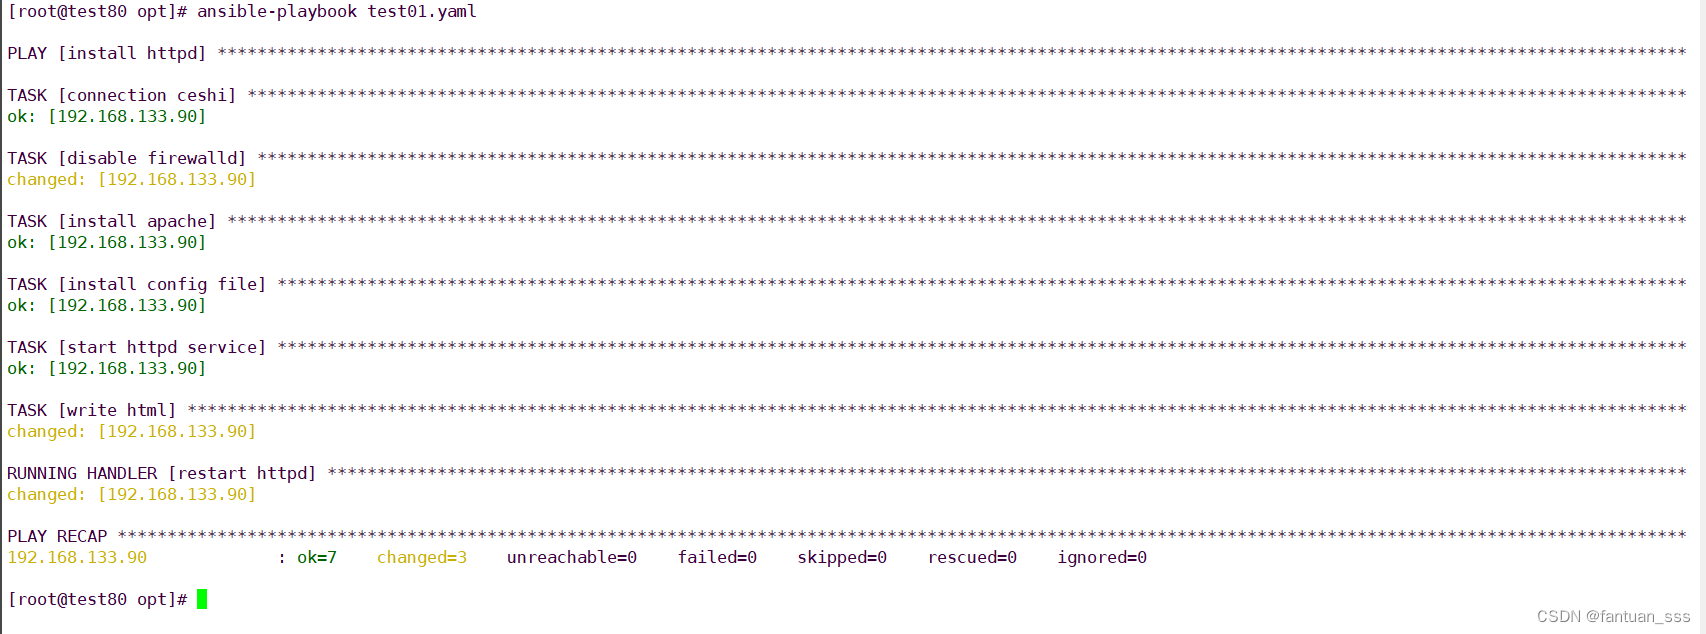
ansible-playbook test01.yaml


1.6 变量的定义和引用
cd /opt
vim test02.yaml
---
- name: variable
hosts: webservers
remote_user: root
vars:
- groupname: test01
- username: nginx
tasks:
- name: create group
group: name={{groupname}} system=yes gid=333
- name: create user
user: name={{username}} uid=333 group={{groupname}}
- name: copy file
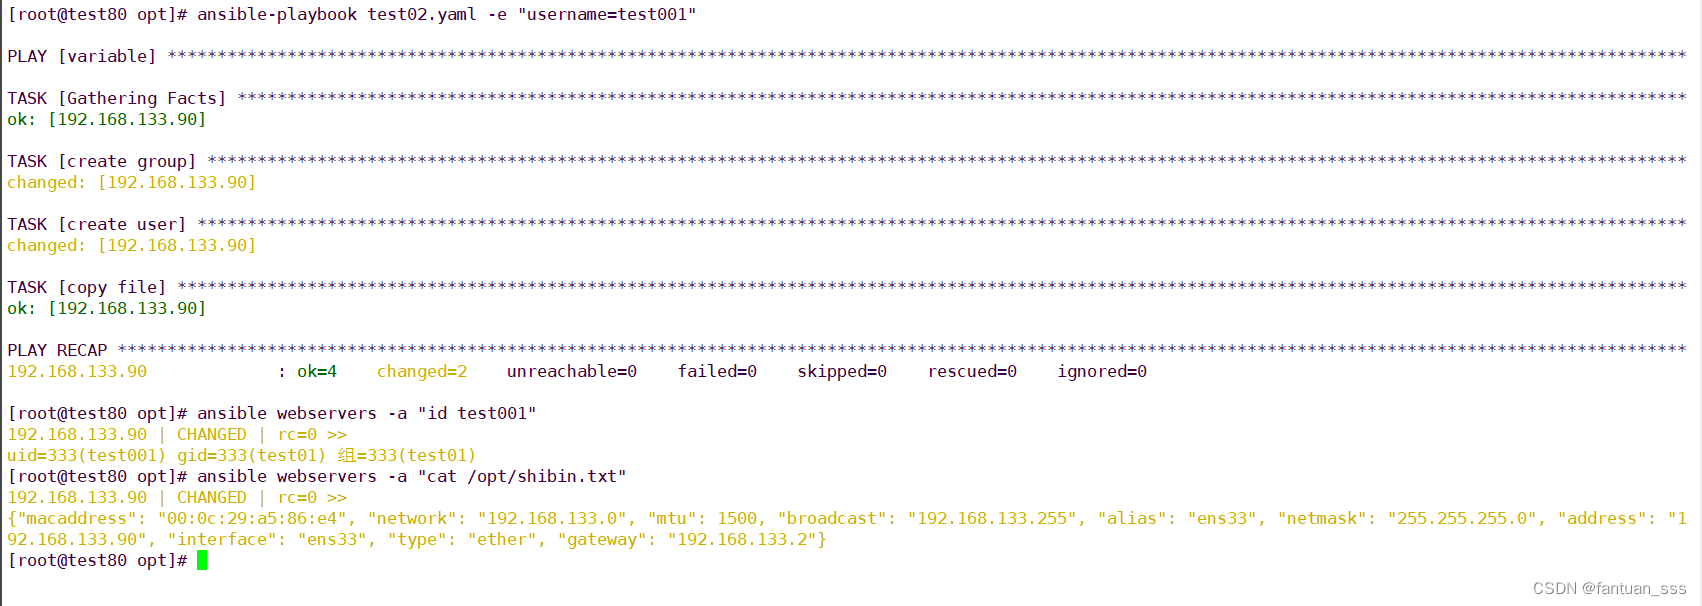
copy: content="{{ansible_default_ipv4}}" dest=/opt/shibin.txt-e选项指定ymal配置文件中变量username,因为指定了在yaml文件中指定的username为"nginx",实际命令中指定为"test001"最终是以-e选项指定的username生效;
注意:命令行中的变量优先级高于YAML配置文件中的变量优先级。
ansible-playbook test02.yaml -e "username=test001"
1.7 指定远程主机sudo切换用户
cd /opt
vim test03.yaml
---
- hosts: webservers
remote_user: zhangsan
become: yes
become_user: root
ansible-playbook test03.yml -K
这里红色显示sudo提权失败,可以去远端主机的配置文件(/etc/sudoers)中修改zhangsan用户的权限


1.8 When(条件判断)
cd /opt
vim test04.yaml
---
- name: reboot host
hosts: dbservers
remote_user: root
tasks:
- name: shutdown host
command: /sbin/shutdown -r now
when: ansible_default_ipv4.address == "192.168.133.10"

由于判断条件为主机地址为192.168.133.10才执行Shutdown操作,所以主机地址为192.168.133.100的主机跳过Playbook
1.9 迭代
1.9.1 创建文件夹
cd /opt
vim test05.yaml
- name: test05
hosts: webservers
tasks:
- name: create directories
file: path={{item}} state=touch
with_items:
- /opt/shibin/s1.txt
- /opt/shibin/s2.txt
- /opt/shibin/s3.txt
- /opt/shibin/s4.txt注意:需提前在webservers里的主机上创建好目录/opt/shibin
ansible-playbook test05.yaml
1.9.2 创建文件夹并建立用户
cd /opt
vim test06.yaml
---
- name: test06
hosts: webservers
gather_facts: false
tasks:
- name: create directories
file:
path: "{{item}}"
state: directory
with_items:
- /tmp/test1
- /tmp/test2
- name: add users
user: name={{item.name}} state=present groups={{item.groups}}
with_items:
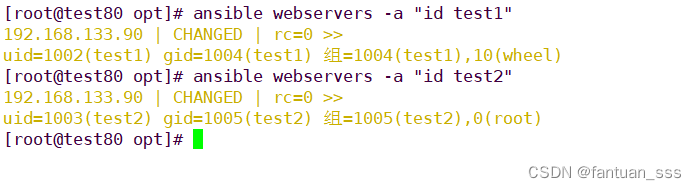
- name: test1
groups: wheel
- name: test2
groups: rootansible-playbook test06.yaml
 二、Templates模块
Jinja是基于Python的模板引擎。Template类是Jinja的一个重要组件,可以看作是一个编译过的模板文件,用来产生目标文本,传递Python的变量给模板去替换模板中的标记。
2.1 准备模板文件并设置引用的变量
yum install -y httpd

cp /etc/httpd/conf/httpd.conf /opt/httpd.conf.j2

vim /opt/httpd.conf.j2

-42行修改-   Listen {{http_port}}
-95行修改-   ServerName {{server_name}}
-119行修改- DocumentRoot "{{root_dir}}" 

2.2 修改主机清单内的变量
vim /etc/ansible/hosts

-19- [webservers]
-20- 192.168.133.90 http_port=192.168.133.90:80 server_name=www.test1.com:80 root_dir=/etc/httpd/htdocs
#注意  root_dir要和前面的server_name空格  不可另起一行,否则报错UNREACHABLE!

-34- [dbservers]
-35- 192.168.133.100 http_port=192.168.133.100:80 server_name=www.test2.com:80 root_dir=/etc/httpd/htdocs
#注意  root_dir要和前面的server_name空格  不可另起一行,否则报错UNREACHABLE!
2.3 编写Playbook剧本
vim apache.yaml
---
- hosts: all
  remote_user: root
  vars:
    - package: httpd
    - service: httpd
  tasks:
    - name: create dir
      file: path=/etc/httpd/htdocs state=directory
    - name: install httpd package
      yum: name={{package}} state=latest
    - name: install configure file
      template: src=/opt/httpd.conf.j2 dest=/etc/httpd/conf/httpd.conf
      notify: "restart httpd"
    - name: start httpd server
      service: name={{service}} enabled=true state=started
  handlers:
    - name: restart httpd
      service: name={{service}} state=restarted
ansible-playbook apache.yaml


三、Tags模块
可以在一个playbook中为某个或某些任务定义“标签”,在执行此playbook时通过ansible-playbook命令使用--tags选项能实现仅运行指定的tasks。
playbook还提供了一个特殊的tags为always。作用就是当使用always当tags的task时,无论执行哪一个tags时,定义有always的tags都会执行。
cd /opt
vim test07.yaml
---
- hosts: webservers
remote_user: root
tasks:
- name: Copy hosts file
copy: src=/etc/hosts dest=/opt/hosts
tags: "shibin"
- name: touch file
file: path=/opt/testhost state=touch
tags: "always"ansible-playbook test07.yaml --tags="shibin" 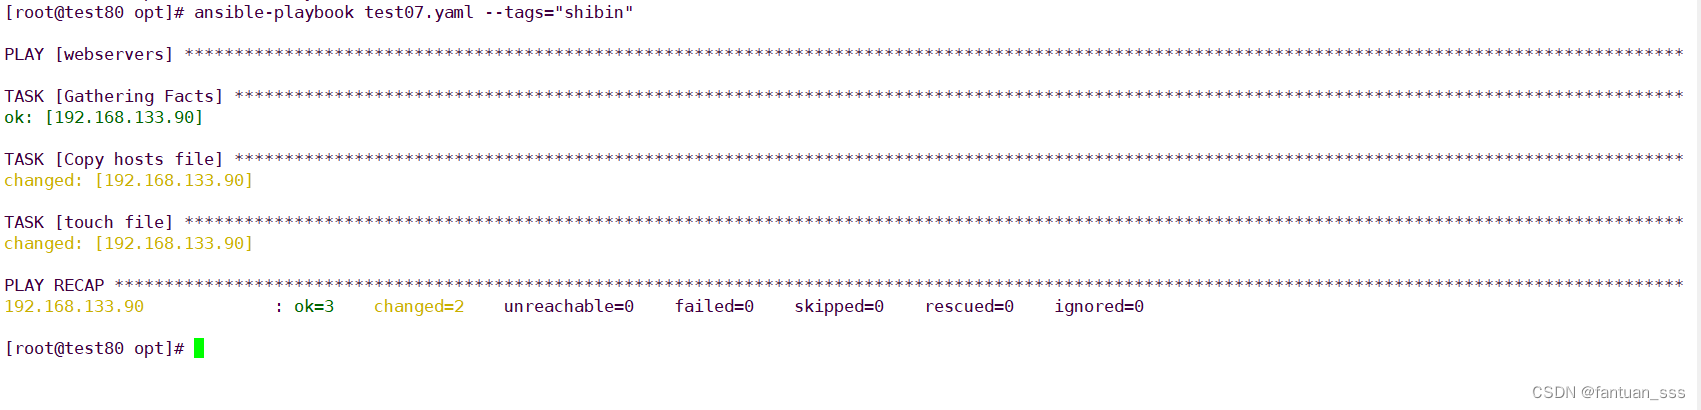

四、Roles模块
Ansible为了层次化、结构化地组织Playbook,使用了角色(roles),roles可以根据层次型结构自动装载变量文件、task以及handlers等。简单来讲,roles就是通过分别将变量、文件、任务、模块及处理器放置于单独的目录中,并可以便捷地include它们。roles一般用于基于主机构建服务的场景中,但也可以用于构建守护进程等场景中。
4.1 Roles目录详解

4.2 在Playbook中使用Roles步骤
4.2.1 环境准备
mkdir /etc/ansible/roles/ -p
#创建以 roles 命名的目录

mkdir /etc/ansible/group_vars/ -p
touch /etc/ansible/group_vars/all
#创建全局变量目录

mkdir /etc/ansible/roles/httpd
mkdir /etc/ansible/roles/mysql
#在 roles 目录中分别创建以各角色名称命令的目录

mkdir /etc/ansible/roles/httpd/{files,templates,tasks,handlers,vars,defaults,meta}
mkdir /etc/ansible/roles/mysql/{files,templates,tasks,handlers,vars,defaults,meta}
#在每个角色命令的目录中分别创建files、handlers、tasks、templates、meta、defaults和vars目录,用不到的目录可以创建为空目录,也可以不创建

touch /etc/ansible/roles/httpd/{defaults,vars,tasks,meta,handlers}/main.yml
touch /etc/ansible/roles/mysql/{defaults,vars,tasks,meta,handlers}/main.yml
#在每个角色的 handlers、tasks、meta、defaults、vars 目录下创建 main.yml 文件,千万不能自定义文件名
4.2.2 修改yml文件
vim /etc/ansible/site.yml---
- hosts: cxk
remote_user: root
roles:
- httpd
- hosts: wyb
remote_user: root
roles:
- mysql4.2.3 运行Ansible-Playbook
cd /etc/ansible
ansible-playbook site.yml
4.3 Roles模块举例——LAMP
mkdir /etc/ansible/roles/httpd/{files,templates,tasks,handlers,vars,defaults,meta} -p
mkdir /etc/ansible/roles/mysql/{files,templates,tasks,handlers,vars,defaults,meta} -p
mkdir /etc/ansible/roles/php/{files,templates,tasks,handlers,vars,defaults,meta} -p

touch /etc/ansible/roles/httpd/{defaults,vars,tasks,meta,handlers}/main.yml
touch /etc/ansible/roles/mysql/{defaults,vars,tasks,meta,handlers}/main.yml
touch /etc/ansible/roles/php/{defaults,vars,tasks,meta,handlers}/main.yml
4.3.1 编写httpd模块
(1)编写yml文件
vim /etc/ansible/roles/httpd/tasks/main.yml- name: install apache
yum: name={{pkg}} state=latest
- name: start apache
service: enabled=true name={{svc}} state=started(2)定义变量
vim /etc/ansible/roles/httpd/vars/main.yml
#可以定义在全局变量中,也可以定义在roles角色变量中,一般定义在角色变量中
pkg: httpd
svc: httpd
4.3.2 编写Mysql模块
(1)编写yml文件
vim /etc/ansible/roles/mysql/tasks/main.yml


- name: install mysql
  yum: name={{pkg}} state=latest
- name: start mysql
  service: enabled=true name={{svc}} state=started
(2)定义变量
vim /etc/ansible/roles/mysql/vars/main.yml


pkg:
  - mariadb
  - mariadb-server
svc: mariadb
4.3.3 编写Php模块
(1)编写yml文件
vim /etc/ansible/roles/php/tasks/main.yml


- name: install php
  yum: name={{pkg}} state=latest
- name: start php-fpm
  service: enabled=true name={{svc}} state=started
(2)定义变量
vim /etc/ansible/roles/php/vars/main.yml


pkg:
  - php
  - php-fpm
svc: php-fpm
4.3.4 编写Roles实例并启动
vim /etc/ansible/site.yml


---
- hosts: wyb
  remote_user: root
  roles:
   - httpd
   - mysql
   - php


cd /etc/ansible
ansible-playbook site.yml
五、 Ansible常用命令小结
5.1.ansible-doc
ansible-doc -h Usage: ansible-doc [options] [module...]
#该指令用于查看模块信息,常用参数有两个-l 和 -s ,具体如下
ansible-doc -l
#列出所有已安装的模块
 ansible-doc -s command
#查看具体某模块的用法,这里如查看command模块
5.2 ansible-galaxy
ansible-galaxy -h Usage: ansible-galaxy [init|info|install|list|remove] [--help] [options] ...
#ansible-galaxy指令用于方便的从https://galaxy.ansible.com/ 站点下载第三方扩展模块,我们可以形象的理解其类似于centos下的yum、python下的pip
5.3 ansible-playbook
通过读取playbook 文件后,执行相应的动作
5.4 ansible-pull
该指令使用需要谈到ansible的另一种模式——pull 模式,这和我们平常经常用的push模式刚好相反,其适用于以下场景:你有数量巨大的机器需要配置,即使使用非常高的线程还是要花费很多时间
5.5 ansible-vault
ansible-vault主要应用于配置文件中含有敏感信息,又不希望他能被人看到,vault可以帮你加密/解密这个配置文件,属高级用法。主要对于playbooks里比如涉及到配置密码或其他变量时,可以通过该指令加密,这样我们通过cat看到的会是一个密码串类的文件,编辑的时候需要输入事先设定的密码才能打开。这种playbook文件在执行时,需要加上 –ask-vault-pass参数,同样需要输入密码后才能正常执行。


 64
64


 被折叠的 条评论
为什么被折叠?
被折叠的 条评论
为什么被折叠?
 到【灌水乐园】发言


