


MVC介绍
MVC适用于实现应用程序的用户界面层的构架设计模式
- Model(模型):包含一组数据的类和管理该数据的逻辑信息
- View(视图):包含显示逻辑,用于显示Controller提供给它的模型中数据
- Controller(控制器):处理Http请求,调用模型,请选择一个视图来呈现该模型
逻辑顺序,就是一个Request过来,会进入Controller,Controllrer去Model调取数据,然后将数据让View形成视图,Respones返回给用户
MVC初步展示运行
建立空项目,在startup里面写入如下代码
public class Startup
    {
    // This method gets called by the runtime. Use this method to add services to the container.
        // For more information on how to configure your application, visit https://go.microsoft.com/fwlink/?LinkID=398940
        public void ConfigureServices(IServiceCollection services)
        {
            services.AddMvc();
        }
        // This method gets called by the runtime. Use this method to configure the HTTP request pipeline.
        public void Configure(IApplicationBuilder app, IWebHostEnvironment env)
        {
            if (env.IsDevelopment())
            {
                app.UseDeveloperExceptionPage();
            }

            app.UseMvcWithDefaultRoute();//添加Mvc默认路由的中间件

            app.UseRouting();

            app.Run(async (content) =>
            {
                await content.Response.WriteAsync("hello world");
            });
        }
    }
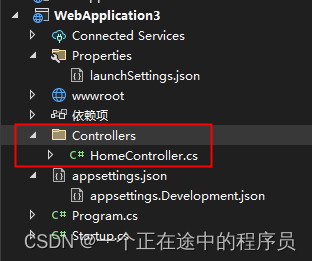
在项目下面添加Controllers文件夹,再在文件夹下面添加一个控制器,可以右键里面有个控制器,点击进行添加就行,添加一个HomeController类名的控制器,添加的文件示例和里面代码如下:
using Microsoft.AspNetCore.Mvc;

namespace WebApplication3.Controllers
{
    public class HomeController : Controller
    {
        public IActionResult Index()
        {
            return View();
        }
    }
}
修改HomeController代码为如下:
using Microsoft.AspNetCore.Mvc;
namespace WebApplication3.Controllers
{
public class HomeController : Controller
{
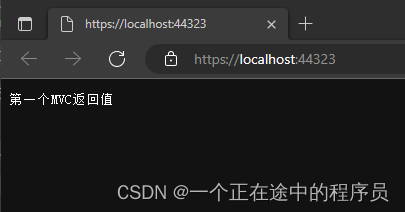
public string Index()
{
return "第一个MVC返回值";
}
}
}
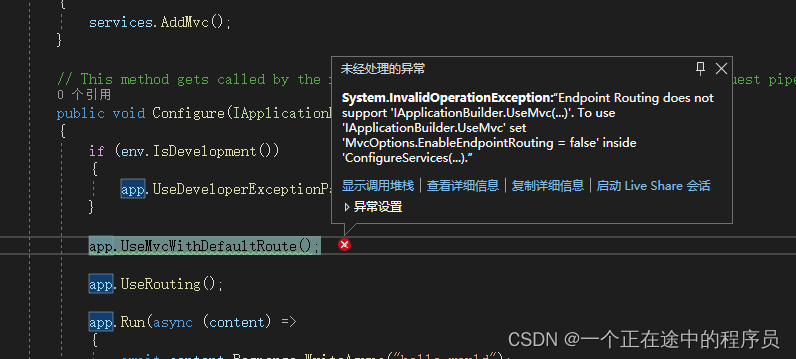
点击运行,如果报如下错误,则需要添加下面的代码
public class Startup
    {
        // This method gets called by the runtime. Use this method to add services to the container.
        // For more information on how to configure your application, visit https://go.microsoft.com/fwlink/?LinkID=398940
        public void ConfigureServices(IServiceCollection services)
        {
            services.AddMvc(option=>option.EnableEndpointRouting = false);
        }

        // This method gets called by the runtime. Use this method to configure the HTTP request pipeline.
        public void Configure(IApplicationBuilder app, IWebHostEnvironment env)
        {
            if (env.IsDevelopment())
            {
                app.UseDeveloperExceptionPage();
            }

            app.UseMvcWithDefaultRoute();

            app.UseRouting();

            app.Run(async (content) =>
            {
                await content.Response.WriteAsync("hello world");
            });
        }
    }
路由后面加上/Home/Index/是一样的结果
总结和讲解
1、ConfigureServices和Configure的作用
正如生成项目以后,这两个方法上面的英文注解一样,给了解释,ConfigureServices其实就是,用户可以通过这个方法,添加一些服务到容器中,比如Mvc服务,Configure这个方法主要是去配置一些HTTP请求的管道,也就是之前课程说的中间件
2、Mvc有两个步骤,第一,讲所需的MVC服务添加到asp.net core中的依赖注入容器中,就是AddMvc方法;第二,添加MVC中间件到我们的请求处理管道中,就是UseMvcWithDefaultRoute方法。
3、可以看usemvcwithdefaultroute方法的定义注解,默认的路由为Home/Index,id后面加?是可有可无的意思
//
        // 摘要:
        //     Adds MVC to the Microsoft.AspNetCore.Builder.IApplicationBuilder request execution
        //     pipeline with a default route named 'default' and the following template: '{controller=Home}/{action=Index}/{id?}'.
        //
        // 参数:
        //   app:
        //     The Microsoft.AspNetCore.Builder.IApplicationBuilder.
        //
        // 返回结果:
        //     A reference to this instance after the operation has completed.
        public static IApplicationBuilder UseMvcWithDefaultRoute(this IApplicationBuilder app);
2、AddMvc和AddMvcCore的区别
可以发现,不仅有Mvc这个服务,还有MvcCore这个服务,可以查看微软的源代码链接: https://github.com/aspnet/Mvc/blob/release/2.2/src/Microsoft.AspNetCore.Mvc/MvcServiceCollectionExtensions.cs
AddMvcCore()方法只会添加最核心的MVC服务,AddMvc这个服务里面包含了AddMvcCore()的服务,另外还有其他必须的服务
/// <summary>
        /// Adds MVC services to the specified <see cref="IServiceCollection" />.
        /// </summary>
        /// <param name="services">The <see cref="IServiceCollection" /> to add services to.</param>
        /// <returns>An <see cref="IMvcBuilder"/> that can be used to further configure the MVC services.</returns>
        public static IMvcBuilder AddMvc(this IServiceCollection services)
        {
            if (services == null)
            {
                throw new ArgumentNullException(nameof(services));
            }

            var builder = services.AddMvcCore();

            builder.AddApiExplorer();
            builder.AddAuthorization();

            AddDefaultFrameworkParts(builder.PartManager);

            // Order added affects options setup order

            // Default framework order
            builder.AddFormatterMappings();
            builder.AddViews();
            builder.AddRazorViewEngine();
            builder.AddRazorPages();
            builder.AddCacheTagHelper();

            // +1 order
            builder.AddDataAnnotations(); // +1 order

            // +10 order
            builder.AddJsonFormatters();

            builder.AddCors();

            return new MvcBuilder(builder.Services, builder.PartManager);
        }


 4746
4746


 被折叠的 条评论
为什么被折叠?
被折叠的 条评论
为什么被折叠?
 到【灌水乐园】发言


