


上一篇博客搭建了S2SH框架,这一篇博客讲述一个实例。
Spring支持泛型注入,所以DAO层变得非常简化。
1.在com.test.dao包中新建接口BaseDao:
package com.test.dao;

import java.io.Serializable;
import java.util.List;

/**
 * 基础数据库操作类
 *
 * @author www.test.com
 *
 */
public interface BaseDao<T> {

	/**
	 * 保存一个对象
	 *
	 * @param o
	 * @return
	 */
	public Serializable save(T o);

	/**
	 * 删除一个对象
	 *
	 * @param o
	 */
	public void delete(T o);

	/**
	 * 更新一个对象
	 *
	 * @param o
	 */
	public void update(T o);

	/**
	 * 保存或更新对象
	 *
	 * @param o
	 */
	public void saveOrUpdate(T o);

	/**
	 * 查询
	 *
	 * @param hql
	 * @return
	 */
	public List<T> find(String hql);

	/**
	 * 查询集合
	 *
	 * @param hql
	 * @param param
	 * @return
	 */
	public List<T> find(String hql, Object[] param);

	/**
	 * 查询集合
	 *
	 * @param hql
	 * @param param
	 * @return
	 */
	public List<T> find(String hql, List<Object> param);

	/**
	 * 查询集合(带分页)
	 *
	 * @param hql
	 * @param param
	 * @param page
	 *            查询第几页
	 * @param rows
	 *            每页显示几条记录
	 * @return
	 */
	public List<T> find(String hql, Object[] param, Integer page, Integer rows);

	/**
	 * 查询集合(带分页)
	 *
	 * @param hql
	 * @param param
	 * @param page
	 * @param rows
	 * @return
	 */
	public List<T> find(String hql, List<Object> param, Integer page, Integer rows);

	/**
	 * 获得一个对象
	 *
	 * @param c
	 *            对象类型
	 * @param id
	 * @return Object
	 */
	public T get(Class<T> c, Serializable id);

	/**
	 * 获得一个对象
	 *
	 * @param hql
	 * @param param
	 * @return Object
	 */
	public T get(String hql, Object[] param);

	/**
	 * 获得一个对象
	 *
	 * @param hql
	 * @param param
	 * @return
	 */
	public T get(String hql, List<Object> param);

	/**
	 * select count(*) from 类
	 *
	 * @param hql
	 * @return
	 */
	public Long count(String hql);

	/**
	 * select count(*) from 类
	 *
	 * @param hql
	 * @param param
	 * @return
	 */
	public Long count(String hql, Object[] param);

	/**
	 * select count(*) from 类
	 *
	 * @param hql
	 * @param param
	 * @return
	 */
	public Long count(String hql, List<Object> param);

	/**
	 * 执行HQL语句
	 *
	 * @param hql
	 * @return 响应数目
	 */
	public Integer executeHql(String hql);

	/**
	 * 执行HQL语句
	 *
	 * @param hql
	 * @param param
	 * @return 响应数目
	 */
	public Integer executeHql(String hql, Object[] param);

	/**
	 * 执行HQL语句
	 *
	 * @param hql
	 * @param param
	 * @return
	 */
	public Integer executeHql(String hql, List<Object> param);

}
这里使用了泛型,把一些常用的数据库操作保存到这里。
2.新建这个接口的实现类BaseDaoImpl:
package com.test.dao.impl;

import java.io.Serializable;
import java.util.List;

import org.hibernate.Query;
import org.hibernate.Session;
import org.hibernate.SessionFactory;
import org.springframework.beans.factory.annotation.Autowired;
import org.springframework.stereotype.Repository;

import com.test.dao.BaseDao;

@Repository("baseDao")
@SuppressWarnings("all")
public class BaseDaOImpl<T> implements BaseDao<T> {

	private SessionFactory sessionFactory;

	public SessionFactory getSessionFactory() {
		return sessionFactory;
	}

	@Autowired
	public void setSessionFactory(SessionFactory sessionFactory) {
		this.sessionFactory = sessionFactory;
	}

	private Session getCurrentSession() {
		return sessionFactory.getCurrentSession();
	}

	public Serializable save(T o) {
		return this.getCurrentSession().save(o);
	}

	public void delete(T o) {
		this.getCurrentSession().delete(o);
	}

	public void update(T o) {
		this.getCurrentSession().update(o);
	}

	public void saveOrUpdate(T o) {
		this.getCurrentSession().saveOrUpdate(o);
	}

	public List<T> find(String hql) {
		return this.getCurrentSession().createQuery(hql).list();
	}

	public List<T> find(String hql, Object[] param) {
		Query q = this.getCurrentSession().createQuery(hql);
		if (param != null && param.length > 0) {
			for (int i = 0; i < param.length; i++) {
				q.setParameter(i, param[i]);
			}
		}
		return q.list();
	}

	public List<T> find(String hql, List<Object> param) {
		Query q = this.getCurrentSession().createQuery(hql);
		if (param != null && param.size() > 0) {
			for (int i = 0; i < param.size(); i++) {
				q.setParameter(i, param.get(i));
			}
		}
		return q.list();
	}

	public List<T> find(String hql, Object[] param, Integer page, Integer rows) {
		if (page == null || page < 1) {
			page = 1;
		}
		if (rows == null || rows < 1) {
			rows = 10;
		}
		Query q = this.getCurrentSession().createQuery(hql);
		if (param != null && param.length > 0) {
			for (int i = 0; i < param.length; i++) {
				q.setParameter(i, param[i]);
			}
		}
		return q.setFirstResult((page - 1) * rows).setMaxResults(rows).list();
	}

	public List<T> find(String hql, List<Object> param, Integer page, Integer rows) {
		if (page == null || page < 1) {
			page = 1;
		}
		if (rows == null || rows < 1) {
			rows = 10;
		}
		Query q = this.getCurrentSession().createQuery(hql);
		if (param != null && param.size() > 0) {
			for (int i = 0; i < param.size(); i++) {
				q.setParameter(i, param.get(i));
			}
		}
		return q.setFirstResult((page - 1) * rows).setMaxResults(rows).list();
	}

	public T get(Class<T> c, Serializable id) {
		return (T) this.getCurrentSession().get(c, id);
	}

	public T get(String hql, Object[] param) {
		List<T> l = this.find(hql, param);
		if (l != null && l.size() > 0) {
			return l.get(0);
		} else {
			return null;
		}
	}

	public T get(String hql, List<Object> param) {
		List<T> l = this.find(hql, param);
		if (l != null && l.size() > 0) {
			return l.get(0);
		} else {
			return null;
		}
	}

	public Long count(String hql) {
		return (Long) this.getCurrentSession().createQuery(hql).uniqueResult();
	}

	public Long count(String hql, Object[] param) {
		Query q = this.getCurrentSession().createQuery(hql);
		if (param != null && param.length > 0) {
			for (int i = 0; i < param.length; i++) {
				q.setParameter(i, param[i]);
			}
		}
		return (Long) q.uniqueResult();
	}

	public Long count(String hql, List<Object> param) {
		Query q = this.getCurrentSession().createQuery(hql);
		if (param != null && param.size() > 0) {
			for (int i = 0; i < param.size(); i++) {
				q.setParameter(i, param.get(i));
			}
		}
		return (Long) q.uniqueResult();
	}

	public Integer executeHql(String hql) {
		return this.getCurrentSession().createQuery(hql).executeUpdate();
	}

	public Integer executeHql(String hql, Object[] param) {
		Query q = this.getCurrentSession().createQuery(hql);
		if (param != null && param.length > 0) {
			for (int i = 0; i < param.length; i++) {
				q.setParameter(i, param[i]);
			}
		}
		return q.executeUpdate();
	}

	public Integer executeHql(String hql, List<Object> param) {
		Query q = this.getCurrentSession().createQuery(hql);
		if (param != null && param.size() > 0) {
			for (int i = 0; i < param.size(); i++) {
				q.setParameter(i, param.get(i));
			}
		}
		return q.executeUpdate();
	}

}
Spring支持泛型注入后,Dao层写这两个文件就差不多了。在Spring出来以前,一般是有多少个模块就要写多少个dao,非常的麻烦。
这个实现类使用了注解@Repository("baseDAO"),这里说明一下,上一节的配置中在Spring配置文件中配置了自动构建加载bean<context:component-scan base-package="com.test" />,这样的话Spring就会扫描com.test包下的所有类。当扫描到@Repository("baseDAO")时,Spring就会自动创建一个这个类的bean,这个bean的id就是baseDAO,这个bean可以注入到其它的地方去。这里面用到了SessionFactory对象,我们在spring的配置文件中定义了SessionFactory对象的实例,要把这个实例注入给这个对象,这里使用@Autowired来标注对象的set方法,这样的话Spring就会自动把配置文件中手动定义的bean注入到这个对象中。
3.新建实体类User:
package com.test.entity;


import javax.persistence.Column;
import javax.persistence.Entity;
import javax.persistence.GeneratedValue;
import javax.persistence.Id;
import javax.persistence.Table;

import org.hibernate.annotations.GenericGenerator;
@Entity
@Table(name="t_user")
public class User {

	private Integer id;
	private String userName;
	private String password;


	@Id
	@GenericGenerator(name = "generator", strategy = "native")
	@GeneratedValue(generator = "generator")
	@Column(name = "id", length=11)
	public Integer getId() {
		return id;
	}
	public void setId(Integer id) {
		this.id = id;
	}
	@Column(name = "userName", length = 20)
	public String getUserName() {
		return userName;
	}
	public void setUserName(String userName) {
		this.userName = userName;
	}
	@Column(name = "password", length = 20)
	public String getPassword() {
		return password;
	}
	public void setPassword(String password) {
		this.password = password;
	}

}
这里使用注解的方式配置生成的数据库表。注解的意思在讲Hibernate的时候讲到了。
4.在com.test.service包下新建事务UserService接口:
package com.test.service;

import java.util.List;

import com.test.entity.User;

public interface UserService {

	public void saveUser(User user);

	public void updateUser(User user);

	public User findUserById(int id);

	public void deleteUser(User user);

	public List<User> findAllList();

	public User findUserByNameAndPassword(User user);
}
5.写这个接口的实现类UserServiceImpl:
package com.test.service.impl;

import java.util.List;

import javax.annotation.Resource;

import org.springframework.stereotype.Service;

import com.test.dao.BaseDao;
import com.test.entity.User;
import com.test.service.UserService;

@Service("userService")
public class UserServiceImpl implements UserService{

	@Resource
	private BaseDao<User> baseDao;

	@Override
	public void saveUser(User user) {
		// TODO Auto-generated method stub
		baseDao.save(user);
	}

	@Override
	public void updateUser(User user) {
		// TODO Auto-generated method stub
		baseDao.update(user);
	}

	@Override
	public User findUserById(int id) {
		return baseDao.get(User.class, id);
	}

	@Override
	public void deleteUser(User user) {
		baseDao.delete(user);
	}

	@Override
	public List<User> findAllList() {
		return baseDao.find("from User");
	}

	@Override
	public User findUserByNameAndPassword(User user) {
		return baseDao.get("from User u where u.userName=? and u.password=?", new Object[]{user.getUserName(),user.getPassword()});
	}

}
这里使用@Service("userService")注解来注解这个类,Spring扫描到这个类的时候会自动创建一个这个类的bean,bean的id是userService。在这个类中需要一个BaseDao对象的实例。这里使用@Resource来注解这个对象,这样的话Spring会自动的给这个对象注入值,而不用手动注入。这里要注意的是,BaseDao对象的名字baseDao一定要与BaseDaoImpl类的注解id相同。
6.新建action层类UserAction:这一层是struts2层
package com.test.action;
import javax.annotation.Resource;
import javax.servlet.http.HttpServletRequest;
import javax.servlet.http.HttpSession;
import org.apache.struts2.interceptor.ServletRequestAware;
import org.springframework.stereotype.Controller;
import com.test.entity.User;
import com.test.service.UserService;
import com.opensymphony.xwork2.ActionSupport;
@Controller
public class UserAction extends ActionSupport implements ServletRequestAware{
/**
*
*/
private static final long serialVersionUID = 1L;
private HttpServletRequest request;
@Resource
private UserService userService;
private User user;
private String error;
public User getUser() {
return user;
}
public void setUser(User user) {
this.user = user;
}
public String getError() {
return error;
}
public void setError(String error) {
this.error = error;
}
public String login()throws Exception{
HttpSession session=request.getSession();
User currentUser=userService.findUserByNameAndPassword(user);
if(currentUser!=null){
session.setAttribute("currentUser", currentUser);
return SUCCESS;
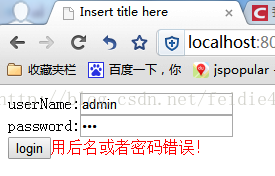
}else{
error="用后名或者密码错误!";
return ERROR;
}
}
@Override
public void setServletRequest(HttpServletRequest request) {
// TODO Auto-generated method stub
this.request=request;
}
}
Struts2层的类也由Spring管理,使用@Controller进行注解,这样的话Struts2的bean就会由Spring来管理。这里要用到UserService对象,使用@Resource对这个对象进行注解,这样的话Spring就会自动给这个对象注入值,这里要注意命名,名字要与Spring生成的UserServiceImpl的bean的id相同。
这里定义了User对象user用来接收从前台传入的对象,定义error对象用来当登录失败的时候向前台传输错误信息。注意一定要生成这两个对象的get和set函数。
定义一个login函数,用来判断前台输入的用户是否存在。
7.配置struts配置文件struts.xml:
<?xml version="1.0" encoding="UTF-8"?>
<!DOCTYPE struts PUBLIC
    "-//Apache Software Foundation//DTD Struts Configuration 2.3//EN"
    "http://struts.apache.org/dtds/struts-2.3.dtd">

<struts>
    <constant name="struts.action.extension" value="action" />

    <package name="s2sh" namespace="/user" extends="struts-default">
    	<action name="user_*" method="{1}" class="com.test.action.UserAction">
    		<result name="success">/success.jsp</result>
    		<result name="error">/index.jsp</result>
    	</action>
    </package>

</struts>
8.修改index.jsp文件为:
<%@ page language="java" contentType="text/html; charset=UTF-8"
    pageEncoding="UTF-8"%>
<!DOCTYPE html PUBLIC "-//W3C//DTD HTML 4.01 Transitional//EN" "http://www.w3.org/TR/html4/loose.dtd">
<html>
<head>
<meta http-equiv="Content-Type" content="text/html; charset=UTF-8">
<title>Insert title here</title>
</head>
<body>
	<form action="${pageContext.request.contextPath }/user/user_login.action" method="post">
		userName:<input type="text" name="user.userName" value="${user.userName }"/><br/>
		password:<input type="password" name="user.password" value="${user.password }"/><br/>
		<input type="submit" value="login"/><font color="red">${error }</font>
	</form>
</body>
</html>
9.新建success.jsp为:
<%@ page language="java" contentType="text/html; charset=UTF-8"
pageEncoding="UTF-8"%>
<!DOCTYPE html PUBLIC "-//W3C//DTD HTML 4.01 Transitional//EN" "http://www.w3.org/TR/html4/loose.dtd">
<html>
<head>
<meta http-equiv="Content-Type" content="text/html; charset=UTF-8">
<title>Insert title here</title>
</head>
<body>
欢迎:${currentUser.userName }
</body>
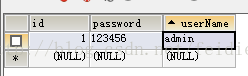
</html>10.在mysql数据库中创建一个名为test的数据库,运行程序,给生成的数据表t_user插入数据:
打开浏览器:
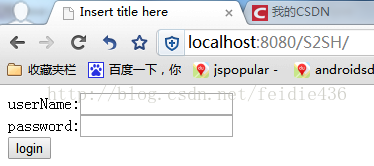
输入正确的用户名和密码后点击login,跳转到了success.jsp页面。
输入错误的用户名和密码后:


 795
795

 被折叠的 条评论
为什么被折叠?
被折叠的 条评论
为什么被折叠?
 到【灌水乐园】发言


