


先创建一个动态web项目,新建
package com.ioc;

public class UserModel {
	private String id;
	private String name;
	private String sex;
	public String getId() {
		return id;
	}
	public void setId(String id) {
		this.id = id;
	}
	public String getName() {
		return name;
	}
	public void setName(String name) {
		this.name = name;
	}
	public String getSex() {
		return sex;
	}
	public void setSex(String sex) {
		this.sex = sex;
	}

	public UserModel() {

	}

	public UserModel(String id, String name, String sex) { this.id = id;
	 this.name = name; this.sex = sex; }


}
和 服务类:
package com.ioc;

public class UserService {
	private UserModel userModel;

	public UserModel getUserModel() {
		return userModel;
	}

	public void setUserModel(UserModel userModel) {
		this.userModel = userModel;
	}

	public void findUse() {
		System.out.println("=======user name ="+userModel.getName());
	}

	public UserService(UserModel userModel) {
		this.userModel = userModel;
	}
}
如果想通过userService去调用userModel里的内容,就必须通过new创建对象,但我们可以通过xml的配置方式进行升级:
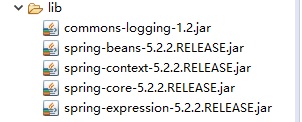
首先使用spring里的ApplicationContext功能,需要几个核心类库
写好xml配置文件
<?xml version="1.0" encoding="UTF-8"?>
<beans xmlns = "http://www.springframework.org/schema/beans"
	xmlns:xsi="http://www.w3.org/2001/XMLSchema-instance"
	xsi:schemaLocation="http://www.springframework.org/schema/beans
	http://www.springframework.org/schema/beans/spring-beans-4.3.xsd">

	<!-- 使用构造器方法进行注入 -->
	<bean id="userModel" class="com.ioc.UserModel">
	 	<constructor-arg index="0" value="xiexie"/>
	 	<constructor-arg index="1" value="huan ying ni"/>
	 	<constructor-arg index="2" value="haha "/>
	 </bean>
	 <!-- 类注入:参数是类 -->
	 <bean id="userService" class="com.ioc.UserService">
	 	<constructor-arg ref="userModel"/>
	 </bean>
</beans>
最后在测试文件中进行测试:
package com.ioc;

import static org.junit.jupiter.api.Assertions.*;

import org.junit.jupiter.api.Test;
import org.springframework.context.ApplicationContext;
import org.springframework.context.support.ClassPathXmlApplicationContext;

class testUserService {

	@Test
	void testFindUser() {
		ApplicationContext context = new ClassPathXmlApplicationContext("applicationContent.xml");
		UserService userService = context.getBean("userService", UserService.class);
		userService.findUse();
	}
}


 5257
5257


 被折叠的 条评论
为什么被折叠?
被折叠的 条评论
为什么被折叠?
 到【灌水乐园】发言


