


在开发过程中,如果需要在本地调用openAI接口进行开发调试,一般主要是通过以下两种方式:直连和代理转发。欢迎私信交流。
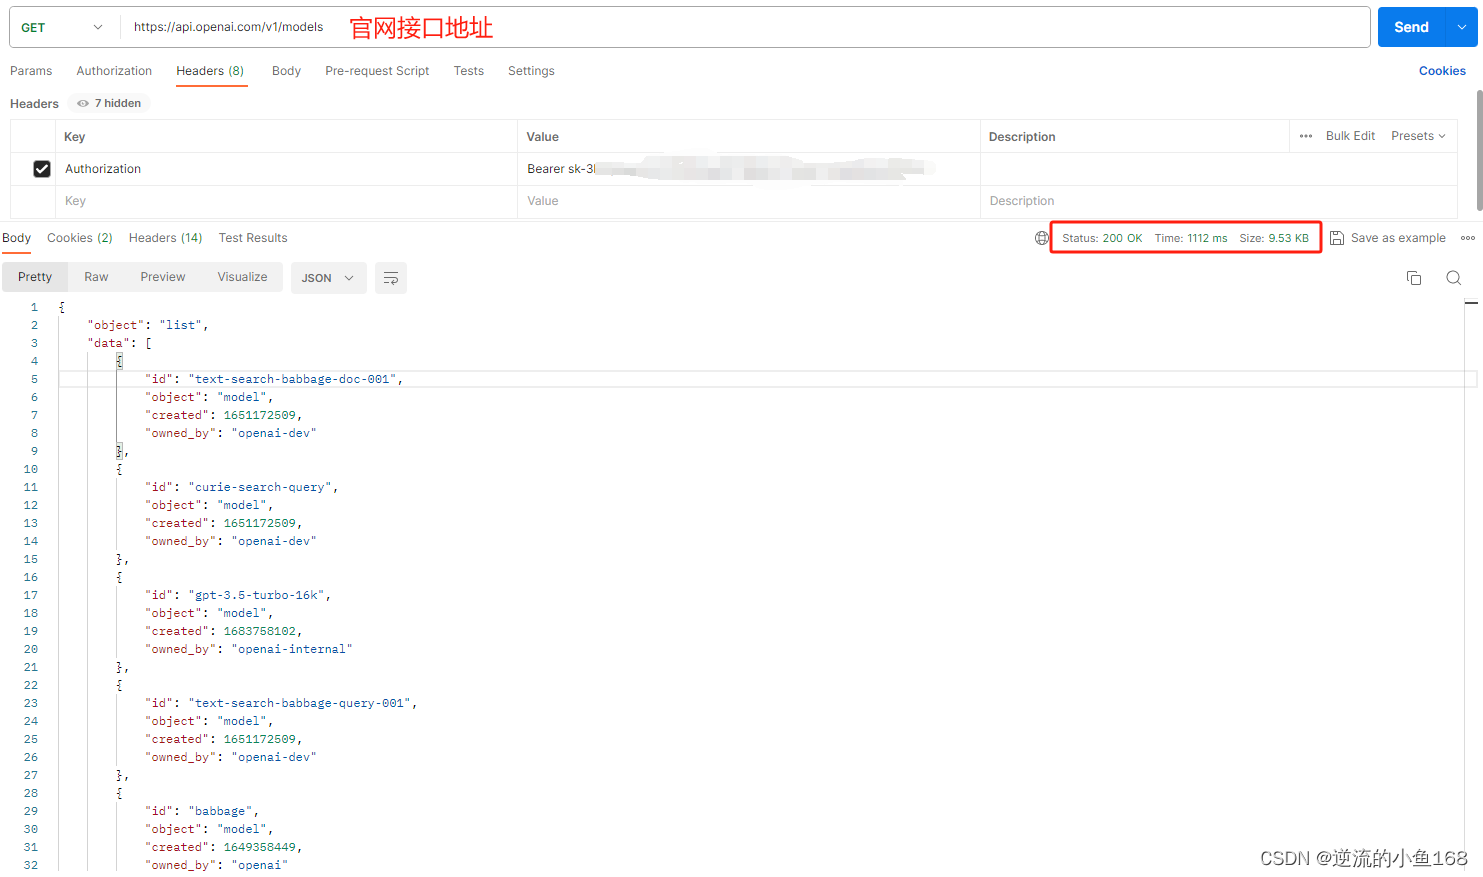
直连
- 简单粗暴,懂的都懂
代理转发
代理转发又有两种类型,使用第三方代理和自建代理两种,下面将分别举例说明
第三方AI网关
- 注册Cloudflare,开通AI网关功能(Beta功能,目前免费)
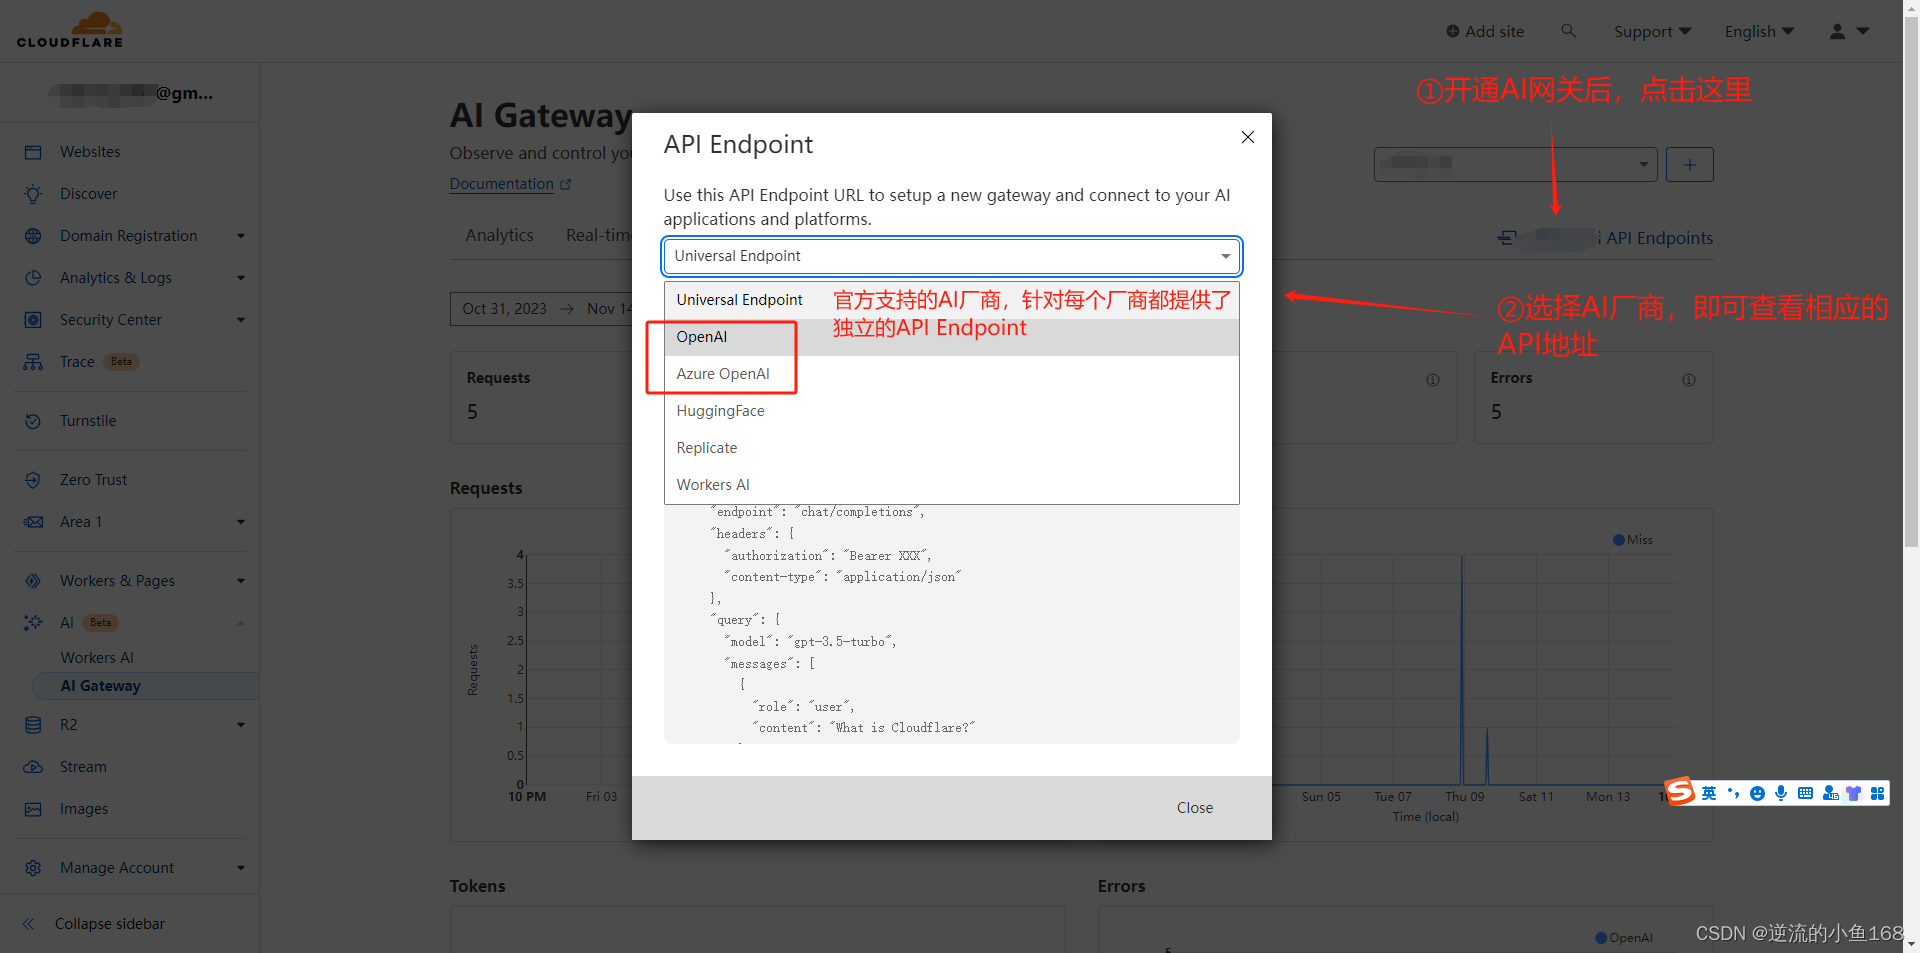
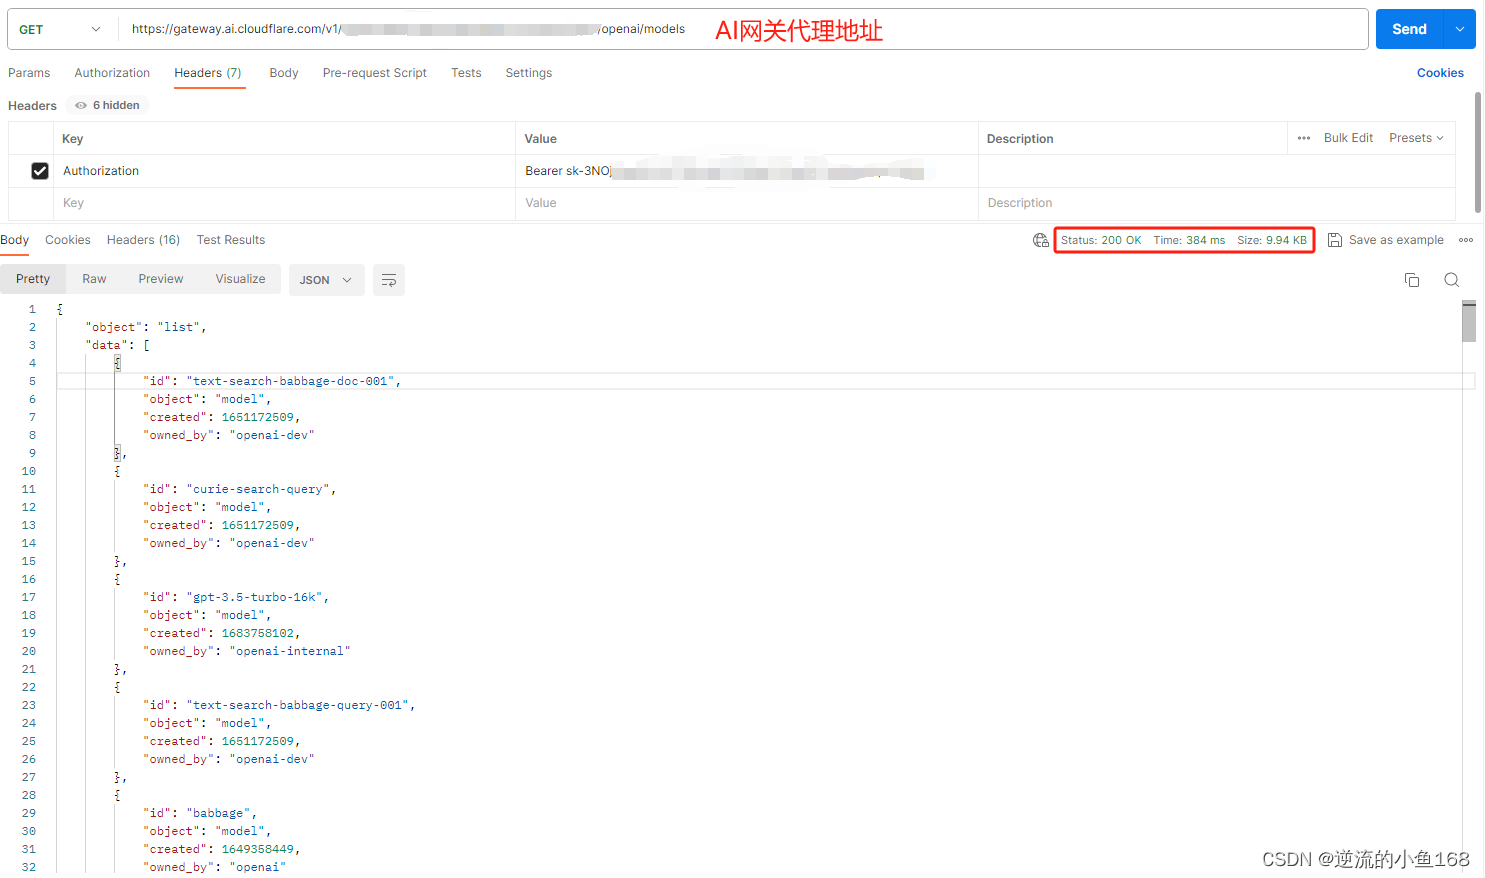
- 使用AI网关地址替换官方接口地址,即可本地调用
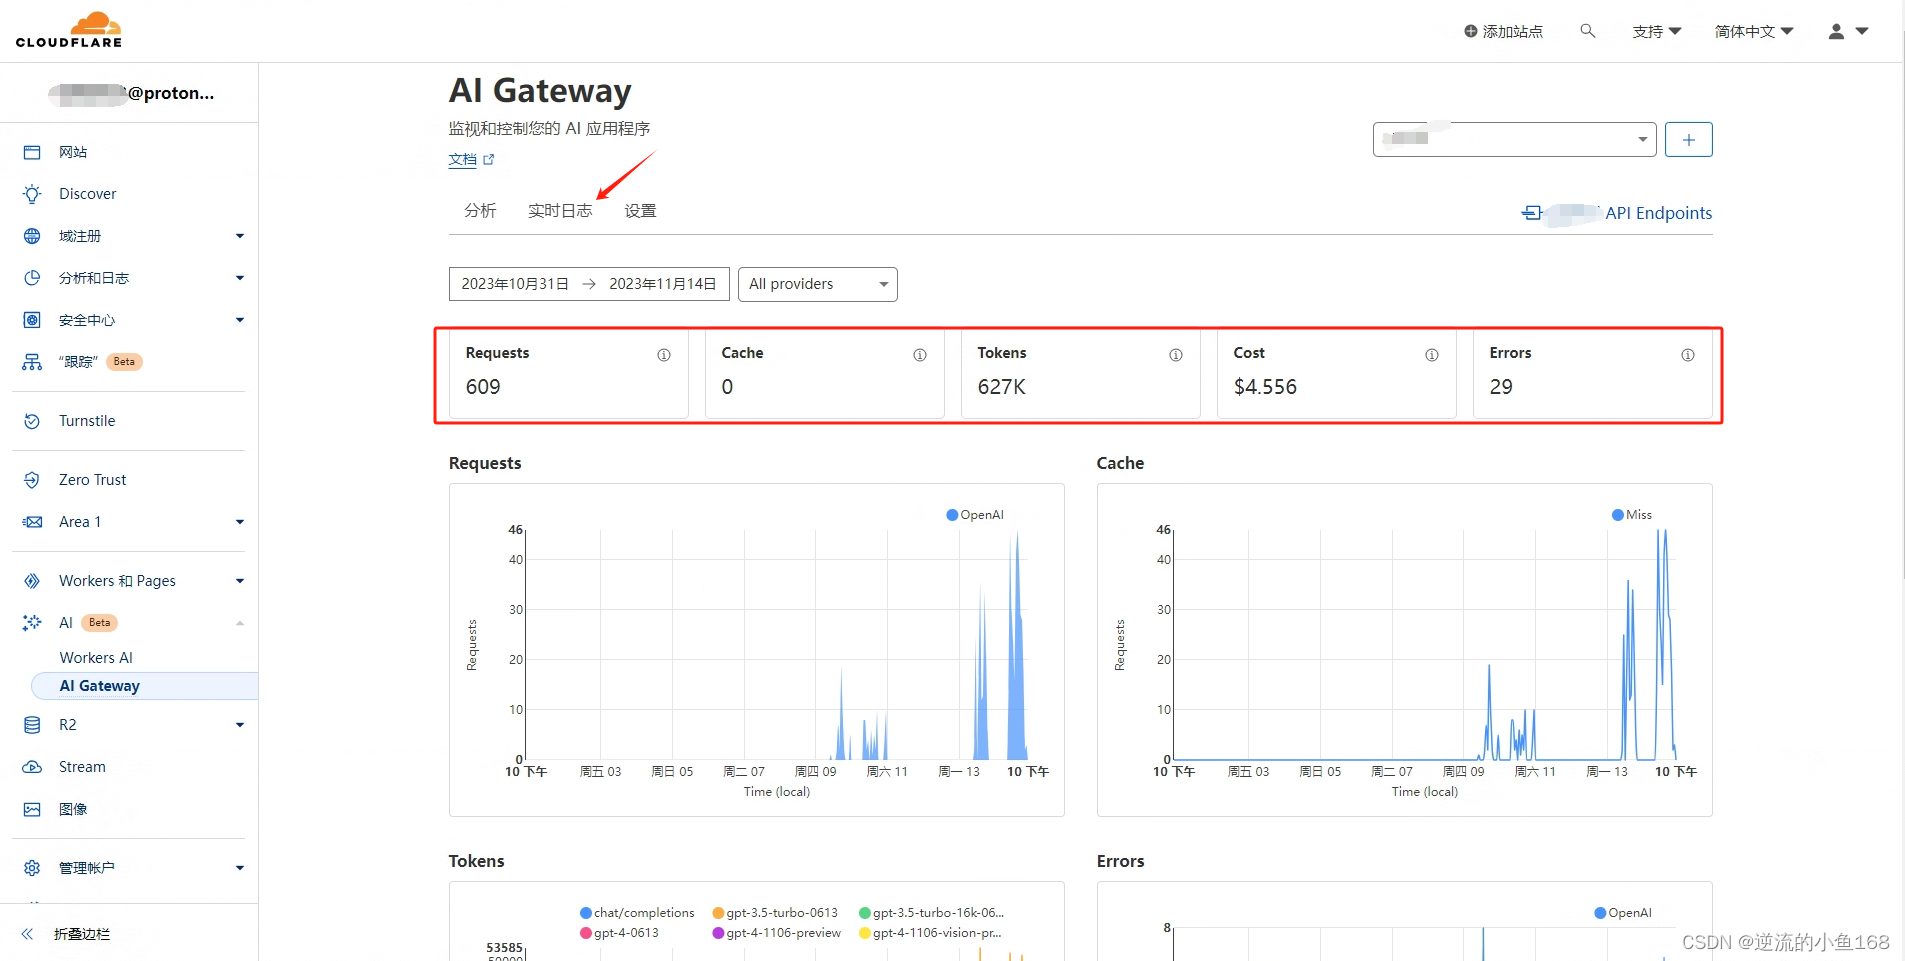
- 在AI网关管理界面,还可以看到接口调用、tokens消耗、以及日志等情况,非常好用
自建Nginx
- 查看Nginx版本和是否已配置stream模块(Nginx版本需要在1.9.0以上,如果已安装stream模块,直接跳到步骤7)
/usr/sbin/nginx -V | grep with-stream
- 重新下载已安装版本的Nginx源码包(上一步我查到已安装的是版本号1.18.0)
wget https://nginx.org/download/nginx-1.18.0.tar.gz - 在原有配置基础上增加配置stream模块
# 在原有配置基础上,追加--with-stream --with-stream_realip_module,切记不要漏掉原有配置 ./configure --with-cc-opt='-g -O2 -ffile-prefix-map=/build/nginx-d8gVax/nginx-1.18.0=. -flto=auto -ffat-lto-objects -flto=auto -ffat-lto-objects -fstack-protector-strong -Wformat -Werror=format-security -fPIC -Wdate-time -D_FORTIFY_SOURCE=2' --with-ld-opt='-Wl,-Bsymbolic-functions -flto=auto -ffat-lto-objects -flto=auto -Wl,-z,relro -Wl,-z,now -fPIC' --prefix=/usr/share/nginx --conf-path=/etc/nginx/nginx.conf --http-log-path=/var/log/nginx/access.log --error-log-path=/var/log/nginx/error.log --lock-path=/var/lock/nginx.lock --pid-path=/run/nginx.pid --modules-path=/usr/lib/nginx/modules --http-client-body-temp-path=/var/lib/nginx/body --http-fastcgi-temp-path=/var/lib/nginx/fastcgi --http-proxy-temp-path=/var/lib/nginx/proxy --http-scgi-temp-path=/var/lib/nginx/scgi --http-uwsgi-temp-path=/var/lib/nginx/uwsgi --with-compat --with-debug --with-pcre-jit --with-http_ssl_module --with-http_stub_status_module --with-http_realip_module --with-http_auth_request_module --with-http_v2_module --with-http_dav_module --with-http_slice_module --with-threads --add-dynamic-module=/build/nginx-d8gVax/nginx-1.18.0/debian/modules/http-geoip2 --with-http_addition_module --with-http_gunzip_module --with-http_gzip_static_module --with-http_sub_module --with-http_ssl_module --with-stream --with-stream_realip_module - 编译,千万不要安装
# 千万不要执行make install make - 备份sbin目录下原来的nginx文件
mv nginx nginx.bak - 将新编译的nginx文件拷贝到Nginx的sbin目录下
- 配置OpenAI接口location(域名和ssl配置请自行设置好)
location /gpt { proxy_pass https://api.openai.com/v1/; proxy_ssl_server_name on; proxy_set_header Host api.openai.com; proxy_set_header Connection ''; proxy_http_version 1.1; # 不缓存,支持流式输出,打字机效果 proxy_cache off; # 关闭缓存 proxy_buffering off; # 关闭代理缓冲 chunked_transfer_encoding on; # 开启分块传输编码 tcp_nopush on; # 开启TCP NOPUSH选项,禁止Nagle算法 tcp_nodelay on; # 开启TCP NODELAY选项,禁止延迟ACK算法 keepalive_timeout 120s; # 设定keep-alive超时时间 proxy_set_header X-Forwarded-For $remote_addr; proxy_set_header X-Forwarded-Proto $scheme; } - 重新加载Nginx配置
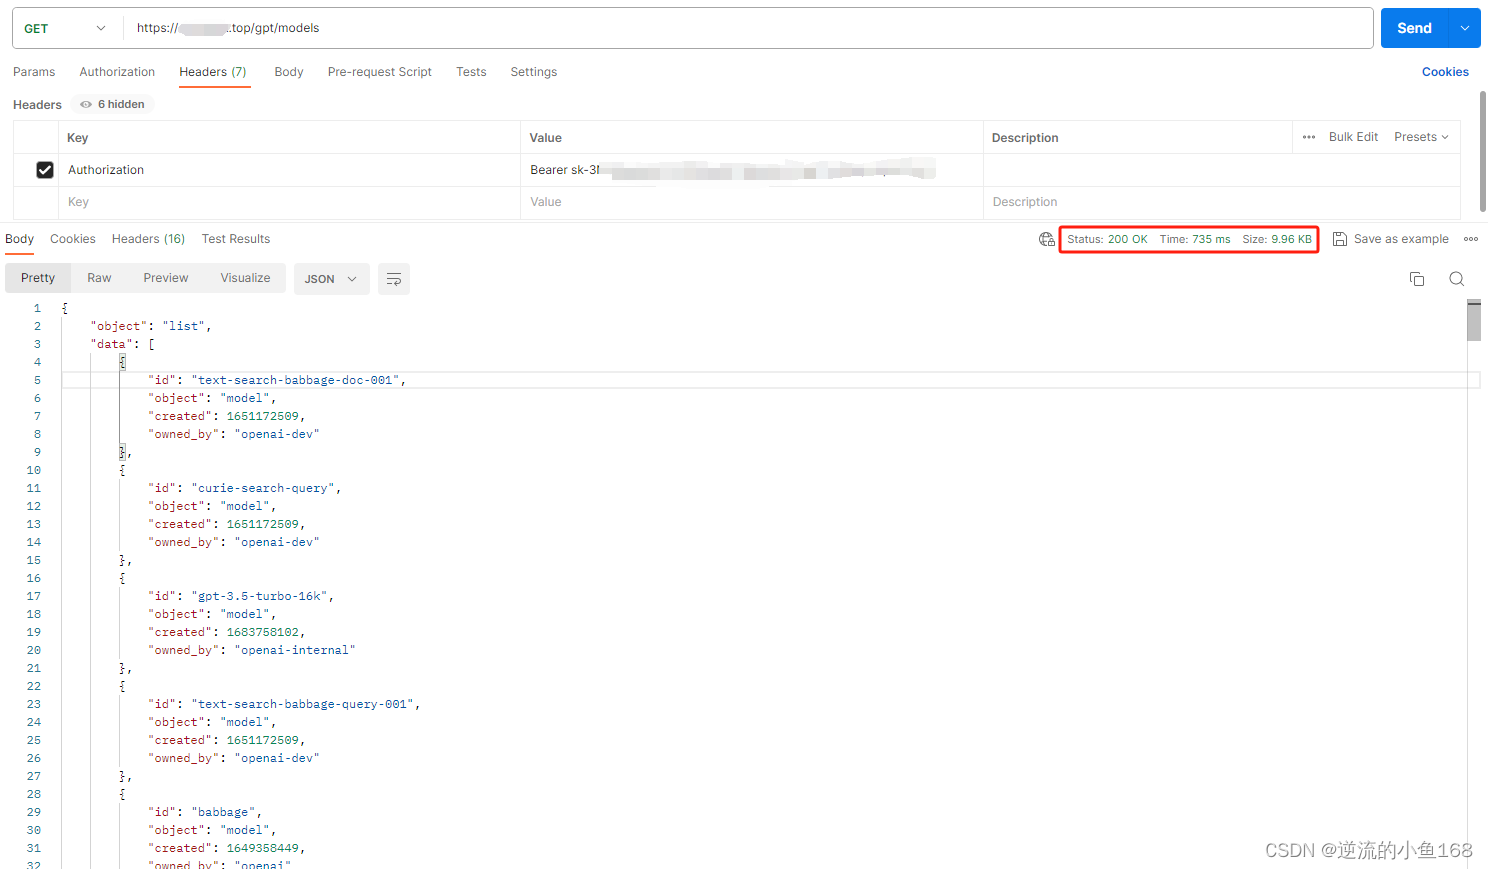
/usr/sbin/nginx -s reload - 本地访问,验证接口调用成功


 1万+
1万+

 被折叠的 条评论
为什么被折叠?
被折叠的 条评论
为什么被折叠?
 到【灌水乐园】发言


