


自定义控件之初窥门径
我是一个苦b的程序员,今晚加班到快通宵了,困得快睁不开眼了,女上司很关心,问我要不要吃宵夜。我没好气地说,宵夜就算了,能让我睡一觉就行了。女上司红着脸说了句讨厌啊,然后坐在我身边不动,好像距离我很近,搞得我很紧张,难道她发现我的程序出了bug?嘿嘿嘿。。。。
今天我们来学习一下简单的组合控件,因为之前在项目上用到了几个,就从里面抽出一个加减器来实现一下,比较简单。
下面是需要的效果图和实际效果
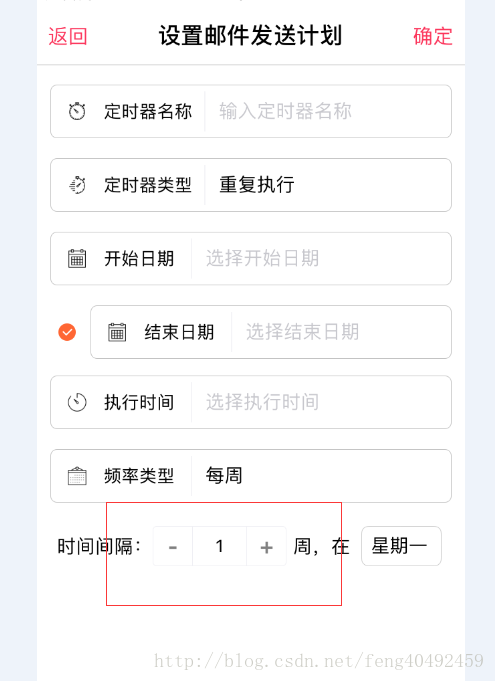
看效果图我们能想到这几点要求
1. 整个控件其实是由两个Button和一个EditText组成,
2. 输入框只能是数字,需要有个最大值,和必须大于0,也就是最小值
3. 输入数字时,输入超出范围的时候,自动填入最大值,
同时为了方便我们写入大小,获取EditText值,我们还需要设置自定义属性和设置监听器
 public AmountView(Context context, AttributeSet attrs, int defStyleAttr) {
        super(context, attrs, defStyleAttr);
        LayoutInflater.from(context).inflate(R.layout.view_amount, this);
        LeftBtn= (Button) findViewById(R.id.LeftBtn);
        RightBtn= (Button) findViewById(R.id.RightBtn);
        etCount= (EditText) findViewById(R.id.etCount);
        LeftBtn.setOnClickListener(this);
        RightBtn.setOnClickListener(this);
        etCount.addTextChangedListener(this);
        TypedArray typedArray=context.obtainStyledAttributes(attrs,R.styleable.AmountView,defStyleAttr,0);
        int btnWidth=typedArray.getDimensionPixelSize(R.styleable.AmountView_btnWidth,LayoutParams.WRAP_CONTENT);
        int btnSize=typedArray.getDimensionPixelSize(R.styleable.AmountView_btnSize,0);
        int tvSize=typedArray.getDimensionPixelSize(R.styleable.AmountView_tvSize,0);
        int tvWidth=typedArray.getDimensionPixelSize(R.styleable.AmountView_tvWidth,80);
        typedArray.recycle();
        LayoutParams btnParams = new LayoutParams(btnWidth, LayoutParams.MATCH_PARENT);
        LeftBtn.setLayoutParams(btnParams);
        RightBtn.setLayoutParams(btnParams);
        if (btnSize!=0){
            LeftBtn.setTextSize(TypedValue.COMPLEX_UNIT_PX, btnSize);
            LeftBtn.setTextSize(TypedValue.COMPLEX_UNIT_PX, btnSize);
        }
        LayoutParams textParams = new LayoutParams(tvWidth, LayoutParams.MATCH_PARENT);
        etCount.setLayoutParams(textParams);
        if (tvSize!=0){
            etCount.setTextSize(TypedValue.COMPLEX_UNIT_PX,tvSize);
        }
}实例化,以及获取自定义属性,这里就没啥解释的了,对于自定义view构造方法不太理解的童鞋们,这里推荐两篇博客,大家可以去了简单解一下自定义控件的构造方法及相关属性的理解 ,Android中自定义控件,三个构造函数 。
   public interface OnGetCountListener{
        void OnGetCount(View view, int amount);
    }
public void setOnListener(OnGetCountListener onListener){
this.onListener=onListener;
}定义一个数量变化的回调接口OnGetCountListener,方便在其他地方调用
    @Override
    public void onClick(View v) {
    int aa=v.getId();
        switch (aa){
            case R.id.LeftBtn:
            if (Count>MixCount){
                Count--;
                etCount.setText(Count+"");
                etCount.setSelection((Count+"").length());
            }
            break;
            case R.id.RightBtn:
                if (Count<MaxCount){
                    Count++;
                    etCount.setText(Count+"");
                    etCount.setSelection((Count+"").length());
                }
                break;
        }
        etCount.clearFocus();//失去焦点
        if (onListener!=null){
            onListener.OnGetCount(this, Count);
        }
    }
这里是 两个Button的也就是加减按钮的点击事件,当数值改变时,调用OnGetCountListener回调接口
    @Override
    public void afterTextChanged(Editable s) {//监听string0,手动更改时候处理的
        //这个方法被调用就是为了通知你在 在s的某个地方的文本内容被改变了!”
        if (s.toString().isEmpty())
            return;
        Count = Integer.valueOf(s.toString());
        if (Count > MaxCount) {
            etCount.setText(MaxCount + "");
            return;
        }
        if (Count < MixCount) {
            etCount.setText(MixCount + "");
            return;
        }
        if (onListener != null) {
            onListener.OnGetCount(this, Count);
        }
    }
同样的实现TextWatcher 设置EditText的数量改变监听,只要实现afterTextChanged()就可以了,也是需要调用OnGetCountListener回调接口,这里给不太理解TextWatcher 接口的童鞋们推荐一篇博客看看,相信你看完之后应该就理解了:最强理解:Android对EditText输入时设置监听即TextWatcher的用法
    /**
     * 设置初始值,默认为1
     * @param Count
     */
    public void setEditText(int Count) {
        this.Count=Count;
        etCount.setText(Count + "");
        etCount.setSelection((Count+"").length());
    }

    /**
     * 最小值
     * @param MixCount
     */
    public void setMixCount(int MixCount){
        this.MixCount=MixCount;
    }

    /**
     * 最大值
     * @param MaxCount
     */
    public void setMaxCount(int MaxCount){
        this.MaxCount=MaxCount;
    }
一些相关的设置,到这里也就结束了。
最后贴下xml
<?xml version="1.0" encoding="utf-8"?>
<LinearLayout xmlns:android="http://schemas.android.com/apk/res/android"
    android:layout_width="wrap_content"
    android:layout_height="wrap_content"
    android:focusable="true"
    android:divider="@drawable/divider"
    android:background="@drawable/bg_amount_layout"
    android:showDividers="middle"
    android:orientation="horizontal">

    <Button
        android:id="@+id/LeftBtn"
        android:layout_width="0dp"
        android:layout_height="match_parent"
        android:layout_weight="1"
        android:gravity="center"
        android:background="@drawable/btn_amount"
        android:text="-"/>

    <EditText
        android:id="@+id/etCount"
        android:layout_width="0dp"
        android:layout_height="match_parent"
        android:minWidth="60dp"
        android:layout_weight="2"
        android:background="@null"
        android:inputType="number"
        android:gravity="center"
        android:text="1000"/>

    <Button
        android:id="@+id/RightBtn"
        android:layout_width="0dp"
        android:layout_height="match_parent"
        android:layout_weight="1"
        android:gravity="center"
        android:background="@drawable/btn_amount"
        android:text="+"/>
</LinearLayout>
借用一句话结束:“干我们这行,啥时候懈怠,就意味着长进的停止,长进的停止就意味着被淘汰,只能往前冲,直到凤凰涅槃的一天!”
另外有个学习讨论的群!大家一起讨论哈哈!一起开车,与君共勉!。群号:188089649!转载请注明出处!谢谢! 本来按照国际惯例是有个Demo的,但是公司任务下来了,来不及上,等闲暇时间在补


 2980
2980

 被折叠的 条评论
为什么被折叠?
被折叠的 条评论
为什么被折叠?
 到【灌水乐园】发言


