


引言:
上一篇博文写了一个项目内嵌tomcat,想了想这次就手写一个简约的Tomcat。
本质其实就是socket通信技术以及io流。
一、Request
url:请求路径
method:请求类型
paramMap:请求参数
public class Request {

    private String url;

    private String method;

    private Map<String, String> paramMap = new HashMap<String, String>();

    public Request(InputStream inputStream) throws IOException {
        InputStreamReader inputStreamReader = new InputStreamReader(inputStream);
        BufferedReader bufferedReader = new BufferedReader(inputStreamReader);
        String[] methodAndUrl = bufferedReader.readLine().split(" ");
        this.method = methodAndUrl[0];
        int indexOf = methodAndUrl[1].indexOf("?");
        if (indexOf != -1) {
            this.url = methodAndUrl[1].substring(0, indexOf);
            ResoveParams(methodAndUrl[1].substring(indexOf + 1));
        } else {
            this.url = methodAndUrl[1];
        }
    }

    public String getRequestParam(String key) {
        return paramMap.get(key);
    }

    private void ResoveParams(String str) {
        String[] params = str.split("&");
        for (String p : params) {
            String[] split = p.split("=");
            if (split[0] != null) {
                paramMap.put(split[0], split[1]);
            }
        }
    }

    public String getUrl() {
        return url;
    }

    public void setUrl(String url) {
        this.url = url;
    }

    public String getMethod() {
        return method;
    }

    public void setMethod(String method) {
        this.method = method;
    }

}
二、Responce
public class Response {
    private OutputStream outputStream;

    public Response(OutputStream outputStream) {
        this.outputStream = outputStream;
    }

    public void write(String content) throws IOException {
        StringBuffer stringBuffer = new StringBuffer();
        stringBuffer.append("HTTP/1.1 200 OK\n").append("Content-Type: text/html\n").append("\r\n")
                .append("<html><body>").append(content).append("</body></html>");
        this.outputStream.write(stringBuffer.toString().getBytes());
        this.outputStream.flush();
        this.outputStream.close();
    }

}
三、Servlet
可以自行拓展Delete、Put等请求类型
public abstract class ExtServlet {
    protected abstract void doGet(Request request, Response response) throws IOException;

    protected abstract void doPost(Request request, Response response) throws IOException;

    public void service(Request request, Response response) throws IOException {
        String method = request.getMethod();
        if ("get".equalsIgnoreCase(method)) {
            doGet(request, response);
        } else if ("post".equalsIgnoreCase(method)) {
            doPost(request, response);
        } else {
            throw new IllegalArgumentException("request method is null");
        }
    }

}
四、添加一个servlet(DemoServlet)
重写doGet、doPost方法
public class DemoServlet extends ExtServlet {
@Override
protected void doGet(Request request, Response response) throws IOException {
doPost(request, response);
}
@Override
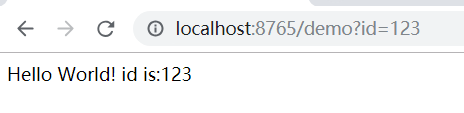
protected void doPost(Request request, Response response) throws IOException {
String id = request.getRequestParam("id");
response.write("Hello World! id is:" + id);
}
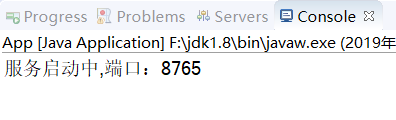
}五、tomcat服务(创建一个ServerSocket)
ServerSocket循化监听端口连接,
我这里直接指定DemoServlet处理请求,可以自行拓展(根据request中url来映射对应的servlet)
public class HttpServer {
    private int port;

    public HttpServer(int port) {
        this.port = port;
    }

    public void start() {
        ServerSocket serverSocket = null;
        try {
            System.out.println("服务启动中,端口:" + port);
            serverSocket = new ServerSocket(port);
            while (true) {
                Socket accept = serverSocket.accept();
                Request request = new Request(accept.getInputStream());
                Response response = new Response(accept.getOutputStream());
                new DemoServlet().service(request, response);
            }
        } catch (IOException e) {
            e.printStackTrace();
        } finally {
            if (serverSocket != null) {
                try {
                    serverSocket.close();
                } catch (IOException e) {
                    e.printStackTrace();
                }
            }
        }
    }
}
六、启动服务
public class App {
    public static void main(String[] args) {
        new HttpServer(8765).start();
    }
}
七、测试验证
Tomcat的简约版就这样了,希望对您有所微薄的帮助,欢迎大家相互交流!
向上的路并不拥挤,而大多数人选择了安逸——IT疯子也


 255
255


 被折叠的 条评论
为什么被折叠?
被折叠的 条评论
为什么被折叠?
 到【灌水乐园】发言


