


已经有一个集群:
192.168.206.138 master
192.168.206.136 k8s-node1
192.168.206.137 k8s-node2
kubectl get nodes -o wide

新加入一个master2节点
192.168.206.139 master2
一、初始化系统参数 139 master2 上
#在136、137、138上添加hosts“”
echo "192.168.206.139 master2" >>/etc/hosts
#在139上执行:
echo "192.168.206.138 master" >>/etc/hosts
echo "192.168.206.136 k8s-node1" >>/etc/hosts
echo "192.168.206.137 k8s-node2" >>/etc/hosts
echo "192.168.206.139 master2" >>/etc/hosts
hostname master2
echo master2 > /etc/hostname
cd /etc/yum.repos.d
wget http://mirrors.aliyun.com/repo/Centos-7.repo

cat <<EOF > /etc/yum.repos.d/kubernetes.repo
[kubernetes]
name=Kubernetes
baseurl=https://mirrors.aliyun.com/kubernetes/yum/repos/kubernetes-el7-x86_64/
enabled=1
gpgcheck=1
repo_gpgcheck=1
gpgkey=https://mirrors.aliyun.com/kubernetes/yum/doc/yum-key.gpg https://mirrors.aliyun.com/kubernetes/yum/doc/rpm-package-key.gpg
EOF

yum clean all
yum repolist


#安装containerd
# 1.安装源和依赖软件包(与docker没区别)
yum install -y yum-utils device-mapper-persistent-data lvm2
yum-config-manager --add-repo https://mirrors.aliyun.com/docker-ce/linux/centos/docker-ce.repo
sed -i 's+download.docker.com+mirrors.aliyun.com/docker-ce+' /etc/yum.repos.d/docker-ce.repo
yum makecache fast

# 2.安装containerd
yum install containerd -y
containerd --version # 查看containerd版本

# 3.启动containerd
systemctl start containerd && systemctl enable containerd && systemctl status containerd

systemctl stop firewalld && systemctl disable firewalld
sed -i 's/^SELINUX=enforcing$/SELINUX=disabled/' /etc/selinux/config
setenforce 0

yes | cp /etc/fstab /etc/fstab_bak
cat /etc/fstab_bak |grep -v swap > /etc/fstab

cat <<EOF | sudo tee /etc/modules-load.d/k8s.conf
br_netfilter
EOF

cat <<EOF | sudo tee /etc/sysctl.d/k8s.conf
net.bridge.bridge-nf-call-ip6tables = 1
net.bridge.bridge-nf-call-iptables = 1
EOF

cat <<EOF | sudo tee /etc/modules-load.d/k8s.conf
br_netfilter
EOF

cat <<EOF | sudo tee /etc/sysctl.d/k8s.conf
net.bridge.bridge-nf-call-ip6tables = 1
net.bridge.bridge-nf-call-iptables = 1
EOF

echo 1 > /proc/sys/net/bridge/bridge-nf-call-iptables
echo 1 > /proc/sys/net/ipv4/ip_forward
swapoff -a

cat > /etc/sysconfig/modules/ipvs.modules <<EOF
 #!/bin/bash
 modprobe -- ip_vs
 modprobe -- ip_vs_rr
 modprobe -- ip_vs_wrr
 modprobe -- ip_vs_sh
 modprobe -- nf_conntrack_ipv4
EOF

chmod 755 /etc/sysconfig/modules/ipvs.modules && bash /etc/sysconfig/modules/ipvs.modules && lsmod | grep -e ip_vs -e nf_conntrack_ipv4

yum -y install docker
#然后修改daemon.json,添加:

cat  << EOF  > /etc/docker/daemon.json
{
    "registry-mirrors": ["https://wyrsf017.mirror.aliyuncs.com"]
}
EOF

systemctl start docker
systemctl enable docker
systemctl status docker
docker version

yum -y install kubelet-1.19.0 kubeadm-1.19.0 kubectl-1.19.0 --disableexcludes=kubernetes
echo 'KUBELET_EXTRA_ARGS="--feature-gates SupportPodPidsLimit=false --feature-gates SupportNodePidsLimit=false"' > /etc/sysconfig/kubelet
systemctl start kubelet
systemctl enable kubelet
systemctl status kubelet

#下载镜像
docker pull registry.cn-hangzhou.aliyuncs.com/google_containers/kube-apiserver:v1.19.16
docker pull registry.cn-hangzhou.aliyuncs.com/google_containers/kube-controller-manager:v1.19.16
docker pull registry.cn-hangzhou.aliyuncs.com/google_containers/kube-scheduler:v1.19.16
docker pull registry.cn-hangzhou.aliyuncs.com/google_containers/kube-proxy:v1.19.16
docker pull registry.cn-hangzhou.aliyuncs.com/google_containers/pause:3.2
docker pull registry.cn-hangzhou.aliyuncs.com/google_containers/etcd:3.4.9-1
docker pull registry.cn-hangzhou.aliyuncs.com/google_containers/coredns:v1.7.0

docker images

docker tag registry.cn-hangzhou.aliyuncs.com/google_containers/kube-apiserver:v1.19.16 registry.k8s.io/kube-apiserver:v1.19.16
docker tag registry.cn-hangzhou.aliyuncs.com/google_containers/kube-controller-manager:v1.19.16 registry.k8s.io/kube-controller-manager:v1.19.16
docker tag registry.cn-hangzhou.aliyuncs.com/google_containers/kube-scheduler:v1.19.16 registry.k8s.io/kube-scheduler:v1.19.16
docker tag registry.cn-hangzhou.aliyuncs.com/google_containers/kube-proxy:v1.19.16 registry.k8s.io/kube-proxy:v1.19.16
docker tag registry.cn-hangzhou.aliyuncs.com/google_containers/pause:3.2 registry.k8s.io/pause:3.2
docker tag registry.cn-hangzhou.aliyuncs.com/google_containers/etcd:3.4.9-1 registry.k8s.io/etcd:3.4.9-1
docker tag registry.cn-hangzhou.aliyuncs.com/google_containers/coredns:v1.7.0 registry.k8s.io/coredns/coredns:v1.7.0

mkdir -p /etc/kubernetes/
echo "export KUBECONFIG=/etc/kubernetes/admin.conf" >> /etc/profile
source /etc/profile
#修改master2的kubeadm-config,加入controlPlaneEndpoint: 192.168.206.138:6443
kubectl -n kube-system edit cm kubeadm-config
#找到
kind: ClusterConfiguration
kubernetesVersion: v1.19.0
#在下面加入:
controlPlaneEndpoint: 192.168.206.138:6443
如果不加这句,加入集群时一定会报错:
[preflight] Running pre-flight checks
[WARNING SystemVerification]: missing optional cgroups: pids
[preflight] Reading configuration from the cluster...
[preflight] FYI: You can look at this config file with 'kubectl -n kube-system get cm kubeadm-config -oyaml'
error execution phase preflight:
One or more conditions for hosting a new control plane instance is not satisfied.unable to add a new control plane instance a cluster that doesn't have a stable controlPlaneEndpoint address
Please ensure that:
* The cluster has a stable controlPlaneEndpoint address.
* The certificates that must be shared among control plane instances are provided.
To see the stack trace of this error execute with --v=5 or higher
二、在master 138上找到加入集群的命令,并将 master 138上的证书copy到139上:
master 138上执行:
cd /etc/kubernetes/
scp -rp pki 192.168.206.139:/etc/kubernetes/
scp /etc/kubernetes/admin.conf 192.168.206.139:/etc/kubernetes/
kubeadm init phase upload-certs --upload-certs
kubeadm token create --print-join-command


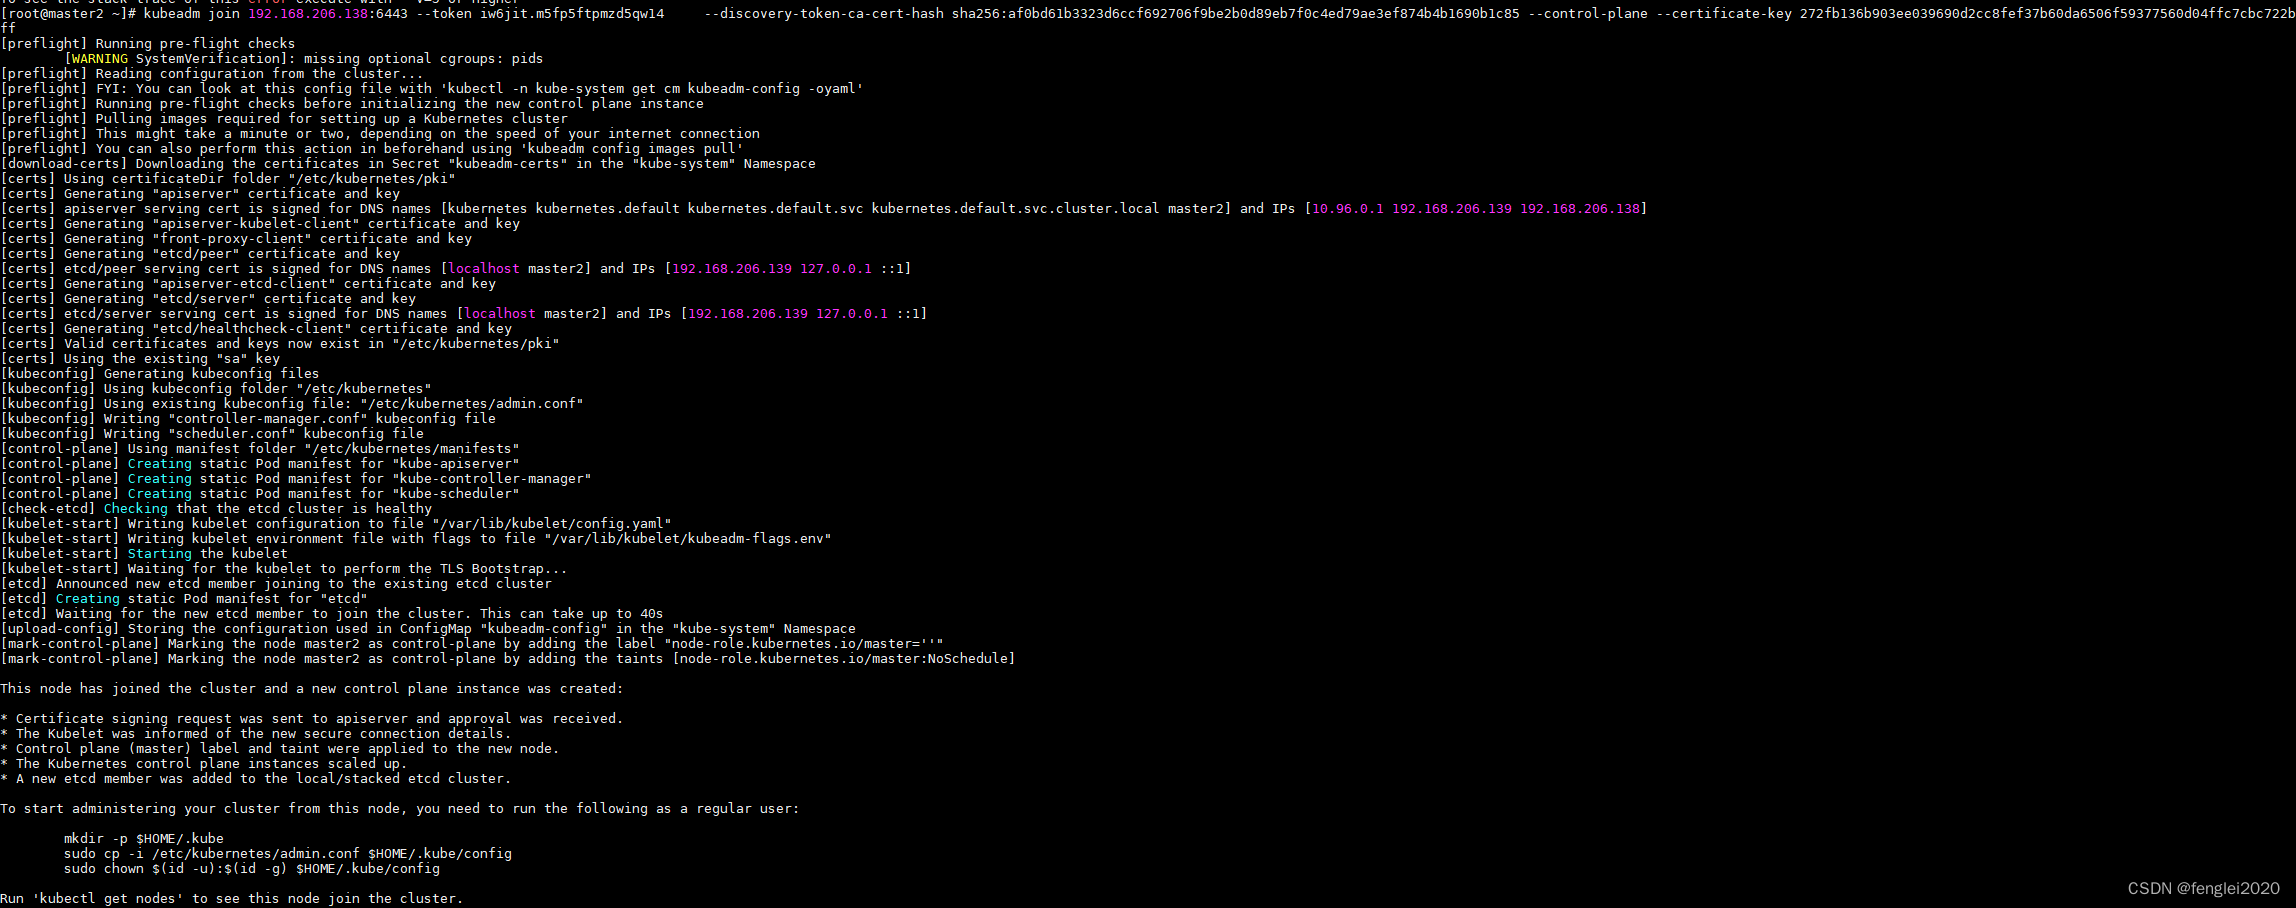
三、master2 使用 kubeadm 命令加入集群
此处是将以上两个参数拼接起来的,特别是key,会一直变,如果耽误时间过长,这里就会报错:
kubeadm join 192.168.206.138:6443 --token iw6jit.m5fp5ftpmzd5qw14 --discovery-token-ca-cert-hash sha256:af0bd61b3323d6ccf692706f9be2b0d89eb7f0c4ed79ae3ef874b4b1690b1c85 --control-plane --certificate-key 272fb136b903ee039690d2cc8fef37b60da6506f59377560d04ffc7cbc722bff
见下图信息为加入成功:
[root@master kubernetes]# kubectl get nodes -o wide

[root@master2 ~]# kubectl get pods -o wide
master2后续步骤:
rm -rf /root/.kube/
mkdir -p $HOME/.kube
sudo cp -i /etc/kubernetes/admin.conf $HOME/.kube/config
sudo chown $(id -u):$(id -g) $HOME/.kube/config
echo "export KUBECONFIG=/etc/kubernetes/admin.conf" >> /etc/profile
export KUBECONFIG=/etc/kubernetes/admin.conf
echo 'source <(kubectl completion bash)' >> /etc/bashrc
source <(kubectl completion bash)
source /etc/profile
kubectl get svc
此时,使用192.168.206.139:30088 即可访问tomcatservice1 下的tomcat网页
四:记录一个错误:
[root@master2 ~]# kubeadm join 192.168.206.138:6443 --token iw6jit.m5fp5ftpmzd5qw14 --discovery-token-ca-cert-hash sha256:af0bd61b3323d6ccf692706f9be2b0d89eb7f0c4ed79ae3ef874b4b1690b1c85 --control-plane --certificate-key b01d7a5a14a2365fc58f08162682eb4078186bd8cc9b54af3af9cf8eca4b3226
[preflight] Running pre-flight checks
[WARNING SystemVerification]: missing optional cgroups: pids
[preflight] Reading configuration from the cluster...
[preflight] FYI: You can look at this config file with 'kubectl -n kube-system get cm kubeadm-config -oyaml'
[preflight] Running pre-flight checks before initializing the new control plane instance
[preflight] Pulling images required for setting up a Kubernetes cluster
[preflight] This might take a minute or two, depending on the speed of your internet connection
[preflight] You can also perform this action in beforehand using 'kubeadm config images pull'
[download-certs] Downloading the certificates in Secret "kubeadm-certs" in the "kube-system" Namespace
error execution phase control-plane-prepare/download-certs: error downloading certs: error downloading the secret: Secret "kubeadm-certs" was not found in the "kube-system" Namespace. This Secret might have expired. Please, run `kubeadm init phase upload-certs --upload-certs` on a control plane to generate a new one
To see the stack trace of this error execute with --v=5 or higher
关键字:error execution phase control-plane-prepare/download-certs: error downloading certs:
解决方案:在master上使用以下命令生成新的key,重新拼接命令
[root@master kubernetes]# kubeadm init phase upload-certs --upload-certs


 2086
2086


 被折叠的 条评论
为什么被折叠?
被折叠的 条评论
为什么被折叠?
 到【灌水乐园】发言


