


Android软键盘的监听与高度控制的几种方案及常用效果![]() https://juejin.cn/post/7150453629021847566
https://juejin.cn/post/7150453629021847566
前言
本文我们会一起复习一下软键盘高度获取的几种方式,布局贴在软键盘上效果的实现与优化。
事情是这样的,有一天我逛PDD的时候,发现这样一个效果,

在搜索页面中,如果软件弹起了就会有一个语音搜索的布局,当我们隐藏软键盘之后就隐藏这个布局,
然后我又看了一下TB的搜索页面,都是类似的效果,但是我发现他们的效果都有优化的空间。
他们的做法是获取到软键盘弹起之后的高度,然后把布局设置到软键盘上面,这个大家都会,但是布局在添加到软键盘之后,软键盘才会慢慢的做一个平移动画展示到指定的位置,如果把动画效果放慢就可以很明显的看到效果。
能不能让我们的布局附着在软键盘上面,随着软键盘的平移动画而动呢?这样的话效果是不是会更流畅一点?
下面我们举例说明一下之前的老方法直接获取到软键盘高度,把布局放上去的做法,和随着软键盘一起动的做法,这两种做法的区别。
一、获取软键盘高度-方式一
要说获取软键盘的高度,那么肯定离不开 getViewTreeObserver().addOnGlobalLayoutListener 的方式。
只是使用起来又分不同的做法,最简单的是拿到Activity的ContentView,设置
contentView.getViewTreeObserver() .addOnGlobalLayoutListener(onGlobalLayoutListener);
然后在监听内部再通过 decorView.getWindowVisibleDisplayFrame来获取显示的Rect,在通过 decorView.getBottom() - outRect.bottom的方式来获取高度。
完整示例如下:
public final class Keyboard1Utils {

    public static int sDecorViewInvisibleHeightPre;
    private static ViewTreeObserver.OnGlobalLayoutListener onGlobalLayoutListener;
    private static int mNavHeight;

    private Keyboard1Utils() {
    }

    private static int sDecorViewDelta = 0;

    private static int getDecorViewInvisibleHeight(final Activity activity) {
        final View decorView = activity.getWindow().getDecorView();
        if (decorView == null) return sDecorViewInvisibleHeightPre;
        final Rect outRect = new Rect();
        decorView.getWindowVisibleDisplayFrame(outRect);

        int delta = Math.abs(decorView.getBottom() - outRect.bottom);

        if (delta <= mNavHeight) {
            sDecorViewDelta = delta;
            return 0;
        }
        return delta - sDecorViewDelta;
    }

    public static void registerKeyboardHeightListener(final Activity activity, final KeyboardHeightListener listener) {
        final int flags = activity.getWindow().getAttributes().flags;

        if ((flags & WindowManager.LayoutParams.FLAG_LAYOUT_NO_LIMITS) != 0) {
            activity.getWindow().clearFlags(WindowManager.LayoutParams.FLAG_LAYOUT_NO_LIMITS);
        }

        final FrameLayout contentView = activity.findViewById(android.R.id.content);
        sDecorViewInvisibleHeightPre = getDecorViewInvisibleHeight(activity);

        onGlobalLayoutListener = new ViewTreeObserver.OnGlobalLayoutListener() {
            @Override
            public void onGlobalLayout() {
                int height = getDecorViewInvisibleHeight(activity);
                if (sDecorViewInvisibleHeightPre != height) {

                    listener.onKeyboardHeightChanged(height);

                    sDecorViewInvisibleHeightPre = height;
                }
            }
        };

        //获取到导航栏高度之后再添加布局监听
        getNavigationBarHeight(activity, new NavigationBarCallback() {
            @Override
            public void onHeight(int height, boolean hasNav) {
                mNavHeight = height;
                contentView.getViewTreeObserver().addOnGlobalLayoutListener(onGlobalLayoutListener);
            }
        });


    }

    public static void unregisterKeyboardHeightListener(Activity activity) {
        onGlobalLayoutListener = null;
        View contentView = activity.getWindow().getDecorView().findViewById(android.R.id.content);
        if (contentView == null) return;
        contentView.getViewTreeObserver().removeGlobalOnLayoutListener(onGlobalLayoutListener);
    }

    private static int getNavBarHeight() {
        Resources res = Resources.getSystem();
        int resourceId = res.getIdentifier("navigation_bar_height", "dimen", "android");
        if (resourceId != 0) {
            return res.getDimensionPixelSize(resourceId);
        } else {
            return 0;
        }
    }

    public static void getNavigationBarHeight(Activity activity, NavigationBarCallback callback) {

        View view = activity.getWindow().getDecorView();
        boolean attachedToWindow = view.isAttachedToWindow();

        if (attachedToWindow) {

            WindowInsetsCompat windowInsets = ViewCompat.getRootWindowInsets(view);
            assert windowInsets != null;

            int height = windowInsets.getInsets(WindowInsetsCompat.Type.navigationBars()).bottom;

            boolean hasNavigationBar = windowInsets.isVisible(WindowInsetsCompat.Type.navigationBars()) &&
                    windowInsets.getInsets(WindowInsetsCompat.Type.navigationBars()).bottom > 0;

            if (height > 0) {
                callback.onHeight(height, hasNavigationBar);
            } else {
                callback.onHeight(getNavBarHeight(), hasNavigationBar);
            }

        } else {

            view.addOnAttachStateChangeListener(new View.OnAttachStateChangeListener() {
                @Override
                public void onViewAttachedToWindow(View v) {

                    WindowInsetsCompat windowInsets = ViewCompat.getRootWindowInsets(v);
                    assert windowInsets != null;
                    int height = windowInsets.getInsets(WindowInsetsCompat.Type.navigationBars()).bottom;

                    boolean hasNavigationBar = windowInsets.isVisible(WindowInsetsCompat.Type.navigationBars()) &&
                            windowInsets.getInsets(WindowInsetsCompat.Type.navigationBars()).bottom > 0;

                    if (height > 0) {
                        callback.onHeight(height, hasNavigationBar);
                    } else {
                        callback.onHeight(getNavBarHeight(), hasNavigationBar);
                    }

                }

                @Override
                public void onViewDetachedFromWindow(View v) {
                }
            });
        }
    }

    public interface KeyboardHeightListener {
        void onKeyboardHeightChanged(int height);
    }
}
复制代码
使用:
    override fun init() {

        Keyboard1Utils.registerKeyboardHeightListener(this) {

            YYLogUtils.w("当前的软键盘高度:$it")

        }
}
复制代码
Log如下:

需要注意的是方法内部获取导航栏的方法是过时的,部分手机会有问题,但是并没有用它做计算,只是用于一个Flag,终归还是能用,经过我的测试也并不会影响效果。
二、获取软键盘高度-方式二
获取软键盘高度的第二种方式也是使用 getViewTreeObserver().addOnGlobalLayoutListener 的方式,不过不同的是,它是在Activity添加了一个PopupWindow,然后让软键盘弹起的时候,计算PopopWindow移动了多少范围,从而计算软键盘的高度。
这个是网上用的比较多的一种开源方案,别的不说这个思路就是清奇,真是和尚的房子-秒啊
它创建一个看不见的弹窗,即宽为0,高为全屏,并为弹窗设置全局布局监听器。当布局有变化,比如有输入法弹窗出现或消失时, 监听器回调函数就会被调用。而其中的关键就是当输入法弹出时, 它会把之前我们创建的那个看不见的弹窗往上挤, 这样我们创建的那个弹窗的位置就变化了,只要获取它底部高度的变化值就可以间接的获取输入法的高度了。
这里我对源码做了一点修改
public class KeyboardHeightUtils extends PopupWindow {

    private KeyboardHeightListener mListener;
    private View popupView;
    private View parentView;
    private Activity activity;

    public KeyboardHeightUtils(Activity activity) {
        super(activity);
        this.activity = activity;

        LayoutInflater inflator = (LayoutInflater) activity.getSystemService(Activity.LAYOUT_INFLATER_SERVICE);
        this.popupView = inflator.inflate(R.layout.keyboard_popup_window, null, false);
        setContentView(popupView);

        setSoftInputMode(WindowManager.LayoutParams.SOFT_INPUT_ADJUST_RESIZE | WindowManager.LayoutParams.SOFT_INPUT_STATE_ALWAYS_VISIBLE);
        setInputMethodMode(PopupWindow.INPUT_METHOD_NEEDED);

        parentView = activity.findViewById(android.R.id.content);

        setWidth(0);
        setHeight(WindowManager.LayoutParams.MATCH_PARENT);

        popupView.getViewTreeObserver().addOnGlobalLayoutListener(new ViewTreeObserver.OnGlobalLayoutListener() {

            @Override
            public void onGlobalLayout() {
                if (popupView != null) {
                    handleOnGlobalLayout();
                }
            }
        });
    }

    public void start() {

        parentView.addOnAttachStateChangeListener(new View.OnAttachStateChangeListener() {
            @Override
            public void onViewAttachedToWindow(View view) {
                if (!isShowing() && parentView.getWindowToken() != null) {
                    setBackgroundDrawable(new ColorDrawable(0));
                    showAtLocation(parentView, Gravity.NO_GRAVITY, 0, 0);
                }
            }

            @Override
            public void onViewDetachedFromWindow(View view) {
            }
        });

    }

    public void close() {
        this.mListener = null;
        dismiss();
    }

    public void registerKeyboardHeightListener(KeyboardHeightListener listener) {
        this.mListener = listener;
    }

    private void handleOnGlobalLayout() {

        Point screenSize = new Point();
        activity.getWindowManager().getDefaultDisplay().getSize(screenSize);

        Rect rect = new Rect();
        popupView.getWindowVisibleDisplayFrame(rect);

        int keyboardHeight = screenSize.y - rect.bottom;

        notifyKeyboardHeightChanged(keyboardHeight);
    }


    private void notifyKeyboardHeightChanged(int height) {
        if (mListener != null) {
            mListener.onKeyboardHeightChanged(height);
        }
    }

    public interface KeyboardHeightListener {
        void onKeyboardHeightChanged(int height);
    }

}
复制代码
使用的方式:
    override fun init() {

        keyboardHeightUtils = KeyboardHeightUtils(this)
        keyboardHeightUtils.registerKeyboardHeightListener {
            YYLogUtils.w("第二种方式:当前的软键盘高度:$it")
        }
        keyboardHeightUtils.start()

    }

    override fun onDestroy() {
        super.onDestroy()
        Keyboard1Utils.unregisterKeyboardHeightListener(this)

        keyboardHeightUtils.close();
    }
复制代码
Log如下:

和第一种方案有异曲同工之妙,都是一个方法,但是思路有所不同,但是这种方法也有一个坑点,就是需要计算状态栏的高度。可以看到第二种方案和第一种方案有一个状态栏高度的偏差,大家记得处理即可。
三、获取软键盘高度-方式三
之前的文章我们讲过 WindowInsets 的方案,这里我们进一步说一下使用 WindowInsets 获取软键盘高度的坑点。
如果能直接使用兼容方案,那肯定是完美的:
    ViewCompat.setWindowInsetsAnimationCallback(window.decorView, object : WindowInsetsAnimationCompat.Callback(DISPATCH_MODE_STOP) {
         override fun onProgress(insets: WindowInsetsCompat, runningAnimations: MutableList<WindowInsetsAnimationCompat>): WindowInsetsCompat {

                val isVisible = insets.isVisible(WindowInsetsCompat.Type.ime())
                val keyboardHeight = insets.getInsets(WindowInsetsCompat.Type.ime()).bottom

                //当前是否展示
                YYLogUtils.w("isVisible = $isVisible")
                //当前的高度进度回调
                YYLogUtils.w("keyboardHeight = $keyboardHeight")

                return insets
            }
        })

        ViewCompat.getWindowInsetsController(findViewById(android.R.id.content))?.apply {

            show(WindowInsetsCompat.Type.ime())

        }
复制代码
可惜想法很好,实际上也只有在Android R 以上才好用,低版本要么就只触发一次,要么就干脆不触发。兼容性的方案也有兼容性问题!
具体可以参考我之前的文章,按照我们之前的说法,我们需要在Android11上使用动画监听的方案,而Android11一下使用 setOnApplyWindowInsetsListener 的方式来获取。
代码大概如下
    fun addKeyBordHeightChangeCallBack(view: View, onAction: (height: Int) -> Unit) {
        var posBottom: Int
        if (Build.VERSION.SDK_INT >= Build.VERSION_CODES.R) {
            val cb = object : WindowInsetsAnimation.Callback(DISPATCH_MODE_STOP) {
                override fun onProgress(
                    insets: WindowInsets,
                    animations: MutableList<WindowInsetsAnimation>
                ): WindowInsets {
                    posBottom = insets.getInsets(WindowInsets.Type.ime()).bottom +
                            insets.getInsets(WindowInsets.Type.systemBars()).bottom
                    onAction.invoke(posBottom)
                    return insets
                }
            }
            view.setWindowInsetsAnimationCallback(cb)
        } else {
            ViewCompat.setOnApplyWindowInsetsListener(view) { _, insets ->
                posBottom = insets.getInsets(WindowInsetsCompat.Type.ime()).bottom +
                        insets.getInsets(WindowInsetsCompat.Type.systemBars()).bottom
                onAction.invoke(posBottom)
                insets
            }
        }
    }
复制代码
但是实测之后发现,就算是兼容版本的 setOnApplyWindowInsetsListener 方法,获取状态栏和导航栏没有问题,但是当软键盘弹起和收起的时候并不会再次回调,也就是部分设备和版本只能调用一次,再次弹软键盘的时候就不触发了。
这... 又是一个坑。
所以我们如果想兼容版本的话,那没办法了,只能出绝招了,我们就把Android11以下的机型使用 getViewTreeObserver().addOnGlobalLayoutListener 的方式,而Android11以上的我们使用 WindowInsets 的方案。
具体的兼容方案如下:
public final class Keyboard4Utils {

    public static int sDecorViewInvisibleHeightPre;
    private static ViewTreeObserver.OnGlobalLayoutListener onGlobalLayoutListener;
    private static int mNavHeight;

    private Keyboard4Utils() {
    }

    private static int sDecorViewDelta = 0;

    private static int getDecorViewInvisibleHeight(final Activity activity) {
        final View decorView = activity.getWindow().getDecorView();
        if (decorView == null) return sDecorViewInvisibleHeightPre;
        final Rect outRect = new Rect();
        decorView.getWindowVisibleDisplayFrame(outRect);

        int delta = Math.abs(decorView.getBottom() - outRect.bottom);
        if (delta <= mNavHeight) {
            sDecorViewDelta = delta;
            return 0;
        }
        return delta - sDecorViewDelta;
    }

    public static void registerKeyboardHeightListener(final Activity activity, final KeyboardHeightListener listener) {

        if (Build.VERSION.SDK_INT >= Build.VERSION_CODES.R) {
            invokeAbove31(activity, listener);
        } else {
            invokeBelow31(activity, listener);
        }


    }

    @RequiresApi(api = Build.VERSION_CODES.R)
    private static void invokeAbove31(Activity activity, KeyboardHeightListener listener) {

        activity.getWindow().getDecorView().setWindowInsetsAnimationCallback(new WindowInsetsAnimation.Callback(DISPATCH_MODE_STOP) {
            @NonNull
            @Override
            public WindowInsets onProgress(@NonNull WindowInsets windowInsets, @NonNull List<WindowInsetsAnimation> list) {

                int imeHeight = windowInsets.getInsets(WindowInsetsCompat.Type.ime()).bottom;
                int navHeight = windowInsets.getInsets(WindowInsetsCompat.Type.navigationBars()).bottom;
                boolean hasNavigationBar = windowInsets.isVisible(WindowInsetsCompat.Type.navigationBars()) &&
                        windowInsets.getInsets(WindowInsetsCompat.Type.navigationBars()).bottom > 0;

                listener.onKeyboardHeightChanged(hasNavigationBar ? Math.max(imeHeight - navHeight, 0) : imeHeight);

                return windowInsets;
            }
        });
    }

    private static void invokeBelow31(Activity activity, KeyboardHeightListener listener) {

        final int flags = activity.getWindow().getAttributes().flags;

        if ((flags & WindowManager.LayoutParams.FLAG_LAYOUT_NO_LIMITS) != 0) {
            activity.getWindow().clearFlags(WindowManager.LayoutParams.FLAG_LAYOUT_NO_LIMITS);
        }

        final FrameLayout contentView = activity.findViewById(android.R.id.content);
        sDecorViewInvisibleHeightPre = getDecorViewInvisibleHeight(activity);

        onGlobalLayoutListener = new ViewTreeObserver.OnGlobalLayoutListener() {
            @Override
            public void onGlobalLayout() {
                int height = getDecorViewInvisibleHeight(activity);
                if (sDecorViewInvisibleHeightPre != height) {

                    listener.onKeyboardHeightChanged(height);

                    sDecorViewInvisibleHeightPre = height;
                }
            }
        };

        //获取到导航栏高度之后再添加布局监听
        getNavigationBarHeight(activity, new NavigationBarCallback() {
            @Override
            public void onHeight(int height, boolean hasNav) {
                mNavHeight = height;
                contentView.getViewTreeObserver().addOnGlobalLayoutListener(onGlobalLayoutListener);
            }
        });

    }

    public static void unregisterKeyboardHeightListener(Activity activity) {
        onGlobalLayoutListener = null;
        View contentView = activity.getWindow().getDecorView().findViewById(android.R.id.content);
        if (contentView == null) return;
        contentView.getViewTreeObserver().removeGlobalOnLayoutListener(onGlobalLayoutListener);
    }

    private static int getNavBarHeight() {
        Resources res = Resources.getSystem();
        int resourceId = res.getIdentifier("navigation_bar_height", "dimen", "android");
        if (resourceId != 0) {
            return res.getDimensionPixelSize(resourceId);
        } else {
            return 0;
        }
    }

    public static void getNavigationBarHeight(Activity activity, NavigationBarCallback callback) {

        View view = activity.getWindow().getDecorView();
        boolean attachedToWindow = view.isAttachedToWindow();

        if (attachedToWindow) {

            WindowInsetsCompat windowInsets = ViewCompat.getRootWindowInsets(view);
            assert windowInsets != null;

            int height = windowInsets.getInsets(WindowInsetsCompat.Type.navigationBars()).bottom;

            boolean hasNavigationBar = windowInsets.isVisible(WindowInsetsCompat.Type.navigationBars()) &&
                    windowInsets.getInsets(WindowInsetsCompat.Type.navigationBars()).bottom > 0;

            if (height > 0) {
                callback.onHeight(height, hasNavigationBar);
            } else {
                callback.onHeight(getNavBarHeight(), hasNavigationBar);
            }

        } else {

            view.addOnAttachStateChangeListener(new View.OnAttachStateChangeListener() {
                @Override
                public void onViewAttachedToWindow(View v) {

                    WindowInsetsCompat windowInsets = ViewCompat.getRootWindowInsets(v);
                    assert windowInsets != null;
                    int height = windowInsets.getInsets(WindowInsetsCompat.Type.navigationBars()).bottom;

                    boolean hasNavigationBar = windowInsets.isVisible(WindowInsetsCompat.Type.navigationBars()) &&
                            windowInsets.getInsets(WindowInsetsCompat.Type.navigationBars()).bottom > 0;

                    if (height > 0) {
                        callback.onHeight(height, hasNavigationBar);
                    } else {
                        callback.onHeight(getNavBarHeight(), hasNavigationBar);
                    }

                }

                @Override
                public void onViewDetachedFromWindow(View v) {
                }
            });
        }
    }

    public interface KeyboardHeightListener {
        void onKeyboardHeightChanged(int height);
    }
}

复制代码
运行的Log如下:

通过这样的方式我们就能实现在 Android R 以上的设备可以有当前的软键盘高度回调,而低版本的会直接回调当前的软键盘需要展示的直接高度。
记住需要判断是否需要处理导航栏的高度哦,就算是R以上的我们也需要判断是否需要减去导航栏高度的。
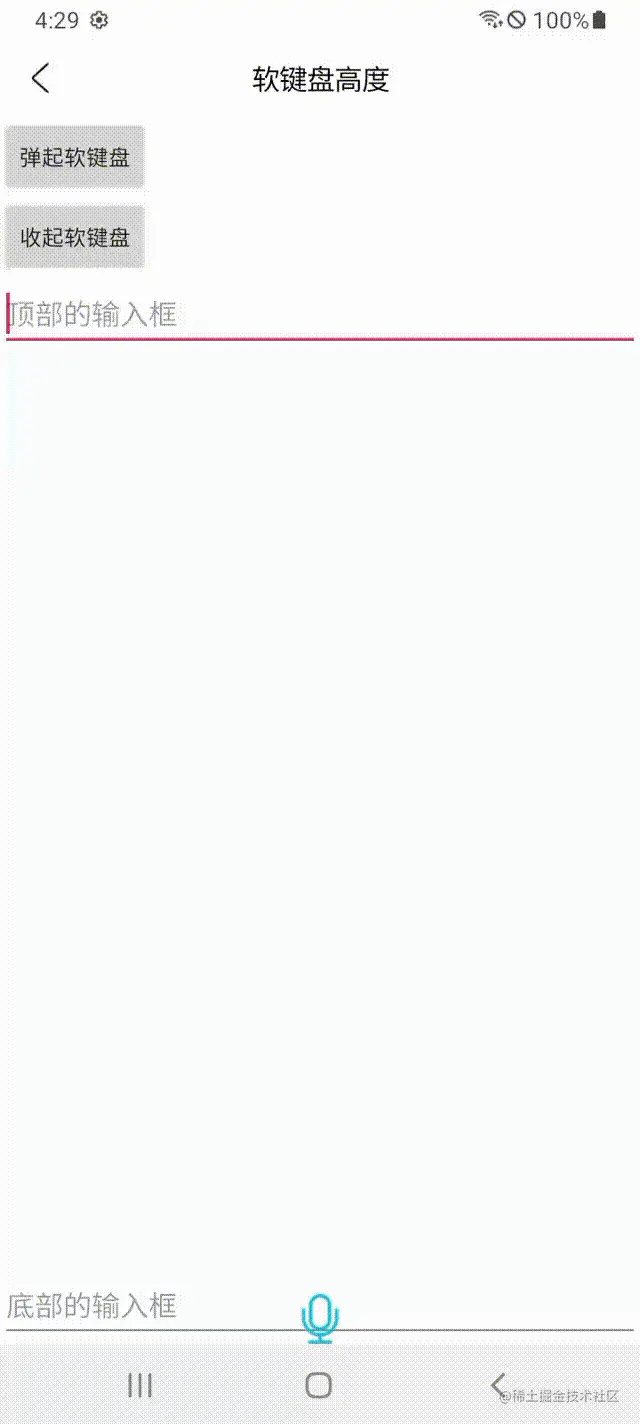
四、实现布局悬停在软键盘上面
做好了软键盘的高度计算之后,我们就能实现对应的布局了,这里我们以非滚动的固定布局为例子。
我们在底部加入一个ImageView,当软键盘弹起的时候我们显示到软键盘上面,弹出软键盘试试!

哎?怎么没效果??别慌,还没开始呢!下面开始上方案。
这里我们使用方案一来看看效果:
        Keyboard1Utils.registerKeyboardHeightListener(this) {

            YYLogUtils.w("当前的软键盘高度:$it")

            updateVoiceIcon(it)
        }

    //更新语音图标的位置
    private fun updateVoiceIcon(height: Int) {

        mIvVoice.updateLayoutParams<FrameLayout.LayoutParams> {
            bottomMargin = height
        }
    }
复制代码
我们简单的做一个增加间距的属性。效果如下:

嗯,就是PDD和TB的应用效果了,那之前我们说的随着软键盘的动画而动画的那种效果呢?
其实就是使用第三种方案,不过只有在Android11以上才能生效,其实目前Android11的占有率还可以。接下来我们换一个手机试试。
没什么效果?是的,我还没换呢,闹个眼子。先发一个效果一的图来做一下对比嘛。
接下来我们使用方案三来试试:
      Keyboard3Utils.registerKeyboardHeightListener(this) {
            YYLogUtils.w("第三种方式:当前的软键盘高度:$it")
            updateVoiceIcon(it)
        }

    //更新语音图标的位置
    private fun updateVoiceIcon(height: Int) {

        mIvVoice.updateLayoutParams<FrameLayout.LayoutParams> {
            bottomMargin = height
        }
    }
复制代码
效果三的运行效果如下:

这么看能看出效果一和效果三之间的区别吗,沿着软键盘做的位移,由于我是手机录屏MP4转码GIF,所以是渣渣画质,实际效果比GIF要流畅。defu纵享丝滑!
总结
本文的示例都是基于固定布局下的一些软键盘的操作,而如果是ScrollView类似的一些滚动布局下,那么又是另外一种做法,这里没有做对比。由于篇幅原因,后期可能会单独出各种布局下软键盘的与EidtText的位置相关设置。(文章已出,有兴趣可以看看这篇文章【传送门】)
话说回来,其实这种把布局贴在软键盘上面的做法,其实在应用开发中还是相对常见的,比如把输入框的Dialog贴在软键盘上面,比如语言搜索的布局放在软键盘上面等等。
对这样的方案来说,其实我们可以尽量的优化一下展示的方式,高版本的手机会更加的丝滑流畅,总的来说使用第三种方案还是不错的,兼容性还可以。
本文用到的一些测试机型为5.0 、6.0、 7.0、 12的这些机型,由于时间精力等原因并没有覆盖全版本和机型,如果大家有其他的兼容性问题也能评论区交流一下。如果有其他或更好的方案也可以评论区交流哦。
好了,本文的全部代码与Demo都已经开源。有兴趣可以看这里。项目会持续更新,大家可以关注一下。
如果感觉本文对你有一点点的启发,还望你能点赞支持一下,你的支持是我最大的动力。
Ok,这一期就此完结。


 401
401


 被折叠的 条评论
为什么被折叠?
被折叠的 条评论
为什么被折叠?
 到【灌水乐园】发言


