


You learned how to set up Azure Pipelines in an earlier module. If you need a refresher, head over to Create a build pipeline with Azure Pipelines .
Since your solution has just the one project in it, the scope of the job agent is limited and cannot access the package. To make sure the agent has the permissions it needs to publish the artifact, you need to turn off Limit job authorization scope to current project in the pipeline settings.
To turn off this setting:
-
In Azure DevOps, navigate to your organization.
-
Select Organization settings from the bottom corner.
-
Under Pipelines, select Settings.
-
Turn off Limit job authorization scope to current project.

You need to make a similar change to your project:
- From Azure DevOps, go to the Space Game - web - Dependencies project.
- Select Project settings at the bottom left.
- Under Pipelines, select Settings
- Turn off Limit job authorization scope to current project.
Next, you'll set up a second pipeline to build the package and upload that package to Azure Artifacts.
-
From Azure DevOps, go to the Space Game - web - Dependencies project.
-
Select Pipelines, from the menu on the left.
-
Select + New Pipeline.
-
From the Connect tab, select GitHub.
-
From the Select tab, select mslearn-tailspin-spacegame-web-models.
If prompted, enter your GitHub credentials. From the page that appears, scroll to the bottom and select Approve and install.
-
From the Review tab, you see the new pipeline's azure-pipelines.yml file.
-
Select Run.
-
Watch the pipeline run.
-
Go to the Artifacts tab.
-
From the dropdown at the top, select Tailspin.SpaceGame.Web.Models.
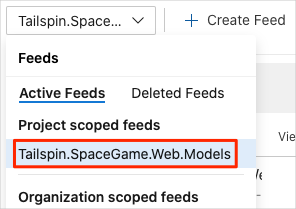
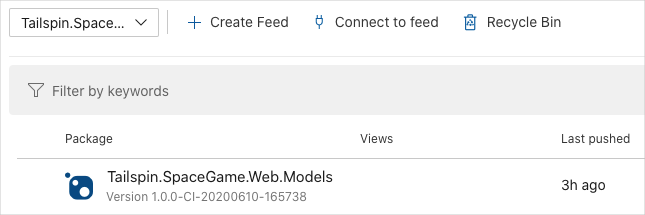
You see the resulting package, Tailspin.SpaceGame.Web.Models, in Azure Artifacts.
-
Select the package to go to the details page. Then copy the version number to a location where you can easily access it later.
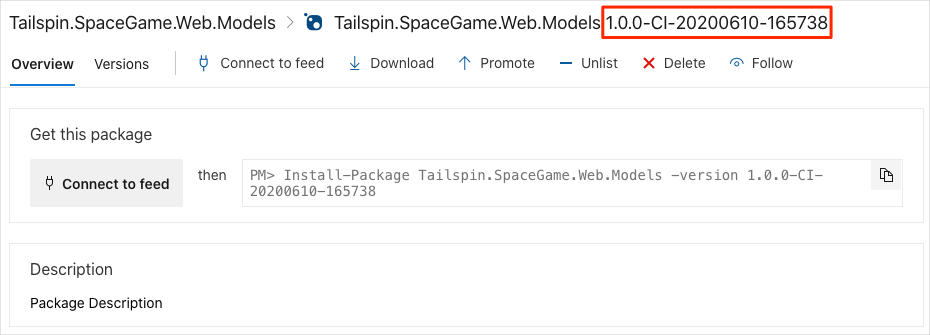
You'll use this version number in the next part.
原文:
https://docs.microsoft.com/zh-cn/learn/modules/manage-build-dependencies/5-create-package-pipeline
Create the pipeline in Azure Pipelines


 933
933


 被折叠的 条评论
为什么被折叠?
被折叠的 条评论
为什么被折叠?
 到【灌水乐园】发言


