


multiprocessing 文档:https://docs.python.org/zh-cn/3.10/library/multiprocessing.html
Process、Lock、Semaphore、Queue、Pipe、Pool:https://cuiqingcai.com/3335.html
网络和进程间通信:https://docs.python.org/zh-cn/3.11/library/ipc.html
- asyncio --- 异步 I/O
- socket --- 底层网络接口
- ssl --- 套接字对象的 TLS/SSL 包装器
- select --- 等待 I/O 完成
- selectors --- 高级 I/O 复用库
- signal --- 设置异步事件处理程序
- mmap --- 内存映射文件支持
1、进程、线程、并发、并行
进程、线程
- 进程:可以看作是线程的集合,由一个或多个线程构成。同时进程也是系统进行资源分配和调度的最小独立单位,所以各进程之间的数据是无法共享的,如多个进程无法共享一个全局变量,进程之间的数据共享需要由单独的机制来实现。
- 线程:是操作系统进行运算调度的最小单位,是进程中的最小运行单元。也是CPU调度的最小单元
并发、并行
在计算机中运行一个程序,底层是通过处理器运行一条条指今来实现的。处理器同一时刻只能执行一条指令,
- 并发(concurrency):是指多个线程对应的多条指令被快速轮换地执行。例如:一个处理器,它先执行线程A的指令一段时间,再执行线程B的指令一段时间,然后再切回线程A执行一段时间。处理器执行指令的速度和切换线程的速度都非常快,人完全感知不到计算机在这个过程中还切换了多个线程的上下文,这使得多个线程从宏观上看起来是同时在运行。从微观上看,处理器连续不断地在多个线程之间切换和执行,每个线程的执行都一定会占用这个处理器的一个时间片段,因此同一时刻其实只有一个线程被执行。
- 并行(parallel):指同一时刻有多条指令在多个处理器上同时执行,这意着并行必须依赖多个处理器。不论是从宏观还是微观上看,多个线程都是在同一时刻一起执行的。并行只能存在于多处理器系统中,因此如果计算机处理器只有一个核,就不可能实现并行。而并发在单处理器和多处理器系统中都可以存在,因为仅靠一个核,就可以实现并发。例如。系统处理器需要同时运行多个线程。如果系统处理器只有一个核,那它只能通过并发的方式来运行这些线程。而如果系统处理器有多个核,那么在一个核执行一个线程的同时,另一个核可以执行另一个线程,这样这两个线程就实现了并行执行。当然,其他线程也可能和另外的线程在同一个核上执行,它们之间就是并发执行。具体的执行方式,取决于操作系统如何调度。
Python 并发执行
Python 标准库:https://docs.python.org/zh-cn/3.12/library/index.html
2、Python "多线程、多进程"
GIL 对 Python 多线程 影响
GIL (全称为 GlobalInterpreter Lock 意思是全局解释器锁) 设计之初是对数据安全的考虑。在 Python多线程,每个线程的执行方式分如下三步:" 获取 GIL; 执行对应线程的代码; 释放 GIL; ",可见,某个线程要想执行,必须先拿到 GIL,可以把 GIL看作通行证,并且在一个Python进程中,GIL 只有一个。线程要是拿不到通行证,就不允许执行。这样会导致即使在多核条件下,一个Python进程中的多个线程在同一时刻也只能执行一个。
总结:
- 在 多线程 场景中,Python因为 GIL 的限制,不论是单核还是多核下,同一时刻都只能运行一个线程,这使得 Python 多线程无法发挥多核并行的优势。
- 在 多进程 场景中 "每个进程都有属于自己的GIL" ,所以在多核处理器下,多进程的运行是不会受GL影响的。所以多进程能够更好地发挥多核优势。但是使用多进程时,要注意 进程间共享数据、进程同步问题。
Python 单线程
就是 Python 代码按照顺序依次执行。执行过程中,不会中断去执行其他代码
import time
import datetime


def func_music(argv):
    for i in range(2):
        print(f"听音乐  {argv}. {datetime.datetime.now()}")
        time.sleep(1)


def func_movie(argv):
    for i in range(2):
        print(f"看电影  {argv}. {datetime.datetime.now()}")
        time.sleep(5)


if __name__ == '__main__':
    func_music('trouble is a friend')
    func_movie('变形金刚')
    print(f"结束: {datetime.datetime.now()}")
Python 多线程
Python 多线程的用法:https://setup.scrape.center/python-threading
Python 中使用线程有两种方式:
- 通过 类继承 threading.Thread 创建一个线程对象。
- 通过使用 start_new_thread 函数。
方法 1:继承Thread类,并重写run方法
通过 继承 threading.Thread 并重写 run 方法,来实现多线程。
import threading

class MyThread(threading.Thread):
   def run(self):
	   print("This is a custom thread.")

# 创建线程实例并启动
thread = MyThread()
thread.start()
threading.Thread 方法说明
- t.start() 激活线程,
- t.getName() 获取线程的名称
- t.setName() 设置线程的名称
- t.name 获取或设置线程的名称
- t.is_alive() 判断线程是否为激活状态
- t.isAlive() 判断线程是否为激活状态
- t.setDaemon() 设置为后台线程或前台线程(默认:False)必须在执行start()方法之后;
- t.isDaemon() 判断是否为守护线程
- t.ident 获取线程的标识符。线程标识符是一个非零整数,只有在调用了start()方法之后该属性才有效,否则它只返回None。
- t.join() 逐个执行每个线程,执行完毕后继续往下执行,该方法使得多线程变得无意义
- t.run() 线程被cpu调度后自动执行线程对象的run方法
示例代码:
import time
import threading
from datetime import datetime

exitFlag = 0


def print_time(thread_name, delay, counter):
    while counter:
        if exitFlag:
            thread_name.exit()
        time.sleep(delay)
        print(f"{thread_name}: {datetime.now()}")
        counter -= 1


class MyThread(threading.Thread):
    def __init__(self, thread_id, name, delay):
        super().__init__()
        self.thread_id = thread_id
        self.name = name
        self.delay = delay

    def run(self):
        print("开始线程:" + self.name)
        print_time(self.name, self.delay, 5)
        print("退出线程:" + self.name)


# 创建新线程
thread1 = MyThread(1, "Thread-1", 1)
thread2 = MyThread(2, "Thread-2", 2)

# 开启新线程
thread1.start()
thread2.start()
thread1.join()
thread2.join()
print("退出主线程")
python 提供了两个模块来实现多线程。
- _thread 有一些缺点,在 threading 得到了弥补。
- threading 模块 (强烈建议使用 threading)
方法 2:函数式 创建线程
直接实例化 Thread 类
import threading

def my_function():
   print("This is a thread.")

# 创建线程
thread = threading.Thread(target=my_function)
thread.start()
守护线程 ( 精灵线程 )
通过 setDaemon(True) 将线程声明为守护线程,必须在 start() 方法调用之前设置,如果不设置为守护线程程序会被无限挂起。子线程启动后,父线程也继续执行下去,当父线程执行完最后一条语句 print("父进程退出") 后,没有等待子线程,直接就退出了,同时子线程也一同结束。
# -*- coding: utf-8 -*-

import time
import threading
import datetime


def music(music_name):
    for i in range(2):
        print(f"[{datetime.datetime.now().replace(microsecond=0)}] 听音乐 {music_name}")
        time.sleep(1)


def movie(movie_name):
    for i in range(2):
        print(f"[{datetime.datetime.now().replace(microsecond=0)}] 看电影 {movie_name}")
        time.sleep(5)


tid_list = [
    threading.Thread(target=music, args=('trouble is a friend',)),
    threading.Thread(target=movie, args=('变形金刚',))
]


if __name__ == '__main__':
    for tid in tid_list:
        tid.setDaemon(True)
        tid.start()
    print("父进程退出")
    pass
join() 等待线程终止
join() 的作用:在子线程完成运行之前,这个子线程的父线程将一直被阻塞。注意:上面程序中 join() 方法的位置是在 for 循环外的,也就是说必须等待for循环里的两个进程都结束后,才去执行主进程。
# -*- coding: utf-8 -*-

import time
import threading
import datetime


def music(music_name):
    for i in range(2):
        print(f"[{datetime.datetime.now().replace(microsecond=0)}] 听音乐 {music_name}")
        time.sleep(1)


def movie(movie_name):
    for i in range(2):
        print(f"[{datetime.datetime.now().replace(microsecond=0)}] 看电影 {movie_name}")
        time.sleep(5)


tid_list = [
    threading.Thread(target=music, args=('trouble is a friend',)),
    threading.Thread(target=movie, args=('变形金刚',))
]


if __name__ == '__main__':
    for tid in tid_list:
        tid.start()
    for tid in tid_list:
        tid.join()
    print("父进程退出")
线程 事件
Python 线程的事件用于主线程控制其他线程的执行。
threading.Event 事件主要提供了三个方法
- set 。将 “Flag” 设置为 False
- wait 。将 “Flag” 设置为 True
- clear 。判断标识位是否为Ture。
事件处理的机制:全局定义了一个 “Flag”,如果 “Flag” 值为 False,那么当程序执行 event.wait 方法时就会阻塞,如果 “Flag” 值为True,那么 event.wait 方法时便不再阻塞。
import threading

def do(event):
    print('start')
    event.wait()
    print('execute')

event_obj = threading.Event()
for i in range(10):
    t = threading.Thread(target=do, args=(event_obj,))
    t.start()

event_obj.clear()
# inp = input('input:')
inp = raw_input('input:')
if inp == 'true':
    event_obj.set()
当线程执行的时候,如果 flag 为False,则线程会阻塞,当 flag 为True 的时候,线程不会阻塞。它提供了 本地 和 远程 的并发性。
线程同步:线程锁
如果多个线程共同对某个数据修改,则可能出现不可预料的结果,为了保证数据的正确性,需要对多个线程进行同步。
多线程的优势在于可以同时运行多个任务(至少感觉起来是这样)。但是当线程需要共享数据时,可能存在数据不同步的问题。考虑这样一种情况:一个列表里所有元素都是 0,线程 "set" 从后向前把所有元素改成1,而线程 "print" 负责从前往后读取列表并打印。那么,可能线程 "set" 开始改的时候,线程 "print" 便来打印列表了,输出就成了一半 0 一半 1,这就是 数据的不同步。
为了避免这种情况,引入了 锁 的概念。锁有两种状态:锁定 和 未锁定。
每当一个线程比如 "set" 要访问共享数据时,必须先获得锁定;如果已经有别的线程比如 "print" 获得锁定了,那么就让线程 "set" 暂停,也就是同步阻塞;等到线程 "print" 访问完毕,释放锁以后,再让线程 "set" 继续。经过这样的处理,打印列表时要么全部输出0,要么全部输出1,不会再出现一半0一半1的尴尬场面。
线程锁
threading.RLock 和 threading.Lock 可以实现简单的线程同步,这两个对象都有 acquire方法 和 release方法。对于那些需要每次只允许一个线程操作的数据,可以将其操作放到 acquire 和release 方法之间。
threading.RLock 和 threading.Lock 的区别:
- RLock 允许在同一线程中被多次 acquire。而 Lock 却不允许这种情况。
- RLock 时 acquire 和 release 必须成对出现,即调用了 n 次 acquire,必须调用 n 次的release 才能真正释放所占用的琐。
示例代码
# -*- coding: utf-8 -*-

import threading

lock = threading.Lock()    # Lock对象
rLock = threading.RLock()  # RLock对象


def main_1():
    lock.acquire()
    lock.acquire()  # 产生了死琐。
    lock.release()
    lock.release()


def main_2():
    rLock.acquire()
    rLock.acquire()  # 在同一线程内,程序不会堵塞。
    rLock.release()
    rLock.release()
示例:
# -*- coding: utf-8 -*-

import time
import datetime
import threading

# 定义一个 "线程锁"
threadLock = threading.Lock()

count = 20


class MyThread(threading.Thread):
    def __init__(self, name, delay_second):
        threading.Thread.__init__(self)
        self.name = name
        self.delay_second = delay_second

    def run(self):
        print("Starting " + self.name)
        result = print_time()
        while result > 0:
            print(f"[{datetime.datetime.now().replace(microsecond=0)}] {self.name} ---> {result}")
            result = print_time()
            time.sleep(self.delay_second)


def print_time():
    # 获得锁,成功获得锁定后返回 True
    # 可选的 timeout 参数不填时将一直阻塞直到获得锁定
    # 否则超时后将返回 False
    threadLock.acquire()
    global count
    count -= 1
    # 释放锁
    threadLock.release()
    return count


if __name__ == '__main__':
    tid_list = [
        MyThread("thread_1", 1),
        MyThread("thread_2", 1)
    ]

    for tid in tid_list:
        tid.start()
    for tid in tid_list:
        tid.join()
    print("主线程退出")
    pass
示例:
import threading
import time
globals_num = 0
lock = threading.RLock()


def func():
    lock.acquire()  # 获得锁
    global globals_num
    globals_num += 1
    time.sleep(1)
    print(globals_num)
    lock.release()  # 释放锁

for i in range(10):
    t = threading.Thread(target=func)
    t.start()
    pass
线程同步:条件变量
一个 threading.Condition 变量总是与某些类型的锁相联系,当几个condition变量必须共享和同一个锁的时候是很有用的。锁 是 conditon 对象的一部分:没有必要分别跟踪。
Condition 类实现了一个 conditon 变量。这个 conditiaon 变量允许一个或多个线程等待,直到他们被另一个线程通知。
- 如果 lock 参数非空,那么他必须是一个 lock 或者 Rlock 对象,它用来做底层锁。
- 如果 lock 参数为空,则会创建一个新的 Rlock 对象,用来做底层锁。
condition 变量服从上下文管理协议:with 语句块封闭之前可以获取与锁的联系。
acquire() 和 release() 会调用与锁相关联的相应的方法。
其他和锁关联的方法必须被调用,wait()方法会释放锁,
当另外一个线程使用 notify() or notify_all()唤醒它之前会一直阻塞。一旦被唤醒,wait()会重新获得锁并返回,
wait(timeout=None) :等待通知,或者等到设定的超时时间。
当调用这wait()方法时,如果调用它的线程没有得到锁,那么会抛出一个RuntimeError异常。
wati()释放锁以后,在被调用相同条件的另一个进程用notify() or notify_all() 叫醒之前会一直阻塞。
wait()还可以指定一个超时时间。 如果有等待的线程,notify()方法会唤醒一个在等待conditon变量的线程。notify_all() 则会唤醒所有在等待conditon变量的线程。
注意: notify()和notify_all()不会释放锁,也就是说,线程被唤醒后不会立刻返回他们的wait() 调用。
除非线程调用notify()和notify_all()之后放弃了锁的所有权。
在典型的设计风格里,利用condition变量用锁去通许访问一些共享状态,线程在获取到它想得到的状态前,会反复调用wait()。
修改状态的线程在他们状态改变时调用 notify() or notify_all(),用这种方式,线程会尽可能的获取到想要的一个等待者状态。
例子:生产者-消费者模型
import threading
import time


def consumer(cond):
    with cond:
        print("consumer before wait")
        cond.wait()
        print("consumer after wait")


def producer(cond):
    with cond:
        print("producer before notifyAll")
        cond.notifyAll()
        print("producer after notifyAll")


condition = threading.Condition()
consumer_1 = threading.Thread(name="c1", target=consumer, args=(condition,))
consumer_2 = threading.Thread(name="c2", target=consumer, args=(condition,))
producer = threading.Thread(name="p", target=producer, args=(condition,))

consumer_1.start()
time.sleep(2)
consumer_2.start()
time.sleep(2)
producer.start()
线程同步:线程安全的 queue
使用 "线程锁" 可以实现线程同步,
同样,使用 "线程安全的 queue (队列)" 也可以达到线程同步。
Python 的 queue ( 线程安全 )
:https://docs.python.org/zh-cn/3.10/search.html?q=queue+&check_keywords=yes&area=default
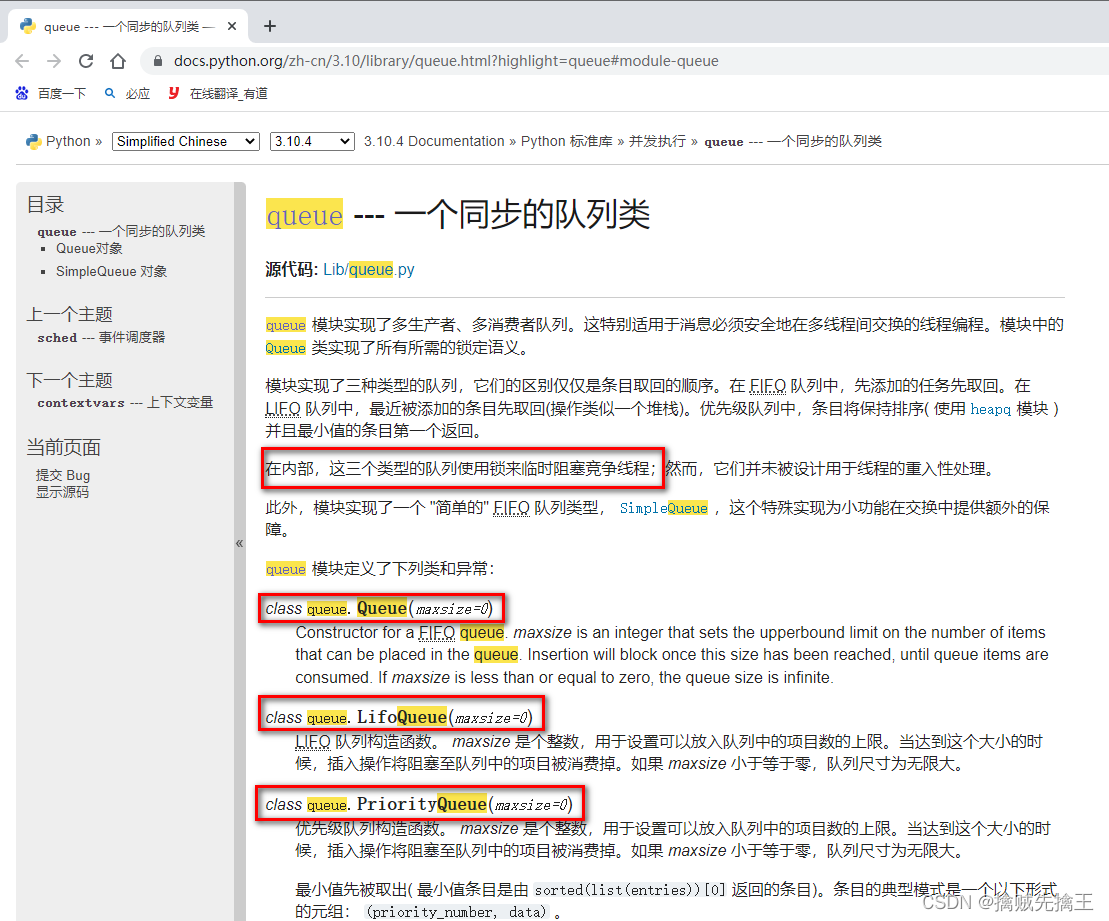
Python 的 queue 模块中提供了同步的、线程安全的队列类。包括
- FIFO(先入先出) 队列
- LIFO(后入先出)队列
- 优先级队列 PriorityQueue
这些队列都实现了 锁原语,能够在多线程中直接使用。可以使用队列来实现线程间的同步。
Queue 模块中的常用方法:
Queue.qsize()    返回队列的大小
Queue.empty()    如果队列为空,返回True,反之False
Queue.full()     如果队列满了,返回True,反之False
Queue.full 与 maxsize 大小对应
Queue.get([block[, timeout]]) 获取队列,timeout是等待时间
Queue.get_nowait()            相当Queue.get(False)
Queue.put(item)               写入队列,timeout是等待时间
Queue.put_nowait(item)        相当Queue.put(item, False)
Queue.task_done()             在完成一项工作之后,Queue.task_done()函数向任务已经完成的队列发送一个信号
Queue.join()                  实际上意味着等到队列为空,再执行别的操作
示例:
# -*- coding: utf-8 -*-

import time
import queue
import threading

task_queue = queue.Queue()


def produce():
    while True:
        for num in range(100):
            task_queue.put(num)
            time.sleep(0.1)


def consume():
    while True:
        if task_queue.empty():
            print('队列为空')
            continue
        num = task_queue.get()
        print(num)
        time.sleep(1)


if __name__ == '__main__':
    thread_list = []
    t1 = threading.Thread(target=produce)
    thread_list.append(t1)
    for i in range(3):
        t_id = threading.Thread(target=consume)
        thread_list.append(t_id)
    for index in thread_list:
        index.start()
    for index in thread_list:
        index.join()
Python 多进程
Python 多进程的用法:https://setup.scrape.center/python-multiprocessingo
把一个 "多线程" 改成 "多进程",主要有下面几种方法:
- subprocess
- signal
- multiprocessing
- concurrent.futures 标准库。
concurrent.futures 标准库
"concurrent.futures 标准库" 提供了 ThreadPoolExecutor 和 ProcessPoolExecutor 两个类,实现了对 threading 和 multiprocessing 的更高级的抽象,对编写 " 线程池 / 进程池 " 提供了直接的支持。
使用示例代码:
import redis
from redis import WatchError
from concurrent.futures import ProcessPoolExecutor

r = redis.Redis(host='127.0.0.1', port=6379)

# 减库存函数, 循环直到减库存完成
# 库存充足, 减库存成功, 返回True
# 库存不足, 减库存失败, 返回False


def reduce_stock():

    # python中redis事务是通过pipeline的封装实现的
    with r.pipeline() as pipe:
        while True:
            try:
                # watch库存键, multi后如果该key被其他客户端改变,
                # 事务操作会抛出WatchError异常
                pipe.watch('stock:count')
                count = int(pipe.get('stock:count'))
                if count > 0:  # 有库存
                    # 事务开始
                    pipe.multi()
                    pipe.decr('stock:count')
                    # 把命令推送过去
                    # execute返回命令执行结果列表, 这里只有一个decr返回当前值
                    print(pipe.execute()[0])
                    return True
                else:
                    return False
            except WatchError as ex:
                # 打印WatchError异常, 观察被watch锁住的情况
                print(ex)
                pipe.unwatch()


def worker():
    while True:
        # 没有库存就退出
        if not reduce_stock():
            break


def main():
    # 设置库存为100
    r.set("stock:count", 100)
    # 多进程模拟多个客户端提交
    with ProcessPoolExecutor() as pool:
        for _ in range(10):
            pool.submit(worker)


if __name__ == "__main__":
    main()
    pass
3、multiprocessing 模块
文档:https://docs.python.org/zh-cn/3.13/library/multiprocessing.html
概述
由于 Python(这里指 CPython) 限制(GLI) 最多只能用满1个CPU核心。但是 multiprocessing 使用 "子进程 而非线程" 有效地绕过了 全局解释器锁,从而可以使用多核处理器。
multiprocessing 包中也有 Lock / Event / Semaphore / Condition类,用来同步进程,其用法也与 threading 包中的同名类一样。multiprocessing 的很大一部份与 threading 使用同一套 API,只不过换到了多进程的场景。但在使用这些共享API的时候,我们要注意以下几点:
- 在 UNIX 平台上,当某个进程终结之后,该进程需要被其父进程调用 wait,否则进程成为僵尸进程(Zombie)。所以,有必要对每个Process对象调用join()方法 (实际上等同于wait)。对于多线程来说,由于只有一个进程,所以不存在此必要性。
- multiprocessing 提供了 threading 包中没有的 IPC ( 比如:Pipe 和 Queue ),效率上更高。应优先考虑 Pipe 和 Queue,避免使用 Lock / Event / Semaphore / Condition 等同步方式 (因为它们占据的不是用户进程的资源 )。
- 多进程应该避免共享资源。在多线程中,我们可以比较容易地共享资源,比如 使用全局变量或者传递参数。在多进程情况下,由于每个进程有自己独立的内存空间,以上方法并不合适。此时我们可以通过 "共享内存" 和 "Manager 的方法" 来共享资源。但这样做提高了程序的复杂度,并因为同步的需要而降低了程序的效率。
- Process.PID中保存有PID,如果进程还没有start(),则PID为None。
multiprocessing 的 __init__.py,通过 __all__ 可以看到所有可用的 对象或者属性
Process
- Process.run()
- Process.start()
- Process.join()
- Process.name
- Process.is_alive()
- Process.daemon
- Process.pid
- Process.exitcode
- Process.authkey
- Process.sentinel
- Process.terminate()
- Process.kill()
- Process.close()
Process 类的构造方法:
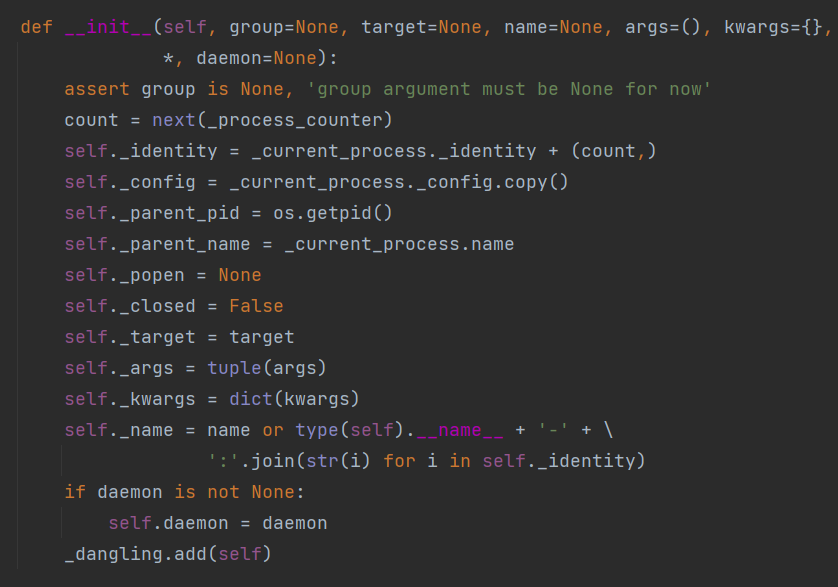
参数说明:
group:进程所属组。基本不用
target:表示调用对象。
args:表示调用对象的位置参数元组。
name:别名
kwargs:表示调用对象的字典。
利用 multiprocessing.Process 可以创建一个 Process 对象,该对象与 Thread对象 的用法相同,拥有如下方法:
- is_alive()
- join([timeout])
- run()
- start()
- terminate()
- ........
属性有:
- authkey
- daemon(要通过start()设置)、
- exitcode(进程在运行时为None、如果为–N,表示被信号N结束)、
- name
- pid
- ........
直接 创建 进程
# -*- coding: utf-8 -*-

from multiprocessing import Process, current_process


def worker_func(num):
    print(f'worker_func [进程号:{current_process().ident}] ---> {num}')


def main():
    pid_list = []
    for i in range(5):
        pid = Process(target=worker_func, args=(i,))
        pid_list.append(pid)
    for pid in pid_list:
        pid.start()
    for pid in pid_list:
        pid.join()


if __name__ == '__main__':
    main()
继承 multiprocessing.Process 创建 进程
利用 class 来创建进程,定制子类
from multiprocessing import Process, current_process


class Worker(Process):

    def run(self):
        print(f'进程号:{current_process().ident} ---> 进程名:{self.name}')
        return


if __name__ == '__main__':
    jobs = []
    for i in range(5):
        p = Worker()
        jobs.append(p)
        p.start()
    for j in jobs:
        j.join()
守护进程
守护进程就是主程序退出后,子进程不退出,仍然继续执行。
mutilprocess.setDaemon(True) 设置 "精灵进程"
也可以等待守护进程退出,要加上 join,join 可以传入浮点数值,等待n久就不等了
import multiprocessing
import time
import sys


def daemon():
    name = multiprocessing.current_process().name
    print('Starting:', name)
    time.sleep(2)
    print('Exiting :', name)


def non_daemon():
    name = multiprocessing.current_process().name
    print('Starting:', name)
    print('Exiting :', name)


if __name__ == '__main__':
    pid_1 = multiprocessing.Process(name='daemon', target=daemon)
    pid_1.daemon = True

    pid_2 = multiprocessing.Process(name='non-daemon', target=non_daemon)
    pid_2.daemon = False

    pid_1.start()
    pid_2.start()

    pid_1.join(1)
    print(f'pid_2.is_alive() ---> {pid_2.is_alive()}')
    pid_2.join()
终止进程
最好使用 poison pill,强制的使用 terminate()。注意 terminate 之后要 join,使其可以更新状态
import multiprocessing
import time


def slow_worker():
    print('Starting worker')
    time.sleep(0.1)
    print('Finished worker')


if __name__ == '__main__':
    p = multiprocessing.Process(target=slow_worker)
    print('BEFORE:', p, p.is_alive())

    p.start()
    print('DURING:', p, p.is_alive())

    p.terminate()
    print('TERMINATED:', p, p.is_alive())

    p.join()
    print('JOINED:', p, p.is_alive())
进程的退出状态
- == 0 未生成任何错误
- 0 进程有一个错误,并以该错误码退出
- < 0 进程由一个-1 * exitcode信号结束
import multiprocessing
import sys
import time


def exit_error():
    sys.exit(1)


def exit_ok():
    return


def return_value():
    return 1


def raises():
    raise RuntimeError('There was an error!')


def terminated():
    time.sleep(3)


if __name__ == '__main__':
    jobs = []
    for f in [exit_error, exit_ok, return_value, raises, terminated]:
        print('Starting process for', f.func_name)
        j = multiprocessing.Process(target=f, name=f.func_name)
        jobs.append(j)
        j.start()

    jobs[-1].terminate()

    for j in jobs:
        j.join()
        print('%15s.exitcode = %s' % (j.name, j.exitcode))
异常
进程间通信 (IPC):管道、队列
multiprocessing 提供了 threading 包中没有的 IPC ( 比如:Pipe 和 Queue ),效率上更高。应优先考虑 Pipe 和 Queue,避免使用 Lock / Event / Semaphore / Condition 等同步方式 (因为它们占据的不是用户进程的资源 )。Pipe 和 Queue 可以用来传送常见的对象。
管道
Pipe 可以是单向(half-duplex),也可以是双向(duplex)。
通过mutiprocessing.Pipe(duplex=False) 创建单向管道 (默认为双向)。一个进程从 PIPE 一端输入对象,然后被 PIPE 另一端的进程接收,单向管道只允许管道一端的进程输入,而双向管道则允许从两端输入。下面的程序展示了 Pipe 的使用:( 这里的 Pipe 是双向的。 )
import multiprocessing as mul


def proc1(pipe=None):
    pipe.send('hello')
    print('proc1 rec:', pipe.recv())


def proc2(pipe=None):
    print('proc2 rec:', pipe.recv())
    pipe.send('hello, too')


# Build a pipe
pipe = mul.Pipe()

# Pass an end of the pipe to process 1
p1 = mul.Process(target=proc1, args=(pipe[0],))
# Pass the other end of the pipe to process 2
p2 = mul.Process(target=proc2, args=(pipe[1],))
p1.start()
p2.start()
p1.join()
p2.join()
Pipe 对象建立的时候,返回一个含有两个元素的表,每个元素代表 Pipe 的一端(Connection对象)。对 Pipe 的某一端调用 send() 方法来传送对象,在另一端使用 recv() 来接收。
队列 Queue
- Queue.qsize()
- Queue.empty()
- Queue.full()
- Queue.put()
- Queue.put_nowait()
- Queue.get()
- Queue.get_nowait()
- Queue.close()
- Queue.join_thread()
- Queue.cancel_join_thread()
mutiprocessing.Queue 与 Pipe 相类似,都是先进先出的结构。但 mutiprocessing.Queue允许多个进程放入,多个进程从队列取出对象。下面的程序展示了 Queue 的使用:
import os
import multiprocessing
import time


# input worker
def input_queue(queue=None):
    info = str(os.getpid()) + '(put):' + str(time.time())
    queue.put(info)


# output worker
def output_queue(queue=None, lock):
    info = queue.get()
    lock.acquire()
    print(str(os.getpid()) + '(get):' + info)
    lock.release()


# ===================
# Main
record1 = []  # store input processes
record2 = []  # store output processes
lock = multiprocessing.Lock()  # To prevent messy print
queue = multiprocessing.Queue(3)

# input processes
for i in range(10):
    process = multiprocessing.Process(target=input_queue, args=(queue,))
    process.start()
    record1.append(process)

# output processes
for i in range(10):
    process = multiprocessing.Process(target=output_queue, args=(queue, lock))
    process.start()
    record2.append(process)

for p in record1:
    p.join()

queue.close()  # No more object will come, close the queue

for p in record2:
    p.join()
一些进程使用 put() 在 Queue 中放入字符串,这个字符串中包含 PID 和时间。另一些进程从Queue 中取出,并打印自己的 PID 以及 get() 的字符串
简单队列 SimpleQueue
JoinableQueue
示例:
Python 进程间传递消息,一般的情况是 Queue 来传递。
- multiprocessing.Queue "进程安全的队列" 。multiprocessing.Queue 在 "多线程环境中并不适用",因为它无法提供线程安全的特性。
- queue.Queue(位于标准库的 queue 模块中)提供了 "线程安全的队列",并且可供多个线程同时使用。
import multiprocessing


class MyFancyClass(object):

    def __init__(self, name):
        self.name = name

    def do_something(self):
        proc_name = multiprocessing.current_process().name
        print(f"{proc_name} ---> {self.name}")


def worker(q):
    obj = q.get()
    obj.do_something()


if __name__ == '__main__':
    queue = multiprocessing.Queue()
    p = multiprocessing.Process(target=worker, args=(queue,))
    p.start()
    queue.put(MyFancyClass('Fancy Dan'))
    # Wait for the worker to finish
    queue.close()
    queue.join_thread()
    p.join()
示例:
import time
import multiprocessing


class Consumer(multiprocessing.Process):

    def __init__(self, task_queue, result_queue):
        super(Consumer, self).__init__()
        self.task_queue = task_queue
        self.result_queue = result_queue

    def run(self):
        proc_name = self.name
        while True:
            next_task = self.task_queue.get()
            if next_task is None:
                # Poison pill means shutdown
                print(f"退出进程 ---> {proc_name}")
                self.task_queue.task_done()
                break
            print(f'{proc_name} 下一个任务 ---> {next_task}')
            answer = next_task()
            self.task_queue.task_done()
            self.result_queue.put(answer)
        return


class Task(object):
    def __init__(self, a, b):
        self.a = a
        self.b = b

    def __call__(self):
        time.sleep(0.1)  # pretend to take some time to do the work
        return f'{self.a} * {self.b} = {self.a * self.b}'

    def __str__(self):
        return str(self.a * self.a)


if __name__ == '__main__':
    # Establish communication queues
    tasks = multiprocessing.JoinableQueue()
    results = multiprocessing.Queue()

    # Start consumers
    num_consumers = multiprocessing.cpu_count() * 2
    print(f"创建 {num_consumers} 消费者")
    consumers = [Consumer(tasks, results) for i in range(num_consumers)]
    for w in consumers:
        w.start()

    # Enqueue jobs
    num_jobs = 10
    for i in range(num_jobs):
        tasks.put(Task(i, i))

    # Add a poison pill for each consumer
    for i in range(num_consumers):
        tasks.put(None)

    # Wait for all tasks to finish
    tasks.join()

    # Start printing results
    while num_jobs:
        result = results.get()
        print(f"结果 ---> {result}")
        num_jobs -= 1
示例:队列
from multiprocessing import Process, Queue

def f(q):
    q.put([42, None, 'hello'])

if __name__ == '__main__':
    q = Queue()
    p = Process(target=f, args=(q,))
    p.start()
    print(q.get())    # prints "[42, None, 'hello']"
p.join()示例:管道
from multiprocessing import Process, Pipe

def f(conn):
    conn.send([42, None, 'hello'])
    conn.close()

if __name__ == '__main__':
    parent_conn, child_conn = Pipe()
    p = Process(target=f, args=(child_conn,))
    p.start()
    print(parent_conn.recv())   # prints "[42, None, 'hello']"
    p.join()
杂项
- active_children()
- cpu_count()
- current_process()
- parent_process()
- freeze_support()
- get_all_start_methods()
- get_context()
- get_start_method()
- set_executable()
- set_forkserver_preload()
- set_start_method()
连接对象(Connection)
- Connection.send()
- Connection.recv()
- Connection.fileno()
- Connection.close()
- Connection.poll()
- Connection.send_bytes()
- Connection.recv_bytes()
- Connection.recv_bytes_into()
进程 同步
同步原语
通常来说同步原语在多进程环境中并不像它们在多线程环境中那么必要。参考 threading 模块的文档。multiprocessing 包含来自 threading 的所有同步原语的等价物。也可以使用管理器对象创建同步原语,参考 管理器 。
例如,可以使用锁来确保一次只有一个进程打印到标准输出:
from multiprocessing import Process, Lock

def f(l, i):
    l.acquire()
    try:
        print('hello world', i)
    finally:
        l.release()

if __name__ == '__main__':
    lock = Lock()

    for num in range(10):
        Process(target=f, args=(lock, num)).start()
不使用锁的情况下,来自于多进程的输出很容易产生混淆。
我们可以从下面的程序中看到 Thread 对象和 Process对象 在使用上的相似性与结果上的不同。各个线程和进程都做一件事:打印PID。但问题是,所有的任务在打印的时候都会向同一个标准输出(stdout)输出。这样输出的字符会混合在一起,无法阅读。使用 Lock 同步,在一个任务输出完成之后,再允许另一个任务输出,可以避免多个任务同时向终端输出。
import os
import threading
import multiprocessing


# worker function
def worker(sign=None, t_lock=None):
    t_lock.acquire()
    print(sign, os.getpid())
    t_lock.release()


# Main
print('Main:', os.getpid())

# Multi-thread
record = []
threading_lock = threading.Lock()
for i in range(5):
    thread = threading.Thread(target=worker, args=('thread', threading_lock))
    thread.start()
    record.append(thread)

for thread in record:
    thread.join()

# Multi-process
record = []
process_lock = multiprocessing.Lock()
for i in range(5):
    process = multiprocessing.Process(target=worker, args=('process', process_lock))
    process.start()
    record.append(process)

for process in record:
    process.join()
所有 Thread 的 PID 都与主程序相同,而每个 Process 都有一个不同的 PID。
Event 提供一种简单的方法,可以在进程间传递状态信息。事件可以切换设置和未设置状态。通过使用一个可选的超时值,时间对象的用户可以等待其状态从未设置变为设置。
import multiprocessing
import time


def wait_for_event(e):
    """Wait for the event to be set before doing anything"""
    print('wait_for_event: starting')
    e.wait()
    print('wait_for_event: e.is_set()->', e.is_set())


def wait_for_event_timeout(e, t):
    """Wait t seconds and then timeout"""
    print('wait_for_event_timeout: starting')
    e.wait(t)
    print('wait_for_event_timeout: e.is_set()->', e.is_set())


if __name__ == '__main__':
    e = multiprocessing.Event()
    w1 = multiprocessing.Process(name='block', target=wait_for_event, args=(e,))
    w1.start()

    w2 = multiprocessing.Process(name='nonblock', target=wait_for_event_timeout, args=(e, 2))
    w2.start()

    print('main: waiting before calling Event.set()')
    time.sleep(3)
    e.set()
    print('main: event is set')
共享内存:共享 ctypes 对象
应该尽量避免多进程共享资源。多进程共享资源必然会带来进程间相互竞争。而这种竞争又会造成race condition,我们的结果有可能被竞争的不确定性所影响。但如果需要,依然可以通过 共享内存 和 Manager对象 这么做。
在共享内存上创建可被子进程继承的共享对象时是可行的。
可以使用 Value 或 Array 将数据存储在共享内存映射中。例如,以下代码:
from multiprocessing import Process, Value, Array


def f(n, a):
    n.value = 3.1415927
    for i in range(len(a)):
        a[i] = -a[i]


if __name__ == '__main__':
    num = Value('d', 0.0)
    arr = Array('i', range(10))

    p = Process(target=f, args=(num, arr))
    p.start()
    p.join()

    print(num.value)
    print(arr[:])
将打印
3.1415927
[0, -1, -2, -3, -4, -5, -6, -7, -8, -9]
创建 num 和 arr 时使用的 'd' 和 'i' 参数是 array 模块使用的类型的 typecode : 'd' 表示双精度浮点数, 'i' 表示有符号整数。这些共享对象将是进程和线程安全的。
为了更灵活地使用共享内存,可以使用 multiprocessing.sharedctypes 模块,该模块支持创建从共享内存分配的任意 ctypes 对象。
例子:
import multiprocessing


def f(n, a):
    n.value = 3.14
    a[0] = 5


num = multiprocessing.Value('d', 0.0)
arr = multiprocessing.Array('i', range(10))

p = multiprocessing.Process(target=f, args=(num, arr))
p.start()
p.join()

print(num.value)
print(arr[:])
这里我们实际上只有主进程和Process对象代表的进程。我们在主进程的内存空间中创建共享的内存,也就是Value和Array两个对象。对象Value被设置成为双精度数(d), 并初始化为0.0。而Array则类似于C中的数组,有固定的类型(i, 也就是整数)。在Process进程中,我们修改了Value和Array对象。回到主程序,打印出结果,主程序也看到了两个对象的改变,说明资源确实在两个进程之间共享。
管理器 Manager()
管理器 Manager() 提供了一种创建共享数据的方法,从而可以在不同进程中共享,甚至可以通过网络跨机器共享数据。管理器维护一个用于管理 共享对象 的服务。其他进程可以通过代理访问这些共享对象。
由 Manager() 返回的管理器对象控制一个服务进程,该进程保存Python对象并允许其他进程使用代理操作它们。Manager()返回的管理器支持类型: list 、 dict 、 Namespace 、 Lock 、 RLock 、 Semaphore 、 BoundedSemaphore 、 Condition 、 Event 、 Barrier 、 Queue 、 Value 和 Array 。
管理器的特点:
服务器进程管理器比使用共享内存对象更灵活,它们支持二进制对象类型。
同时,一个单独的manager可以被网络上的不同计算机的进程共享。
缺点是比使用shared memory慢。
代理对象
共享资源 --- Manager ( 分布式 进程 )
Manager 对象类似于 服务器 与 客户 之间的通信 (server-client)。
- 用一个进程作为服务器,建立 Manager 来真正存放资源。
- 其它的进程可以通过 "网络传递参数" 的方式访问 Manager,建立连接后,操作服务器上的资源。即 Manager 可以运用于多计算机,实现分布式。
Python 中 multiprocessing 的子模块 managers 支持把多进程分布到多台机器上,一个服务进程可以作为调度者来将任务分布到其它的多个进程当中,并依靠网络进行互相通信。由于managers的模块封装好了,所以在Python中我们调用它时可以不需要了解网络通信的底层细节,就可以直接进行分布式多进程程序的编写。
Manager() 返回一个 manager 对象。它控制一个服务器进程,这个进程会管理Python对象并允许其他进程通过代理的方式来操作这些对象。
Manager 的使用类似于 shared memory,但可以共享更丰富的对象类型。
import multiprocessing


def f(x, arr, l):
    x.value = 3.14
    arr[0] = 5
    l.append('Hello')


server = multiprocessing.Manager()
x = server.Value('d', 0.0)
arr = server.Array('i', range(10))
l = server.list()

proc = multiprocessing.Process(target=f, args=(x, arr, l))
proc.start()
proc.join()

print(x.value)
print(arr)
print(l)
Manager 利用 list() 方法提供了表的共享方式。实际上你可以利用 dict() 来共享词典,Lock() 来共享 threading.Lock ( 注意,我们共享的是 threading.Lock,而不是进程的 mutiprocessing.Lock。后者本身已经实现了进程共享) 等。 这样 Manager 就允许我们共享更多样的对象。
多台主机 分布式 进程
服务端
3.8版本增加了freeze_support()函数。主要是为了支持windows可执行文件。毕竟multiprocessing可用于分布式进程。所以必须引入freeze_support:
import random, time, queue
from multiprocessing.managers import BaseManager
from multiprocessing import freeze_support

# 建立2个队列,一个发送,一个接收
task_queue = queue.Queue()
result_queue = queue.Queue()


def get_task():
    return task_queue


def get_result():
    return result_queue


class QueueManager(BaseManager):
    pass


# 服务器的管理器上注册2个共享队列
QueueManager.register('get_task', callable=get_task)
QueueManager.register('get_result', callable=get_result)
# 设置端口,地址默认为空。验证码authkey需要设定。
manager = QueueManager(address=('127.0.0.1', 5000), authkey=b'abc')


def manager_run():
    manager.start()
    # 通过管理器访问共享队列。
    task = manager.get_task()
    result = manager.get_result()

    # 对队列进行操作, 往task队列放进任务。
    for value in range(10):
        n = random.randint(0, 100)
        print('Put task %d' % n)
        task.put(n)
    # 从result队列取出结果
    print('Try get result...')
    try:
        for value in range(10):
            r = result.get(timeout=10)
            print('Result: %s' % r)
    except queue.Empty:
        print('result is empty')
    # 关闭管理器。
    manager.shutdown()
    print('master exit.')


if __name__ == '__main__':
    freeze_support()
    manager_run()
客户端
import time, sys, queue
from multiprocessing.managers import BaseManager


class QueueManager(BaseManager):
    pass


# 从网络上的服务器上获取Queue,所以注册时只提供服务器上管理器注册的队列的名字:
QueueManager.register('get_task')
QueueManager.register('get_result')

server_addr = '127.0.0.1'
print('Connect to server %s...' % server_addr)
# b'abc'相当于'abc'.encode('ascii'),类型是bytes
m = QueueManager(address=(server_addr, 5000), authkey=b'abc')
# 连接服务器
m.connect()
# 获得服务器上的队列对象
task = m.get_task()
result = m.get_result()

for value in range(10):
    try:
        n = task.get(timeout=1)
        print('run task %d * %d...' % (n, n))
        r = '%d * %d = %d' % (n, n, n * n)
        time.sleep(1)
        result.put(r)
    except queue.Empty:
        print('task queue is empty')

print('worker exit.')
进程池
直接使用 Process类动态的生成多个进程,十几个还好,但是如果上百个甚至更多,那手动去限制进程数量就显得特别的繁琐,此时 进程池 就派上用场了。进程池 (Process Pool) 可以创建多个进程。这些进程就像是随时待命的士兵,准备执行任务(程序)。一个进程池中可以容纳多个待命的士兵。
Pool 类可以提供指定数量的进程供用户调用,当有新的请求提交到Pool中时,如果池还没有满,就会创建一个新的进程来执行请求。如果池满,请求就会告知先等待,直到池中有进程结束,才会创建新的进程来执行这些请求。
Pool 类描述了一个工作进程池,他有几种不同的方法让任务卸载工作进程。 进程池内部维护一个进程序列,当使用时,则去进程池中获取一个进程,如果进程池序列中没有可供使用的进程,那么程序就会等待,直到进程池中有可用进程为止。我们可以用 Pool 类创建一个进程池,展开提交的任务给进程池。
一个进程池对象可以控制工作进程池的哪些工作可以被提交,它支持 超时 和 回调的异步结果,有一个类似 map 的实现。
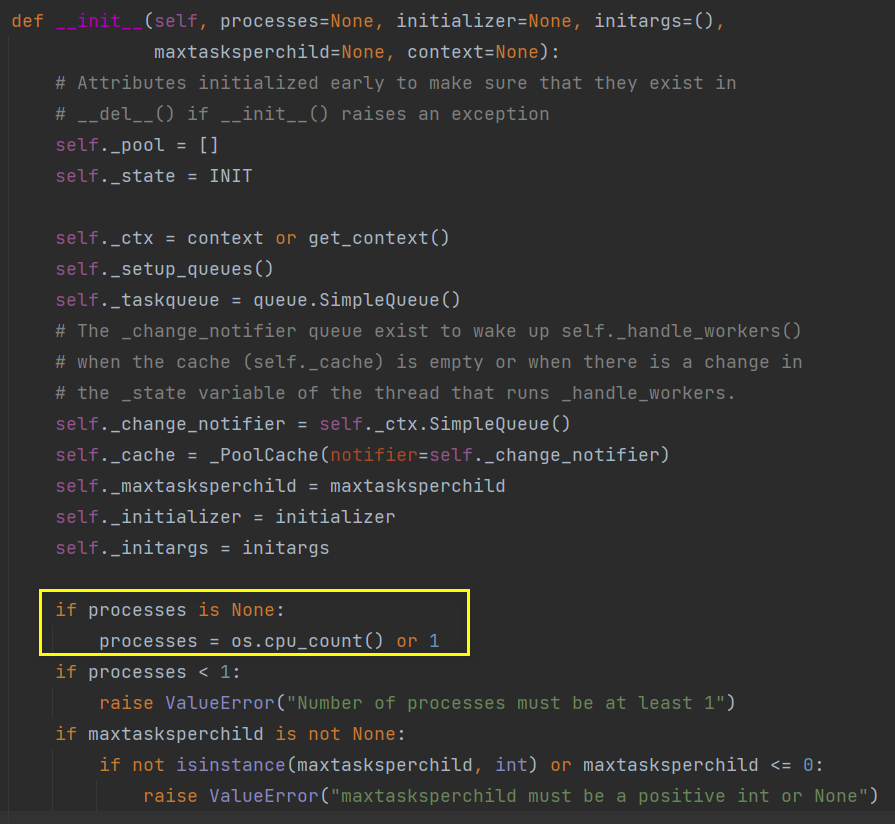
参数
- processes :进程的数量,如果 processes 是 None 那么使用 os.cpu_count() 返回的数量。
- initializer:如果是 None,那么每一个工作进程在开始的时候会调 initializer(*initargs)。
- maxtasksperchild:工作进程退出之前可以完成的任务数,完成后用一个新的工作进程来替代原进程,来让闲置的资源被释放。maxtasksperchild 默认是 None,意味着只要 Pool 存在工作进程就会一直存活。
- context:用在制定工作进程启动时的上下文,一般使用 multiprocessing.Pool() 或者 一个context 对象的 Pool() 方法来创建一个池,两种方法都适当的设置了context
进程池的方法
- apply(func[, args[, kwds]]) :调用 func 函数并传递 args 和 kwds,不建议使用,并且 3.x 以后不在出现。结果返回前主进程会被阻塞直到函数执行结束,由于这个原因,apply_async() 更适合并发执行。
- apply_async(func[, args[, kwds[, callback[, error_callback]]]]) : apply() 方法的一个变体,会返回一个结果对象。 如果 callback 被指定,那么 callback 可以接收一个参数然后被调用,当结果准备好回调时会调用 callback,调用失败时,则用 error_callback 替换 callback。 Callbacks 应被立即完成,否则处理结果的线程会被阻塞。 非阻塞 版本
- close() :阻止更多的任务提交到 pool,待任务完成后,工作进程会退出。
- terminate() :不管任务是否完成,立即停止工作进程。在对 pool 对象进程垃圾回收的时候,会立即调用 terminate()。
- join():wait 工作线程的退出,在调用 join() 前,必须调用 close() 或者 terminate()。这样是因为被终止的进程需要被父进程调用 wait(join等价与wait),否则进程会成为僵尸进程。( 主进程阻塞,等待子进程的退出, join 方法要在 close 或 terminate 之后使用。 )
- map(func, iterable[, chunksize])
- map_async(func, iterable[, chunksize[, callback[, error_callback]]])
- imap(func, iterable[, chunksize])
- imap_unordered(func, iterable[, chunksize])
- starmap(func, iterable[, chunksize])
- starmap_async(func, iterable[, chunksize[, callback[, error_back]]])
Pool 类表示一个工作进程池。它具有允许以几种不同方式将任务分配到工作进程的方法。
from multiprocessing import Pool, TimeoutError
import time
import os


def f(x):
    return x * x


if __name__ == '__main__':
    # start 4 worker processes
    with Pool(processes=4) as pool:

        # print "[0, 1, 4,..., 81]"
        print(pool.map(f, range(10)))

        # print same numbers in arbitrary order
        for i in pool.imap_unordered(f, range(10)):
            print(i)

        # evaluate "f(20)" asynchronously
        res = pool.apply_async(f, (20,))  # runs in *only* one process
        print(res.get(timeout=1))  # prints "400"

        # evaluate "os.getpid()" asynchronously
        res = pool.apply_async(os.getpid, ())  # runs in *only* one process
        print(res.get(timeout=1))  # prints the PID of that process

        # launching multiple evaluations asynchronously *may* use more processes
        multiple_results = [pool.apply_async(os.getpid, ()) for i in range(4)]
        print([res.get(timeout=1) for res in multiple_results])

        # make a single worker sleep for 10 secs
        res = pool.apply_async(time.sleep, (10,))
        try:
            print(res.get(timeout=1))
        except TimeoutError:
            print("We lacked patience and got a multiprocessing.TimeoutError")

        print("For the moment, the pool remains available for more work")

    # exiting the 'with'-block has stopped the pool
    print("Now the pool is closed and no longer available")
非阻塞 进程池 --- apply_async
注意:是 "进程池",不是 "线程池"。它可以让你跑满多核CPU,而且使用方法非常简单。
注意要用 apply_async,如果省略了 async,就变成阻塞版本了。
使用 进程池( 非阻塞 版本)
# -*- coding: utf-8 -*-

import time
import multiprocessing


def worker_func(process_name=None, arg=None):
    for i in range(3):
        print(f"{process_name} ---> {arg}")
        time.sleep(1)


if __name__ == "__main__":

    cpu_count = multiprocessing.cpu_count()
    pool = multiprocessing.Pool(processes=cpu_count)
    for index in range(10):
        data = f"hello {index}"
        pool.apply_async(worker_func, (f"process_name_{index}", data))
    pool.close()
    pool.join()
    print("主线程退出")
示例:
# -*- coding: utf-8 -*-

import os
import time
import random
import multiprocessing


def func_1():
    # os.getpid()获取当前的进程的ID
    print(f"func_1 ---> {os.getpid()}")
    start = time.time()
    time.sleep(random.random() * 10)
    end = time.time()
    print(f'func_1 ---> 运行 {end - start}秒')


def func_2():
    print(f"func_2 ---> {os.getpid()}")

    start = time.time()
    time.sleep(random.random() * 20)
    end = time.time()
    print(f'func_2 ---> 运行 {end - start}秒')


def func_3():
    print(f"func_3 ---> {os.getpid()}")
    start = time.time()
    time.sleep(random.random() * 30)
    end = time.time()
    print(f'func_3 ---> 运行 {end - start}秒')


if __name__ == '__main__':
    func_list = [func_1, func_2, func_3]
    print(f"父进程 ---> {os.getpid()}")

    pool = multiprocessing.Pool(4)
    for func in func_list:
        # Pool执行函数,当有一个进程执行完毕后,会添加一个新的进程到pool中
        pool.apply_async(func)

    print('等待字进程...')
    pool.close()

    # 调用join之前,一定要先调用close() 函数,否则会出错
    # close()执行后不会有新的进程加入到 pool, join 函数等待素有子进程结束
    pool.join()
    print('所有进程都完成')
    pass
阻塞 进程池 --- apply
# coding: utf-8
import time
import multiprocessing


def worker_func(arg):
    print(f"worker_func ---> {arg}")
    time.sleep(3)


if __name__ == "__main__":
    pool = multiprocessing.Pool(processes=3)
    for i in range(4):
        data = f"hello {i}"
        # 维持执行的进程总数为processes,当一个进程执行完毕后会添加新的进程进去
        pool.apply(worker_func, (data,))
    pool.close()
    pool.join()
map()
函数原型:map(func, iterable[, chunksize=None])
Pool 类中的 map 方法,与内置的 map 函数用法行为基本一致,它会使进程阻塞直到返回结果。
注意,虽然第二个参数是一个迭代器,但在实际使用中,必须在整个队列都就绪后,程序才会运行子进程。
import time
import multiprocessing


def worker_func(arg=None):
    time.sleep(1)
    print('arg * arg')
    return arg * arg


if __name__ == "__main__":
    temp_list = [1, 2, 3, 4, 5, 6,7,8,9]

    start_time = time.time()
    for item in temp_list:
        worker_func(item)
    end_time = time.time()
    print("顺序执行时间:", int(end_time - start_time))

    pool = multiprocessing.Pool(5)  # 创建拥有5个进程数量的进程池
    start_time = time.time()
    result = pool.map(worker_func, temp_list)  # 使进程阻塞直到返回结果
    pool.close()  # 关闭进程池,不再接受新的进程
    pool.join()   # 主进程阻塞等待子进程的退出
    end_time = time.time()
    print("并行执行时间:", int(end_time - start_time))
print(f'map 的所有子进程返回的结果列表: {result}')上例是一个创建多个进程并发处理与顺序执行处理同一数据,所用时间的差别。从结果可以看出,并发执行的时间明显比顺序执行要快很多,但是进程是要耗资源的,所以平时工作中,进程数也不能开太大。程序中的 result 表示全部进程执行结束后全部的返回结果集,run 函数有返回值,所以一个进程对应一个返回结果,这个结果存在一个列表中。
对 Pool对象调用 join() 方法会等待所有子进程执行完毕,调用 join() 之前必须先调用 close(),让其不再接受新的 Process。
close()
关闭进程池(pool),使其不在接受新的任务。
terminate()
结束工作进程,不在处理未处理的任务。
join()
主进程阻塞等待子进程的退出,join 方法必须在 close 或 terminate 之后使用。
使用 Pool,并需要关注结果
更多的时候,我们不仅需要多进程执行,还需要关注每个进程的执行结果,如下:
# -*- coding: utf-8 -*-

import multiprocessing
import time


def func(msg):
    for i in range(3):
        print(msg)
        time.sleep(1)
    return "done " + msg


if __name__ == "__main__":
    pool = multiprocessing.Pool(processes=4)
    result = []
    for index in range(10):
        msg = f"hello {index}"
        result.append(pool.apply_async(func, (msg,)))
    pool.close()
    pool.join()
    for res in result:
        print(res.get())
    print("Sub-process(es) done.")
示例
import multiprocessing


def do_calculation(data):
    return data * 2


def start_process():
    print('Starting', multiprocessing.current_process().name)


if __name__ == '__main__':
    inputs = list(range(10))
    print('Inputs  :', inputs)

    builtin_output = list(map(do_calculation, inputs))
    print('Build-In :', builtin_output)

    pool_size = multiprocessing.cpu_count() * 2
    pool = multiprocessing.Pool(processes=pool_size, initializer=start_process, )
    # 默认情况下,Pool会创建固定数目的工作进程,并向这些工作进程传递作业,直到再没有更多作业为止。
    # maxtasksperchild 参数为每个进程执行 task 的最大数目,
    # 设置 maxtasksperchild参数可以告诉池在完成一定数量任务之后重新启动一个工作进程,
    # 来避免运行时间很长的工作进程消耗太多的系统资源。
    # pool = multiprocessing.Pool(processes=pool_size, initializer=start_process, maxtasksperchild=2)
    print('-' * 20)
    pool_outputs = pool.map(do_calculation, inputs)
    pool.close()
    pool.join()

    print('Pool  :', pool_outputs)
监听器及客户端
认证密码
日志记录
线程池
multiprocessing.dummy 模块
编程指导
使用 multiprocessing 时,应遵循一些指导原则和习惯用法。
下面这些适用于所有start方法。
避免共享状态
应该尽可能避免在进程间传递大量数据,越少越好。
最好坚持使用队列或者管道进行进程间通信,而不是底层的同步原语。
可序列化
保证所代理的方法的参数是可以序列化的。
代理的线程安全性
不要在多线程中同时使用一个代理对象,除非你用锁保护它。
(而在不同进程中使用 相同 的代理对象却没有问题。)
使用 Join 避免僵尸进程
在 POSIX 上当一个进程结束但没有被合并则它将变成僵尸进程。 这样的进程应该不会很多因为每次启动新进程(或 active_children() 被调用)时所有尚未被合并的已完成进程都将被合并。 而且调用一个已结束进程的 Process.is_alive 也会合并这个进程。 虽然如此但显式地合并你所启动的所有进程仍然是个好习惯。
继承优于序列化、反序列化
当使用 spawn 或者 forkserver 的启动方式时,multiprocessing 中的许多类型都必须是可序列化的,这样子进程才能使用它们。但是通常我们都应该避免使用管道和队列发送共享对象到另外一个进程,而是重新组织代码,对于其他进程创建出来的共享对象,让那些需要访问这些对象的子进程可以直接将这些对象从父进程继承过来。
避免杀死进程
通过 Process.terminate 停止一个进程很容易导致这个进程正在使用的共享资源(如锁、信号量、管道和队列)损坏或者变得不可用,无法在其他进程中继续使用。
所以,最好只对那些从来不使用共享资源的进程调用 Process.terminate 。
Join 使用队列的进程
记住,往队列放入数据的进程会一直等待直到队列中所有项被"feeder" 线程传给底层管道。(子进程可以调用队列的 Queue.cancel_join_thread 方法禁止这种行为)
这意味着,任何使用队列的时候,你都要确保在进程join之前,所有存放到队列中的项将会被其他进程、线程完全消费。否则不能保证这个写过队列的进程可以正常终止。记住非精灵进程会自动 join 。
死锁的例子:交换最后两行可以修复这个问题(或者直接删掉 p.join())。
from multiprocessing import Process, Queue

def f(q):
    q.put('X' * 1000000)

if __name__ == '__main__':
    queue = Queue()
    p = Process(target=f, args=(queue,))
    p.start()
    p.join()                    # this deadlocks
    obj = queue.get()
显式传递资源给子进程
在 POSIX 上使用 fork 启动方法,子进程将能够访问使用全局资源在父进程中创建的共享资源。 但是,更好的做法是将对象作为子进程构造器的参数来传入。
除了(部分原因)让代码兼容 Windows 以及其他的进程启动方式外,这种形式还保证了在子进程生命期这个对象是不会被父进程垃圾回收的。如果父进程中的某些对象被垃圾回收会导致资源释放,这就变得很重要。
示例:
from multiprocessing import Process, Lock

def f(l):
    ... do something using "l" ...

if __name__ == '__main__':
    lock = Lock()
    for i in range(10):
        Process(target=f, args=(lock,)).start()
spawn 和 forkserver 启动方式相对于 fork 启动方式,有一些额外的限制。
更依赖序列化
Process.__init__()的所有参数都必须可序列化。同样的,当你继承 Process 时,需要保证当调用 Process.start 方法时,实例可以被序列化。
全局变量
记住,如果子进程中的代码尝试访问一个全局变量,它所看到的值(如果有)可能和父进程中执行 Process.start 那一刻的值不一样。
当全局变量只是模块级别的常量时,是不会有问题的。
安全导入主模块
确保新的 Python 解释器可以安全地导入主模块,而不会导致意想不到的副作用(如启动新进程)。
例如,使用 spawn 或 forkserver 启动方式执行下面的模块,会引发 RuntimeError 异常而失败。
from multiprocessing import Process

def foo():
    print('hello')

p = Process(target=foo)
p.start()
应该通过下面的方法使用 if __name__ == '__main__': ,从而保护程序"入口点":
from multiprocessing import Process, freeze_support, set_start_method

def foo():
    print('hello')

if __name__ == '__main__':
    freeze_support()
    set_start_method('spawn')
    p = Process(target=foo)
    p.start()
(如果程序将正常运行而不是冻结,则可以省略 freeze_support() 行)
这允许新启动的 Python 解释器安全导入模块然后运行模块中的 foo() 函数。
如果主模块中创建了进程池或者管理器,这个规则也适用。
multiprocessing 示例
示例:创建和使用自定义管理器、代理
from multiprocessing import freeze_support
from multiprocessing.managers import BaseManager, BaseProxy
import operator


##

class Foo:
    def f(self):
        print('you called Foo.f()')

    def g(self):
        print('you called Foo.g()')

    def _h(self):
        print('you called Foo._h()')


# A simple generator function
def baz():
    for i in range(10):
        yield i * i


# Proxy type for generator objects
class GeneratorProxy(BaseProxy):
    _exposed_ = ['__next__']

    def __iter__(self):
        return self

    def __next__(self):
        return self._callmethod('__next__')


# Function to return the operator module
def get_operator_module():
    return operator


##

class MyManager(BaseManager):
    pass


# register the Foo class; make `f()` and `g()` accessible via proxy
MyManager.register('Foo1', Foo)

# register the Foo class; make `g()` and `_h()` accessible via proxy
MyManager.register('Foo2', Foo, exposed=('g', '_h'))

# register the generator function baz; use `GeneratorProxy` to make proxies
MyManager.register('baz', baz, proxytype=GeneratorProxy)

# register get_operator_module(); make public functions accessible via proxy
MyManager.register('operator', get_operator_module)


##

def test():
    manager = MyManager()
    manager.start()

    print('-' * 20)

    f1 = manager.Foo1()
    f1.f()
    f1.g()
    assert not hasattr(f1, '_h')
    assert sorted(f1._exposed_) == sorted(['f', 'g'])

    print('-' * 20)

    f2 = manager.Foo2()
    f2.g()
    f2._h()
    assert not hasattr(f2, 'f')
    assert sorted(f2._exposed_) == sorted(['g', '_h'])

    print('-' * 20)

    it = manager.baz()
    for i in it:
        print('<%d>' % i, end=' ')
    print()

    print('-' * 20)

    op = manager.operator()
    print('op.add(23, 45) =', op.add(23, 45))
    print('op.pow(2, 94) =', op.pow(2, 94))
    print('op._exposed_ =', op._exposed_)


##

if __name__ == '__main__':
    freeze_support()
    test()
示例:使用 Pool
import multiprocessing
import time
import random
import sys


#
# Functions used by test code
#

def calculate(func, args):
    result = func(*args)
    return '%s says that %s%s = %s' % (
        multiprocessing.current_process().name,
        func.__name__, args, result
    )


def calculatestar(args):
    return calculate(*args)


def mul(a, b):
    time.sleep(0.5 * random.random())
    return a * b


def plus(a, b):
    time.sleep(0.5 * random.random())
    return a + b


def f(x):
    return 1.0 / (x - 5.0)


def pow3(x):
    return x ** 3


def noop(x):
    pass


#
# Test code
#

def test():
    PROCESSES = 4
    print('Creating pool with %d processes\n' % PROCESSES)

    with multiprocessing.Pool(PROCESSES) as pool:
        #
        # Tests
        #

        TASKS = [(mul, (i, 7)) for i in range(10)] + \
                [(plus, (i, 8)) for i in range(10)]

        results = [pool.apply_async(calculate, t) for t in TASKS]
        imap_it = pool.imap(calculatestar, TASKS)
        imap_unordered_it = pool.imap_unordered(calculatestar, TASKS)

        print('Ordered results using pool.apply_async():')
        for r in results:
            print('\t', r.get())
        print()

        print('Ordered results using pool.imap():')
        for x in imap_it:
            print('\t', x)
        print()

        print('Unordered results using pool.imap_unordered():')
        for x in imap_unordered_it:
            print('\t', x)
        print()

        print('Ordered results using pool.map() --- will block till complete:')
        for x in pool.map(calculatestar, TASKS):
            print('\t', x)
        print()

        #
        # Test error handling
        #

        print('Testing error handling:')

        try:
            print(pool.apply(f, (5,)))
        except ZeroDivisionError:
            print('\tGot ZeroDivisionError as expected from pool.apply()')
        else:
            raise AssertionError('expected ZeroDivisionError')

        try:
            print(pool.map(f, list(range(10))))
        except ZeroDivisionError:
            print('\tGot ZeroDivisionError as expected from pool.map()')
        else:
            raise AssertionError('expected ZeroDivisionError')

        try:
            print(list(pool.imap(f, list(range(10)))))
        except ZeroDivisionError:
            print('\tGot ZeroDivisionError as expected from list(pool.imap())')
        else:
            raise AssertionError('expected ZeroDivisionError')

        it = pool.imap(f, list(range(10)))
        for i in range(10):
            try:
                x = next(it)
            except ZeroDivisionError:
                if i == 5:
                    pass
            except StopIteration:
                break
            else:
                if i == 5:
                    raise AssertionError('expected ZeroDivisionError')

        assert i == 9
        print('\tGot ZeroDivisionError as expected from IMapIterator.next()')
        print()

        #
        # Testing timeouts
        #

        print('Testing ApplyResult.get() with timeout:', end=' ')
        res = pool.apply_async(calculate, TASKS[0])
        while 1:
            sys.stdout.flush()
            try:
                sys.stdout.write('\n\t%s' % res.get(0.02))
                break
            except multiprocessing.TimeoutError:
                sys.stdout.write('.')
        print()
        print()

        print('Testing IMapIterator.next() with timeout:', end=' ')
        it = pool.imap(calculatestar, TASKS)
        while 1:
            sys.stdout.flush()
            try:
                sys.stdout.write('\n\t%s' % it.next(0.02))
            except StopIteration:
                break
            except multiprocessing.TimeoutError:
                sys.stdout.write('.')
        print()
        print()


if __name__ == '__main__':
    multiprocessing.freeze_support()
    test()
示例:使用队列来向一组工作进程提供任务并收集结果
import time
import random

from multiprocessing import Process, Queue, current_process, freeze_support

#
# Function run by worker processes
#

def worker(input, output):
    for func, args in iter(input.get, 'STOP'):
        result = calculate(func, args)
        output.put(result)

#
# Function used to calculate result
#

def calculate(func, args):
    result = func(*args)
    return '%s says that %s%s = %s' % \
        (current_process().name, func.__name__, args, result)

#
# Functions referenced by tasks
#

def mul(a, b):
    time.sleep(0.5*random.random())
    return a * b

def plus(a, b):
    time.sleep(0.5*random.random())
    return a + b

#
#
#

def test():
    NUMBER_OF_PROCESSES = 4
    TASKS1 = [(mul, (i, 7)) for i in range(20)]
    TASKS2 = [(plus, (i, 8)) for i in range(10)]

    # Create queues
    task_queue = Queue()
    done_queue = Queue()

    # Submit tasks
    for task in TASKS1:
        task_queue.put(task)

    # Start worker processes
    for i in range(NUMBER_OF_PROCESSES):
        Process(target=worker, args=(task_queue, done_queue)).start()

    # Get and print results
    print('Unordered results:')
    for i in range(len(TASKS1)):
        print('\t', done_queue.get())

    # Add more tasks using `put()`
    for task in TASKS2:
        task_queue.put(task)

    # Get and print some more results
    for i in range(len(TASKS2)):
        print('\t', done_queue.get())

    # Tell child processes to stop
    for i in range(NUMBER_OF_PROCESSES):
        task_queue.put('STOP')


if __name__ == '__main__':
    freeze_support()
    test()
4、Python 协程
协程 英文名 Coroutine。 关于协程,可以参考 greenlet、stackless、gevent、eventlet 等的实现。
并发编程目前有四种方式:多进程,多线程,异步,和协程。
多线程编程 Python 中有 Thread 和 threading,在 linux 下所谓的线程,实际上是 LWP 轻量级进程,其在内核中具有和进程相同的调度方式,有关 LWP,COW(写时拷贝),fork,vfork,clone等的资料较多,不再赘述。异步在 linux 下主要有三种实现 select,poll,epoll 。
协程的好处:
- 无需线程上下文切换的开销,协程的切换是由程序自身控制,因此,没有线程切换的开销,和多线程比,线程数量越多,协程的性能优势就越明显。
- 不需要多线程的锁机制。因为只有一个线程,也不存在同时写变量冲突,
- 方便切换控制流,简化编程模型
- 高并发+高扩展性+低成本:一个CPU支持上万的协程都不是问题。所以很适合用于高并发处理。
如何利用多核资源:
- 协程的本质是个单线程,它不能同时利用 CPU 多核资源。
- 协程需要和进程配合才能运行在多CPU上。"异步多进程" 可以解决利用多核资源。多进程 + 协程,既充分利用多核,又充分发挥协程的高效率,可获得极高的性能。
- 进行阻塞(Blocking)操作(如IO时)会阻塞掉整个程序
传统的 "生产者 --- 消费者" 模型是一个线程写消息,一个线程取消息,通过锁机制控制队列和等待,但一不小心就可能死锁。如果改用协程,生产者生产消息后,直接通过 yield 跳转到消费者开始执行,待消费者执行完毕后,切换回生产者继续生产,效率极高:
import time

def consumer():
    r = ''
    while True:
        n = yield r
        if not n:
            return
        print('[CONSUMER] Consuming %s...' % n)
        time.sleep(1)
        r = '200 OK'

def produce(c):
    c.next()
    n = 0
    while n < 5:
        n = n + 1
        print('[PRODUCER] Producing %s...' % n)
        r = c.send(n)
        print('[PRODUCER] Consumer return: %s' % r)
    c.close()

if __name__=='__main__':
    c = consumer()
    produce(c)
执行结果:
[PRODUCER] Producing 1...
[CONSUMER] Consuming 1...
[PRODUCER] Consumer return: 200 OK
[PRODUCER] Producing 2...
[CONSUMER] Consuming 2...
[PRODUCER] Consumer return: 200 OK
[PRODUCER] Producing 3...
[CONSUMER] Consuming 3...
[PRODUCER] Consumer return: 200 OK
[PRODUCER] Producing 4...
[CONSUMER] Consuming 4...
[PRODUCER] Consumer return: 200 OK
[PRODUCER] Producing 5...
[CONSUMER] Consuming 5...
[PRODUCER] Consumer return: 200 OK
注意到consumer函数是一个generator(生成器),把一个consumer传入produce后:
1. 首先调用c.next()启动生成器;
2. 然后,一旦生产了东西,通过c.send(n)切换到consumer执行;
3. consumer通过yield拿到消息,处理,又通过yield把结果传回;
4. produce拿到consumer处理的结果,继续生产下一条消息;
5. produce决定不生产了,通过c.close()关闭consumer,整个过程结束。
整个流程无锁,由一个线程执行,produce和consumer协作完成任务,所以称为“协程”,而非线程的抢占式多任务。最后套用Donald Knuth的一句话总结协程的特点:“子程序就是协程的一种特例”
线程、进程 的操作是由程序触发系统接口,最后的执行者是系统;
协程 的操作则是程序员。
协程示例:
import asyncio


async def cor1():
    print("COR1 start")
    await cor2()
    print("COR1 end")


async def cor2():
    print("COR2")


asyncio.run(cor1())
greenlet、Eventlet,gevent ( 推荐 )、
- greenlet :是使用生成器实现的协程,调度起来很麻烦,而且不是正在意义上的协程,只是实现的代码执行过程中的挂起,唤醒操作。Greenlet没有自己的调度过程,所以一般不会直接使用。greenlet:http://greenlet.readthedocs.org/en/latest/
- eventlet:是在 greenlet 的基础上实现了自己的 GreenThread,实际上就是 greenlet 类的扩展封装,而与Greenlet的不同是,Eventlet实现了自己调度器称为Hub,Hub类似于Tornado的IOLoop,是单实例的。在Hub中有一个event loop,根据不同的事件来切换到对应的GreenThread。同时 Eventlet 还实现了一系列的补丁来使 Python 标准库中的 socket 等等module 来支持 GreenThread 的切换。Eventlet 的 Hub 可以被定制来实现自己调度过程。eventlet 目前支持 CPython 2.7 和 3.4+ 并将在未来删除,仅保留 CPython 3.5+ 支持。
- gevent:基于 libev 与 Greenlet 实现。不同于 Eventlet 的用 python 实现的 hub 调度,Gevent 通过 Cython 调用 libev 来实现一个高效的 event loop 调度循环。同时类似于 Event,Gevent 也有自己的 monkey_patch,在打了补丁后,完全可以使用 python 线程的方式来无感知的使用协程,减少了开发成本。
在 Python 的世界里由于 GIL 的存在,线程一直都不是很好用,所以就有了各种协程的 hack。gevnet 是当前使用起来最方便的协程,但是由于依赖于 libev 所以不能在 pypy上 跑,如果需要在pypy上使用协程,Eventlet 是最好的选择。
gevent 属于第三方模块需要下载安装包
pip3 install --upgrade pip3
pip3 install gevent
示例:
import gevent
def fun1():
    print("www.baidu.com")  # 第一步
    gevent.sleep(0)
    print("end the baidu.com")  # 第三步

def fun2():
    print("www.zhihu.com")  # 第二步
    gevent.sleep(0)
    print("end th zhihu.com")  # 第四步

gevent.joinall([
    gevent.spawn(fun1),
    gevent.spawn(fun2),
])
示例:遇到 IO 操作自动切换:
import gevent
from gevent import monkey
from datetime import datetime
monkey.patch_all()
import requests


def func(url):
    print(f"[{datetime.now().replace(microsecond=0)}] 开始请求 {url}")
    gevent.sleep(0)
    proxies = {
        "http": "http://172.17.18.80:8080",
        "https": "http://172.17.18.80:8080",
    }
    proxies = None
    resp = requests.get(url, proxies=proxies)
    print(f"[{datetime.now().replace(microsecond=0)}] {{resp.url}} ---> {len(resp.content)}")


gevent.joinall([
    gevent.spawn(func, 'https://www.baidu.com/'),
    gevent.spawn(func, 'https://www.sina.com.cn/'),
    gevent.spawn(func, 'https://www.qq.com/'),
])
多进程 + 协程:
import gevent
from gevent import monkey
monkey.patch_all()

import sys
import requests
from multiprocessing import Process
from importlib import reload


def fetch(url):
    try:
        s = requests.Session()
        r = s.get(url, timeout=1)  # 在这里抓取页面
    except BaseException as be:
        print(be)
    return None


def setup_process(url_list):
    task_list = []
    for url in url_list:
        task_list.append(gevent.spawn(fetch, url))
    gevent.joinall(task_list)  # 使用协程来执行


def main(filepath, per_task=100000):  # 每10W条url启动一个进程

    with open(filepath, 'r') as f:  # 从给定的文件中读取url
        url_list = f.readlines()

    url_list = [temp.strip() for temp in url_list]
    url_len = len(url_list)
    process_count = int(url_len / per_task) if url_len % per_task == 0 else int(url_len / per_task) + 1
    for index in range(process_count):
        task_list = url_list[index * per_task: (index + 1) * per_task]
        p = Process(target=setup_process, args=(url_list,))
        p.start()


if __name__ == '__main__':
    main('./test_data.txt')  # 读取指定文件
例子中隐藏了一个问题:进程的数量会随着 url 数量的增加而不断增加,我们在这里不使用进程池multiprocessing.Pool 来控制进程数量的原因是 multiprocessing.Pool 和 gevent 有冲突不能同时使用,但是有兴趣的同学可以研究一下 gevent.pool 这个协程池。
"""
对于有些人来说Gevent和multiprocessing组合在一起使用算是个又高大上又奇葩的工作模式.
Python的多线程受制于GIL全局锁的特性,Gevent身为协程也是线程的一种,只是io调度上自己说了算而已。
那么如何使用多个cpu核心?
可以利用多进程 mutliprocessing 来进行多核并行工作,
在多进程里面使用gevent协程框架可以更好的做io调度,相比线程来说减少了无谓的上下文切换.
"""

import datetime
from multiprocessing import Process, cpu_count, Queue, JoinableQueue
import gevent
from gevent import monkey
monkey.patch_all()


class Consumer(object):
    def __init__(self, task_queue, task_list, consumer_name):
        self.task_queue = task_queue
        self.task_list = task_list
        self.consumer_name = consumer_name
        self.__run_gevent()

    def __run_gevent(self):
        jobs = [gevent.spawn(self.__print_value) for x in range(self.task_list)]
        gevent.joinall(jobs)

    def __print_value(self):
        while True:
            value = self.task_queue.get()
            if value is None:
                self.task_queue.task_done()
                break
            else:
                print(f"[{datetime.datetime.now()}] {self.consumer_name} ---> value: {value}")
        return


class Producer(object):
    def __init__(self, task_queue, task_list, producer_name, consumers_tasks):
        self.task_queue = task_queue
        self.task_list = task_list
        self.producer_name = producer_name
        self.consumer_tasks = consumers_tasks
        self.__run_gevent()

    def __run_gevent(self):
        jobs = [gevent.spawn(self.produce) for x in range(self.task_list)]
        gevent.joinall(jobs)
        for x in range(self.consumer_tasks):
            self.task_queue.put_nowait(None)
        self.task_queue.close()

    def produce(self):
        for no in range(10000):
            print(no)
            self.task_queue.put(no, block=False)
        return


def main():
    worker_count = cpu_count() * 2
    task_queue = JoinableQueue()
    producer_gevent = 10
    consumer_gevent = 7
    pid_list = []
    for index in range(worker_count):
        if not index % 2:
            pid = Process(
                target=Producer,
                args=(task_queue, 10, f"producer_{index}", consumer_gevent)
            )
            pid.start()
            pid_list.append(pid)
        else:
            pid = Process(
                target=Consumer,
                args=(task_queue, consumer_gevent, f"consumer_{index}")
            )
            pid.start()
            pid_list.append(pid)

    for pid in pid_list:
        pid.join()


if __name__ == '__main__':
    main()
5、异步多进程 aiomultiprocess
aiomultiprocess 是 标准模块 multiprocessing 的异步IO 版本
安装:https://pypi.org/project/aiomultiprocess/
安装后,源码文件如下:
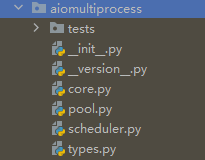
core.py 源码
重点是 Process 和 Worker 这两个类,通过源码中注释可以看到
- Process:在一个单独的进程中执行 协程
- Worker:继承 Process 类,也是在一个单独的进程中执行 协程,但是可以得到进程执行结束后的执行结果

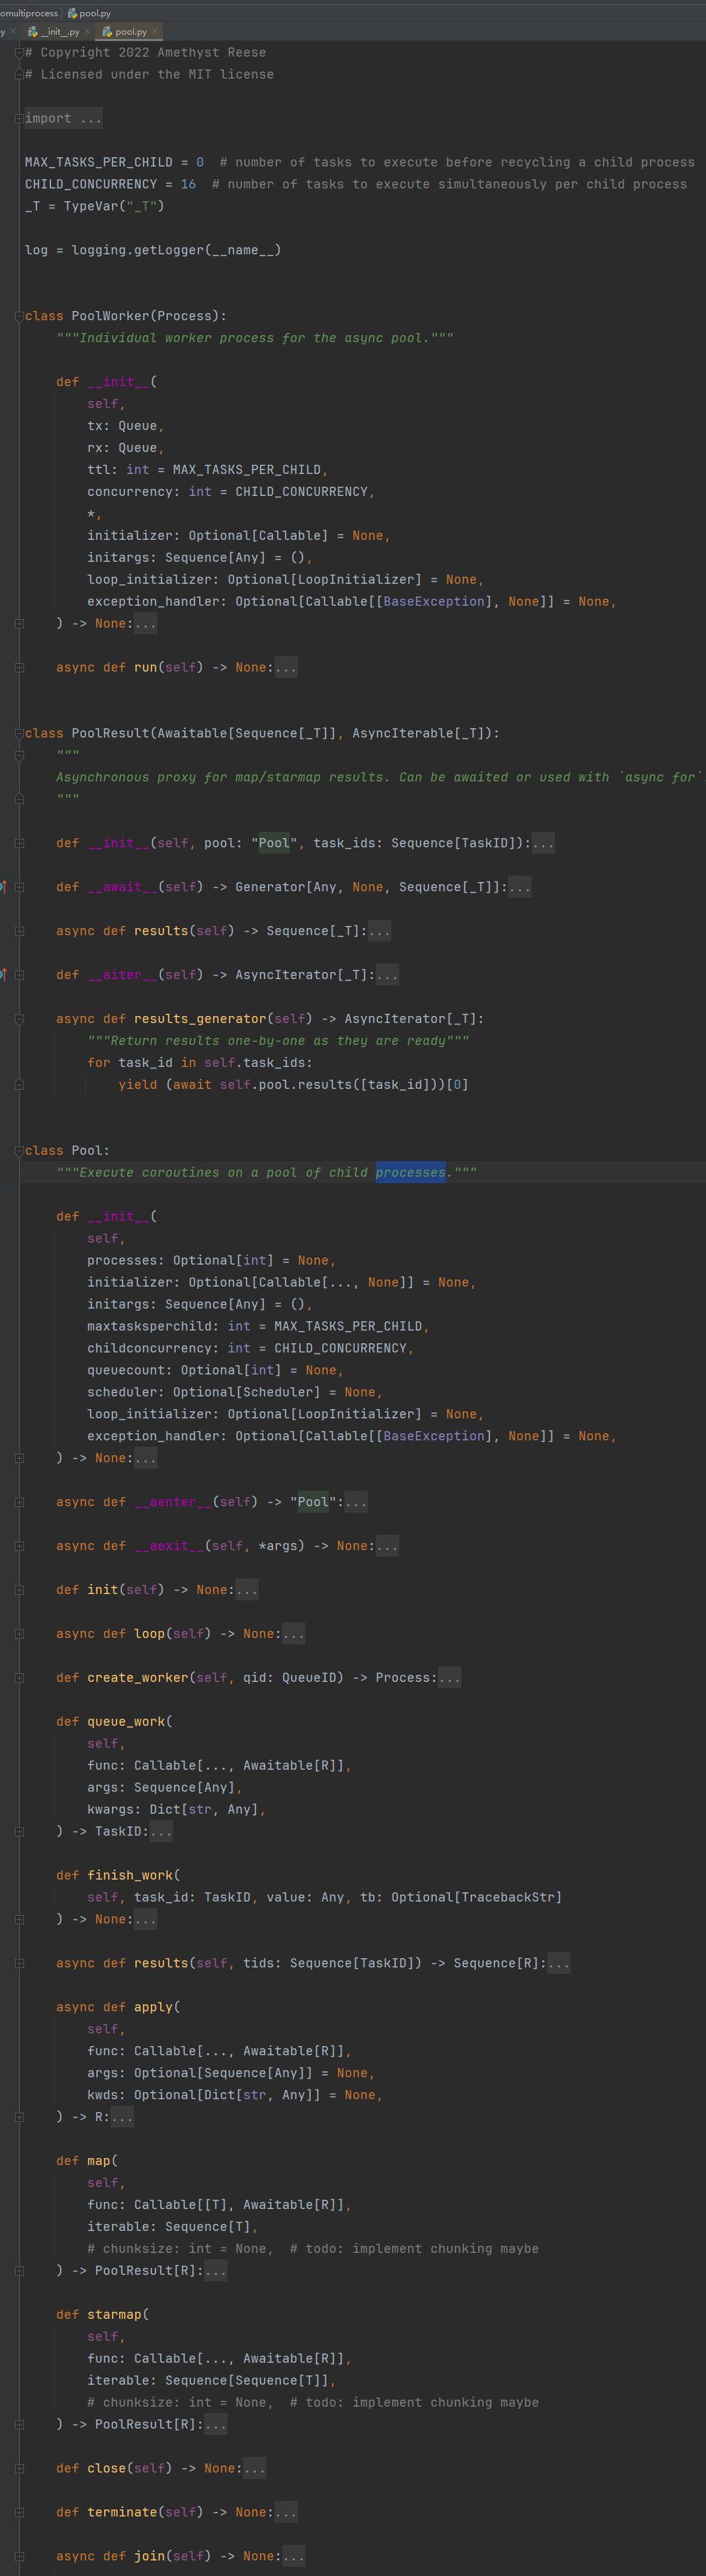
pool.py 源码
源码中都有注释,可以查看注释
scheduler.py 源码

使用格式
import asyncio
from aiomultiprocess import Pool


async def async_worker(data):
    # 异步任务的逻辑
    await do_something_async(data)


async def do_something_async(data):
    # 在此处编写异步任务的逻辑
    ...


def process_worker(data):
    # 同步任务的逻辑
    do_something(data)


def do_something(data):
    # 在此处编写同步任务的逻辑
    ...


async def main():
    # 创建进程池
    pool = await Pool()

    # 准备数据
    data_list = [1, 2, 3, 4, 5]

    # 异步任务
    async_tasks = [async_worker(data) for data in data_list]
    await asyncio.gather(*async_tasks)

    # 多进程同步任务
    await pool.map(process_worker, data_list)
    pool.close()
    await pool.join()


# 运行主程序
if __name__ == '__main__':
    asyncio.run(main())
示例:多进程
import os
import asyncio
from aiomultiprocess import Process, Worker


# 异步任务函数,这将在单独的进程中执行
async def async_process_task_1(name):
    print(f"[{os.getpid()}] {name} 开始工作")
    await asyncio.sleep(1)  # 模拟异步工作
    print(f"[{os.getpid()}] {name} 完成工作")
    return f"结果来自 [{os.getpid()}] {name}"


# 异步任务函数,这将在单独的进程中执行
async def async_process_task_2(name):
    print(f"[{os.getpid()}] {name} 开始工作")
    await asyncio.sleep(1)  # 模拟异步工作
    print(f"[{os.getpid()}] {name} 完成工作")
    return f"结果来自 [{os.getpid()}] {name}"


async def main():
    # 创建 Process 实例,将异步任务函数及其参数传递给 target 和 args
    process_1 = Process(target=async_process_task_1, args=("进程1",))
    process_2 = Process(target=async_process_task_2, args=("进程2",))

    # 启动进程
    process_1.start()
    process_2.start()

    # 等待进程完成执行
    await process_1.join()
    await process_2.join()


if __name__ == "__main__":
    asyncio.run(main())
示例:进程池
import asyncio
from aiohttp import request
from aiomultiprocess import Pool

async def get(url):
    async with request("GET", url) as response:
        return await response.text("utf-8")

async def main():
    urls = ["https://noswap.com", ...]
    async with Pool() as pool:
        async for result in pool.map(get, urls):
            ...  # process result

if __name__ == '__main__':
    # Python 3.7
    asyncio.run(main())

    # Python 3.6
    # loop = asyncio.get_event_loop()
    # loop.run_until_complete(main())
示例:获取 进程 执行结果
import os
import asyncio
from aiomultiprocess import Worker


# 异步任务函数,这将在单独的进程中执行
async def async_process_task_1(name):
    print(f"[{os.getpid()}] {name} 开始工作")
    await asyncio.sleep(1)  # 模拟异步工作
    print(f"[{os.getpid()}] {name} 完成工作")
    return f"结果来自 [{os.getpid()}] {name}"


# 异步任务函数,这将在单独的进程中执行
async def async_process_task_2(name):
    print(f"[{os.getpid()}] {name} 开始工作")
    await asyncio.sleep(1)  # 模拟异步工作
    print(f"[{os.getpid()}] {name} 完成工作")
    return f"结果来自 [{os.getpid()}] {name}"


async def main():
    # 创建 Process 实例,将异步任务函数及其参数传递给 target 和 args
    worker_1 = Worker(target=async_process_task_1, args=("进程1",))
    worker_2 = Worker(target=async_process_task_2, args=("进程2",))

    # 启动进程
    worker_1.start()
    worker_2.start()

    # 等待进程完成执行
    await worker_1.join()
    await worker_2.join()

    # 运行 Worker 并获取结果
    result_1 = await worker_1
    result_2 = await worker_2

    # 输出结果
    print(f"result_1: {result_1}")
    print(f"result_2: {result_2}")


# 运行主函数
if __name__ == "__main__":
    asyncio.run(main())
示例:
import json
import asyncio
import aiomultiprocess
from loguru import logger
from ichrome import AsyncChromeDaemon
from ichrome.async_utils import Chrome


async def startup_chrome(dp_port=None):
    """
        设置 chrome 参数,然后启动 chrome
    :param dp_port: 自定义 debug port
    :return:
    """
    logger.info(f'dp_port ---> {dp_port}')
    timeout = 5
    # 也可以给 Chrome 添加代理
    proxy = '127.0.0.1:8080'
    udd= f'c:/chrome_user_data_dir_{dp_port}'
    async with AsyncChromeDaemon(port=dp_port, proxy=proxy, user_data_dir=udd) as cd:
        async with cd.connect_tab(index=0) as tab:
            url = 'https://space.bilibili.com/1904149/'
            await tab.set_url(url, timeout=timeout)
            await asyncio.sleep(5)
            cookie = await tab.get_cookies(url, timeout=timeout)
            cookie_string = json.dumps(cookie, ensure_ascii=False)
            logger.info(f'cookie_string ---> {cookie_string}')


async def main():
    db_list = [9301 + offset for offset in range(5)]
    async with aiomultiprocess.Pool() as aio_pool:
        await aio_pool.map(startup_chrome, db_list)
    await aio_pool.join()


if __name__ == "__main__":
    asyncio.run(main())
    pass


 389
389

 被折叠的 条评论
为什么被折叠?
被折叠的 条评论
为什么被折叠?
 到【灌水乐园】发言


