


CountDownLatch使用场景
CountDownLatch是一个同步工具类,它允许一个或多个线程一直等待,直到其他线程执行完后再执行。例如,应用程序的主线程希望在负责启动框架服务的线程已经启动所有框架服务之后执行。CountDownLatch在多线程并发编程中充当一个计时器的功能。
典型的使用例子如下:
public class CountDownLatchTest {

    private static CountDownLatch latch = new CountDownLatch(2);


    public static void main(String[] args) throws Exception {
        long now = System.currentTimeMillis();
        ThreadPoolExecutor executor = new ThreadPoolExecutor(3, 6, 1,
            TimeUnit.MILLISECONDS, new ArrayBlockingQueue<>(5), Executors.defaultThreadFactory(),
            new ThreadPoolExecutor.AbortPolicy());

        executor.execute(new QuickTask(latch));
        executor.execute(new SlowTask(latch));

        latch.await();
        System.out.println("Both QuickTask and SlowTask are finished cost: " + (System.currentTimeMillis() - now));
        executor.shutdown();
    }


    static final class QuickTask implements Runnable {

        private CountDownLatch countDownLatch;

        public QuickTask(CountDownLatch countDownLatch) {
            this.countDownLatch = countDownLatch;
        }

        @Override
        public void run() {
            try {
                System.out.println("QuickTaskThread: " + Thread.currentThread().getName());
                Thread.sleep(3000);
                System.out.println("QuickTaskThread finished");
            } catch (InterruptedException e) {
                e.printStackTrace();
            } finally {
                if (countDownLatch != null) {
                    countDownLatch.countDown();
                }
            }
        }
    }


    static final class SlowTask implements Runnable {

        private CountDownLatch countDownLatch;

        public SlowTask(CountDownLatch countDownLatch) {
            this.countDownLatch = countDownLatch;
        }

        @Override
        public void run() {
            try {
                System.out.println("SlowTaskThread: " + Thread.currentThread().getName());
                Thread.sleep(5000);
                System.out.println("SlowTaskThread finished");
            } catch (InterruptedException e) {
                e.printStackTrace();
            } finally {
                if (countDownLatch != null) {
                    countDownLatch.countDown();
                }
            }
        }
    }
}
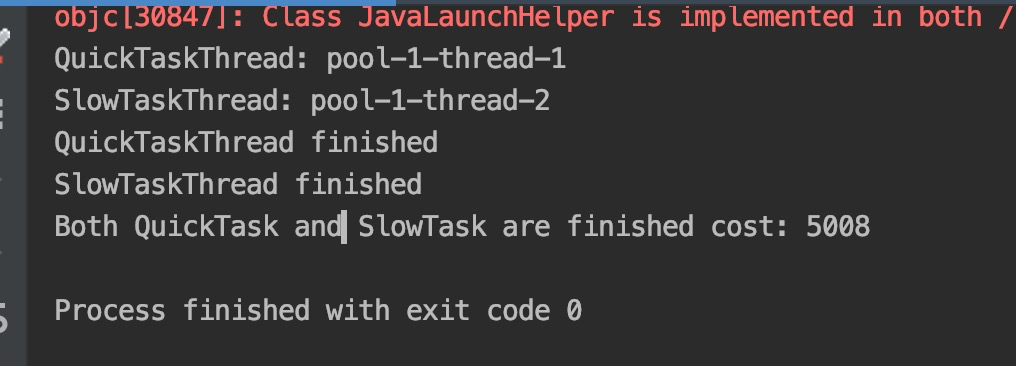
运行结果:
CountDownLatch实现分析
CountDownLatch类的源码很简单,如下:
public class CountDownLatch {

    private final Sync sync;

    public CountDownLatch(int count) {
        if (count < 0) throw new IllegalArgumentException("count < 0");
        this.sync = new Sync(count);
    }
    /**
     * 这里继承队列同步器,并重写tryAcquireShared(int acquires)、tryReleaseShared(int releases)方法
     */
    private static final class Sync extends AbstractQueuedSynchronizer {
        private static final long serialVersionUID = 4982264981922014374L;

        /**
         * 设置AQS同步状态,同步状态变量定义在抽象类AbstractQueuedSynchronizer中
         * private volatile int state;
         */
        Sync(int count) {
            setState(count);
        }

        int getCount() {
            return getState();
        }

        /**
         * 只有当CountDownLatch里面的计数器为0时,才会返回1
         * 在AbstractQueuedSynchronizer里面tryAcquireShared(int acquires)表示共享式获取同步状态,
         * 只有返回值大于等于0的时候表示获取成功,反之则表示获取失败
         */
        protected int tryAcquireShared(int acquires) {
            return (getState() == 0) ? 1 : -1;
        }

        /**
         * 在AbstractQueuedSynchronizer里面tryAcquireShared(int acquires)表示共享式释放同步状态
         * 每成功调用一次这个方法Sync的实例的status值就会减一,当status的值减为0时,则不会再减。
         */
        protected boolean tryReleaseShared(int releases) {
         // Decrement count; signal when transition to zero
         // compareAndSetState方法执行不成功就一直循环执行直到成功
            for (;;) {
                int c = getState();
                if (c == 0)
                    return false;
                int nextc = c-1;
                if (compareAndSetState(c, nextc))
                    return nextc == 0;
            }
        }
    }

    public void await() throws InterruptedException {
        sync.acquireSharedInterruptibly(1);
    }

    public boolean await(long timeout, TimeUnit unit)
        throws InterruptedException {
        return sync.tryAcquireSharedNanos(1, unit.toNanos(timeout));
    }

    /**
     * countDown:每调用一次countDown()方法都会使sync成员变量status减一(直到status为0),status为0,则会让调用await()方法的地方不在阻塞,
     * 从而达到可以等待多个并发事件完成的目标
     * void
     */
    public void countDown() {
        sync.releaseShared(1);
    }
    public long getCount() {
        return sync.getCount();
    }
    public String toString() {
        return super.toString() + "[Count = " + sync.getCount() + "]";
    }
}
CountDownLatch内部依赖Sync实现,而Sync继承AQS。
CountDownLatch主要分析以下三点:
- 构造方法,创建CountDownLatch对象时指定count值,即线程个数
- countDown()方法的实现,每执行一个线程方法就将计数器减一,当计数为0时,启用当前线程
- await()方法的实现,当前线程在计数器为0之前一直等待,除非线程被中断
countDown()方法实现
countDown()方法源码如下:
public void countDown() {
    //递减锁重入次数,当state=0时唤醒所有阻塞线程
    sync.releaseShared(1);
}
releaseShared()方法定义在抽象类AbstractQueuedSynchronizer中,如下这里使用了模板方法模式,该方法中的tryReleaseShard()共享式释放锁方法交给子类去实现,doReleaseShared()方法在抽象类中实现。
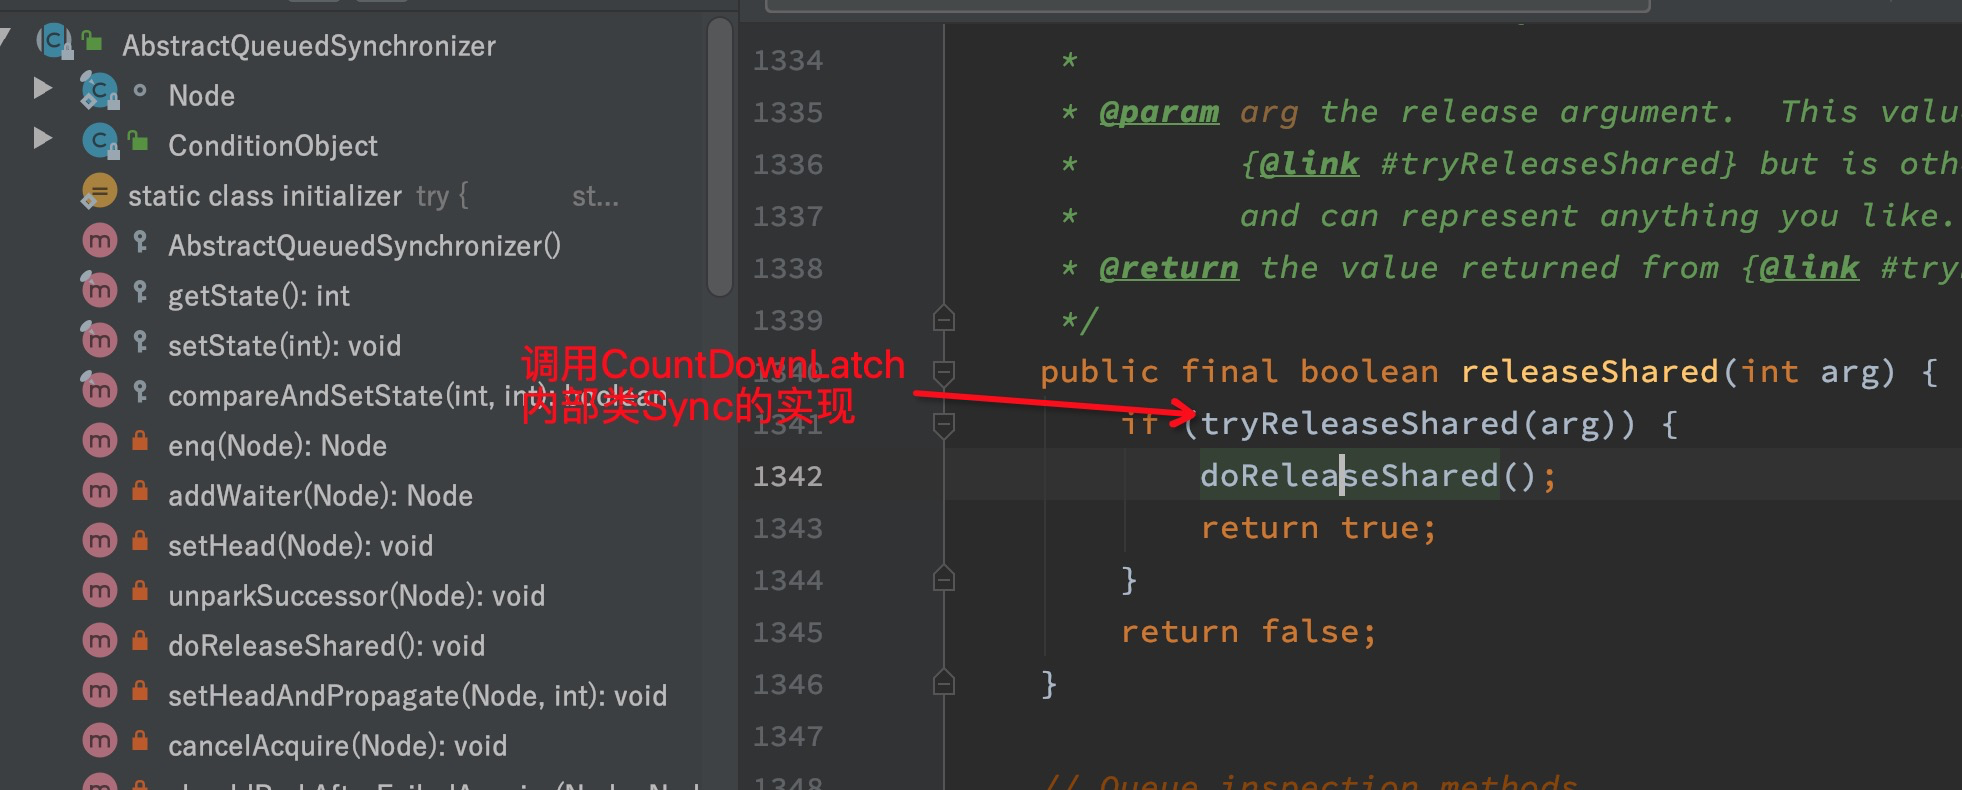
AbstractQueuedSynchronizer中的doReleaseShared()方法如下:
private void doReleaseShared() {
	//唤醒所有阻塞队列里面的线程
	for (;;) {
	    Node h = head;
	    if (h != null && h != tail) {
	        int ws = h.waitStatus;
	        //节点是否在等待唤醒状态
	        if (ws == Node.SIGNAL) {
	        	//修改状态为初始
	            if (!compareAndSetWaitStatus(h, Node.SIGNAL, 0))
	                continue;
	            //成功则唤醒线程
	            unparkSuccessor(h);
	        }
	        else if (ws == 0 && !compareAndSetWaitStatus(h, 0, Node.PROPAGATE))
	            continue;                // loop on failed CAS
	    }
	    if (h == head)                   // loop if head changed
	        break;
	}
}
CountDownLatch内部通过共享锁实现。在创建CountDownLatch实例时,需要传递一个int型的参数:count,该参数为计数器的初始值,也可以理解为该共享锁可以获取的总次数。
await()方法实现
await()方法源码如下:
public void await() throws InterruptedException {
    sync.acquireSharedInterruptibly(1);
}
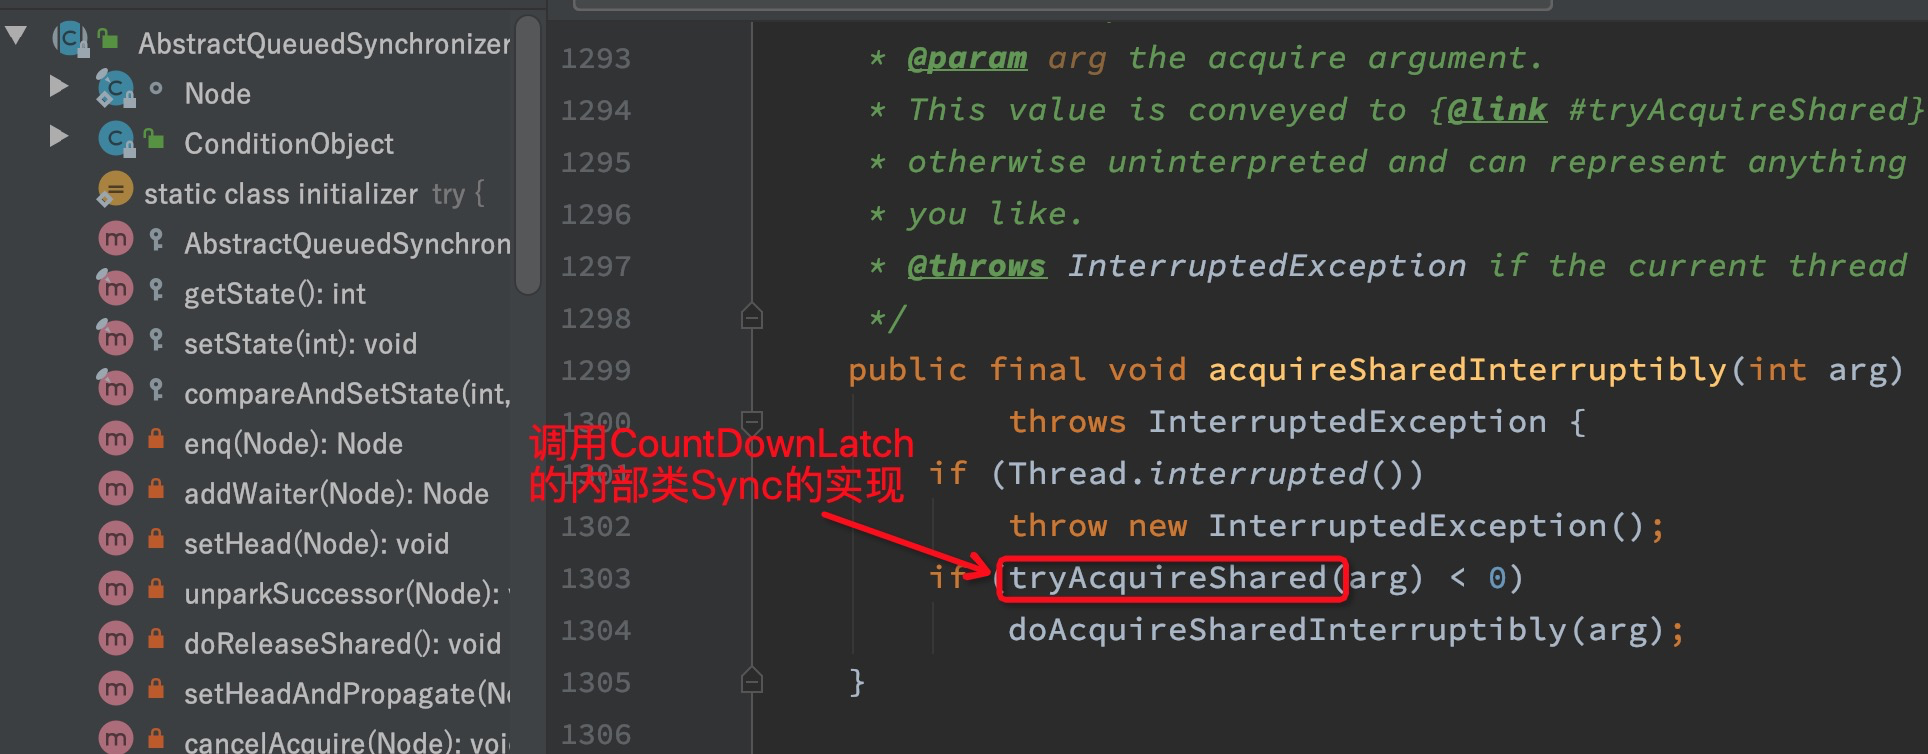
acquireSharedInterruptibly()方法定义在抽象类AbstractQueuedSynchronizer中,如下这里使用了模板方法模式,该方法中的tryAcquiredShard()共享式获取锁方法交给子类去实现,doAcquiredSharedInterruptibly()方法在抽象类中实现。
protected int tryAcquireShared(int acquires) {
     return (getState() == 0) ? 1 : -1;
}
CountDownLatch中的内部类Sync对AQS的tryAcquireShared方法进行了复写。
- 当前计数器的值为0的时候返回1,表示获取锁成功,此时acquireSharedInterruptibly()方法直接返回,线程可继续操作。
- 当前计数器的值不为0的时候返回-1,表示获取锁失败 ,进入doAcquiredSharedInterruptibly()方法,进入队列中排队等待。
AQS中doAcquiredSharedInterruptibly()方法实现如下:
private void doAcquireSharedInterruptibly(int arg)
    throws InterruptedException {
    //加入等待队列
    final Node node = addWaiter(Node.SHARED);
    boolean failed = true;
    // 进入 CAS 循环
    try {
        for (;;) {
            //当一个节点进入等待队列后, 获取此节点的prev节点
            final Node p = node.predecessor();
            // 如果获取到的prev是head,也就是队列中第一个等待线程
            if (p == head) {
                //再次尝试申请,反应到CountDownLatch就是查看是否还有线程需要等待(state是否为0)
                int r = tryAcquireShared(arg);
                // 如果 r >=0 说明 没有线程需要等待了state==0
                if (r >= 0) {
                    //尝试将第一个线程关联的节点设置为head
                    setHeadAndPropagate(node, r);
                    p.next = null; // help GC
                    failed = false;
                    return;
                }
            }
            //经过自旋tryAcquireShared后,state还不为0,就会到这里,第一次的时候,waitStatus是0,那么node的waitStatus就会被置为SIGNAL,第二次再走到这里,就会用LockSupport的park方法把当前线程阻塞住
            if (shouldParkAfterFailedAcquire(p, node) &&
                parkAndCheckInterrupt())
                throw new InterruptedException();
        }
    } finally {
        if (failed)
            cancelAcquire(node);
    }
}
这个方法进来执行的第一个动作就是尝试将当前线程封装成Node加入同步队列 ,即调用addWaiter()方法。到这里就走到了AQS的核心部分,AQS用内部的一个Node类维护一个Node FIFO队列。addWaiter()方法内部用CAS实现队列出入不会发生阻塞。入队过程的详情在从源码角度理解ReentrantLock及队列同步器一文中有详细分析。LockSupport是JDK中比较底层的类,用来创建锁和其他同步工具类的基本线程阻塞原语。
setHeadAndPropagate()方法负责将自旋等待或被LockSupport阻塞的线程唤醒。
private void setHeadAndPropagate(Node node, int propagate) {
	//备份现在的head
    Node h = head;
	//抢到锁的线程被唤醒,将这个节点设置为head
    setHead(node)
	// propagate 一般都会大于0 或者存在可被唤醒的线程
    if (propagate > 0 || h == null || h.waitStatus < 0 || (h = head) == null || h.waitStatus < 0) {
        Node s = node.next;
        // 只有一个节点或者是共享模式 释放所有等待线程各自尝试抢占锁
        if (s == null || s.isShared())
            doReleaseShared();
    }
}
线程封装成Node对象时,waitStatus是volatile变量,初始值是0,对其赋值可能有4个取值
//当前节点线程由于超时或中断被取消,这种状态的节点将会被忽略,并移出队列
static final int CANCELLED =  1;
//表示当前线程已被挂起,其后继节点可以尝试抢占锁
static final int SIGNAL    = -1;
//线程在Condition条件队列中等待,当从同步队列中复制到条件队列时变为0
static final int CONDITION = -2;
//共享模式下,释放共享资源时通知其他节点
static final int PROPAGATE = -3;
AQS独占与共享小结
AQS的功能可以分为两类:独占与共享;如ReentrantLock利用了其独占功能,CountDownLatch利用了其共享功能。AQS的静态内部类Node里有两个变量,独占锁与共享锁在创建自己的节点时(addWaiter方法)用于表明身份,它们会被赋值给Node的nextWaiter变量。
/** Marker to indicate a node is waiting in shared mode */
static final Node SHARED = new Node();
/** Marker to indicate a node is waiting in exclusive mode */
static final Node EXCLUSIVE = null;
final boolean isShared() {
    return nextWaiter == SHARED;
}

Node(Thread thread, Node mode) {     // Used by addWaiter
    this.nextWaiter = mode;
    this.thread = thread;
}

Node(Thread thread, int waitStatus) { // Used by Condition
    this.waitStatus = waitStatus;
    this.thread = thread;
}
独占锁就是每次只允许一个线程执行,当前线程执行完会release将同步状态归零,再唤醒后继节点。通过自定义tryAcquire()方法来实现公平与非公平。
独占式获取及释放资源acquire & release
//成功代表同步状态的变更,排斥其他线程;否则加入等待队列
public final void acquire(int arg) {
    if (!tryAcquire(arg) &&
        acquireQueued(addWaiter(Node.EXCLUSIVE), arg))
        selfInterrupt();
}
//同步状态归0后,唤醒后继节点
public final boolean release(int arg) {
    if (tryRelease(arg)) {
        Node h = head;
        if (h != null && h.waitStatus != 0)
            unparkSuccessor(h);
        return true;
    }
    return false;
}
独占式地释放和获取资源都是严格按照FIFO的,即通过链表的前后驱指针按顺序来的。在获取资源时,节点每次都看自身前节点是否是头节点,若是就尝试获取资源;获取没成功不要紧,此时头节点状态是SIGNAL,此时该节点会使用LokSupport的park挂起自己,头节点释放资源后就会unpark该节点线程,下一轮循环中该节点就可以成功获取资源啦! 如果前节点不是头节点,那就继续自旋。
不同于ReentrantLock,CountDownLatch调用的是AQS里的acquireSharedInterruptibly()与releaseShared()方法,这两个方法是共享式获取与释放资源的实现。CountDownLatch实现了自己的tryAcquireShared()与tryReleaseShared()方法。
共享式获取及释放资源acquireSharedInterruptibly & releaseShared
//tryAcquireShared()方法返回正数,代表资源获取成功,只要不为0尝试获取资源的线程就一直成功,返回0代表最后一个资源被获取了,返回负数代表资源已经没有了,加入等待队列
public final void acquireSharedInterruptibly(int arg)
        throws InterruptedException {
    if (Thread.interrupted())
        throw new InterruptedException();
    if (tryAcquireShared(arg) < 0)
        doAcquireSharedInterruptibly(arg);
}

//tryReleaseShared()方法返回true,代表资源释放成功,唤醒所有等待资源的阻塞线程
public final boolean releaseShared(int arg) {
	if (tryReleaseShared(arg)) {
	    doReleaseShared();
	    return true;
	}
	return false;
}
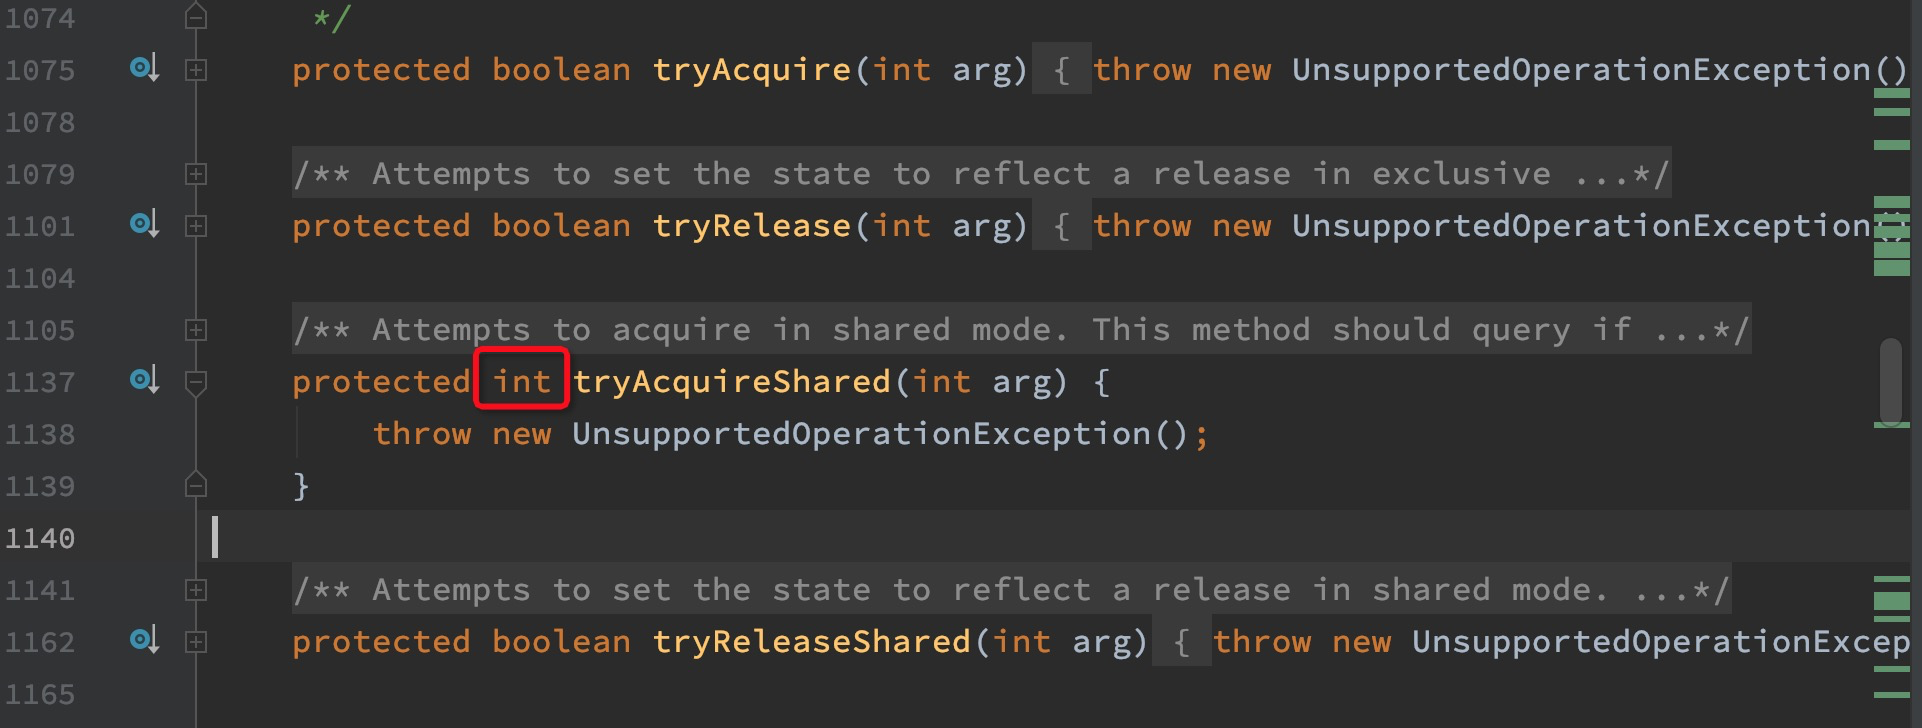
独占锁的tryAcquire()及tryRelease()返回boolean代表同步状态更改的成功与否;tryReleaseShared()方法也返回boolean值代表资源释放成功与否,但是AQS中定义的tryAcquireShared()方法返回的却是int值,这正好体现了独占与共享的区别。
来看tryAcquireShared()方法对返回值的注释
* @return a negative value on failure; zero if acquisition in shared
 *         mode succeeded but no subsequent shared-mode acquire can
 *         succeed; and a positive value if acquisition in shared
 *         mode succeeded and subsequent shared-mode acquires might
 *         also succeed, in which case a subsequent waiting thread
 *         must check availability. (Support for three different
 *         return values enables this method to be used in contexts
 *         where acquires only sometimes act exclusively.)  Upon
 *         success, this object has been acquired.
翻译一下,就是tryAcquireShared()返回大于0的正数代表当前线程能够正常获取资源,其之后的线程也可能正常获取资源,返回0代表当前线程能够正常获取资源,但之后的线程将会进入等待队列中。独占与共享最大不同就在各自的tryAcquire里,对于独占来说只有true或false,只有一个线程得以执行任务;而对于共享锁的tryAcquireShared()来说,线程数没达到限制都可以直接执行。
但本质上都是对AQS同步状态的修改,一个是0与1之间,另一个允许更多而已。


 675
675

 被折叠的 条评论
为什么被折叠?
被折叠的 条评论
为什么被折叠?
 到【灌水乐园】发言


