


如何安装ElasticSearch服务和基本的使用
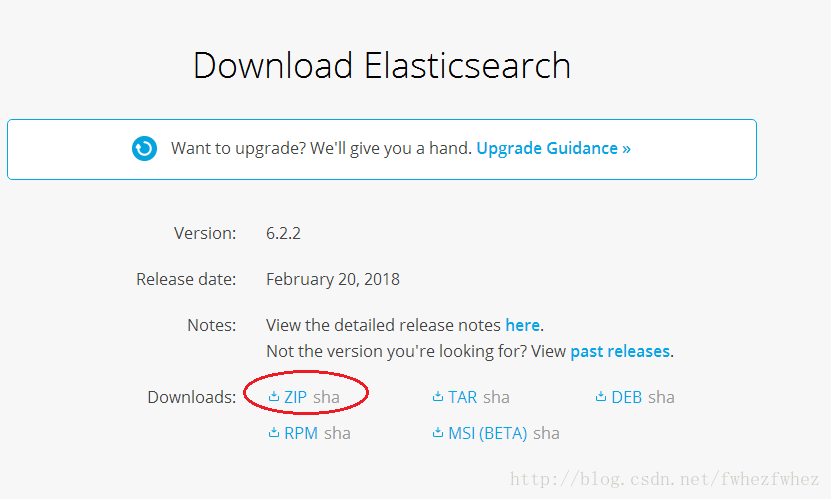
1.安装路径
2.选择合适的安装包,博主选的是ZIP
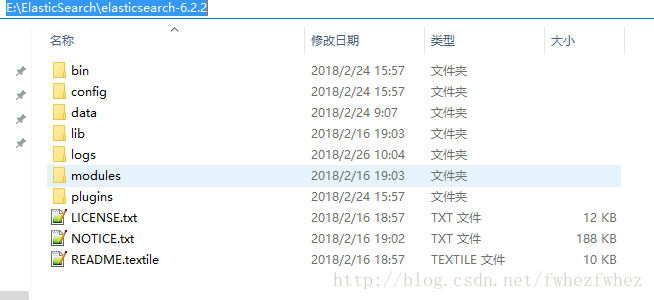
3.在工作盘创建文件结构如下,并解压下载的zip
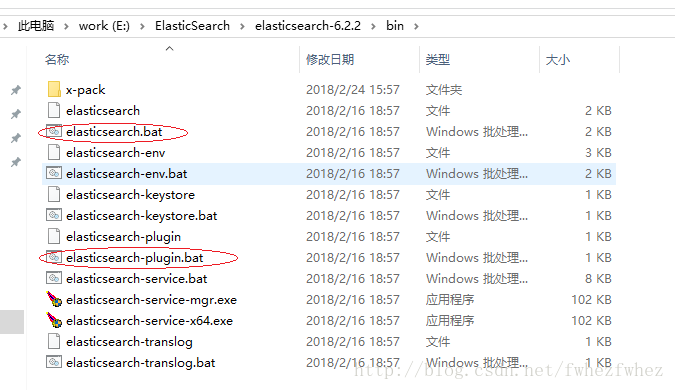
4.打开bin,我们常用的东东就是这些了
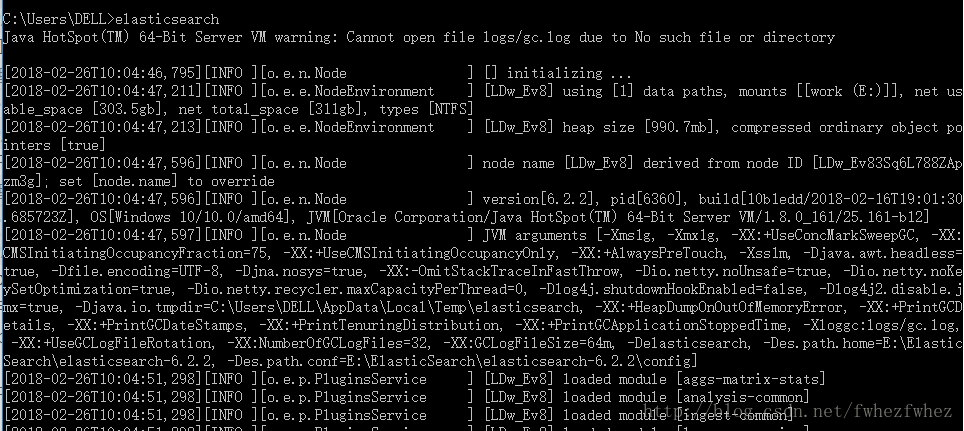
5.将bin路径添加到path里,方便使用命令
我的电脑右键-属性-高级设置-环境变量-系统变量-path-编辑,把E:\ElasticSearch\elasticsearch-6.2.2\bin放进path的值里,注意不要之前的值给改了,很多程序都要配置path,不同的配置之间用分号隔开
6.打开cmd,执行elasticsearch
7.安装git for windows 后直接在桌面右键git bash here
go开发经常使用到go get命令,这个命令也是要安装git才能用的
git for windows
执行curl localhost:9200
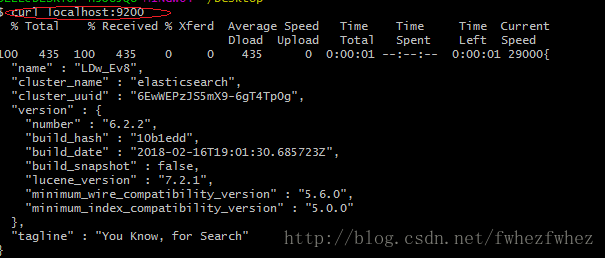
即表示服务已经健康开启.
8.之前已经了解了elastic的相关概念,我们知道index,type,id,document,fields再集群中的概念类比于数据库的database,table,id,row,column,所以对该服务的操作无外乎就是对这几个对象的增删改差.可以使用sense插件,chrom和360浏览器都支持
不过博主遇到了这样的问题

使用curl语句也会报格式错误,对sense不知道该怎么修改数据结构为application/json,所以就弃用了。
使用curl出现一样的问题,我是这样解决的,加了-H 块才能成功插入数据
需要注意的是,如果要有中文参数,必须安装分词器ik和smartcn都可以,怎么使用这里不介绍了,我也还不会,哈哈哈
curl -X PUT 'localhost:9200/accounts/person/1' -H 'Content-Type: application/json' -d '
{
"user" : "ft",
"title" : "eng",
"desc" : "program"
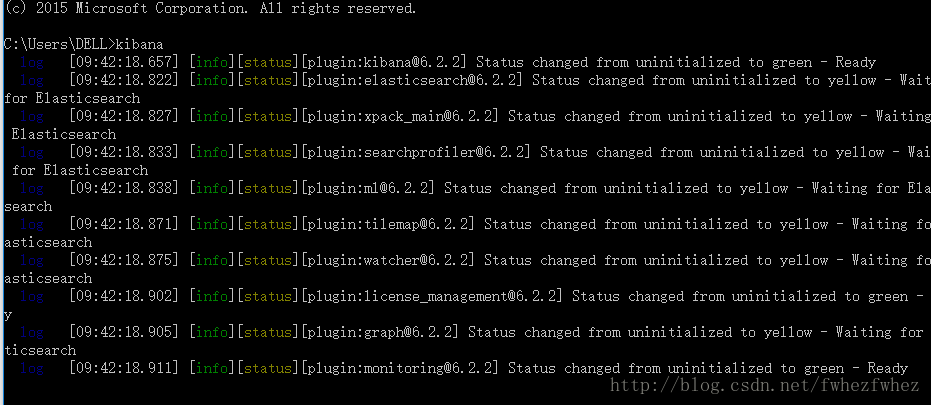
}'使用Kibana也挺方便的,有类似Sense的功能,下载kibana,配置路径bin到path,修改一下配置文件
运行之后再浏览器输入localhost:5601,界面是这样的:
类似Sense界面是这样的

这里就没有报数据格式的错误,鬼知道发生了什么。
这些执行语句都是DSL格式,具体怎么操作可以参考这里的博客
click me
然后下面介绍如何通过go程序,去进行操作,并附上详细的注解,我们的口号是,”中国的程序员,就要写中文的注释,哼哼!”
参考的东西再这里:
click me
使用的底层依赖是”github.com/olivere/elastic”,记得go get一下
详细使用可以看看他里面的readme,这个main.go也是修改了部分版本差异改出来适合6.x的并且注释中文化了。
觉得操作太少了,还想更秀,就看一下这里
click me
这部分的例子下次再做吧。
main.go
package main

import (
    "github.com/olivere/elastic"
    "fmt"
    "time"
    "context"
    "reflect"
    "encoding/json"
)

//json tag是序列化前后属性的匹配,加上omitempty的属性,可以不设置,不会提交,空值会按数据库/es默认处理,而不是go程的默认零值
type Tweet struct {
    User     string                `json:"user"`
    Message  string                `json:"message"`
    Retweets int                   `json:"retweets"`
    Image    string                `json:"image,omitempty"`
    Created  time.Time             `json:"created,omitempty"`
    Tags     []string              `json:"tags,omitempty"`
    Location string                `json:"location,omitempty"`
    Suggest  *elastic.SuggestField `json:"suggest_field,omitempty"`
}

const mapping = `
{
    "settings":{
        "number_of_shards": 1,
        "number_of_replicas": 0
    },
    "mappings":{
        "tweet":{
            "properties":{
                "user":{
                    "type":"keyword"
                },
                "message":{
                    "type":"text",
                    "store": true,
                    "fielddata": true
                },
                "image":{
                    "type":"keyword"
                },
                "created":{
                    "type":"date"
                },
                "tags":{
                    "type":"keyword"
                },
                "location":{
                    "type":"geo_point"
                },
                "suggest_field":{
                    "type":"completion"
                }
            }
        }
    }
}`

func main() {
    //创建一个空值的上下文,用于整合传递参数与适配运行状态
    ctx := context.Background()

    //通过NewClient创建的client会自动start,无须显式Start(),当然写了也无妨
    client, err := elastic.NewClient(
        /* 设置elastic服务实例ip
                * DefaultURL = "http://127.0.0.1:9200"
            */
        elastic.SetURL("http://127.0.0.1:9200"),

        /* 监视时使用的协议,默认是http
            * DefaultScheme = "http"
         */
        elastic.SetScheme("http"),

        //设置健康检查
        elastic.SetHealthcheck(true),
        elastic.SetHealthcheckTimeoutStartup(5*time.Second),
        elastic.SetHealthcheckTimeout(1*time.Second),
        elastic.SetHealthcheckInterval(60*time.Second),

        //设置嗅探监测
        elastic.SetSniff(true),
        elastic.SetSnifferInterval(15*time.Minute),
        elastic.SetSnifferTimeoutStartup(5*time.Second),
        elastic.SetSnifferTimeout(2*time.Second),
        //设置request方式
        elastic.SetSendGetBodyAs("GET"),
    )
    if err != nil {
        panic(err)
    }
    //1.client通过newclient创建默认开启,所以true
    //http://10.0.203.92:9200 [dead=false,failures=0,deadSince=<nil>],true
    fmt.Println(client.String(), client.IsRunning())

    //2.关开client
    client.Stop()
    //false
    fmt.Println(client.IsRunning())
    client.Start()
    //true
    fmt.Println(client.IsRunning())

    //3.Ping一下es服务
    info, code, err := client.Ping("http://127.0.0.1:9200").Do(ctx)
    if err != nil {
        panic(err)
    }
    //Elasticsearch returned with code 200 and version 6.2.2
    fmt.Printf("Elasticsearch returned with code %d and version %s\n", code, info.Version.Number)

    //4.获取es版本信息
    //可以直接curl localhost:9200 查看,也可以浏览器输入localhost:9200查看
    version, err := client.ElasticsearchVersion("http://127.0.0.1:9200")
    if err != nil {
        panic(err)
    }
    //Elasticsearch version 6.2.2
    fmt.Printf("Elasticsearch version %s\n", version)

    //5.创建index,等价于postgresql的database
    exists, err := client.IndexExists("ft_test_index_novels").Do(ctx)
    if err != nil {
        panic(err)
    }
    if !exists {

        /*
            createIndex是一个结构体IndicesCreateResult,结构类型是:
            type IndicesCreateResult struct {
                Acknowledged       bool   `json:"acknowledged"`
                ShardsAcknowledged bool   `json:"shards_acknowledged"`
                Index              string `json:"index,omitempty"`
            }
           事实上,如果你使用curl -X PUT 'localhost:9200/weather'
           返回的就是:{"acknowledged":true,"shards_acknowledged":true,"index":"weather"}
           值得关注的是,该Do()方法,是put一个新index的Do()方法,是*IndicesCreateService对象的Do()方法
           后面还有不少Do()方法,比如IndexService对象的Do(),要注意
         */
        createIndex, err := client.CreateIndex("ft_test_index_novels").BodyString(mapping).Do(ctx)
        if err != nil {
            panic(err)
        }
        if !createIndex.Acknowledged {
            fmt.Println("请求未被接收到")
        }
        fmt.Println(createIndex)
    } else {
        fmt.Println("已经存在ft_test_index_novels索引")
    }

    //6.index a struct tweet--存进一个json对象
    //官方的文档使用的index是twitter,这里要修改成自己想建的index比如我的就是"ft_test_index_novels",因为这里选用的是6.x版本
    //在es6.x版本,已经不允许一个index多个type了,twitter里内置了doc类型的Type,再添加一个tweet类型就会被拒绝
    //5.x以前还是可以使用twitter做测试的~~注意一下噢
    tweet1 := Tweet{User: "olivere", Message: "Take Five", Retweets: 0}
    /*put1是一个*IndexResponse,当执行PUT命令后,得到的响应体,结构如下
        type IndexResponse struct {
        Index         string      `json:"_index,omitempty"`
        Type          string      `json:"_type,omitempty"`
        Id            string      `json:"_id,omitempty"`
        Version       int64       `json:"_version,omitempty"`
        Result        string      `json:"result,omitempty"`
        Shards        *shardsInfo `json:"_shards,omitempty"`
        SeqNo         int64       `json:"_seq_no,omitempty"`
        PrimaryTerm   int64       `json:"_primary_term,omitempty"`
        Status        int         `json:"status,omitempty"`
        ForcedRefresh bool        `json:"forced_refresh,omitempty"`
    }
     */
    put1, err := client.Index(). //返回一个IndexService对象指针,不能跳过该行,因为Index()内容是创建一个*IndexService对象
        Index("ft_test_index_novels"). //返回一个设置了索引(数据库)名的IndexService指针,和上一个指针相同
        Type("tweet"). //继续设置类型(表),返回同一个IndexService对象指针
        Id("1"). //设置Id返回,*IndexService
        BodyJson(tweet1). //填充数据内容,这就是一个document *IndexService
        Do(ctx) //传递上下文对象,新建对象简述为IITIBD:I Imagine To Imitate Beautiful Duck
    //"我想着去模仿一只美丽的鸭子"
    if err != nil {
        panic(err)
    }
    fmt.Printf("Indexed tweet [%s] to index [%s], type [%s]\n", put1.Id, put1.Index, put1.Type)

    //再存一个
    //重复执行也会有效噢,事实上提交修改的命令也是用PUT
    tweet2 := `{"user" : "olivere", "message" : "It's a Raggy Waltz"}`
    put2, err := client.Index().
        Index("ft_test_index_novels").
        Type("tweet").
        Id("2").
        BodyString(tweet2).
        Do(ctx)
    if err != nil {
        panic(err)
    }
    //Indexed tweet [2] to index [ft_test_index_novels], type [tweet]
    fmt.Printf("Indexed tweet [%s] to index [%s], type [%s]\n", put2.Id, put2.Index, put2.Type)

    //7.获取到指定id对象,跟我念Image To Imitate --Index("ft_test_index_novels").Type("tweet").Id("1")
    get1, err := client.Get().Index("ft_test_index_novels").Type("tweet").Id("1").Do(ctx)
    if err != nil {
        panic(err)
    }
    if get1.Found {
        //Got document [1] in version [825741075640] from index [ft_test_index_novels], type [tweet]
        //每次执行的version都不一样,因为前面的操作实际上重复put就会修改值,每次修改,es都会内部修改版本号
        fmt.Printf("Got document [%s] in version [%d] from index [%s], type [%s]\n", get1.Id, get1.Version, get1.Index, get1.Type)
    }
    // Flush to make sure the documents got written.
    //返回的值是分片结构,有总数-成功数-失败数
    _, err = client.Flush().Index("ft_test_index_novels").Do(ctx)
    if err != nil {
        panic(err)
    }

    // 精准查询term query
    /*
        和之相对的的是match query,二者的区别在于是否经过分词。
        分词的概念有点类似前面struct的tag标签,即数据名和表名的匹配,分词前后的样式可能不一致
        如果用term query去查询,查什么就是什么
        使用match query去查询,会把查询内容分词一哈子,然后再找,请大家查阅一下es的增删改差DSL语言相关基础只是,再去查看
        参考:
        http://blog.csdn.net/lom9357bye/article/details/52852935
     */
    termQuery := elastic.NewTermQuery("user", "olivere")//termQuery关键字必须是keyword而不能是text,否则就会报:
                                                        //go type=search_phase_execution_exception异常,异常的原因和分词有关

    /*
       返回一个*SearchResult。
            type SearchResult struct {
            TookInMillis int64          `json:"took"`              // search time in milliseconds
            ScrollId     string         `json:"_scroll_id"`        // only used with Scroll and Scan operations
            Hits         *SearchHits    `json:"hits"`              // the actual search hits
            Suggest      SearchSuggest  `json:"suggest"`           // results from suggesters
            Aggregations Aggregations   `json:"aggregations"`      // results from aggregations
            TimedOut     bool           `json:"timed_out"`         // true if the search timed out
            Error        *ErrorDetails  `json:"error,omitempty"`   // only used in MultiGet
            Profile      *SearchProfile `json:"profile,omitempty"` // profiling results, if optional Profile API was active for this search
            Shards       *shardsInfo    `json:"_shards,omitempty"` // shard information
        }
     */
    searchResult, err := client.Search().
        Index("ft_test_index_novels").  // 指定index,返回一个*SearchService对象
        Query(termQuery).                     // 设置查询体,返回同一个*SearchService对象
        Sort("user", true).     // 按照user升序排列
        From(0).Size(10).            // 从第一条数据,找十条,即0-9
        Pretty(true).                   // 使查询request和返回的结果格式美观
        Do(ctx)                               // 返回一个*SearchResult
    if err != nil {
        panic(err)
    }
    //显示耗时:
    //Query took 13 milliseconds
    fmt.Printf("Query took [%d] milliseconds\n", searchResult.TookInMillis)

    //7.1使用Each()从查询结果中获取对象
    var tweet Tweet
    for _, value := range searchResult.Each(reflect.TypeOf(tweet)) {
        //类型断言,将value的值,强制转换为Tweet类型,再赋予t,如果转换失败,ok会为false
        if t, ok := value.(Tweet); ok {
            fmt.Printf("User:[%s] Message: [%s]\n", t.User, t.Message)
        }
    }
    // 查看匹配到多少组数据
    fmt.Printf("找到 [%d] 组tweets\n", searchResult.TotalHits())


    //7.2 全手工解码对象
    // Here's how you iterate through results with full control over each step.
    if searchResult.Hits.TotalHits > 0 {
        fmt.Printf("找到 [%d] 组tweets\n", searchResult.Hits.TotalHits)

        for _, hit := range searchResult.Hits.Hits {
            var t Tweet
            //Source是一个生的未被处理的[]bytes
            err := json.Unmarshal(*hit.Source, &t)
            if err != nil {
                panic(err)
            }

            fmt.Printf("User: [%s],Message: [%s]\n", t.User, t.Message)
        }
    } else {
        fmt.Print("没找到匹配结果")
    }

    // 8.更新局部片段
    update, err := client.Update().Index("ft_test_index_novels").Type("tweet").Id("1").
        Script(elastic.NewScriptInline("ctx._source.retweets += params.num").Lang("painless").Param("num", 1)).
        Upsert(map[string]interface{}{"retweets": 0}).
        Do(ctx)
    if err != nil {
        panic(err)
    }
    fmt.Printf("New version of tweet [%q] is now [%d]\n", update.Id, update.Version)

    //9.删除该数据库索引index
    deleteIndex, err := client.DeleteIndex("ft_test_index_novels").Do(ctx)
    if err != nil {
        panic(err)
    }
    if !deleteIndex.Acknowledged {
        fmt.Println("未收到请求")
    }else{
        fmt.Println("删除成功")
    }
}


 被折叠的 条评论
为什么被折叠?
被折叠的 条评论
为什么被折叠?
 到【灌水乐园】发言


