


Java集合之JDK1.7HashMap原理解析
数据结构
- 数组 + 链表(单向链表)
- 元素插入方式:采用头插法
HashMap成员变量
在Java常用的集合中,首屈一指的Map,Map作为名词被翻译为"地图",当然旗下有很多的子类等等,此篇文章主要学习与了解HashMap,我们经过查看猿码,不难发现拥有如下成员变量:
public class HashMap<K,V>
    extends AbstractMap<K,V>
    implements Map<K,V>, Cloneable, Serializable
{

    // 默认初始化容量 16
    static final int DEFAULT_INITIAL_CAPACITY = 1 << 4; // aka 16
    // 最大容量 2的30次方
    static final int MAXIMUM_CAPACITY = 1 << 30;
	// 默认加载因子 0.75
    static final float DEFAULT_LOAD_FACTOR = 0.75f;
	// 创建一个空数组
    static final Entry<?,?>[] EMPTY_TABLE = {};
	// 数组初始化空数组
    transient Entry<K,V>[] table = (Entry<K,V>[]) EMPTY_TABLE;
	// 用以统计当前map中元素的个数
    transient int size;

    /**
     * The next size value at which to resize (capacity * load factor).
     * @serial
     */
    // If table == EMPTY_TABLE then this is the initial capacity at which the
    // table will be created when inflated.
    int threshold;

    // The load factor for the hash table 加载因子
    final float loadFactor;

    // 统计元素被修改的次数 且 不支持并发操作,在多线程的情况下会报ConcurrentModificationException
    transient int modCount;
	// 默认映射阈值
    static final int ALTERNATIVE_HASHING_THRESHOLD_DEFAULT = Integer.MAX_VALUE;

    // hash种子
    transient int hashSeed = 0;
}
构造方法
无参构造
    public HashMap() {
    	// 使用无参构造方法时,使用 默认初始化容量和默认加载因子
        this(DEFAULT_INITIAL_CAPACITY, DEFAULT_LOAD_FACTOR);
    }
有参构造
    public HashMap(int initialCapacity) {
    	// 指定初始化容量 + 默认加载因子
        this(initialCapacity, DEFAULT_LOAD_FACTOR);
    }
	// 自定义初始化容量 + 自定义加载因子
    public HashMap(int initialCapacity, float loadFactor) {
        if (initialCapacity < 0)
            throw new IllegalArgumentException("Illegal initial capacity: " +
                                               initialCapacity);
        if (initialCapacity > MAXIMUM_CAPACITY)
            initialCapacity = MAXIMUM_CAPACITY;
        if (loadFactor <= 0 || Float.isNaN(loadFactor))
            throw new IllegalArgumentException("Illegal load factor: " +
                                               loadFactor);

        this.loadFactor = loadFactor;//加载因子
        threshold = initialCapacity; // 暂时初始化,后面会发现
        init();
    }
Put方法
/**
* Put方法:添加元素
*/
public V put(K key, V value) {
		// 当数组为空(空数组)时,则表示第一次添加元素
        if (table == EMPTY_TABLE) {
        	// 此处的threshold(即构造方法中的:threshold=initialCapacity)
            inflateTable(threshold);
        }
        // 如果key为空,则添加一个key=null的value,单独处理
        if (key == null)
            return putForNullKey(value);
        // 如果key不为空,则根据key获取hash值
        int hash = hash(key);
        // 根据hash值和数组长度,获取下标值i
        int i = indexFor(hash, table.length);
        // 取位置下标为i的数组元素
        for (Entry<K,V> e = table[i]; e != null; e = e.next) {
            Object k;
            // 若hash = e.hash且 k = e.key 且 键值 key == k
            if (e.hash == hash && ((k = e.key) == key || key.equals(k))) {
            	// 创建变量值oldValue 保存当前node节点的值,作为oldValue
                V oldValue = e.value;
                // 将当前节点的值指向最新的值
                e.value = value;
                e.recordAccess(this);
                // 返回oldValue值
                return oldValue;
            }
        }
		// +1
        modCount++;
        // 创建新节点node
        addEntry(hash, key, value, i);
        return null;
    }
inflateTable方法
private void inflateTable(int toSize) {
        // 初始化容量为 2^n >= toSize
        int capacity = roundUpToPowerOf2(toSize);
		// 数组扩容时的阈值=(capacity * loadFactor)
        threshold = (int) Math.min(capacity * loadFactor, MAXIMUM_CAPACITY + 1);
        // 初始化数组的大小
        table = new Entry[capacity];
        //
        initHashSeedAsNeeded(capacity);
    }
addEntry方法
void addEntry(int hash, K key, V value, int bucketIndex) {
		// 如果当前map的大小 大于或等于阈值threshold=(capacity * loadFactor) 且 当前下标bucketIndex不等于空时 进行扩容处理
        if ((size >= threshold) && (null != table[bucketIndex])) {
        	// 数组大小扩容为原来的2倍
            resize(2 * table.length);
            // 标识扩容后 再次hash
            hash = (null != key) ? hash(key) : 0;
            // 扩容后 获取最新下标值
            bucketIndex = indexFor(hash, table.length);
        }

        createEntry(hash, key, value, bucketIndex);
    }
resize方法
void resize(int newCapacity) {
		// 创建临时变量保存原数组大小 方便下边操作
        Entry[] oldTable = table;
        // 获取老数组的容量大小
        int oldCapacity = oldTable.length;
        if (oldCapacity == MAXIMUM_CAPACITY) {
            threshold = Integer.MAX_VALUE;
            return;
        }
		// 创建新数组 大小为newCapacity
        Entry[] newTable = new Entry[newCapacity];
        // 将原数组的值全部转移到新数组中
        transfer(newTable, initHashSeedAsNeeded(newCapacity));
        // 将当前table指向最新数组
        table = newTable;
        // 扩容阈值为: newCapacity * loadFactor
        threshold = (int)Math.min(newCapacity * loadFactor, MAXIMUM_CAPACITY + 1);
    }
transfer方法
/**
 *
 * @param newTable
 * @param rehash: 再次hash,由initHashSeedAsNeeded(newCapacity)决定
 */
void transfer(Entry[] newTable, boolean rehash) {
		// 保存新数组的容量长度
        int newCapacity = newTable.length;
        for (Entry<K,V> e : table) {
            while(null != e) {// 当前节点e不为空
            	// 保存下一个节点 next
                Entry<K,V> next = e.next;
                if (rehash) {
                // 如果rehash为true,则需要进行再次hash
                    e.hash = null == e.key ? 0 : hash(e.key);
                }
                // 获取新数组的下标i
                int i = indexFor(e.hash, newCapacity);
                // 将e的next指向新数组i
                e.next = newTable[i];
                // 将下标为i的位置赋值为e
                newTable[i] = e;
                // 将节点e指向原来保存的next节点
                e = next;
            }
        }
    }
createEntry方法(采用头插法)
 void createEntry(int hash, K key, V value, int bucketIndex) {
 		// 创建一个entry指向下标为bucketIndex的节点
        Entry<K,V> e = table[bucketIndex];
        // table[bucketIndex]完成赋值操作
        table[bucketIndex] = new Entry<>(hash, key, value, e);
        // 大小+1
        size++;
    }
Get方法
    public V get(Object key) {
    	// 如果key为null 则根据null值key获取最新的value
        if (key == null)
            return getForNullKey();
         // key不为空 ,则获取entry节点
        Entry<K,V> entry = getEntry(key);
		// 返回value(如果entry为空,则value为null,反之value = entry.getValue())
        return null == entry ? null : entry.getValue();
    }
getEntry方法
final Entry<K,V> getEntry(Object key) {
        if (size == 0) {
        	// 因为size每添加一个元素之后会+1,因此若size为空,则元素为空,默认返回null
            return null;
        }
		// 如果key为空时 hash=0,反之根据key获取hash值
        int hash = (key == null) ? 0 : hash(key);
        // index i = indexFor(hash, table.length) 先获取下标值i
        // 然后再从table中获取元素e,如果e不为空时,则需要遍历节点e以及next节点
        for (Entry<K,V> e = table[indexFor(hash, table.length)];
             e != null;
             e = e.next) {
            Object k;
            // hash值相等且 key相等 或 (请求Key不为空且请求key值等于节点e的key)
            if (e.hash == hash &&
                ((k = e.key) == key || (key != null && key.equals(k))))
                // 返回节点e
                return e;
        }
        // 没有找到对应的KEY值,默认返回null
        return null;
    }
modCount参数
代码执行逻辑
/**
 * @author Mr.Gao
 * @date 2023/1/3 11:00
 * @apiNote: 开启两个线程来操作hashMap,一边put插入数据一边remove数据
 *           对于单线程的hashmap是不会存在并发修改异常的
 */
public class HashMapTest {
    public static void main(String[] args) {
        final Map<String, Object> hashMap = new HashMap<>(10);
        new Thread(new Runnable() {
            @Override
            public void run() {
                hashMap.put("A", "1");
                hashMap.put("A1", "11");
                hashMap.put("A2", "12");
            }
        }).start();

        new Thread(new Runnable() {
            @Override
            public void run() {
                hashMap.put("B", "2");
                hashMap.put("B1", "21");
                hashMap.put("B2", "22");
            }
        }).start();

        for (String key : hashMap.keySet()) {
            if (key.equals("A")) {
                hashMap.remove("A");
            }
        }
    }
}
报异常ConcurrentModificationException

原因:因为hashMap中内嵌的迭代器Iterator,实际上调用的是迭代器重写的remove方法,从注释中可以发现为了快速失败,关键代码如下:
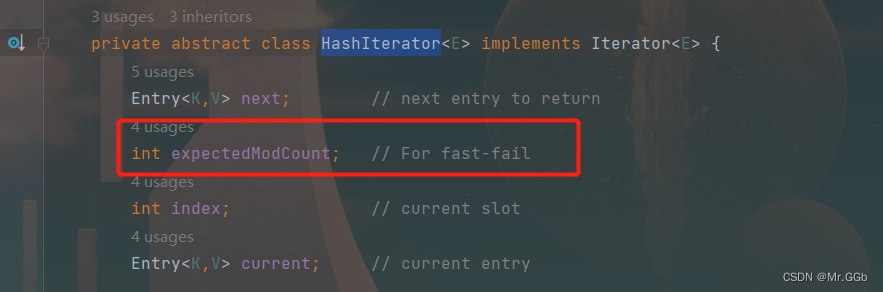
final Entry<K,V> nextEntry() {
			// 如果modCount和期望的expectedModCount,则报出ConcurrentModificationException异常
            if (modCount != expectedModCount)
                throw new ConcurrentModificationException();
            Entry<K,V> e = next;
            if (e == null)
                throw new NoSuchElementException();

            if ((next = e.next) == null) {
                Entry[] t = table;
                while (index < t.length && (next = t[index++]) == null)
                    ;
            }
            current = e;
            return e;
        }

        public void remove() {
            if (current == null)
                throw new IllegalStateException();
            if (modCount != expectedModCount)
                throw new ConcurrentModificationException();
            Object k = current.key;
            current = null;
            HashMap.this.removeEntryForKey(k);
            expectedModCount = modCount;
        }
问题小结
观察到此处可以发现java的1.7HashMap的一些问题:
- 1、不安全,Put方法和Get方法均为普通方法,任意一个线程均可操作map,
- 2、本身不支持多个线程操作执行一边foreach一边remove移除,否则会报并发修改异常ConcurrentModificationException。
- 3、经过阅读可以发现,元素插入时采用头插法,而采用头插法问题如下:
- 在put元素时,如果此时触发扩容,则在转移元素的时候顺序发生改变
- 在单线程情况下,put元素且触发扩容,是没有问题的
- 在多线程情况下,put元素且触发扩容,存在问题,由单向链表变更为环形链表(死循环)导致CPU飙升。


 566
566


 被折叠的 条评论
为什么被折叠?
被折叠的 条评论
为什么被折叠?
 到【灌水乐园】发言


