


步骤:
1、源码编译
clang需要用CMake和Ninja来编译,可以通过Homebrew安装
- 安装brew。官网:https://brew.sh/
/usr/bin/ruby -e "$(curl -fsSL https://raw.githubusercontent.com/Homebrew/install/master/install)"- 安装cmake和ninja
$ brew install cmake$ brew install ninja- ninja如果安装失败,可以直接从github获取release版放入【/usr/local/bin】中。官网:https://github.com/ninja-build/ninja/releases
2、源码下载
- 下载llvm;大小 648.2 M,仅供参考
$ git clone https://git.llvm.org/git/llvm.git/- 下载clang。注意要在刚下载的llvm文件夹下的tools下
$ cd llvm/tools
$ git clone https://git.llvm.org/git/clang.git/
3、源码编译
- 使用ninja 编译
1、在LLVM源码同级目录下新建一个【llvm_build】目录(最终会在【llvm_build】目录下生成【build.ninja】
$ cd llvm_build
$ cmake -G Ninja ../llvm -DCMAKE_INSTALL_PREFIX=../llvm_release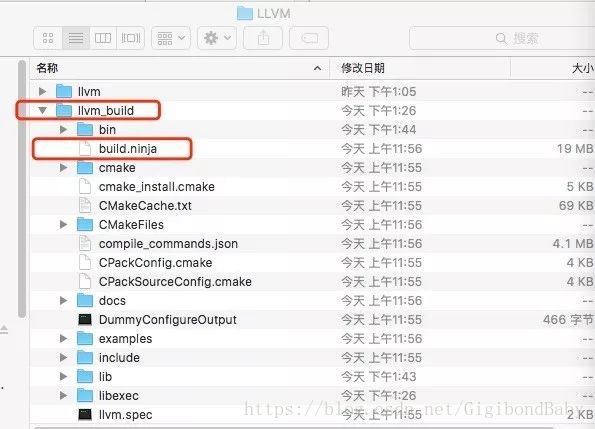
2、依次执行编译、安装指令。编译完毕后, 【llvm_build】目录大概 21.05 G(仅供参考),安装完毕后,安装目录大概 11.92 G(仅供参考)
$ ninja
$ ninja install
在llvm同级目录下新建一个【llvm_xcode】目录
- 使用Xcode编译
$ cd llvm_xcode
$ cmake -G Xcode ../llvm
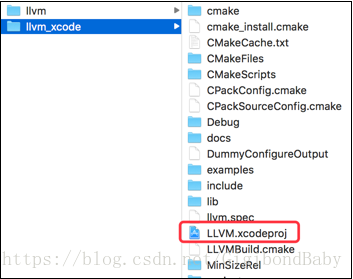
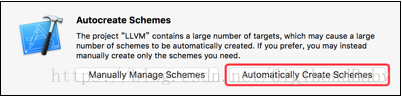
在 llvm_Xcode 目录下打开 LLVM.xcodeproj 文件,选择自动创建 Schemes:
选择 ALL_BUILD,来编译,大概要一个小时以上
4、编写插件
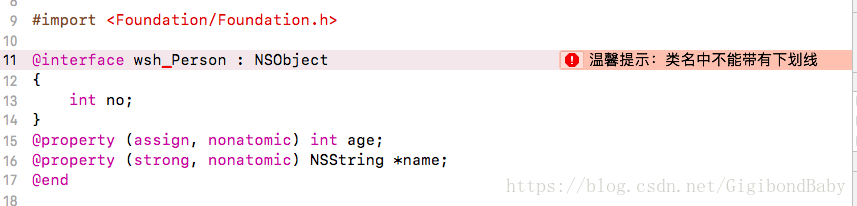
这个插件实现的功能是检测类中的声明规范,如果有下划线就报错并提示警告信息
1、在llvm/tools/clang/tools源码目录下新建一个插件目录,我取名叫做wsh_plugin。如图所示
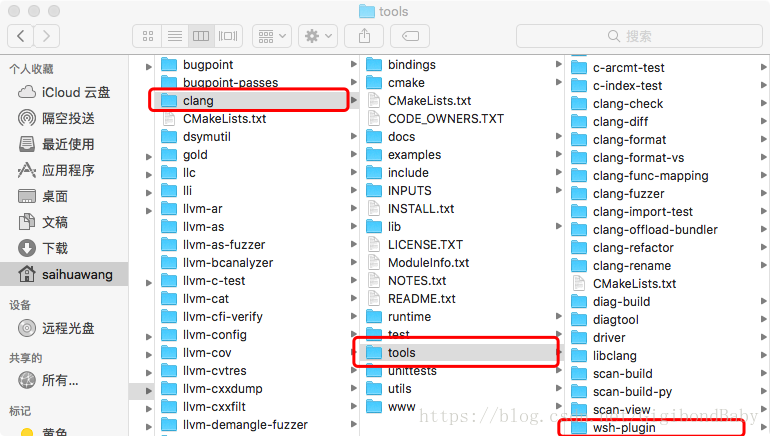
2、修改如下图所示的CMakeLists.txt文件,在最后一行添加add_clang_subdirectory(wsh-plugin)
3、在wsh-plugin文件夹中添加WSHPlugin.cpp,用于编写插件代码
4、在wsh-plugin文件夹中添加CMakeLists.txt文件,并添加内容add_llvm_loadable_module(WSHPlugin WSHPlugin.cpp),如下图所示。

5、在WSHPlugin.cpp中编写如下代码
#include <iostream>
#include "clang/AST/AST.h"
#include "clang/AST/ASTConsumer.h"
#include "clang/ASTMatchers/ASTMatchers.h"
#include "clang/ASTMatchers/ASTMatchFinder.h"
#include "clang/Frontend/CompilerInstance.h"
#include "clang/Frontend/FrontendPluginRegistry.h"

using namespace clang;
using namespace std;
using namespace llvm;
using namespace clang::ast_matchers;

namespace WSHPlugin {
    class MJHandler : public MatchFinder::MatchCallback {
    private:
        CompilerInstance &ci;

    public:
        MJHandler(CompilerInstance &ci) :ci(ci) {}

        void run(const MatchFinder::MatchResult &Result) {
            if (const ObjCInterfaceDecl *decl = Result.Nodes.getNodeAs<ObjCInterfaceDecl>("ObjCInterfaceDecl")) {
                size_t pos = decl->getName().find('_');
                if (pos != StringRef::npos) {
                    DiagnosticsEngine &D = ci.getDiagnostics();
                    SourceLocation loc = decl->getLocation().getLocWithOffset(pos);
                    D.Report(loc, D.getCustomDiagID(DiagnosticsEngine::Error, "温馨提示:类名中不能带有下划线"));
                }
            }
        }
    };

    class MJASTConsumer: public ASTConsumer {
    private:
        MatchFinder matcher;
        MJHandler handler;

    public:
        MJASTConsumer(CompilerInstance &ci) :handler(ci) {
            matcher.addMatcher(objcInterfaceDecl().bind("ObjCInterfaceDecl"), &handler);
        }

        void HandleTranslationUnit(ASTContext &context) {
            matcher.matchAST(context);
        }
    };

    class MJASTAction: public PluginASTAction {
    public:
        unique_ptr<ASTConsumer> CreateASTConsumer(CompilerInstance &ci, StringRef iFile) {
            return unique_ptr<MJASTConsumer> (new MJASTConsumer(ci));
        }

        bool ParseArgs(const CompilerInstance &ci, const vector<string> &args) {
            return true;
        }
    };
}

static FrontendPluginRegistry::Add<WSHPlugin::MJASTAction>
X("WSHPlugin", "The WSHPlugin is my first clang-plugin.");
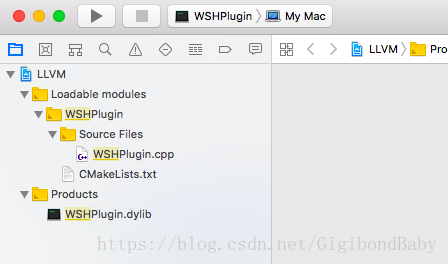
6、编写完代码后,重新输入一下命令
cmake -G Xcode ../llvm然后选择WSHPlugin这个target进行编译。编译完之后会在product中生成一个动态库文件“WSHPlugin.dylib”。如图所示
5、加载插件
1、hack Xcode首先要对Xcode进行Hack,才能修改默认的编译器
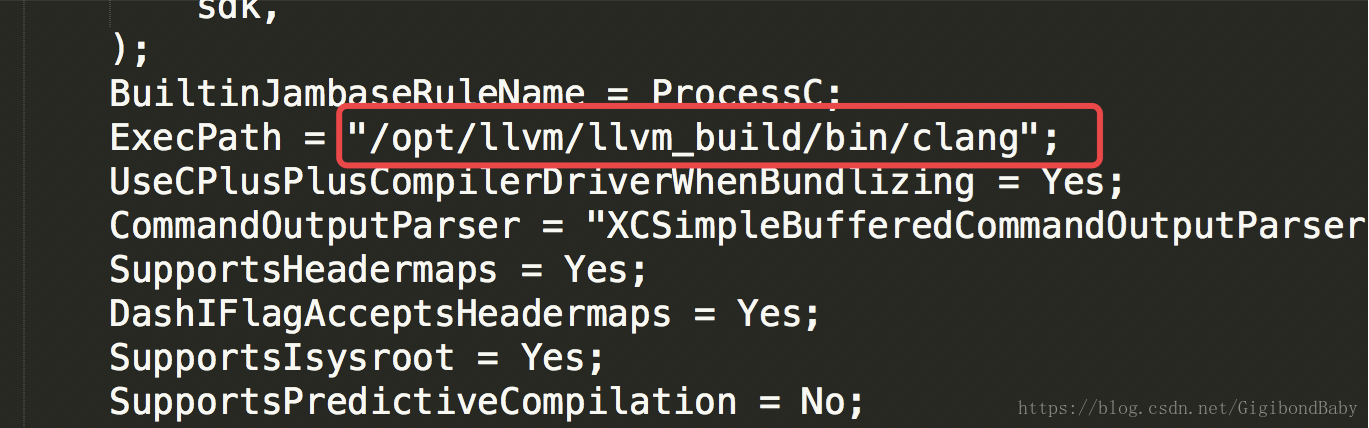
下载【XcodeHacking.zip】,解压,修改【HackedClang.xcplugin/Contents/Resources/HackedClang.xcspec】的内容,设
置一下自己编译好的clang的路径
然后在XcodeHacking目录下进行以下命令行,将XcodeHacking的内容剪切到Xcode内部
$ sudo mv HackedClang.xcplugin `xcode-select -print-
path`/../PlugIns/Xcode3Core.ideplugin/Contents/SharedSupport/Developer/Library/Xcode/Plug-ins


$ sudo mv HackedBuildSystem.xcspec `xcode-select -print- path`/Platforms/iPhoneSimulator.platform/Developer/Library/Xcode/Specifications
执行完以上操作后,重启Xcode
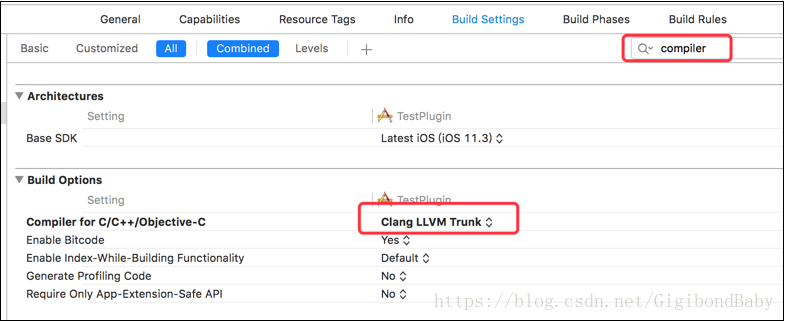
2、点击 Target 的 Build Settings,修改 Compiler for C/C++/Objective-C 项为 Clang LLVM Trunk
3、在Xcode项目中指定加载插件动态库:Build Settings > OTHER_CFLAGS,下图标记地方按自己需求修改
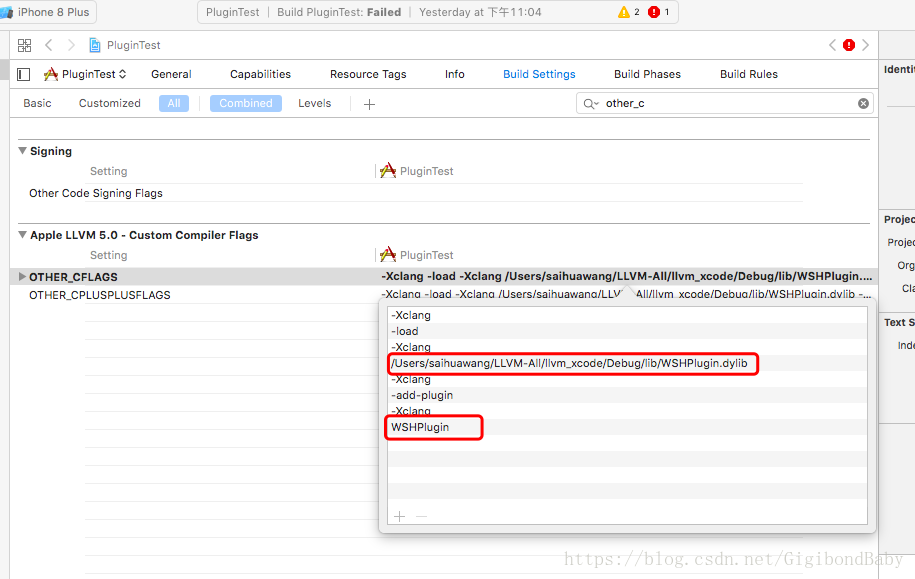
以上操作结束后编译就会得到文章开头的图所示效果。
6、总结
在第5部hackXcode的时候路径要注意是编译之后product下的clang路径,如果写错路径并已经替换了原来Xcode的HackedClang.xcplugin文件,可以通过前往“/Applications/Xcode.app/Contents/PlugIns/Xcode3Core.ideplugin/Contents/SharedSupport/Developer/Library/Xcode/Plug-ins/HackedClang.xcplugin”这个路径去重新替换。


 2875
2875


 被折叠的 条评论
为什么被折叠?
被折叠的 条评论
为什么被折叠?
 到【灌水乐园】发言


