There are three methods to generate model information in IDA.
A. Export the model in IDA for Power Design or Erwin, then work them in them.
B. Rename .ldm file to .xml, then work on it as a XML (XMI) file format, you can use XML editor such as Stylus Studio with XSLT.
C. Generate model information with BIRT report as below:
You can use the reporting feature to generate reports to help you analyze a data model or package. You control the contents of the report, and can choose the file format.
You can use the reporting feature to create report designs, but you can generate a report without knowing how to design them. For information about designing reports, see the topic "Customizing data model BIRT reports."
·
Generating model information reports with BIRT report designs
You generate BIRT-based data model reports by creating and running report launch configurations that specify a BIRT report design.
You generate BIRT-based data model reports by creating and running report launch configurations that specify a BIRT report design.
To create and run a report launch configuration based on a BIRT report design:
1. In the Data perspective, click Run > Report > Report Configurations.
2. In the Report window, right-click the type of report to launch; then click New.
3. In the Name field, type a name for the new launch configuration.
4. Specify the report to use:
§ To use a report that is provided with your IBM® product, select Built-In and click Browse to specify the name of the report.
§ To use a report from another source, select Location and click Workspace or File System to specify the location and report file name.
When you select a report, the Data Sources field lists the data sources that are specified in the report. When you click a data source in the Data Sources field, the Instance Models field lists the associated instance models.
5. To add a data source or instance model to include in the report, click in the Data Sources field or Instance Models field and click Add. To remove a data source or instance model, select it and click Remove.
6. Define how to handle the report output:
§ Specify a location for the report output.
§ Select the report format. The available values are Microsoft Word (DOC), WWW hypertext (HTML), Adobe Reader (PDF),Postscript (PS), Microsoft PowerPoint (PPT), and Microsoft Excel (XLS). The Microsoft® Word format is compatible with Microsoft Word 2003 and later.
§ Select whether to overwrite existing files in the report location without a warning.
7. To specify how to save, display, and launch the report configuration, click the Common tab. Note that you can save the report configuration as a shared file with launch as the file name extension.
8. To generate the report, click Report.
When the publishing process is complete, the report is displayed automatically if the appropriate program is available on your computer.
You can access the report directly from the location that you specified for the report output.
Ref.: Customizing data model BIRT reports
Several Business Intelligence and Reporting Tools (BIRT) data model report design templates are available in this product. These templates provide data sources and data sets for different types of data models. The data sets organize elements from the data sources into tables that BIRT can use. You can customize these default template designs to meet your business needs.
Your IBM® product extends the BIRT component so that the BIRT user interface and capabilities are available to you.
To customize an existing BIRT report design template, you modify it in the BIRT report designer. For more detailed information, refer to the following technote: Obtaining and using data model information to customize a BIRT report design.
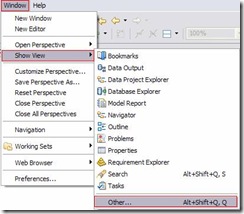
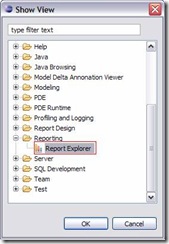
- Open the Report Explorer view by clicking Window > Show view > Other, expanding the Reporting node, and selecting Report Explorer. Several categories of data model report projects are displayed.
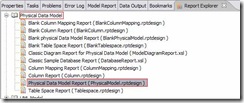
- Expand a data model report category.
- Create a copy of the built-in report to modify it. BIRT report designs have RPTDESIGN as the file name extension
- Modify the design as needed. For more detailed information, refer to the following technote: Obtaining and using data model information to customize a BIRT report design. You can also refer to the BIRT documentation, which is available in this product from the Help > Help Contents menu, or from the link below.
Ref.:Obtaining and using data model information to customize a BIRT report design
Technote (FAQ)
Question
How can users obtain the data model information that they need to customize their BIRT report designs?
Answer
Table of Contents
=============================================================
How to obtain alias information for your BIRT report design. 1
How to obtain primary key information for your BIRT report design. 13
How to obtain a column which has primary key as a true/false value. 23
How to obtain alias information for your BIRT report design
This document will guide you through the process of how to add alias information to a BIRT report design.
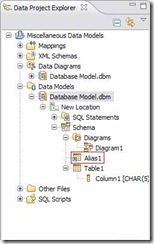
1. Ensure that there is at least one alias in the physical model.
2. Click on Window > Show View > Other.
3. Expand the Reporting node and double-click Report Explorer to open the view.
4. Double-click Physical Data Model Report to open its report design.
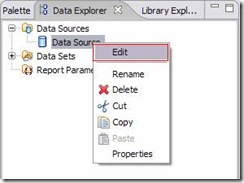
5. In the Data Explorer, expand the Data Sources node, right-click the Data Source node and select Edit to edit the data source.
6. Click the Add button to add a data source.
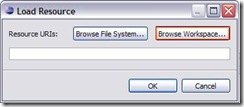
7. Click Browse Workspace to add an existing model as a data source.
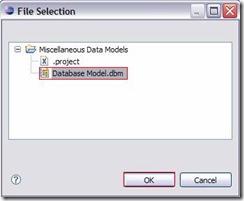
8. Expand the Miscellaneous Data Models node, highlight Database Model.dbm and click OK. In the Load Resource window, click OK again.
9. You should see the data model in the list of EMF data instances. Click OK.
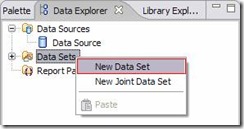
10. Right-click the Data Sets node and select New Data Set to create a new data set.
11. Enter Alias in the Data Set Name and click Next.
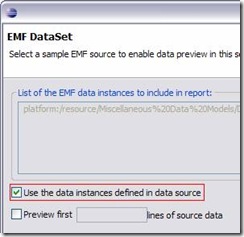
12. Ensure that the Use the data instances defined in data source check box is selected, and click Next.
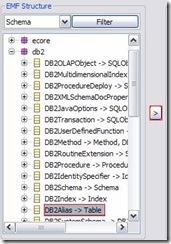
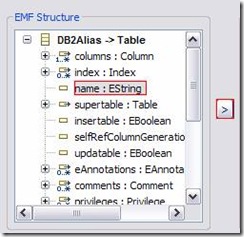
13. Expand the db2 node, highlight the DB2Alias > Table node and click the right arrow (>) button.
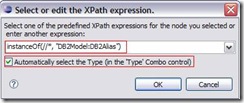
14. Enter instanceOf(//*, “DB2Model:DB2Alias”) as the XPath expression to select all aliases. Ensure that the Automatically select the Type (in the 'Type' Combo control) check box is selected, and click OK.
NOTE: Please enter the XPath manually.
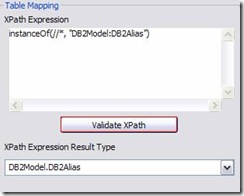
15. Click Validate XPath to ensure that the XPath expression is valid. Click Next.
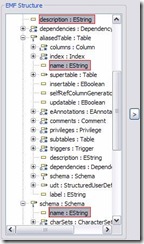
16. Highlight the name:EString node in the EMF Structure tree and click the right arrow (>) button.
17. Enter Name in the Column Name field and click OK.
18. Click the Preview button and the name of the aliases in the model should appear.
19. Repeat step 16 and 17 to add description, aliased table name, schema name and label one at a time.
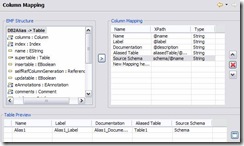
20. The Column Mapping view should now look like this. Click OK to exit the wizard.
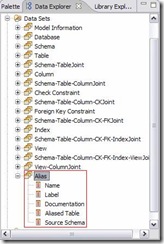
21. In the Data Explorer view, Alias data set fields should appear under the Data Sets node.
22. Drag and drop the Alias Name onto the report design.
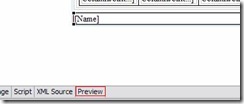
23. Click the Preview tab to preview the report.
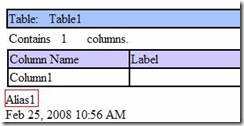
24. At the bottom of the report, the name of the alias should be displayed.
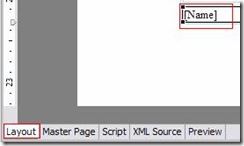
25. Click the Layout tab to go back to the layout view. Highlight the alias name and delete it.
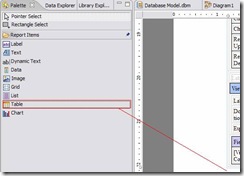
26. Drag and drop a Table object from the Palette view onto the end of the report design. Enter 5 when prompted for the number of columns.
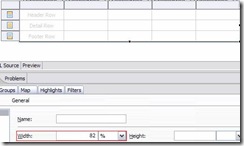
27. With the table highlighted, change the width to 82%. Any width bigger than 82% will be cutoff in the print out.
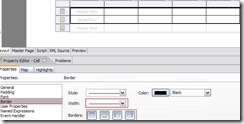
28. Highlight the first two rows of the table by holding the Shift key and left mouse click on the cells of the first two rows. Click the Border node in the Properties view. Change the width and click on all four buttons for borders.
29. Drag and drop the fields onto the second row of the table one at a time.
30. The table should now look like this:
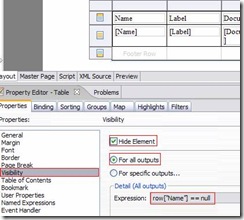
31. With the table highlighted, click the Visibility tab in the Properties area and enter the information as shown below. This step makes the table invisible if there is no alias in the report design.
How to obtain primary key information for your BIRT report design.
This section will guide you through the process of how to primary key information to a BIRT report design.
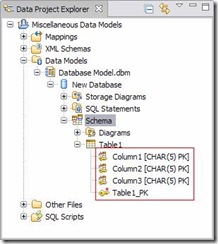
1. First ensure that there is a primary key in the data model. In the example below, the primary key owns three columns.
2. Click Window > Show View > Other.
3. Expand the Reporting node and double-click Report Explorer to open the view.
4. Double-click Physical Data Model Report to open its report design.
5. In the Data Explorer, expand the Data Sources node, right-click the Data Source node and select Edit.
6. Click the Add button to add a data source.
7. Click Browse Workspace to browse to and add an existing model as a data source.
8. Expand the Miscellaneous Data Models node, highlight Database Model.dbm and click OK. In the Load Resource window, click OK again.
9. You should see the data model in the list of EMF data instances. Click OK.
10. Right-click the Data Sets node and select New Data Set to create a new data set.
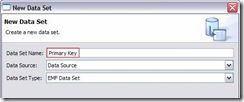
11. Enter Primary Key in the Data Set Name field, and click Next.
12. Ensure that the Use the data instances defined in data source check box is selected, and click Next.
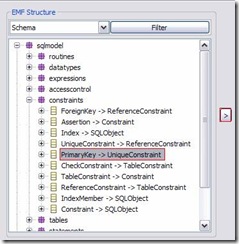
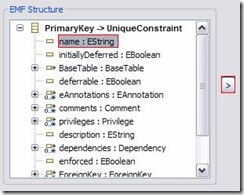
13. In the Table mapping view, expand the sqlmodel node and the constraints node, highlight PrimaryKey > UniqueConstraint and click the right arrow (>) button.
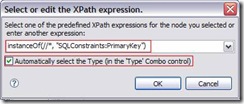
14. Enter instanceOf(//*, “SQLConstraints:PrimaryKey”) as the XPath expression to select all primary keys. Ensure that the Automatically select the Type (in the 'Type' Combo control) check box is selected, and click OK.
NOTE: Enter the XPath statement manually.
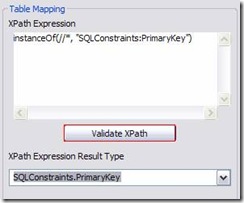
15. Click Validate XPath to verify that the XPath expression is valid, then click Next.
16. In the Column mapping view, highlight name:EString and click the right arrow (>) button.
17. Enter Name in the Column Name field and click OK.
18. Click the Preview button and the name of the primary key in the model should appear in the Table Preview grid. Click Finish and OK to exit the wizard.
19. Repeat step 10 and 11, entering Primary Key Column as the name this time, then repeat step 12.
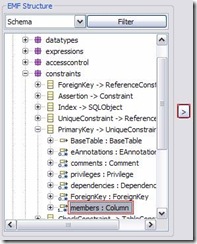
20. In the Table mapping view, expand the sqlmodel node, the constraints node, and the PrimaryKey > UniqueConstraint node. Highlight members : Column and click the right arrow (>) button.
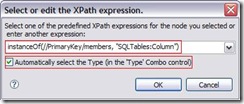
21. Enter instanceOf(//PrimaryKey/members, “SQLTables:Column”) as the XPath expression to select all primary key columns. Ensure that the Automatically select the Type (in the 'Type' Combo control) check box is selected, and click OK.
NOTE: Enter the XPath statement manually.
22. Click Validate XPath to verify that the XPath expression is valid, then click Next.
23. In the Column mapping view, highlight name:EString and click the right arrow (>) button.
24. Enter Name in the Column Name field and click OK.
25. Click the Preview button, and the name of the primary key in the model should appear in the Table Preview grid. Click Finish and OK to exit the wizard.
26. Now you have two new data sets that represent the primary key and the primary key columns, respectively.
How to obtain a column which has primary key as a true/false value.
This section guides you through the process of adding primary key information to a BIRT report design.
1. Ensure that there is a primary key in the data model. In this example, the primary key owns three columns.
2. Click Window > Show View > Other.
3. Expand the Reporting node and double-click Report Explorer to open the view.
4. Double-click Physical Data Model Report to open the report design.
5. In the Data Explorer, expand the Data Sources node, right-click Data Source and select Edit .
6. Click the Add button to add a data source.
7. Click Browse Workspace to add an existing model as a data source.
8. Expand the Miscellaneous Data Models node, highlight Database Model.dbm and click OK. In the Load Resource window, click OK again.
9. The data model should appear in the list of EMF data instances. Click OK.
10. Right-click the Data Sets node and select New Data Set.
11. Enter Primary Key in the Data Set Name field, and click Next.
12. Ensure that the Use the data instances defined in data source check box is selected, and click Next.
13. In the Table mapping view, expand the sqlmodel node and the constraints node. Highlight PrimaryKey > UniqueConstraint and click the right arrow (>) button.
14. Enter instanceOf(//*, “SQLConstraints:PrimaryKey”) as the XPath expression to select all primary keys. Ensure that the Automatically select the Type (in the 'Type' Combo control) check box is selected, and click OK.
NOTE: Enter the XPath statement manually.
15. Click Validate XPath to verify that the XPath expression is valid, and click Next.
16. In the Column mapping view, highlight name:EString and click the right arrow (>) button.
17. Enter Name in the Column Name field, and click OK.
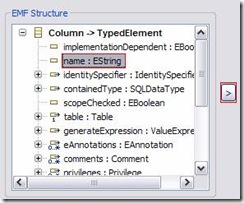
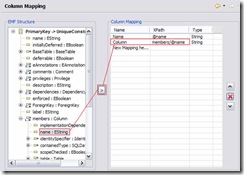
18. Expand the members node, highlight name:EString, and click the right arrow (>) button. Enter Column in the the Name cell and click OK.
19. Click the Preview button and the name of the primary key and the column that has the primary key constraint should appear. Click Finish and OK to exit the wizard.
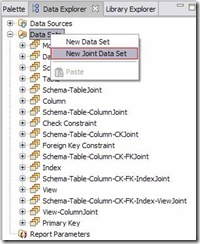
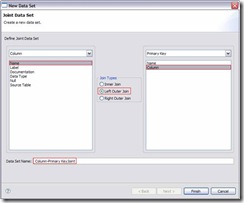
20. Right-click the Data Sets node and select New Joint Data Set.
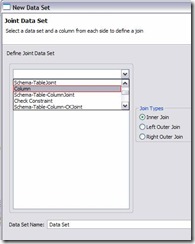
21. Select Column in the Define Joint Data Set list. This wil be the first data set.
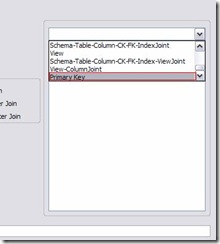
22. Select Primary Key from the list as the second data set.
23. Select Name for the Column data set and select Column for the Primary Key data set to join them. Select Left Outer Join as the join type. Enter Column-Primary KeyJoint in the Data Set Name field, and click Finish.
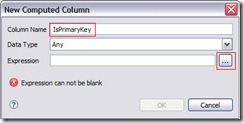
24. Select the Computed Columns node and click New.
25. Enter IsPrimaryKey in the Column Name field, and click the ellipsis […] button.
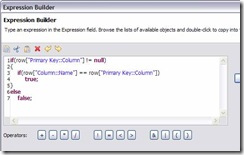
26. Enter a script as shown in the screen shot. Click OK, and click OK again.
27. Click the Preview Results tab. The columns and their corresponding isPrimaryKey value should appear.
Copyright and trademark information
IBM, the IBM logo and ibm.com are trademarks of International Business Machines Corp., registered in many jurisdictions worldwide. Other product and service names might be trademarks of IBM or other companies. A current list of IBM trademarks is available on the Web at "Copyright and trademark information" at www.ibm.com/legal/copytrade.shtml.
·
You generate XSLT-based model reports by creating and running report launch configurations that specify an XSLT report template.
You generate XSLT-based model reports by creating and running report launch configurations that specify an XSLT report template.
Before you can generate a report with an XSLT template other than the built-in templates, you must register the template.
To create and run a data model report launch configuration based on XSLT report templates:
- Click Run > Report > Report Configurations.
- In the Report window, right-click Data Model Classic XSLT Report; then click New.
- In the Name field, type a name for the new launch configuration.
- In the Report Input field, specify a data model file in the Location field, and a data model element in the Element field.
- Specify the report to use:
- To use a report that is provided with your IBM® product, select Built-In and click Browse to specify the name of the report.
Ensure that the type of built in report that you select matches the type of data model that you selected in the Location field.
- To use a report from another source, select Location and click Workspace or File System to specify the location and report file name.
- Specify a location for the report output.
- To specify information about how to save, display, and launch the report configuration, click the Common tab. Note that you can save the report configuration as a shared file with launch as the file name extension.
- To generate the report, click Report.
When the publishing process is complete, the report is displayed automatically if the appropriate program is available on your computer.
You can access the report directly from the location that you specified for the report output.









![clip_image004[1] clip_image004[1]](https://p-blog.csdn.net/images/p_blog_csdn_net/gigle/516729/o_clip_image004%5B1%5D_thumb.jpg)
![clip_image005[1] clip_image005[1]](https://p-blog.csdn.net/images/p_blog_csdn_net/gigle/516729/o_clip_image005%5B1%5D_thumb.jpg)
![clip_image006[1] clip_image006[1]](https://p-blog.csdn.net/images/p_blog_csdn_net/gigle/516729/o_clip_image006%5B1%5D_thumb.jpg)
![clip_image007[1] clip_image007[1]](https://p-blog.csdn.net/images/p_blog_csdn_net/gigle/516729/o_clip_image007%5B1%5D_thumb.jpg)
![clip_image008[1] clip_image008[1]](https://p-blog.csdn.net/images/p_blog_csdn_net/gigle/516729/o_clip_image008%5B1%5D_thumb.jpg)
![clip_image009[1] clip_image009[1]](https://p-blog.csdn.net/images/p_blog_csdn_net/gigle/516729/o_clip_image009%5B1%5D_thumb.jpg)
![clip_image010[1] clip_image010[1]](https://p-blog.csdn.net/images/p_blog_csdn_net/gigle/516729/o_clip_image010%5B1%5D_thumb.jpg)
![clip_image011[1] clip_image011[1]](https://p-blog.csdn.net/images/p_blog_csdn_net/gigle/516729/o_clip_image011%5B1%5D_thumb.jpg)
![clip_image012[1] clip_image012[1]](https://p-blog.csdn.net/images/p_blog_csdn_net/gigle/516729/o_clip_image012%5B1%5D_thumb.jpg)
![clip_image014[1] clip_image014[1]](https://p-blog.csdn.net/images/p_blog_csdn_net/gigle/516729/o_clip_image014%5B1%5D_thumb.jpg)
![clip_image019[1] clip_image019[1]](https://p-blog.csdn.net/images/p_blog_csdn_net/gigle/516729/o_clip_image019%5B1%5D_thumb.jpg)

![clip_image019[2] clip_image019[2]](https://p-blog.csdn.net/images/p_blog_csdn_net/gigle/516729/o_clip_image019%5B2%5D_thumb.jpg)
![clip_image034[1] clip_image034[1]](https://p-blog.csdn.net/images/p_blog_csdn_net/gigle/516729/o_clip_image034%5B1%5D_thumb.jpg)
![clip_image004[2] clip_image004[2]](https://p-blog.csdn.net/images/p_blog_csdn_net/gigle/516729/o_clip_image004%5B2%5D_thumb.jpg)
![clip_image005[2] clip_image005[2]](https://p-blog.csdn.net/images/p_blog_csdn_net/gigle/516729/o_clip_image005%5B2%5D_thumb.jpg)
![clip_image006[2] clip_image006[2]](https://p-blog.csdn.net/images/p_blog_csdn_net/gigle/516729/o_clip_image006%5B2%5D_thumb.jpg)
![clip_image007[2] clip_image007[2]](https://p-blog.csdn.net/images/p_blog_csdn_net/gigle/516729/o_clip_image007%5B2%5D_thumb.jpg)
![clip_image008[2] clip_image008[2]](https://p-blog.csdn.net/images/p_blog_csdn_net/gigle/516729/o_clip_image008%5B2%5D_thumb.jpg)
![clip_image009[2] clip_image009[2]](https://p-blog.csdn.net/images/p_blog_csdn_net/gigle/516729/o_clip_image009%5B2%5D_thumb.jpg)
![clip_image010[2] clip_image010[2]](https://p-blog.csdn.net/images/p_blog_csdn_net/gigle/516729/o_clip_image010%5B2%5D_thumb.jpg)
![clip_image011[2] clip_image011[2]](https://p-blog.csdn.net/images/p_blog_csdn_net/gigle/516729/o_clip_image011%5B2%5D_thumb.jpg)
![clip_image012[2] clip_image012[2]](https://p-blog.csdn.net/images/p_blog_csdn_net/gigle/516729/o_clip_image012%5B2%5D_thumb.jpg)
![clip_image035[1] clip_image035[1]](https://p-blog.csdn.net/images/p_blog_csdn_net/gigle/516729/o_clip_image035%5B1%5D_thumb.jpg)
![clip_image014[2] clip_image014[2]](https://p-blog.csdn.net/images/p_blog_csdn_net/gigle/516729/o_clip_image014%5B2%5D_thumb.jpg)
![clip_image036[1] clip_image036[1]](https://p-blog.csdn.net/images/p_blog_csdn_net/gigle/516729/o_clip_image036%5B1%5D_thumb.jpg)
![clip_image037[1] clip_image037[1]](https://p-blog.csdn.net/images/p_blog_csdn_net/gigle/516729/o_clip_image037%5B1%5D_thumb.jpg)
![clip_image038[1] clip_image038[1]](https://p-blog.csdn.net/images/p_blog_csdn_net/gigle/516729/o_clip_image038%5B1%5D_thumb.jpg)
![clip_image039[1] clip_image039[1]](https://p-blog.csdn.net/images/p_blog_csdn_net/gigle/516729/o_clip_image039%5B1%5D_thumb.jpg)
![clip_image019[3] clip_image019[3]](https://p-blog.csdn.net/images/p_blog_csdn_net/gigle/516729/o_clip_image019%5B3%5D_thumb.jpg)



 1万+
1万+


 被折叠的 条评论
为什么被折叠?


