


前言
刚从后端开发转向前端开发时,整个人都感觉轻松不少🤪🤪🤪,不用在为繁杂的数据结构设计而头疼,只需要专注前端开发的感觉简直不要太舒服。
但是慢慢的,发现联调接口时我是越来越难受。刚开始是后端参考UI,然后根据自己的理解出接口和文档,这种情况造就了提供的API和交互流程相差甚远(这我能忍,况且我本身之前就是后端开发😠😠😠)。后来就由我来出接口文档,后端直接按照文档返回数据接口,但是偏偏我就碰上了那么几个(还好几年开发经验呢💢💢💢)。
当然这些都不是重点,既然不行,那我就自己上💪💪💪,原来的后端语言不考虑,只是写个接口服务而已,所以就瞄上了go和node,再权衡再三下,最终选了node(NestJS), 这才有了这篇文章。
提示:咱们废话不多说,直接开始正题。本文默认NestJS项目已经创建完成。如需要了解如何创建,请参考👉👉👉NestJS中文文档👈👈👈
Ⅰ 📖路由篇
① 路由前缀
方式一:全局设置统一路由前缀
实例全局统一添加api前缀,访问url由 http://localhost:3001/demo => http://localhost:3001/api/demo
// main.ts
...
async function bootstrap() {
	const app = await NestFactory.create(AppModule);
	...
	app.setGlobalPrefix('api');
	...
}
...
方式二:局部设置统一路由前缀,@controller()或者请求方式的装饰器都可以。
// demo.controller.ts

// http://localhost:3001/demo/
@controller('demo')
export class DemoController {

	// http://localhost:3001/demo/demo
	@Get('demo')
	getDemo():any {
		return 'demo';
	}
}
提示:路由配置可根据业务需求自由灵活组合使用。
② 路由参数
这个在这就不再详述了,文档太多了,详细请参考👉👉👉NestJS-Route parameters👈👈👈
③ 参数验证
使用nestjs的提供的开箱即用的内置管道: ValidationPipe以及 class-validator、class-transformer来实现。关于其它内置管道,感兴趣的可自行去了解。
先安装class-validator和class-transformer扩展包
yarn add class-validator class-transformer
// main.ts

import { ValidationPipe } from '@nestjs/common';
// ...
async function bootstrap() {
	// ...
	// +++ 注册验证管道
    app.useGlobalPipes(new ValidationPipe());
	// ...
}
// ...
创建验证dto文件,在我看来所谓dto类似与验证规则集合体,更准确点就是php的验证场景。
nest g d demo
// demo.dto.ts
// class-validator还提供了很多内置规则,示例仅简单举例
import {IsNumber, IsString} from 'class-validator';

export class DemoDto {
  @IsNumber()
  id: number;

  @IsString()
  name: string;
}
// demo.controller.ts
import { Controller, Get, Query } from '@nestjs/common';
import { DemoDto } from './dto/Demo.dto';

@Controller('demo')
export class UserController {

    @Get('info')
    getUser(@Query() demoDto : DemoDto ) {
        return 'user info';
    }

}
提示:这样就完成了都路由参数id:是否为数字, name:是否为字符串的验证
④ 连接数据库
本文以Mysql为例,使用的TypeOrm
# 扩展安装
yarn add @nestjs/typeorm typeorm mysql2
// app.module.ts
import { Module } from '@nestjs/common';
import { TypeOrmModule } from '@nestjs/typeorm';

@Module({
  imports: [
    TypeOrmModule.forRoot({
      type: 'mysql',
      host: 'localhost',
      port: 3306,
      username: 'root',
      password: 'root',
      database: 'test',
      entities: ['dist/**/*.entity{.ts,.js}'],
      synchronize: true,
    }),
  ],
})
export class AppModule {}
1 创建一张简单的用户表:users(包含id,name, value字段)
2 创建user表实体:user.entity.ts
3 在user module中注册user 并重新导入以便其它模块也可以使用。
// user.entity.ts
import { Column, Entity, PrimaryGeneratedColumn } from "typeorm";

@Entity('user')
export class User {
    @PrimaryGeneratedColumn()
    id: number;

    @Column()
    name: string;

    @Column()
    value: string;
}
// user.module.ts
import { Module } from '@nestjs/common';
import { TypeOrmModule } from '@nestjs/typeorm';
import { UserController } from './user.controller';
import { UserService } from './user.service';
import { User } from './user.entity';

@Module({
  imports: [TypeOrmModule.forFeature([User])],
  controllers: [UserController],
  providers: [UserService]
})
export class UserModule {}
// user.service.ts
import { Injectable } from '@nestjs/common';
import { InjectRepository } from '@nestjs/typeorm';
import { Repository } from 'typeorm';
// 引入实体表
import { User } from './user.entity';

@Injectable()
export class UserService {
    constructor(
        @InjectRepository(User)
        private userReponsitory: Repository<User>,
    ) {}

    findAll() {
        return this.userReponsitory.find();
    }

    findOne() {
        return this.userReponsitory.count();
    }
}
// user.controller.ts
import { Controller, Get} from '@nestjs/common';
import { UserService } from './user.service';
@Controller({
path: 'user',
version: '1'
})
export class UserController {
constructor(private readonly userService: UserService) {}
@Get('count')
getcount() {
return this.userService.findOne();
}
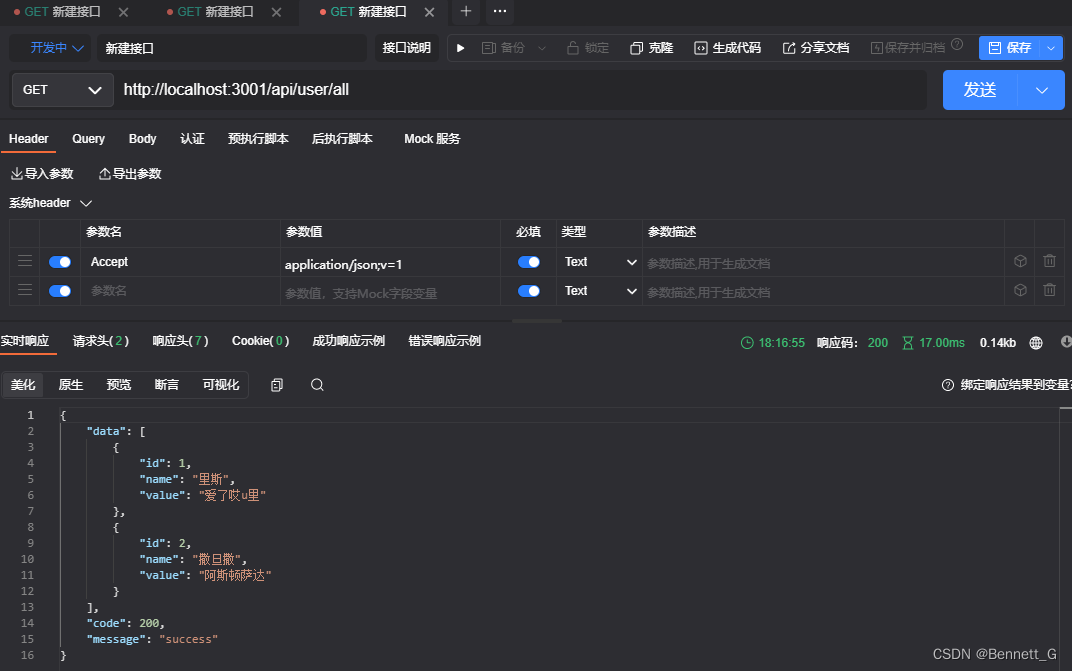
@Get('all')
getAll() {
return this.userService.findAll();
}
}
这样已经可以连接数据库了。关于typeOrm操作数据的方法,大家可到官网详细查看👉👉👉TyepOrm👈👈👈
Ⅱ 📖实用篇
① 版本控制
NestJS内置了版本控制:支持4种类型
1:URI Versioning(版本再URI内传递,这是默认的方式)
2:Header Versioning (自定义请求标头指定版本)
3:Media Type Versioning(请求标头指定版本Accept)
4:Custom Versioning(自定义的版本指向)
提示:本文示例将使用方式二的版本控制,即Header Versioning
// main.ts
import { VersioningType } from '@nestjs/common';

async function bootstrap() {
	// ...
	app.enableVersioning({
		// ... 设置默认版本号
        defaultVersion: '1',
        // ... 设置版本控制类型
        type: VersioningType.MEDIA_TYPE,
        // 在标头中,版本将与媒体类型分开,并带有分号
        // ... Accept: application/json;v=1
		key: 'v=',
    });
	// ...
}
// ...
// demo.controller.ts

// 方式一
// 请求http://localhost:3001/demo/version1, 如果没有再main.ts中设置默认版本的话,则在请求时需要在header增加 Accept:application/json;v=1
@Controller('demo')
export class DemoController {
	@Get('version1')
	getVersion1(): string {
		return 'this is version 1'
	}

	@Get('version2')
	getVersion1(): string {
		return 'this is version 2'
	}
}

// 方式二
// 效果同方法一
@Controller({
	path: 'demo',
	version: '1'
})
export class DemoController {
	getVersion1(): string {
		return 'this is version 1'
	}

	getVersion1(): string {
		return 'this is version 2'
	}
}
提示:当然NestJS也同时支持多个版本,可以将版本设置为数组形式即可['1', '2']. 想了解其它版本控制方式请参考
👉👉👉NestJS-Versioning👈👈👈
② 统一数据返回格式(成功)
使用interceptor(拦截器),对成功返回的数据进行统一处理并返回
# 创建httpOk拦截器
nest g itc httpOk
// httpOk.interceptor.ts

import { Injectable, NestInterceptor, CallHandler, ExecutionContext } from '@nestjs/common';
import { map } from 'rxjs/operators';
import { Observable } from 'rxjs';

@Injectable()
export class HttpOkInterceptor implements NestInterceptor {
  intercept(context: ExecutionContext, next: CallHandler): Observable<any> {
    return next.handle().pipe(
      map((data) => {
        return {
          data,
          code: 200,
          message: 'success',
        };
      }),
    );
  }
}
// main.ts

import { HttpOkInterceptor } from 'src/interceptor/http-ok.interceptor';
// ...
async function bootstrap() {
	// ...
	// +++ 全局注册响应拦截器
    app.useGlobalInterceptors(new HttpOkInterceptor());
	// ...
}
// ...
提示:😎😎😎这下API正常返回的数据格式都统一了😎😎😎
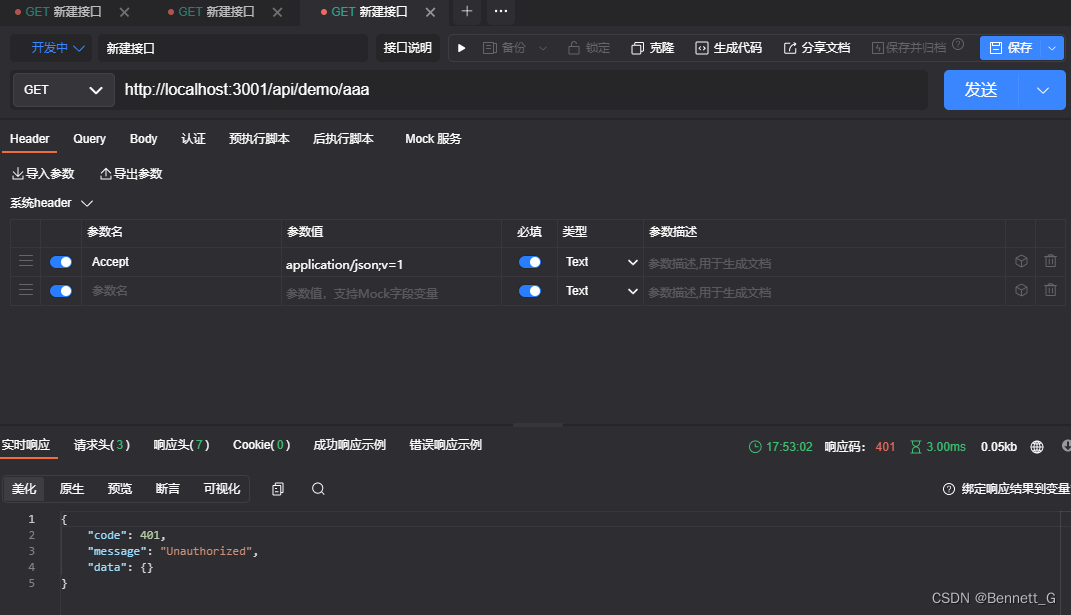
③ 统一返回数据格式(异常)
统一了正常的数据格式,当然也不能少了异常情况下的数据格式,开整~~~
这块使用NestJS内置的Exception Filters, 我们通过继承该异常筛选器并自定义自己的响应逻辑即可
nest g f http-exception
// http-exception.filter.ts

import { ArgumentsHost, Catch, ExceptionFilter, HttpException } from '@nestjs/common';

@Catch()
export class HttpExceptionFilter implements ExceptionFilter {
    catch(exception: HttpException, host: ArgumentsHost) {
		const ctx = host.switchToHttp();
		const response = ctx.getResponse();
		const status = exception.getStatus();
		// 优先详细报错信息,其次异常报错信息
    	const message = exception.getResponse()['message'] || exception.message;

		response.header('Content-Type', 'application/json; charset=utf-8');
		response
			.status(status)
			.json({
				code: status,
				message,
				data: {}
			});
    }
}
提示:大家可根据exception的一系列获取异常信息并根据需求自行组装异常信息的返回格式、
// main.ts

import { HttpExceptionFilter} from './filters/http-exception.filter'';
// ...
async function bootstrap() {
	// ...
    // +++ 全局注册异常过滤器
    app.useGlobalFilters(new HttpExceptionFilter());
	// ...
}
// ...
Ⅲ 📖安全篇
在我们真实使用场景时,接口的安全措施必不可少,比如鉴权、限流、以及跨域处理等
① 跨域
// main.ts

// ...
async function bootstrap() {
	// ...
    // +++
    app.enableCors();
	// ...
}
// ...
提示:没错,你没有看错,就是这么简单粗暴😆😆😆。如果需要更进步设置,可以查看enableCors相关的CorsOptions,比如有 origin | methods | allowedHeaders | exposedHeaders | credentials 等等
② 限流
yarn add @nestjs/throttler
这个就比较简单了,支持全局设置以及自定义的设置代理,具体查看官方文档👉👉👉NestJS-Rate limiting👈👈👈,上面介绍的很详细了。
③ 鉴权
本文采用的pasword 以及bearer Token,并没有使用官方使用的基于用户/密码的验证机制。又想了解用户、密码验证的passport可去查看👉👉👉NestJS-Authentication👈👈👈
yarn add @nestjs/passport passport passport-http-bearer @nestjs/jwt passport-jwt
# 创建auth.service.ts
nest g s auth
// auth.service.ts

import { Injectable } from '@nestjs/common';
import { JwtService } from '@nestjs/jwt';

@Injectable()
export class AuthService {
    constructor (
        private readonly jwtService: JwtService,
    ) {}

	// 生成Token
    async createToken() {
        console.log(123);
        const user = { ut: '123456'};
        return this.jwtService.sign(user);
    }

    // 验证Token
    async validateToken(token: any) {
        return {}
    }
}
#  创建auth.controller.ts
nest g co auth
// auth.controller.ts
import { Controller, Get, UseGuards } from '@nestjs/common';
import { AuthGuard } from '@nestjs/passport';
import { AuthService } from './auth.service';
@Controller('auth')
export class AuthController {
constructor(
private readonly authService: AuthService,
){}
@Get('token')
async getToken() {
return await this.authService.createToken();
}
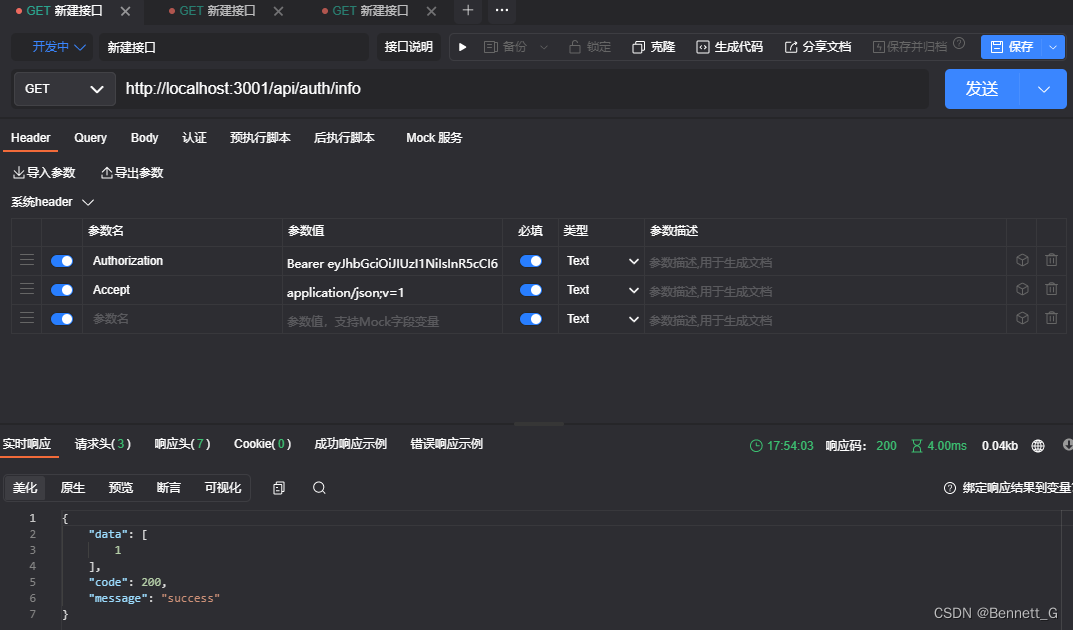
@Get('info')
@UseGuards(AuthGuard('jwt'))
getAaa() {
return [1];
}
}
# 创建auth.module.ts
nest g mo auth
// auth.module.ts
import { Module } from '@nestjs/common';
import { PassportModule } from '@nestjs/passport';
import { JwtModule } from '@nestjs/jwt';
import { JwtStrategy } from 'src/strategy/jwt.strategy';
import { AuthController } from './auth.controller';
import { AuthService } from './auth.service';

@Module({
    imports: [
        PassportModule.register({
            defaultStrategy: 'jwt'
        }),
        JwtModule.register({
            secretOrPrivateKey: 'secretKey',
            signOptions: {
                expiresIn: 3600,
            },
        }),
    ],
    controllers: [AuthController],
    providers: [AuthService, JwtStrategy],
    exports: [AuthService]
})
export class AuthModule {}
// 手动创建jwt.strategy.ts
// jwt.strategy.ts

import { ExtractJwt, Strategy } from 'passport-jwt';
import { AuthService } from 'src/auth/auth.service';
import { PassportStrategy } from '@nestjs/passport';
import { Injectable, UnauthorizedException } from '@nestjs/common';

@Injectable()
export class JwtStrategy extends PassportStrategy(Strategy) {
    constructor(private readonly authService: AuthService) {
        super({
            jwtFromRequest: ExtractJwt.fromAuthHeaderAsBearerToken(),
            secretOrKey: 'secretKey'
        })
    }

    async validate(payload: any) {
        const user = await this.authService.validateToken(payload);
        if (!user) {
          throw new UnauthorizedException();
        }
        return user;
    }
}
提示:此时访问http://localhost:3001/auth/token就可以获取到token了. 请求http://localhost:3001/auth/info,则会提示401:Not Unauthorized
此时接口鉴权已经基本完成了,但是还有没有优化空间呢?答案是当然有的。下面我们来实现jwt Guard,来简化我们每次使用都必须要使用 @UseGuards(AuthGuard(‘jwt’))。
# 创建auth.guard.ts
nest g gu auth
// auth.guard.ts
import { Injectable } from '@nestjs/common';
import { AuthGuard } from '@nestjs/passport';

@Injectable()
export class JwtAuthGuard extends AuthGuard('jwt') {}
// 调整auth.controller.ts
// 其它用到的controller同样的操作

// --- import { AuthGuard } from '@nestjs/passport';
// +++ import { JwtAuthGuard } from './auth.guard';

@Controller('auth')
export class AuthController {
    @Get('info')
    // --- @UseGuards(AuthGuard('jwt'))
    // +++ @UseGuards(JwtAuthGuard)
    getAaa() {
        return [1];
    }
}
至此,接口应用的准备工作已经全部完成了,剩下的就是各自愉快的玩耍时间啦🎉🎉🎉
下面放两张接口测试图供大家参考
1 获取token
2 请求验证未通过
3 验证通过


 1381
1381


 被折叠的 条评论
为什么被折叠?
被折叠的 条评论
为什么被折叠?
 到【灌水乐园】发言


