


RESTEasy, JBoss project, implementation of the JAX-RS specification. In this tutorial, we show you how to use RESTEasy framework to create a simple REST style web application.
Technologies and Tools used in this article:
- RESTEasy 2.2.1.GA
- JDK 1.6
- Maven 3.0.3
- Eclipse 3.6
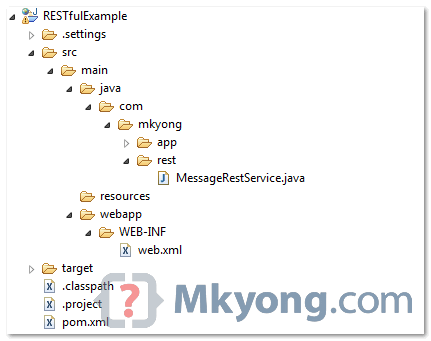
1. Directory Structure
Review final directory structure of this tutorial. Just a standard web project structure.
2. Standard Web Project
Create a standard Maven web project structure.
mvn archetype:generate -DgroupId=com.mkyong.common -DartifactId=RESTfulExample
    -DarchetypeArtifactId=maven-archetype-webapp -DinteractiveMode=false
Convert to Eclipse web project.
mvn eclipse:eclipse -Dwtpversion=2.03. Project Dependencies
Declares JBoss public Maven repository and “resteasy-jaxrs” in your Maven pom.xml file. That’s all you need to use RESTEasy.
File : pom.xml
<project ...">

    <repositories>
       <repository>
          <id>JBoss repository</id>
          <url>https://repository.jboss.org/nexus/content/groups/public-jboss/</url>
       </repository>
    </repositories>

    <dependencies>

        <dependency>
            <groupId>org.jboss.resteasy</groupId>
            <artifactId>resteasy-jaxrs</artifactId>
            <version>2.2.1.GA</version>
        </dependency>

    </dependencies>
</project>
4. REST Service
A simple REST service. See demo at the end of the article, it should be self-explanatory.
package com.mkyong.rest;

import javax.ws.rs.GET;
import javax.ws.rs.Path;
import javax.ws.rs.PathParam;
import javax.ws.rs.core.Response;

@Path("/message")
public class MessageRestService {

    @GET
    @Path("/{param}")
    public Response printMessage(@PathParam("param") String msg) {

        String result = "Restful example : " + msg;

        return Response.status(200).entity(result).build();

    }

}
5. web.xml
Now, configure listener and servlet to support RESTEasy.
File : web.xml
<web-app id="WebApp_ID" version="2.4"
    xmlns="http://java.sun.com/xml/ns/j2ee"
    xmlns:xsi="http://www.w3.org/2001/XMLSchema-instance"
    xsi:schemaLocation="http://java.sun.com/xml/ns/j2ee
    http://java.sun.com/xml/ns/j2ee/web-app_2_4.xsd">
    <display-name>Restful Web Application</display-name>

    <!-- Auto scan REST service -->
    <context-param>
        <param-name>resteasy.scan</param-name>
        <param-value>true</param-value>
    </context-param>

    <!-- this need same with resteasy servlet url-pattern -->
    <context-param>
        <param-name>resteasy.servlet.mapping.prefix</param-name>
        <param-value>/rest</param-value>
    </context-param>

    <listener>
        <listener-class>
            org.jboss.resteasy.plugins.server.servlet.ResteasyBootstrap
        </listener-class>
    </listener>

    <servlet>
        <servlet-name>resteasy-servlet</servlet-name>
        <servlet-class>
            org.jboss.resteasy.plugins.server.servlet.HttpServletDispatcher
        </servlet-class>
    </servlet>

    <servlet-mapping>
        <servlet-name>resteasy-servlet</servlet-name>
        <url-pattern>/rest/*</url-pattern>
    </servlet-mapping>

</web-app>
Note
You need to set the “resteasy.servlet.mapping.prefix” if yourservlet-mappingfor the resteasy servlet has a url-pattern other than “/*“.
In above example, the resteasy servlet url-pattern is “/rest/*“, so you have to set the “resteasy.servlet.mapping.prefix” to “/rest” as well, otherwise, you will hit resource not found error message.
Note
Remember to set “resteasy.scan” totrue, so that RESTEasy will find and register your REST service automatically.
6. Demo
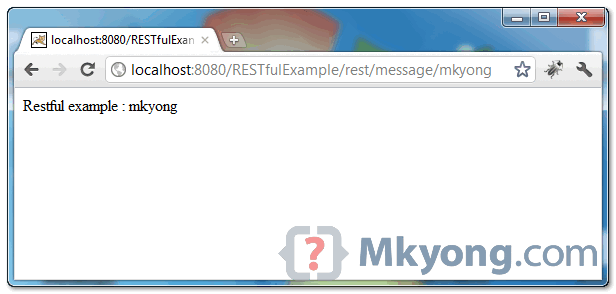
In this example, web request from “projectURL/rest/message/” will match to “MessageRestService“, and “projectURL/rest/message/{any values}” will match to @PathParam parameter.
Test 1 : http://localhost:8080/RESTfulExample/rest/message/mkyong
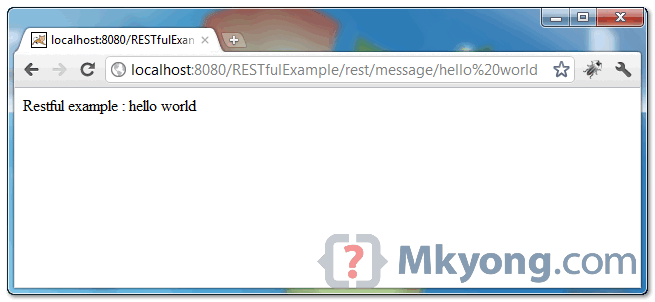
Test 2 : http://localhost:8080/RESTfulExample/rest/message/hello%20world
Alternative REST Service Registration
In above example, you are register REST service via “ResteasyBootstrap” listener. Here i show you another way.
Create a class and extends javax.ws.rs.core.Application, and add your REST service manually.
package com.mkyong.app;

import java.util.HashSet;
import java.util.Set;
import javax.ws.rs.core.Application;
import com.mkyong.rest.MessageRestService;

public class MessageApplication extends Application {
    private Set<Object> singletons = new HashSet<Object>();

    public MessageApplication() {
        singletons.add(new MessageRestService());
    }

    @Override
    public Set<Object> getSingletons() {
        return singletons;
    }
}
File : web.xml , no more listener, configure your application class like below :
<web-app id="WebApp_ID" version="2.4"
    xmlns="http://java.sun.com/xml/ns/j2ee"
        xmlns:xsi="http://www.w3.org/2001/XMLSchema-instance"
    xsi:schemaLocation="http://java.sun.com/xml/ns/j2ee
    http://java.sun.com/xml/ns/j2ee/web-app_2_4.xsd">
    <display-name>Restful Web Application</display-name>

    <context-param>
        <param-name>resteasy.servlet.mapping.prefix</param-name>
        <param-value>/rest</param-value>
    </context-param>

    <servlet>
        <servlet-name>resteasy-servlet</servlet-name>
        <servlet-class>
            org.jboss.resteasy.plugins.server.servlet.HttpServletDispatcher
                </servlet-class>
        <init-param>
            <param-name>javax.ws.rs.Application</param-name>
            <param-value>com.mkyong.app.MessageApplication</param-value>
        </init-param>
    </servlet>

    <servlet-mapping>
        <servlet-name>resteasy-servlet</servlet-name>
        <url-pattern>/rest/*</url-pattern>
    </servlet-mapping>

</web-app>
Done.


 146
146

 被折叠的 条评论
为什么被折叠?
被折叠的 条评论
为什么被折叠?
 到【灌水乐园】发言


