


JSP standard actions, such as the <jsp:useBean> and <jsp:getProperty> actions and JSTL ( JSP Standard Tag Library ) libraries are HTML-like elements for commonly needed operations in a JSP page like executing some functions, accessing data, formatting text and invoking other JSP pages. However, for a complex application, these generic actions may not be enough. Perhaps you want to develop application-specific actions. Fortunately, JSP is extendable and we can create our own custom tags to perform certain operations. In this example, we are going to show you how to create and use JSP custom tags.
1. More About JSP Custom Tags
Unlike HTML tags that are interpreted by the web browser, JSP tags are interpreted on the server-side by the application server (Tomcat, WebLogic, etc.) When the JSP engine encounters a custom tag, it executes Java code that has been specified to go with that tag.
JSP tags improves the separation of program logic and presentation logic; specifically, to abstract Java syntax from HTML. Scriptlets are written in Java and require the author to be familiar with Java syntax, whereas tags are HTML-like in syntax and require no Java knowledge. Thus, JSP tags are more convenient for the content developers (art designers, HTML developers, and the like).
Creating tags needs specifying how they will be used by the JSP Container. To properly work with a tag, the runtime must know several things about it, such as what (if any) attributes it has, and whether or not it has a body. This information is made available to the runtime engine via a standard XML file called a tag library descriptor (TLD).
2. Overview
After brief description about JSP custom tags, we can begin to write our example. Our preferred IDE is Eclipse and we use ‘Maven’ for the dependency management. We create a dynamic web application in the Eclipse and deploy it into the Tomcat server.
3. Implementations
Conventionally, our first example is a “hello world” implementation. We try to create a tag that outputs a simple message to the page. The TLD file created for the HelloWorld tag is presented below:
javacodegeeks.tld
<taglib>
    <tlib-version>1.0</tlib-version>
    <jsp-version>2.0</jsp-version>
    <short-name>Example TLD</short-name>
    <tag>
        <name>HelloWorld</name>
        <tag-class>com.javacodegeeks.examples.jspcustomtagexample.tag.HelloWorldTag</tag-class>
        <body-content>empty</body-content>
    </tag>
</taglib>
Tag library descriptor file names must have the extension .tld and must be packaged in the /WEB-INF/ directory or subdirectory of the WAR file or in the /META-INF/ directory or subdirectory of a tag library packaged in a JAR. The TLD file contains the definition of a single tag library and one or more tag definitions. Simple tag definition, enclosed within a body of <tag> and should contain the name of the tag and the handler class. The handler class in our example is below. The JSP 2.0 specification introduced SimpleTagSupport class. The SimpleTagSupport class implements the SimpleTag interface and adds additional convenience methods including getter methods for the properties in SimpleTag. To write a custom tag, you can simply extend SimpleTagSupport class and override the doTag() method. SimpleTagSupport provide getJspContext() method through which we can take JspWriter object and write data to the response.
HelloWorldTag.java
package com.javacodegeeks.examples.jspcustomtagexample.tag;

import java.io.IOException;

import javax.servlet.jsp.JspException;
import javax.servlet.jsp.JspWriter;
import javax.servlet.jsp.tagext.SimpleTagSupport;

public class HelloWorldTag extends SimpleTagSupport {

    @Override
    public void doTag() throws JspException, IOException {
        final JspWriter out = getJspContext().getOut();
        out.println( "Hello JSP Custom Tag!" );
    }
}
In the JSP page, we declare the tag library putting “taglib” directive with a custom prefix at the beginning of the JSP file. The URI property references the library location.
index.jsp
<%@ taglib prefix="jgc" uri="WEB-INF/custom.tld"%>

<?xml version="1.0" encoding="ISO-8859-1" ?>
<!DOCTYPE html PUBLIC "-//W3C//DTD XHTML 1.0 Transitional//EN" "http://www.w3.org/TR/xhtml1/DTD/xhtml1-transitional.dtd">

<html xmlns="http://www.w3.org/1999/xhtml">
<head>
    <meta http-equiv="Content-Type" content="text/html; charset=ISO-8859-1" />
    <title>Jsp Custom Tag Example</title>
</head>
<body>
    <jgc:HelloWorld/>
</body>
</html>
After running the Tomcat server and invokes the JSP page URL, we can see our message written by our custom HelloWorld tag in the screen:
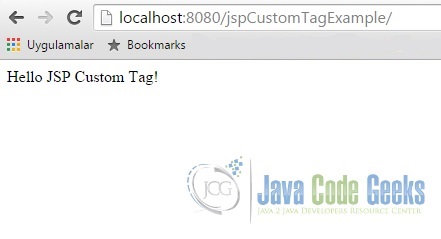
Hello World Custom Tag
In the second example, we create a tag with body and attributes. This custom tag includes a message from one person to another. The message body is the message content and the person names are in the “to” and “from” attributes. We append the new tag definition to our TLD file:
javacodegeeks.tld
...
<tag>
    <name>SendMessage</name>
    <tag-class>com.javacodegeeks.examples.jspcustomtagexample.tag.SendMessageTag</tag-class>
    <body-content>scriptless</body-content>
    <attribute>
        <name>from</name>
        <required>true</required>
    </attribute>
    <attribute>
        <name>to</name>
        <required>true</required>
    </attribute>
</tag>
...
Please pay attention to the body-content. It is different from the “Hello world tag”. “Scriptless” means that the tag can contain plain text, EL elements, other custom tags and page directives, but no explicit scripting is allowed (<%= … %>). The tag attributes are defined using <attribute> element.
Tag handler class is:
SendMessageTag.java
package com.javacodegeeks.examples.jspcustomtagexample.tag;

import java.io.IOException;
import java.io.StringWriter;

import javax.servlet.jsp.JspException;
import javax.servlet.jsp.tagext.SimpleTagSupport;

public class SendMessageTag extends SimpleTagSupport {

    private String  from;
    private String  to;

    public void setFrom( final String from ) {
        this.from = from;
    }

    public void setTo( final String to ) {
        this.to = to;
    }

    @Override
    public void doTag() throws JspException, IOException {

        final StringWriter sw = new StringWriter();
        getJspBody().invoke( sw );

        getJspContext().getOut().println( "There is a message from '" +
            from + "' to '" + to + "'. Message content is '" +
            sw.toString() + "'" );
    }
}
Tag handler class needs to implement setter methods to accept an attribute value like a java bean. So we create the setter methods of the “from” and “to” attributes. To access the body of a tag in the tag handler class, we call the getJspBody() method and call the invoke() method on it with a writer as a parameter. In this way, the text in the body of the tag is written to the given writer parameter. As you notice, we call sw.toString() to get the body text.
index.jsp
We add the second custom tag to the current JSP page. After running the Tomcat server, we see the page like below:
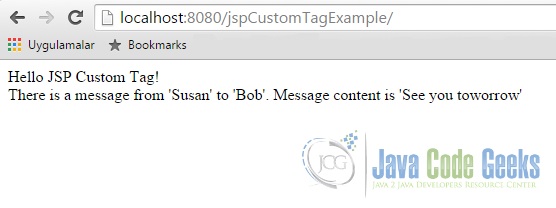
Custom Tag with Body and Attributes


 508
508

 被折叠的 条评论
为什么被折叠?
被折叠的 条评论
为什么被折叠?
 到【灌水乐园】发言


