研究生学习中......
学习博客:https://www.cnblogs.com/ruo-li-suo-yi/p/8484820.html
学习书籍:《OPNET网络仿真》--陈敏
OPNET Modeler采用的是“项目-场景”的方法,在OPNET中一个项目包含多个场景,场景就是所构建网络的整体。
Modeler将建模分为三层:进程,节点,网络(顺序依次提升,进程为最底层)。
进程由有限状态机构成,可以理解成一个顺序执行的一系列函数,通过c语言编写实现进程模块,来控制协议运行。进程以状态机来描述协议。
节点由相应的协议模型构成,反应了设备的特性,将节点互连组成设备,设备互连组成网络,几个不同的网络组成项目。
Modeler将节点分为三类:
固定节点:路由器,交换机,服务器等
移动节点:移动台等
卫星节点
根据《OPNET网络仿真》--陈敏,该书第一章的实例实现。
题目:需要为公司内部互联网的扩展制定一个合理的方案,公司网络是一个星型拓扑网络,要确保新增的网络不会导致整个网络连通失败。
首先新建工程
创建工程 ---点击file>>>new
![](https://img-blog.csdnimg.cn/img_convert/e6eeac3dd93f8a874ddeb38e1dd67a82.png)
![](https://img-blog.csdnimg.cn/img_convert/7b5eddd56d2a3b5c65895d9b626c3676.png)
2.点击ok,然后接着创建新的背景拓扑图(弹出界面即是)
![](https://img-blog.csdnimg.cn/img_convert/f94bb1695f1a11d166a63a79171454f7.png)
3.工程名:project1 环境名:scenario1 点击ok
![](https://img-blog.csdnimg.cn/img_convert/a5e8c47f4c0ea2b1fe585cd4374995cc.png)
4.点击create empty scenario,点击next(下图含翻译,原图无【】中内容)
![](https://img-blog.csdnimg.cn/img_convert/c97c480bd5c1bd5fc5058f95f3da90ab.png)
5.选定网络范围office
![](https://img-blog.csdnimg.cn/img_convert/eb16c7cc0acf25f811d0fbc6b4ebeec0.png)
6.指定大小,不用修改点击next。
![](https://img-blog.csdnimg.cn/img_convert/b6092f68a2cab10c16cea81c32b430c1.png)
7.该页面为OPNET自带的对象模型家族种类选择,有一些典型的应用场景,有类似的可以调用(可不调用)。找到Sm_Int_Model_List,将后面的no点击一下改成yes,接着点next。下一个页面为总结页面,可忽略之间点finsh。点完finsh后弹出的对象工具树界面(用来拖模型工具)可直接关掉,后期可以在菜单栏第五项直接点开。
![](https://img-blog.csdnimg.cn/img_convert/4498057232c3fad56932380ece6c80b6.png)
![](https://img-blog.csdnimg.cn/img_convert/505c726fdfbe12207095843f8f0d4c49.png)
![](https://img-blog.csdnimg.cn/img_convert/03696c2118ec1b61cea26f1af3ea6ab0.png)
![](https://img-blog.csdnimg.cn/img_convert/b987a0d52b8408303b93b213559a71e7.png)
接下来是创建拓扑:
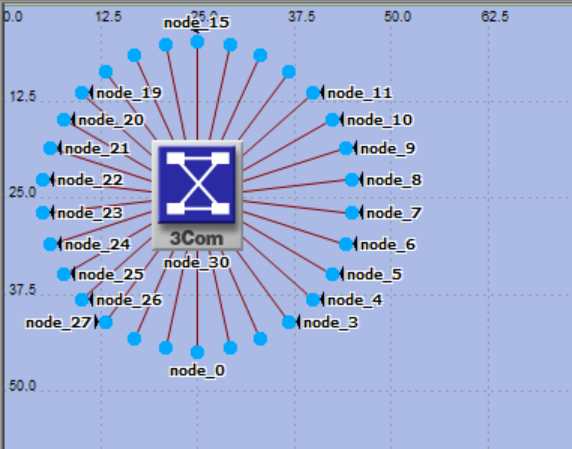
1.菜单栏拓扑topology--------选择快速配置Rapid Configuration-----选择星型star拓扑结构
![](https://img-blog.csdnimg.cn/img_convert/c5ee421da5388ae6295f8a0c726b4bc5.png)
![](https://img-blog.csdnimg.cn/img_convert/6566a83a631ab21dd1c3cbcd21a6ec1a.png)
![](https://img-blog.csdnimg.cn/img_convert/112c013a53a8ef6d25495073b47e53fa.png)
中心节点模块center node model :3C_SSII_1100_3300_4s_aeS2_e48_ge3(3com公司的交换机)
周边节点模块Periphery node model:Sm_Int_wkstn,节点数设置为30
连接模型选link model:10BaseT
下面坐标X,Y分别为25,25,半径radius为20
![](https://img-blog.csdnimg.cn/img_convert/c4e356529b41fc7dca8b77c43761eef8.png)
![](https://img-blog.csdnimg.cn/img_convert/1f47cf76733519d145f5fdfac82f7b67.png)
3.放置一个服务器,点击菜单栏第五项或者topology选项中的open object palette
![](https://img-blog.csdnimg.cn/img_convert/38bbfb16bd9e180decd0fb6cf3618d26.png)
选择sm_int_server,放置服务器在网络中(双击后点击在网络中,然后右键鼠标即可取消),用link model中的10baseT双击连接,右键取消。
![](https://img-blog.csdnimg.cn/img_convert/6801fd842636275ca78ac18b5f4691a7.png)
![](https://img-blog.csdnimg.cn/img_convert/478a5334175de4986ac6ef6f3edd0122.png)
4.最后为网络配置业务,包括应用定义application和业务规格定义profile,放置在网络中,无需连接
![](https://img-blog.csdnimg.cn/img_convert/7b9d09770e4b67c738188ad2f1e09e01.png)
![](https://img-blog.csdnimg.cn/img_convert/fb079e54aeb7ca34a3bb30e9c9f4c4cf.png)
统计结果
找到与服务器负载相关的统计量来确定服务器有无能力处理扩展网络的额外业务负载
对象统计量:server load ,全局统计量:Ethernet delay
在蓝色部分右键鼠标(不触碰任何节点)选择choose individual DESstatistics
![](https://img-blog.csdnimg.cn/img_convert/1ed41652c70fe4064afed6eb3240375f.png)
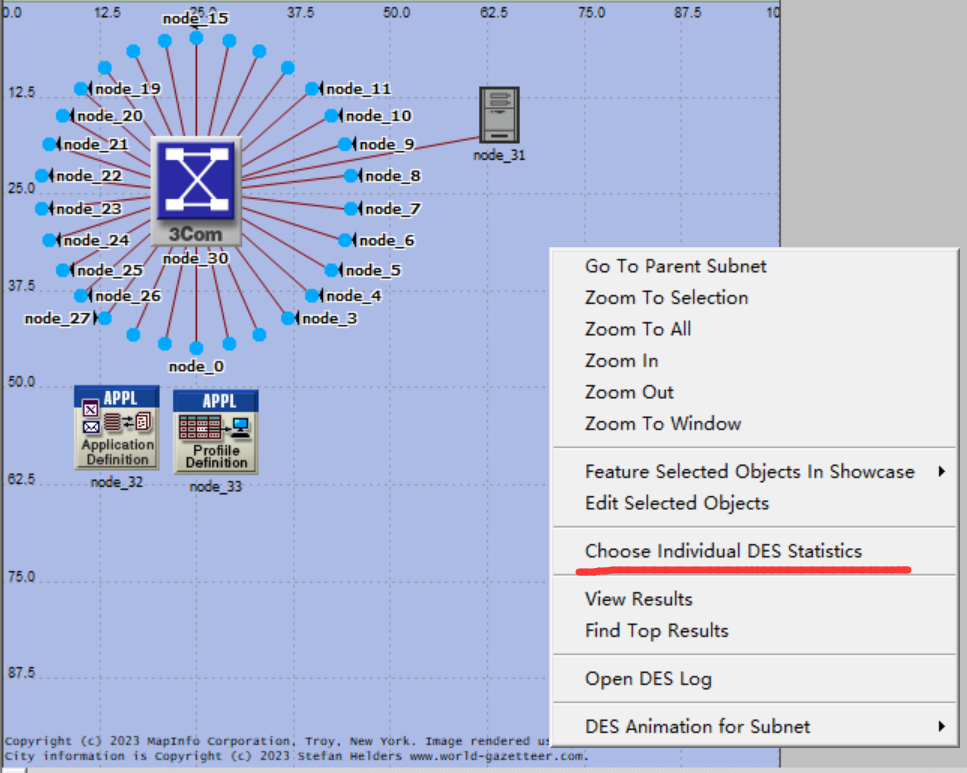
任何在弹出的界面中点击node statistics前面的+号,在点击Ethernet前面的+,选择load(bit/sec)
![](https://img-blog.csdnimg.cn/img_convert/726dceaae4c00c55cbab524eb98c31e6.png)
在点击global statistics前面的+,再点击Ethernet前面的+,选择Delay(sec),然后ok即可。
![](https://img-blog.csdnimg.cn/img_convert/a5662978b98d1ea24e3dbf86d4ad6c52.png)
最后进行仿真
要确定repositories属性正确,
edit中选择preferences,在搜索栏中搜索repositories,点击find ,将value中双击改成stdomd
![](https://img-blog.csdnimg.cn/img_convert/51a8b676428a950cde2da2c5266c550c.png)
运行仿真
DES---configure/run discrete event simulation,在弹出窗口中将时间改为0.5,点击run
![](https://img-blog.csdnimg.cn/img_convert/983912af6c3e251b7c0672c680ccec8d.png)
![](https://img-blog.csdnimg.cn/img_convert/b7d66827a228d6bc43a6ef1ef8fa338e.png)
点击close即可
![](https://img-blog.csdnimg.cn/img_convert/f86484c89bdba48b418722cc556a2d5f.png)
查看结果
类似于统计结结果,在蓝色部分右键选择view result
![](https://img-blog.csdnimg.cn/img_convert/fc5777c82cd1a0e2a307675a2d62e11b.png)
查看全局时延,可以看出收敛时间约为0.4微妙。
![](https://img-blog.csdnimg.cn/img_convert/f453a88579f1c417ddc28822b3d6033d.png)
右键单击node31,选择view result
![](https://img-blog.csdnimg.cn/img_convert/dc7737d440a1398738001a9790977e01.png)
可以看到负载量最大值有七千多
![](https://img-blog.csdnimg.cn/img_convert/ffd3cd8c20e998beb13a4d457267f96a.png)
这里已经完成了基础搭建,然后是进行扩展网络,判断负载
首先复制场景,点击菜单栏中scenarios中的duplicate scenario
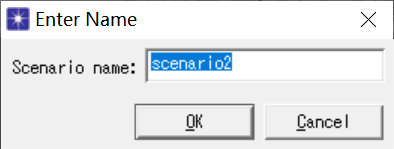
![](https://img-blog.csdnimg.cn/img_convert/6537843371e55b514b5ed9a2dcde0bcb.png)
点击ok
现在的就是场景2
再构建一个星形拓扑结构,与上相同,左边设置为62.5,62.5
![](https://img-blog.csdnimg.cn/img_convert/8c9a716657e55a7f563f4e49664ea1e2.png)
点击菜单栏第五项或者topology选项中的open object palette,选择一个路由器连接两个交换机
![](https://img-blog.csdnimg.cn/img_convert/3c7735e878d17cefd12e966a5aa49152.png)
![](https://img-blog.csdnimg.cn/img_convert/f63603524782a1df1e6568236abc83eb.png)
再进行仿真(DES---configure/run discrete event simulation),将时间设置为0.5,运行run
![](https://img-blog.csdnimg.cn/img_convert/4214f0d2a5baf9bf46fca7be4caa075c.png)
最后开始比较结果,可以直接单机蓝色空白部分,选择view result
![](https://img-blog.csdnimg.cn/img_convert/462bfff969a4387a2e16d86e5ffda168.png)
我们将展示结果改成整个项目all projects,勾选环境1和环境2
![](https://img-blog.csdnimg.cn/img_convert/c9aabad98850a9b23566419be0aceeb6.png)
![](https://img-blog.csdnimg.cn/img_convert/cfb17005d7212d16821ffc12f6e6b493.png)
可直接在此处选择node31 来看负载量
![](https://img-blog.csdnimg.cn/img_convert/fc07ac551e9f0e8adb799796976be34c.png)
![](https://img-blog.csdnimg.cn/img_convert/95d411a9beb39d76a2aa96f66f5b0742.png)
然后结果出现
![](https://img-blog.csdnimg.cn/img_convert/2360d240b53b34e15415cedd0e58d1e6.png)
对比图可以点击右下角的overlaid statistics
![](https://img-blog.csdnimg.cn/img_convert/3ea439d3800a2e4a899ad67fcef144d7.png)
![](https://img-blog.csdnimg.cn/img_convert/1165a154cd342371f9ef1db9cffc81ec.png)
可以看出负载量明显增大
然后我们将左下勾选的load(bit/sec)取消掉,再回到global statistics 全部勾选
![](https://img-blog.csdnimg.cn/img_convert/64cf2adf75e35b52c4fa45f252e257ca.png)
因为右边的展示还是overlaid statistics,所以展示结果直接是对比图,可以看出时延没有发生很大变化
![](https://img-blog.csdnimg.cn/img_convert/a2e38b381c93f67de2176b16394238e3.png)
所以最好可以得出结果是增加了一个同样的星形网络仍未影响网络速度,所以可以增加。