


路由传参
1. 通过路由属性中的name来确定匹配的路由,通过params来传递参数
- 父组件
this.$router.push传递参数
//html
<button @click="toChild"> </button>

//方法
toChild(){
	this.$router.push({
		name:''ChildView",
		params:{
			id : 1,
			age:20,
			···
		}
	})
}
- 子组件
使用this. r o u t e . p a r a m s . x x x 获 取 数 据 / / 注 意 : 父 组 件 使 用 的 是 route.params.xxx 获取数据 //注意:父组件使用的是 route.params.xxx获取数据//注意:父组件使用的是router,子组件使用的是$route
<div>{{this.$route.params.id}}</div>
<div>{{this.$route.params.age}}</div>
- 路由表
{
	path:'/child',
	name:'ChildView',   //关键就是名字
	component:Child
}

注意:地址栏中不显示参数,刷新页面,参数丢失
2. 使用path来匹配路由(或者name也可以),然后通过query来传递参数
- 父组件
this.$router.push传递参数
//html
<button @click="toChild"> </button>

//方法
toChild(){
	this.$router.push({
		path:''ChildView",
		query:{
			id : 1,
			age:20,
			···
		}
	})
}
//方法二 query用name或者path都可以,params只能用name
toChild(){
	this.$router.push({
		name:''ChildView",
		query:{
			id : 1,
			age:20,
			···
		}
	})
}
- 子组件
使用this. r o u t e . q u e r y . x x x 获 取 数 据 / / 注 意 : 父 组 件 使 用 的 是 route.query.xxx 获取数据 //注意:父组件使用的是 route.query.xxx获取数据//注意:父组件使用的是router,子组件使用的是$route
<div>{{this.$route.query.id}}</div>
<div>{{this.$route.query.age}}</div>
- 路由表
{
	path:'/child',
	name:'ChildView',
	component:Child
}
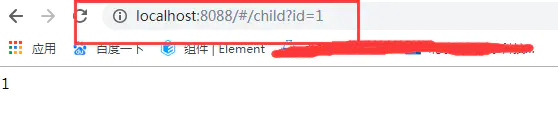
注意:参数显示在地址栏中,刷新页面参数不丢失
总结:
- params地址栏中不显示参数,刷新页面,参数丢失,并且params参数是路由的一部分,是一定要存在的;
- query地址栏显示参数,刷新页面参数不丢失,并且name/path都可以使用
3. 补充:利用动态路由传参
- 路由表配置
{
	path:'/child/:id', //重点就在这,   如果想传递多个值: path:'/child/:id/:age/:num/···',
	//路由中的动态参数以 : 进行声明,冒号后面是动态路径参数的名称
	// :id (id自定义)就是占位符,是动态可变的,可以在$route.params中拿到 id
	name:'ChildView',
	component:Child
}
- 父组件
- 通过this.$router.push 实现携带参数的跳转
- 使用router-link进行路由导航,传递参数
//方案一
//html
<button @click="toChild(传递参数)"> </button>

//方法
toChild(){
	this.$router.push({
		path:`/child/${id}`
		//如果想传递多个值:path:`/child/${id}/${age}/${num}/···`
	})
}
//方案二
//html
<router-link to="/child/123"></router-link>  //child是子页面路由路径,123是需要传递的参数
}
- 子组件
1.使用this.$route.params.xxx来接收路由参数
2.通过props来接收参数,不过需要在路由配置中开启props
例如:{path: “/movie/:mid” , component:Movie , props:true}
//使用this.$route.params.xxx来接收路由参数
<div>{{this.$route.params.id}}</div>

//通过props来接收参数
<div>{{id}}</div>
props:['id']
注意:
- 在地址栏中显示传递的参数,只显示值,不显示key,也可以传递多个值
- 重大注意:如果采用这种方法,就是将参数融入path,意味着如果没有对应的参数传入,path地址不对,不能访问
- 刷新页面,值也存在


 2689
2689


 被折叠的 条评论
为什么被折叠?
被折叠的 条评论
为什么被折叠?
 到【灌水乐园】发言


