


Python入门指北
文章目录

一、安转python环境
1、查看安装了那些源码包
[root@python ~]# yum grouplist
已加载插件:fastestmirror, langpacks
没有安装组信息文件
Maybe run: yum groups mark convert (see man yum)
Loading mirror speeds from cached hostfile
 * base: mirrors.aliyun.com
 * extras: mirrors.aliyun.com
 * updates: mirrors.aliyun.com
可用的环境分组:
   最小安装
   基础设施服务器
   计算节点
   文件及打印服务器
   Cinnamon 桌面环境
   MATE 桌面环境
   基本网页服务器
   虚拟化主机
   带 GUI 的服务器
   GNOME 桌面
   KDE Plasma Workspaces
   开发及生成工作站
可用组:
   Cinnamon
   Fedora Packager
   Haskell
   LXQt 桌面环境
   MATE
   Milkymist
   TurboGears 应用程序构架
   Xfce
   传统 UNIX 兼容性
   兼容性程序库
   图形管理工具
   安全性工具
   开发工具
   控制台互联网工具
   教育软件
   智能卡支持
   电子实验室
   科学记数法支持
   系统管理
   系统管理工具
   通用桌面
完成
2、安装 Development Tools 及其使用的组件
[root@python ~]# yum groupinstall -y "Development Tools"
已加载插件:fastestmirror, langpacks
没有安装组信息文件
Maybe run: yum groups mark convert (see man yum)
Loading mirror speeds from cached hostfile
* base: mirrors.aliyun.com
* extras: mirrors.aliyun.com
* updates: mirrors.aliyun.com
base | 3.6 kB 00:00:00
epel | 4.7 kB 00:00:00
extras | 2.9 kB 00:00:00
updates | 2.9 kB 00:00:00
zabbix | 2.9 kB 00:00:00
zabbix-frontend | 2.9 kB 00:00:00
zabbix-non-supported | 2.9 kB 00:00:00
正在解决依赖关系
--> 正在检查事务
---> 软件包 bison.x86_64.0.3.0.4-2.el7 将被 安装
---> 软件包 byacc.x86_64.0.1.9.20130304-3.el7 将被 安装
---> 软件包 cscope.x86_64.0.15.8-10.el7 将被 安装
---> 软件包 ctags.x86_64.0.5.8-13.el7 将被 安装
---> 软件包 diffstat.x86_64.0.1.57-4.el7 将被 安装
---> 软件包 doxygen.x86_64.1.1.8.5-4.el7 将被 安装
---> 软件包 flex.x86_64.0.2.5.37-6.el7 将被 安装
---> 软件包 gcc-gfortran.x86_64.0.4.8.5-44.el7 将被 安装
--> 正在处理依赖关系 libquadmath-devel = 4.8.5-44.el7,它被软件包 gcc-gfortran-4.8.5-44.el7.x86_64 需要
--> 正在处理依赖关系 libquadmath = 4.8.5-44.el7,它被软件包 gcc-gfortran-4.8.5-44.el7.x86_64 需要
--> 正在处理依赖关系 libgfortran = 4.8.5-44.el7,它被软件包 gcc-gfortran-4.8.5-44.el7.x86_64 需要
--> 正在处理依赖关系 libgfortran.so.3()(64bit),它被软件包 gcc-gfortran-4.8.5-44.el7.x86_64 需要
---> 软件包 git.x86_64.0.1.8.3.1-23.el7_8 将被 安装
--> 正在处理依赖关系 perl-Git = 1.8.3.1-23.el7_8,它被软件包 git-1.8.3.1-23.el7_8.x86_64 需要
--> 正在处理依赖关系 perl(Term::ReadKey),它被软件包 git-1.8.3.1-23.el7_8.x86_64 需要
--> 正在处理依赖关系 perl(Git),它被软件包 git-1.8.3.1-23.el7_8.x86_64 需要
--> 正在处理依赖关系 perl(Error),它被软件包 git-1.8.3.1-23.el7_8.x86_64 需要
---> 软件包 indent.x86_64.0.2.2.11-13.el7 将被 安装
---> 软件包 intltool.noarch.0.0.50.2-7.el7 将被 安装
--> 正在处理依赖关系 perl(XML::Parser),它被软件包 intltool-0.50.2-7.el7.noarch 需要
--> 正在处理依赖关系 gettext-devel,它被软件包 intltool-0.50.2-7.el7.noarch 需要
---> 软件包 libtool.x86_64.0.2.4.2-22.el7_3 将被 安装
---> 软件包 patch.x86_64.0.2.7.1-12.el7_7 将被 安装
---> 软件包 patchutils.x86_64.0.0.3.3-5.el7_9 将被 安装
---> 软件包 rcs.x86_64.0.5.9.0-7.el7 将被 安装
---> 软件包 redhat-rpm-config.noarch.0.9.1.0-88.el7.centos 将被 安装
--> 正在处理依赖关系 dwz >= 0.4,它被软件包 redhat-rpm-config-9.1.0-88.el7.centos.noarch 需要
--> 正在处理依赖关系 perl-srpm-macros,它被软件包 redhat-rpm-config-9.1.0-88.el7.centos.noarch 需要
---> 软件包 rpm-build.x86_64.0.4.11.3-48.el7_9 将被 安装
--> 正在处理依赖关系 rpm = 4.11.3-48.el7_9,它被软件包 rpm-build-4.11.3-48.el7_9.x86_64 需要
---> 软件包 rpm-sign.x86_64.0.4.11.3-48.el7_9 将被 安装
--> 正在处理依赖关系 rpm-build-libs(x86-64) = 4.11.3-48.el7_9,它被软件包 rpm-sign-4.11.3-48.el7_9.x86_64 需要
---> 软件包 subversion.x86_64.0.1.7.14-16.el7 将被 安装
--> 正在处理依赖关系 subversion-libs(x86-64) = 1.7.14-16.el7,它被软件包 subversion-1.7.14-16.el7.x86_64 需要
--> 正在处理依赖关系 libsvn_wc-1.so.0()(64bit),它被软件包 subversion-1.7.14-16.el7.x86_64 需要
--> 正在处理依赖关系 libsvn_subr-1.so.0()(64bit),它被软件包 subversion-1.7.14-16.el7.x86_64 需要
--> 正在处理依赖关系 libsvn_repos-1.so.0()(64bit),它被软件包 subversion-1.7.14-16.el7.x86_64 需要
--> 正在处理依赖关系 libsvn_ra_svn-1.so.0()(64bit),它被软件包 subversion-1.7.14-16.el7.x86_64 需要
--> 正在处理依赖关系 libsvn_ra_neon-1.so.0()(64bit),它被软件包 subversion-1.7.14-16.el7.x86_64 需要
--> 正在处理依赖关系 libsvn_ra_local-1.so.0()(64bit),它被软件包 subversion-1.7.14-16.el7.x86_64 需要
--> 正在处理依赖关系 libsvn_ra-1.so.0()(64bit),它被软件包 subversion-1.7.14-16.el7.x86_64 需要
--> 正在处理依赖关系 libsvn_fs_util-1.so.0()(64bit),它被软件包 subversion-1.7.14-16.el7.x86_64 需要
--> 正在处理依赖关系 libsvn_fs_fs-1.so.0()(64bit),它被软件包 subversion-1.7.14-16.el7.x86_64 需要
--> 正在处理依赖关系 libsvn_fs_base-1.so.0()(64bit),它被软件包 subversion-1.7.14-16.el7.x86_64 需要
--> 正在处理依赖关系 libsvn_fs-1.so.0()(64bit),它被软件包 subversion-1.7.14-16.el7.x86_64 需要
--> 正在处理依赖关系 libsvn_diff-1.so.0()(64bit),它被软件包 subversion-1.7.14-16.el7.x86_64 需要
--> 正在处理依赖关系 libsvn_delta-1.so.0()(64bit),它被软件包 subversion-1.7.14-16.el7.x86_64 需要
--> 正在处理依赖关系 libsvn_client-1.so.0()(64bit),它被软件包 subversion-1.7.14-16.el7.x86_64 需要
---> 软件包 swig.x86_64.0.2.0.10-5.el7 将被 安装
---> 软件包 systemtap.x86_64.0.4.0-13.el7 将被 安装
--> 正在处理依赖关系 systemtap-devel = 4.0-13.el7,它被软件包 systemtap-4.0-13.el7.x86_64 需要
--> 正在处理依赖关系 systemtap-client = 4.0-13.el7,它被软件包 systemtap-4.0-13.el7.x86_64 需要
--> 正在检查事务
---> 软件包 dwz.x86_64.0.0.11-3.el7 将被 安装
---> 软件包 gettext-devel.x86_64.0.0.19.8.1-3.el7 将被 安装
--> 正在处理依赖关系 gettext-libs = 0.19.8.1-3.el7,它被软件包 gettext-devel-0.19.8.1-3.el7.x86_64 需要
--> 正在处理依赖关系 gettext-common-devel = 0.19.8.1-3.el7,它被软件包 gettext-devel-0.19.8.1-3.el7.x86_64 需要
--> 正在处理依赖关系 gettext = 0.19.8.1-3.el7,它被软件包 gettext-devel-0.19.8.1-3.el7.x86_64 需要
---> 软件包 libgfortran.x86_64.0.4.8.5-44.el7 将被 安装
---> 软件包 libquadmath.x86_64.0.4.8.5-44.el7 将被 安装
---> 软件包 libquadmath-devel.x86_64.0.4.8.5-44.el7 将被 安装
---> 软件包 perl-Error.noarch.1.0.17020-2.el7 将被 安装
---> 软件包 perl-Git.noarch.0.1.8.3.1-23.el7_8 将被 安装
---> 软件包 perl-TermReadKey.x86_64.0.2.30-20.el7 将被 安装
---> 软件包 perl-XML-Parser.x86_64.0.2.41-10.el7 将被 安装
---> 软件包 perl-srpm-macros.noarch.0.1-8.el7 将被 安装
---> 软件包 rpm.x86_64.0.4.11.3-35.el7 将被 升级
--> 正在处理依赖关系 rpm = 4.11.3-35.el7,它被软件包 rpm-libs-4.11.3-35.el7.x86_64 需要
--> 正在处理依赖关系 rpm = 4.11.3-35.el7,它被软件包 rpm-python-4.11.3-35.el7.x86_64 需要
---> 软件包 rpm.x86_64.0.4.11.3-48.el7_9 将被 更新
---> 软件包 rpm-build-libs.x86_64.0.4.11.3-35.el7 将被 升级
---> 软件包 rpm-build-libs.x86_64.0.4.11.3-48.el7_9 将被 更新
---> 软件包 subversion-libs.x86_64.0.1.7.14-16.el7 将被 安装
---> 软件包 systemtap-client.x86_64.0.4.0-13.el7 将被 安装
--> 正在处理依赖关系 systemtap-runtime = 4.0-13.el7,它被软件包 systemtap-client-4.0-13.el7.x86_64 需要
---> 软件包 systemtap-devel.x86_64.0.4.0-13.el7 将被 安装
--> 正在处理依赖关系 kernel-devel-uname-r,它被软件包 systemtap-devel-4.0-13.el7.x86_64 需要
--> 正在检查事务
---> 软件包 gettext.x86_64.0.0.19.8.1-2.el7 将被 升级
---> 软件包 gettext.x86_64.0.0.19.8.1-3.el7 将被 更新
---> 软件包 gettext-common-devel.noarch.0.0.19.8.1-3.el7 将被 安装
---> 软件包 gettext-libs.x86_64.0.0.19.8.1-2.el7 将被 升级
---> 软件包 gettext-libs.x86_64.0.0.19.8.1-3.el7 将被 更新
---> 软件包 kernel-debug-devel.x86_64.0.3.10.0-1160.76.1.el7 将被 安装
---> 软件包 rpm-libs.x86_64.0.4.11.3-35.el7 将被 升级
---> 软件包 rpm-libs.x86_64.0.4.11.3-48.el7_9 将被 更新
---> 软件包 rpm-python.x86_64.0.4.11.3-35.el7 将被 升级
---> 软件包 rpm-python.x86_64.0.4.11.3-48.el7_9 将被 更新
---> 软件包 systemtap-runtime.x86_64.0.3.3-3.el7 将被 升级
---> 软件包 systemtap-runtime.x86_64.0.4.0-13.el7 将被 更新
--> 解决依赖关系完成
依赖关系解决
=====================================================================================================================
Package 架构 版本 源 大小
=====================================================================================================================
Installing for group install "开发工具":
bison x86_64 3.0.4-2.el7 base 674 k
byacc x86_64 1.9.20130304-3.el7 base 65 k
cscope x86_64 15.8-10.el7 base 203 k
ctags x86_64 5.8-13.el7 base 155 k
diffstat x86_64 1.57-4.el7 base 35 k
doxygen x86_64 1:1.8.5-4.el7 base 3.6 M
flex x86_64 2.5.37-6.el7 base 293 k
gcc-gfortran x86_64 4.8.5-44.el7 base 6.7 M
git x86_64 1.8.3.1-23.el7_8 base 4.4 M
indent x86_64 2.2.11-13.el7 base 150 k
intltool noarch 0.50.2-7.el7 base 59 k
libtool x86_64 2.4.2-22.el7_3 base 588 k
patch x86_64 2.7.1-12.el7_7 base 111 k
patchutils x86_64 0.3.3-5.el7_9 updates 104 k
rcs x86_64 5.9.0-7.el7 base 230 k
redhat-rpm-config noarch 9.1.0-88.el7.centos base 81 k
rpm-build x86_64 4.11.3-48.el7_9 updates 150 k
rpm-sign x86_64 4.11.3-48.el7_9 updates 49 k
subversion x86_64 1.7.14-16.el7 base 1.0 M
swig x86_64 2.0.10-5.el7 base 1.3 M
systemtap x86_64 4.0-13.el7 base 15 k
为依赖而安装:
dwz x86_64 0.11-3.el7 base 99 k
gettext-common-devel noarch 0.19.8.1-3.el7 base 410 k
gettext-devel x86_64 0.19.8.1-3.el7 base 320 k
kernel-debug-devel x86_64 3.10.0-1160.76.1.el7 updates 18 M
libgfortran x86_64 4.8.5-44.el7 base 301 k
libquadmath x86_64 4.8.5-44.el7 base 190 k
libquadmath-devel x86_64 4.8.5-44.el7 base 54 k
perl-Error noarch 1:0.17020-2.el7 base 32 k
perl-Git noarch 1.8.3.1-23.el7_8 base 56 k
perl-TermReadKey x86_64 2.30-20.el7 base 31 k
perl-XML-Parser x86_64 2.41-10.el7 base 223 k
perl-srpm-macros noarch 1-8.el7 base 4.6 k
subversion-libs x86_64 1.7.14-16.el7 base 922 k
systemtap-client x86_64 4.0-13.el7 base 3.6 M
systemtap-devel x86_64 4.0-13.el7 base 2.2 M
为依赖而更新:
gettext x86_64 0.19.8.1-3.el7 base 1.0 M
gettext-libs x86_64 0.19.8.1-3.el7 base 502 k
rpm x86_64 4.11.3-48.el7_9 updates 1.2 M
rpm-build-libs x86_64 4.11.3-48.el7_9 updates 108 k
rpm-libs x86_64 4.11.3-48.el7_9 updates 279 k
rpm-python x86_64 4.11.3-48.el7_9 updates 84 k
systemtap-runtime x86_64 4.0-13.el7 base 444 k
事务概要
=====================================================================================================================
安装 21 软件包 (+15 依赖软件包)
升级 ( 7 依赖软件包)
总计:50 M
总下载量:46 M
Downloading packages:
cscope-15.8-10.el7.x86_64.rpm FAILED
http://mirrors.cloud.aliyuncs.com/centos/7/os/x86_64/Packages/cscope-15.8-10.el7.x86_64.rpm: [Errno 14] curl#6 - "Could not resolve host: mirrors.cloud.aliyuncs.com; Unknown error"
正在尝试其它镜像。
(1/36): ctags-5.8-13.el7.x86_64.rpm | 155 kB 00:00:03
(2/36): bison-3.0.4-2.el7.x86_64.rpm | 674 kB 00:00:05
(3/36): dwz-0.11-3.el7.x86_64.rpm | 99 kB 00:00:00
(4/36): flex-2.5.37-6.el7.x86_64.rpm | 293 kB 00:00:00
(5/36): doxygen-1.8.5-4.el7.x86_64.rpm | 3.6 MB 00:00:08
(6/36): gettext-common-devel-0.19.8.1-3.el7.noarch.rpm | 410 kB 00:00:01
(7/36): gcc-gfortran-4.8.5-44.el7.x86_64.rpm | 6.7 MB 00:00:11
byacc-1.9.20130304-3.el7.x86_6 FAILED
http://mirrors.aliyuncs.com/centos/7/os/x86_64/Packages/byacc-1.9.20130304-3.el7.x86_64.rpm: [Errno 14] curl#7 - "Failed connect to mirrors.aliyuncs.com:80; Connection refused"
正在尝试其它镜像。
diffstat-1.57-4.el7.x86_64.rpm FAILED
http://mirrors.aliyuncs.com/centos/7/os/x86_64/Packages/diffstat-1.57-4.el7.x86_64.rpm: [Errno 14] curl#7 - "Failed connect to mirrors.aliyuncs.com:80; Connection refused"
正在尝试其它镜像。
(8/36): indent-2.2.11-13.el7.x86_64.rpm | 150 kB 00:00:03
(9/36): intltool-0.50.2-7.el7.noarch.rpm | 59 kB 00:00:00
(10/36): libgfortran-4.8.5-44.el7.x86_64.rpm | 301 kB 00:00:01
(11/36): libquadmath-4.8.5-44.el7.x86_64.rpm | 190 kB 00:00:00
(12/36): git-1.8.3.1-23.el7_8.x86_64.rpm | 4.4 MB 00:00:06
(13/36): libquadmath-devel-4.8.5-44.el7.x86_64.rpm | 54 kB 00:00:00
(14/36): patch-2.7.1-12.el7_7.x86_64.rpm | 111 kB 00:00:00
(15/36): perl-Error-0.17020-2.el7.noarch.rpm | 32 kB 00:00:00
(16/36): perl-Git-1.8.3.1-23.el7_8.noarch.rpm | 56 kB 00:00:00
(17/36): perl-TermReadKey-2.30-20.el7.x86_64.rpm | 31 kB 00:00:00
(18/36): libtool-2.4.2-22.el7_3.x86_64.rpm | 588 kB 00:00:02
(19/36): perl-XML-Parser-2.41-10.el7.x86_64.rpm | 223 kB 00:00:00
(20/36): perl-srpm-macros-1-8.el7.noarch.rpm | 4.6 kB 00:00:00
(21/36): redhat-rpm-config-9.1.0-88.el7.centos.noarch.rpm | 81 kB 00:00:00
(22/36): rcs-5.9.0-7.el7.x86_64.rpm | 230 kB 00:00:00
(23/36): patchutils-0.3.3-5.el7_9.x86_64.rpm | 104 kB 00:00:03
(24/36): rpm-build-4.11.3-48.el7_9.x86_64.rpm | 150 kB 00:00:00
(25/36): rpm-sign-4.11.3-48.el7_9.x86_64.rpm | 49 kB 00:00:00
(26/36): subversion-libs-1.7.14-16.el7.x86_64.rpm | 922 kB 00:00:05
(27/36): subversion-1.7.14-16.el7.x86_64.rpm | 1.0 MB 00:00:06
(28/36): systemtap-4.0-13.el7.x86_64.rpm | 15 kB 00:00:00
(29/36): swig-2.0.10-5.el7.x86_64.rpm | 1.3 MB 00:00:03
gettext-devel-0.19.8.1-3.el7.x FAILED ] 807 kB/s | 29 MB 00:00:21 ETA
http://mirrors.aliyuncs.com/centos/7/os/x86_64/Packages/gettext-devel-0.19.8.1-3.el7.x86_64.rpm: [Errno 14] curl#7 - "Failed connect to mirrors.aliyuncs.com:80; Connection refused"
正在尝试其它镜像。
(30/36): systemtap-devel-4.0-13.el7.x86_64.rpm | 2.2 MB 00:00:05
(31/36): cscope-15.8-10.el7.x86_64.rpm | 203 kB 00:00:00
(32/36): byacc-1.9.20130304-3.el7.x86_64.rpm | 65 kB 00:00:00
(33/36): diffstat-1.57-4.el7.x86_64.rpm | 35 kB 00:00:00
(34/36): gettext-devel-0.19.8.1-3.el7.x86_64.rpm | 320 kB 00:00:00
(35/36): systemtap-client-4.0-13.el7.x86_64.rpm | 3.6 MB 00:00:10
(36/36): kernel-debug-devel-3.10.0-1160.76.1.el7.x86_64.rpm | 18 MB 00:00:37
---------------------------------------------------------------------------------------------------------------------
总计 730 kB/s | 46 MB 00:01:04
Running transaction check
Running transaction test
Transaction test succeeded
Running transaction
正在更新 : rpm-libs-4.11.3-48.el7_9.x86_64 1/50
正在更新 : rpm-4.11.3-48.el7_9.x86_64 2/50
正在更新 : rpm-build-libs-4.11.3-48.el7_9.x86_64 3/50
正在安装 : libquadmath-4.8.5-44.el7.x86_64 4/50
正在安装 : 1:perl-Error-0.17020-2.el7.noarch 5/50
正在安装 : patch-2.7.1-12.el7_7.x86_64 6/50
正在更新 : gettext-libs-0.19.8.1-3.el7.x86_64 7/50
正在更新 : gettext-0.19.8.1-3.el7.x86_64 8/50
正在安装 : libquadmath-devel-4.8.5-44.el7.x86_64 9/50
正在安装 : libgfortran-4.8.5-44.el7.x86_64 10/50
正在安装 : gettext-common-devel-0.19.8.1-3.el7.noarch 11/50
正在安装 : dwz-0.11-3.el7.x86_64 12/50
正在安装 : kernel-debug-devel-3.10.0-1160.76.1.el7.x86_64 13/50
正在安装 : systemtap-devel-4.0-13.el7.x86_64 14/50
正在安装 : subversion-libs-1.7.14-16.el7.x86_64 15/50
正在安装 : perl-srpm-macros-1-8.el7.noarch 16/50
正在安装 : redhat-rpm-config-9.1.0-88.el7.centos.noarch 17/50
正在安装 : perl-TermReadKey-2.30-20.el7.x86_64 18/50
正在安装 : perl-Git-1.8.3.1-23.el7_8.noarch 19/50
正在安装 : git-1.8.3.1-23.el7_8.x86_64 20/50
正在安装 : gettext-devel-0.19.8.1-3.el7.x86_64 21/50
正在安装 : perl-XML-Parser-2.41-10.el7.x86_64 22/50
正在更新 : systemtap-runtime-4.0-13.el7.x86_64 23/50
正在安装 : systemtap-client-4.0-13.el7.x86_64 24/50
正在安装 : systemtap-4.0-13.el7.x86_64 25/50
正在安装 : intltool-0.50.2-7.el7.noarch 26/50
正在安装 : rpm-build-4.11.3-48.el7_9.x86_64 27/50
正在安装 : subversion-1.7.14-16.el7.x86_64 28/50
正在安装 : gcc-gfortran-4.8.5-44.el7.x86_64 29/50
正在更新 : rpm-python-4.11.3-48.el7_9.x86_64 30/50
正在安装 : rpm-sign-4.11.3-48.el7_9.x86_64 31/50
正在安装 : diffstat-1.57-4.el7.x86_64 32/50
正在安装 : byacc-1.9.20130304-3.el7.x86_64 33/50
正在安装 : bison-3.0.4-2.el7.x86_64 34/50
正在安装 : cscope-15.8-10.el7.x86_64 35/50
正在安装 : flex-2.5.37-6.el7.x86_64 36/50
正在安装 : indent-2.2.11-13.el7.x86_64 37/50
正在安装 : libtool-2.4.2-22.el7_3.x86_64 38/50
正在安装 : swig-2.0.10-5.el7.x86_64 39/50
正在安装 : 1:doxygen-1.8.5-4.el7.x86_64 40/50
正在安装 : rcs-5.9.0-7.el7.x86_64 41/50
正在安装 : patchutils-0.3.3-5.el7_9.x86_64 42/50
正在安装 : ctags-5.8-13.el7.x86_64 43/50
清理 : rpm-python-4.11.3-35.el7.x86_64 44/50
清理 : rpm-build-libs-4.11.3-35.el7.x86_64 45/50
清理 : rpm-libs-4.11.3-35.el7.x86_64 46/50
清理 : rpm-4.11.3-35.el7.x86_64 47/50
清理 : gettext-0.19.8.1-2.el7.x86_64 48/50
清理 : gettext-libs-0.19.8.1-2.el7.x86_64 49/50
清理 : systemtap-runtime-3.3-3.el7.x86_64 50/50
验证中 : ctags-5.8-13.el7.x86_64 1/50
验证中 : gcc-gfortran-4.8.5-44.el7.x86_64 2/50
验证中 : patchutils-0.3.3-5.el7_9.x86_64 3/50
验证中 : rpm-4.11.3-48.el7_9.x86_64 4/50
验证中 : libquadmath-devel-4.8.5-44.el7.x86_64 5/50
验证中 : systemtap-runtime-4.0-13.el7.x86_64 6/50
验证中 : perl-XML-Parser-2.41-10.el7.x86_64 7/50
验证中 : gettext-libs-0.19.8.1-3.el7.x86_64 8/50
验证中 : git-1.8.3.1-23.el7_8.x86_64 9/50
验证中 : rcs-5.9.0-7.el7.x86_64 10/50
验证中 : 1:doxygen-1.8.5-4.el7.x86_64 11/50
验证中 : libquadmath-4.8.5-44.el7.x86_64 12/50
验证中 : perl-TermReadKey-2.30-20.el7.x86_64 13/50
验证中 : perl-srpm-macros-1-8.el7.noarch 14/50
验证中 : intltool-0.50.2-7.el7.noarch 15/50
验证中 : swig-2.0.10-5.el7.x86_64 16/50
验证中 : perl-Git-1.8.3.1-23.el7_8.noarch 17/50
验证中 : libtool-2.4.2-22.el7_3.x86_64 18/50
验证中 : patch-2.7.1-12.el7_7.x86_64 19/50
验证中 : systemtap-client-4.0-13.el7.x86_64 20/50
验证中 : rpm-build-4.11.3-48.el7_9.x86_64 21/50
验证中 : systemtap-4.0-13.el7.x86_64 22/50
验证中 : gettext-devel-0.19.8.1-3.el7.x86_64 23/50
验证中 : libgfortran-4.8.5-44.el7.x86_64 24/50
验证中 : indent-2.2.11-13.el7.x86_64 25/50
验证中 : subversion-1.7.14-16.el7.x86_64 26/50
验证中 : subversion-libs-1.7.14-16.el7.x86_64 27/50
验证中 : flex-2.5.37-6.el7.x86_64 28/50
验证中 : kernel-debug-devel-3.10.0-1160.76.1.el7.x86_64 29/50
验证中 : systemtap-devel-4.0-13.el7.x86_64 30/50
验证中 : rpm-libs-4.11.3-48.el7_9.x86_64 31/50
验证中 : 1:perl-Error-0.17020-2.el7.noarch 32/50
验证中 : cscope-15.8-10.el7.x86_64 33/50
验证中 : bison-3.0.4-2.el7.x86_64 34/50
验证中 : rpm-python-4.11.3-48.el7_9.x86_64 35/50
验证中 : byacc-1.9.20130304-3.el7.x86_64 36/50
验证中 : gettext-0.19.8.1-3.el7.x86_64 37/50
验证中 : rpm-build-libs-4.11.3-48.el7_9.x86_64 38/50
验证中 : dwz-0.11-3.el7.x86_64 39/50
验证中 : diffstat-1.57-4.el7.x86_64 40/50
验证中 : gettext-common-devel-0.19.8.1-3.el7.noarch 41/50
验证中 : rpm-sign-4.11.3-48.el7_9.x86_64 42/50
验证中 : redhat-rpm-config-9.1.0-88.el7.centos.noarch 43/50
验证中 : rpm-python-4.11.3-35.el7.x86_64 44/50
验证中 : systemtap-runtime-3.3-3.el7.x86_64 45/50
验证中 : rpm-libs-4.11.3-35.el7.x86_64 46/50
验证中 : gettext-libs-0.19.8.1-2.el7.x86_64 47/50
验证中 : rpm-4.11.3-35.el7.x86_64 48/50
验证中 : gettext-0.19.8.1-2.el7.x86_64 49/50
验证中 : rpm-build-libs-4.11.3-35.el7.x86_64 50/50
已安装:
bison.x86_64 0:3.0.4-2.el7 byacc.x86_64 0:1.9.20130304-3.el7
cscope.x86_64 0:15.8-10.el7 ctags.x86_64 0:5.8-13.el7
diffstat.x86_64 0:1.57-4.el7 doxygen.x86_64 1:1.8.5-4.el7
flex.x86_64 0:2.5.37-6.el7 gcc-gfortran.x86_64 0:4.8.5-44.el7
git.x86_64 0:1.8.3.1-23.el7_8 indent.x86_64 0:2.2.11-13.el7
intltool.noarch 0:0.50.2-7.el7 libtool.x86_64 0:2.4.2-22.el7_3
patch.x86_64 0:2.7.1-12.el7_7 patchutils.x86_64 0:0.3.3-5.el7_9
rcs.x86_64 0:5.9.0-7.el7 redhat-rpm-config.noarch 0:9.1.0-88.el7.centos
rpm-build.x86_64 0:4.11.3-48.el7_9 rpm-sign.x86_64 0:4.11.3-48.el7_9
subversion.x86_64 0:1.7.14-16.el7 swig.x86_64 0:2.0.10-5.el7
systemtap.x86_64 0:4.0-13.el7
作为依赖被安装:
dwz.x86_64 0:0.11-3.el7 gettext-common-devel.noarch 0:0.19.8.1-3.el7
gettext-devel.x86_64 0:0.19.8.1-3.el7 kernel-debug-devel.x86_64 0:3.10.0-1160.76.1.el7
libgfortran.x86_64 0:4.8.5-44.el7 libquadmath.x86_64 0:4.8.5-44.el7
libquadmath-devel.x86_64 0:4.8.5-44.el7 perl-Error.noarch 1:0.17020-2.el7
perl-Git.noarch 0:1.8.3.1-23.el7_8 perl-TermReadKey.x86_64 0:2.30-20.el7
perl-XML-Parser.x86_64 0:2.41-10.el7 perl-srpm-macros.noarch 0:1-8.el7
subversion-libs.x86_64 0:1.7.14-16.el7 systemtap-client.x86_64 0:4.0-13.el7
systemtap-devel.x86_64 0:4.0-13.el7
作为依赖被升级:
gettext.x86_64 0:0.19.8.1-3.el7 gettext-libs.x86_64 0:0.19.8.1-3.el7 rpm.x86_64 0:4.11.3-48.el7_9
rpm-build-libs.x86_64 0:4.11.3-48.el7_9 rpm-libs.x86_64 0:4.11.3-48.el7_9 rpm-python.x86_64 0:4.11.3-48.el7_9
systemtap-runtime.x86_64 0:4.0-13.el7
完毕!
[root@python ~]# yum install -y zlib-devel bzip2-devel openssl-devel sqlite-devel readline-devel libffi-devel
已加载插件:fastestmirror, langpacks
Loading mirror speeds from cached hostfile
 * base: mirrors.aliyun.com
 * extras: mirrors.aliyun.com
 * updates: mirrors.aliyun.com
软件包 zlib-devel-1.2.7-20.el7_9.x86_64 已安装并且是最新版本
软件包 1:openssl-devel-1.0.2k-25.el7_9.x86_64 已安装并且是最新版本
正在解决依赖关系
--> 正在检查事务
---> 软件包 bzip2-devel.x86_64.0.1.0.6-13.el7 将被 安装
---> 软件包 libffi-devel.x86_64.0.3.0.13-19.el7 将被 安装
--> 正在处理依赖关系 libffi = 3.0.13-19.el7,它被软件包 libffi-devel-3.0.13-19.el7.x86_64 需要
---> 软件包 readline-devel.x86_64.0.6.2-11.el7 将被 安装
--> 正在处理依赖关系 readline = 6.2-11.el7,它被软件包 readline-devel-6.2-11.el7.x86_64 需要
--> 正在处理依赖关系 ncurses-devel,它被软件包 readline-devel-6.2-11.el7.x86_64 需要
---> 软件包 sqlite-devel.x86_64.0.3.7.17-8.el7_7.1 将被 安装
--> 正在处理依赖关系 sqlite = 3.7.17-8.el7_7.1,它被软件包 sqlite-devel-3.7.17-8.el7_7.1.x86_64 需要
--> 正在检查事务
---> 软件包 libffi.x86_64.0.3.0.13-18.el7 将被 升级
---> 软件包 libffi.x86_64.0.3.0.13-19.el7 将被 更新
---> 软件包 ncurses-devel.x86_64.0.5.9-14.20130511.el7_4 将被 安装
---> 软件包 readline.x86_64.0.6.2-10.el7 将被 升级
---> 软件包 readline.x86_64.0.6.2-11.el7 将被 更新
---> 软件包 sqlite.x86_64.0.3.7.17-8.el7 将被 升级
---> 软件包 sqlite.x86_64.0.3.7.17-8.el7_7.1 将被 更新
--> 解决依赖关系完成

依赖关系解决

=======================================================================================
 Package               架构          版本                            源           大小
=======================================================================================
正在安装:
 bzip2-devel           x86_64        1.0.6-13.el7                    base        218 k
 libffi-devel          x86_64        3.0.13-19.el7                   base         23 k
 readline-devel        x86_64        6.2-11.el7                      base        139 k
 sqlite-devel          x86_64        3.7.17-8.el7_7.1                base        104 k
为依赖而安装:
 ncurses-devel         x86_64        5.9-14.20130511.el7_4           base        712 k
为依赖而更新:
 libffi                x86_64        3.0.13-19.el7                   base         30 k
 readline              x86_64        6.2-11.el7                      base        193 k
 sqlite                x86_64        3.7.17-8.el7_7.1                base        394 k

事务概要
=======================================================================================
安装  4 软件包 (+1 依赖软件包)
升级           ( 3 依赖软件包)

总计:1.8 M
总下载量:1.2 M
Downloading packages:
(1/5): libffi-devel-3.0.13-19.el7.x86_64.rpm                    |  23 kB  00:00:02
(2/5): bzip2-devel-1.0.6-13.el7.x86_64.rpm                      | 218 kB  00:00:03
(3/5): readline-devel-6.2-11.el7.x86_64.rpm                     | 139 kB  00:00:00
(4/5): ncurses-devel-5.9-14.20130511.el7_4.x86_64.rpm           | 712 kB  00:00:01
(5/5): sqlite-devel-3.7.17-8.el7_7.1.x86_64.rpm                 | 104 kB  00:00:00
---------------------------------------------------------------------------------------
总计                                                      281 kB/s | 1.2 MB  00:04
Running transaction check
Running transaction test
Transaction test succeeded
Running transaction
  正在更新    : readline-6.2-11.el7.x86_64                                        1/11
  正在更新    : sqlite-3.7.17-8.el7_7.1.x86_64                                    2/11
  正在更新    : libffi-3.0.13-19.el7.x86_64                                       3/11
  正在安装    : ncurses-devel-5.9-14.20130511.el7_4.x86_64                        4/11
  正在安装    : readline-devel-6.2-11.el7.x86_64                                  5/11
  正在安装    : libffi-devel-3.0.13-19.el7.x86_64                                 6/11
  正在安装    : sqlite-devel-3.7.17-8.el7_7.1.x86_64                              7/11
  正在安装    : bzip2-devel-1.0.6-13.el7.x86_64                                   8/11
  清理        : sqlite-3.7.17-8.el7.x86_64                                        9/11
  清理        : readline-6.2-10.el7.x86_64                                       10/11
  清理        : libffi-3.0.13-18.el7.x86_64                                      11/11
  验证中      : bzip2-devel-1.0.6-13.el7.x86_64                                   1/11
  验证中      : readline-6.2-11.el7.x86_64                                        2/11
  验证中      : sqlite-3.7.17-8.el7_7.1.x86_64                                    3/11
  验证中      : sqlite-devel-3.7.17-8.el7_7.1.x86_64                              4/11
  验证中      : ncurses-devel-5.9-14.20130511.el7_4.x86_64                        5/11
  验证中      : libffi-devel-3.0.13-19.el7.x86_64                                 6/11
  验证中      : readline-devel-6.2-11.el7.x86_64                                  7/11
  验证中      : libffi-3.0.13-19.el7.x86_64                                       8/11
  验证中      : libffi-3.0.13-18.el7.x86_64                                       9/11
  验证中      : readline-6.2-10.el7.x86_64                                       10/11
  验证中      : sqlite-3.7.17-8.el7.x86_64                                       11/11

已安装:
  bzip2-devel.x86_64 0:1.0.6-13.el7        libffi-devel.x86_64 0:3.0.13-19.el7
  readline-devel.x86_64 0:6.2-11.el7       sqlite-devel.x86_64 0:3.7.17-8.el7_7.1

作为依赖被安装:
  ncurses-devel.x86_64 0:5.9-14.20130511.el7_4

作为依赖被升级:
  libffi.x86_64 0:3.0.13-19.el7                readline.x86_64 0:6.2-11.el7
  sqlite.x86_64 0:3.7.17-8.el7_7.1

完毕!
3、在Python官网下载源码包
Python官网地址:https://www.python.org/


[root@python ~]# wget https://www.python.org/ftp/python/3.8.6/Python-3.8.6.tar.xz
--2022-10-21 19:52:43--  https://www.python.org/ftp/python/3.8.6/Python-3.8.6.tar.xz
正在解析主机 www.python.org (www.python.org)... 151.101.76.223, 2a04:4e42:12::223
正在连接 www.python.org (www.python.org)|151.101.76.223|:443... 已连接。
无法建立 SSL 连接。
[root@python ~]# wget http://www.python.org/ftp/python/3.8.6/Python-3.8.6.tar.xz
--2022-10-21 19:56:14--  http://www.python.org/ftp/python/3.8.6/Python-3.8.6.tar.xz
正在解析主机 www.python.org (www.python.org)... 151.101.76.223, 2a04:4e42:12::223
正在连接 www.python.org (www.python.org)|151.101.76.223|:80... 已连接。
已发出 HTTP 请求,正在等待回应... 301 Moved Permanently
位置:https://www.python.org/ftp/python/3.8.6/Python-3.8.6.tar.xz [跟随至新的 URL]
--2022-10-21 19:56:16--  https://www.python.org/ftp/python/3.8.6/Python-3.8.6.tar.xz
正在连接 www.python.org (www.python.org)|151.101.76.223|:443... 已连接。
已发出 HTTP 请求,正在等待回应... 200 OK
长度:18233864 (17M) [application/octet-stream]
正在保存至: “Python-3.8.6.tar.xz”

100%[===========================================================================>] 18,233,864  10.2KB/s 用时 24m 51s

2022-10-21 20:21:11 (11.9 KB/s) - 已保存 “Python-3.8.6.tar.xz” [18233864/18233864])
4、解压安装
[root@python ~]# ls
anaconda-ks.cfg       Python-3.8.6.tar.xz  zabbix  模板  图片  下载  桌面
initial-setup-ks.cfg  sshd_config          公共    视频  文档  音乐
[root@python ~]# tar -xf Python-3.8.6.tar.xz
[root@python ~]# ls
anaconda-ks.cfg       Python-3.8.6         sshd_config  公共  视频  文档  音乐
initial-setup-ks.cfg  Python-3.8.6.tar.xz  zabbix       模板  图片  下载  桌面
[root@python ~]# cd Python-3.8.6
[root@python Python-3.8.6]# ls
aclocal.m4          configure.ac  Lib              Misc     PCbuild        setup.py
CODE_OF_CONDUCT.md  Doc           LICENSE          Modules  Programs       Tools
config.guess        Grammar       m4               Objects  pyconfig.h.in
config.sub          Include       Mac              Parser   Python
configure           install-sh    Makefile.pre.in  PC       README.rst
5、修改文件module的配置信息
5.1方法一:用vim修改Python-3.8.6/Modules/Setup,去掉如下几行的注释
readline readline.c -lreadline -ltermcap

SSL=/usr/local/ssl
_ssl _ssl.c \
             -DUSE_SSL -I$(SSL)/include -
I$(SSL) /include/openssl \
         -L$(SSL)/lib  -lssl -lcrypto
5.2 方法二:在shell命令提示符下执行如下命令:
[root@python Python-3.8.6]# sed -ri 's/^#readline/readline/' Modules/Setup
[root@python Python-3.8.6]# sed -ri 's/^#(SSL=)/\1/' Modules/Setup
[root@python Python-3.8.6]# sed -ri 's/^#(_ssl)/\1/' Modules/Setup
[root@python Python-3.8.6]# sed -ri 's/^#([\t]*-DUSE)/\1/' Modules/Setup
[root@python Python-3.8.6]# sed -ri 's/^#([\t]*-L\$\(SSL\))/\1/' Modules/Setup
6、进行编译安装
[root@python Python-3.8.6]#./configure --enable-shared  #--enable-shared 指定安装共享库,共享库在使用其他需要调用Python的软件是会用到,比如使用mod_wgis连接Apache与python时需要
[root@python Python-3.8.6]# make -j 2 && make install #-j 当前主机的 cpu 核心数
LD_LIBRARY_PATH=/root/Python-3.8.6 CC='gcc -pthread' LDSHARED='gcc -pthread -shared    ' OPT='-DNDEBUG -g -fwrapv -O3 -Wall' 	_TCLTK_INCLUDES='' _TCLTK_LIBS='' 	./python -E ./setup.py  build
running build
running build_ext
INFO: Can't locate Tcl/Tk libs and/or headers

Python build finished successfully!
The necessary bits to build these optional modules were not found:
_dbm                  _gdbm                 _lzma
_tkinter              _uuid
To find the necessary bits, look in setup.py in detect_modules() for the module's name.
....
....
Looking in links: /tmp/tmpip9k7d0a
Processing /tmp/tmpip9k7d0a/setuptools-49.2.1-py3-none-any.whl
Processing /tmp/tmpip9k7d0a/pip-20.2.1-py2.py3-none-any.whl
Installing collected packages: setuptools, pip
Successfully installed pip-20.2.1 setuptools-49.2.1
二、配置环境
1、执行如下命令
[root@python ~]# cmd1='export LD_LIBRARY_PATH='
[root@python ~]# cmd2='$LD_LIBRARY_PATH:/usr/local/lib'
[root@python ~]# file="/etc/profile.d/python3_lib.sh"
[root@python ~]# echo "${cmd1}${cmd2}" >$file
[root@python ~]# path="/usr/local/lib"
[root@python ~]# file2="/etc/ld.so.conf.d/python3.conf"
[root@python ~]# echo ${path} > $file2
[root@python ~]# cat /etc/profile.d/python3_lib.sh
export LD_LIBRARY_PATH=$LD_LIBRARY_PATH:/usr/local/lib
[root@python ~]# cat /etc/ld.so.conf.d/python3.conf
/usr/local/lib
接下来,执行如下命令使配置好的环境信息生效
[root@python ~]# ldconfig
[root@python ~]# source /etc/profile
2、测试Python3
[root@python ~]# python3 -V
Python 3.8.6
[root@python ~]# python  #这是系统自带的
Python 2.7.5 (default, Jun 28 2022, 15:30:04)
[GCC 4.8.5 20150623 (Red Hat 4.8.5-44)] on linux2
Type "help", "copyright", "credits" or "license" for more information.
>>> exit()

[root@python ~]# python3 #这是我们刚刚安装的
Python 3.8.6 (default, Oct 21 2022, 21:12:03)
[GCC 4.8.5 20150623 (Red Hat 4.8.5-44)] on linux
Type "help", "copyright", "credits" or "license" for more information.
>>> exit()
如上显示含有Python3.8.6就没有问题
3、测试pip3
[root@python ~]# pip3 -V #pip的作用类似Linux中的yum
pip 20.2.1 from /usr/local/lib/python3.8/site-packages/pip (python 3.8)
输出信息中的目录
/usr/local/lib/python3.8/site-packages/
是用于存放 安装的第三方模块的
三、配置使用本地的源安装第三方模块
1.在当前用户的家目录下创建一个隐藏的目录.pip
[root@python ~]# mkdir ~/.pip
2.执行如下命令,以便写入国内的源:
[root@python ~]# echo '[global]' >> ~/.pip/pip.conf
[root@python ~]# c1="index-url=https://"
[root@python ~]# c2="mirrors.aliyun.com/pypi/simple"
[root@python ~]# echo "${c1}${c2}" >> ~/.pip/pip.conf
[root@python ~]# cat /root/.pip/pip.conf
[global]
index-url=https://mirrors.aliyun.com/pypi/simple
豆瓣源:https://pypi.douban.com/simple/
阿里源:https://mirrors.aliyun.com/pypi/simple
3.测试配置正确行
可以安装一个增强版的解释器ipython用于测试,后面也会用到这个模块
[root@python ~]# pip3 install ipython
Looking in indexes: https://mirrors.aliyun.com/pypi/simple
Collecting ipython
  Downloading https://mirrors.aliyun.com/pypi/packages/13/0d/ad3266203acb01189588aac9c1fc4dc982b58b0512ddb3cd4bea3cc26e22/ipython-8.5.0-py3-none-any.whl (752 kB)
     |████████████████████████████████| 752 kB 1.1 MB/s
Collecting pexpect>4.3; sys_platform != "win32"
  Downloading https://mirrors.aliyun.com/pypi/packages/39/7b/88dbb785881c28a102619d46423cb853b46dbccc70d3ac362d99773a78ce/pexpect-4.8.0-py2.py3-none-any.whl (59 kB)
     |████████████████████████████████| 59 kB 777 kB/s
Collecting matplotlib-inline
  Downloading https://mirrors.aliyun.com/pypi/packages/f2/51/c34d7a1d528efaae3d8ddb18ef45a41f284eacf9e514523b191b7d0872cc/matplotlib_inline-0.1.6-py3-none-any.whl (9.4 kB)
Collecting backcall
  Downloading https://mirrors.aliyun.com/pypi/packages/4c/1c/ff6546b6c12603d8dd1070aa3c3d273ad4c07f5771689a7b69a550e8c951/backcall-0.2.0-py2.py3-none-any.whl (11 kB)
Collecting decorator
  Downloading https://mirrors.aliyun.com/pypi/packages/d5/50/83c593b07763e1161326b3b8c6686f0f4b0f24d5526546bee538c89837d6/decorator-5.1.1-py3-none-any.whl (9.1 kB)
Collecting prompt-toolkit<3.1.0,>3.0.1
  Downloading https://mirrors.aliyun.com/pypi/packages/26/ec/2ebddd1f0584fec4a6d4b5dc57627254070c3db310f00981bc5de03dd5ab/prompt_toolkit-3.0.31-py3-none-any.whl (382 kB)
     |████████████████████████████████| 382 kB 1.2 MB/s
Collecting pickleshare
  Downloading https://mirrors.aliyun.com/pypi/packages/9a/41/220f49aaea88bc6fa6cba8d05ecf24676326156c23b991e80b3f2fc24c77/pickleshare-0.7.5-py2.py3-none-any.whl (6.9 kB)
Collecting stack-data
  Downloading https://mirrors.aliyun.com/pypi/packages/57/dc/9367ef8074e2331706fbad14d749157341fbffd21339c43820e07664ec94/stack_data-0.5.1-py3-none-any.whl (24 kB)
Collecting traitlets>=5
  Downloading https://mirrors.aliyun.com/pypi/packages/7d/28/8f4757d68ee7c46e0733dda81595f1bd107fda7bc0c6a577912387e87d86/traitlets-5.4.0-py3-none-any.whl (107 kB)
     |████████████████████████████████| 107 kB 1.3 MB/s
Collecting pygments>=2.4.0
  Downloading https://mirrors.aliyun.com/pypi/packages/4f/82/672cd382e5b39ab1cd422a672382f08a1fb3d08d9e0c0f3707f33a52063b/Pygments-2.13.0-py3-none-any.whl (1.1 MB)
     |████████████████████████████████| 1.1 MB 1.2 MB/s
Collecting jedi>=0.16
  Downloading https://mirrors.aliyun.com/pypi/packages/b3/0e/836f12ec50075161e365131f13f5758451645af75c2becf61c6351ecec39/jedi-0.18.1-py2.py3-none-any.whl (1.6 MB)
     |████████████████████████████████| 1.6 MB 1.2 MB/s
Collecting ptyprocess>=0.5
  Downloading https://mirrors.aliyun.com/pypi/packages/22/a6/858897256d0deac81a172289110f31629fc4cee19b6f01283303e18c8db3/ptyprocess-0.7.0-py2.py3-none-any.whl (13 kB)
Collecting wcwidth
  Downloading https://mirrors.aliyun.com/pypi/packages/59/7c/e39aca596badaf1b78e8f547c807b04dae603a433d3e7a7e04d67f2ef3e5/wcwidth-0.2.5-py2.py3-none-any.whl (30 kB)
Collecting pure-eval
  Downloading https://mirrors.aliyun.com/pypi/packages/2b/27/77f9d5684e6bce929f5cfe18d6cfbe5133013c06cb2fbf5933670e60761d/pure_eval-0.2.2-py3-none-any.whl (11 kB)
Collecting executing
  Downloading https://mirrors.aliyun.com/pypi/packages/00/de/9222dd64c07608cfe7b43e0ced0c6317b003c8ebef8043a6938ea22d9796/executing-1.1.0-py2.py3-none-any.whl (22 kB)
Collecting asttokens
  Downloading https://mirrors.aliyun.com/pypi/packages/2d/1b/fdbdf82b86e07ca90985740ac160a1dd4ab09cb81071ec12d71c701e1138/asttokens-2.0.8-py2.py3-none-any.whl (23 kB)
Collecting parso<0.9.0,>=0.8.0
  Downloading https://mirrors.aliyun.com/pypi/packages/05/63/8011bd08a4111858f79d2b09aad86638490d62fbf881c44e434a6dfca87b/parso-0.8.3-py2.py3-none-any.whl (100 kB)
     |████████████████████████████████| 100 kB 812 kB/s
Collecting six
  Downloading https://mirrors.aliyun.com/pypi/packages/d9/5a/e7c31adbe875f2abbb91bd84cf2dc52d792b5a01506781dbcf25c91daf11/six-1.16.0-py2.py3-none-any.whl (11 kB)
Installing collected packages: ptyprocess, pexpect, traitlets, matplotlib-inline, backcall, decorator, wcwidth, prompt-toolkit, pickleshare, pure-eval, executing, six, asttokens, stack-data, pygments, parso, jedi, ipython
Successfully installed asttokens-2.0.8 backcall-0.2.0 decorator-5.1.1 executing-1.1.0 ipython-8.5.0 jedi-0.18.1 matplotlib-inline-0.1.6 parso-0.8.3 pexpect-4.8.0 pickleshare-0.7.5 prompt-toolkit-3.0.31 ptyprocess-0.7.0 pure-eval-0.2.2 pygments-2.13.0 six-1.16.0 stack-data-0.5.1 traitlets-5.4.0 wcwidth-0.2.5
WARNING: You are using pip version 20.2.1; however, version 22.2.2 is available.
You should consider upgrading via the '/usr/local/bin/python3.8 -m pip install --upgrade pip' command.
4.进行升级
[root@python ~]# pip3 install --upgrade pip
Looking in indexes: https://mirrors.aliyun.com/pypi/simple
Collecting pip
  Downloading https://mirrors.aliyun.com/pypi/packages/1f/2c/d9626f045e7b49a6225c6b09257861f24da78f4e5f23af2ddbdf852c99b8/pip-22.2.2-py3-none-any.whl (2.0 MB)
     |████████████████████████████████| 2.0 MB 1.4 MB/s
Installing collected packages: pip
  Attempting uninstall: pip
    Found existing installation: pip 20.2.1
    Uninstalling pip-20.2.1:
      Successfully uninstalled pip-20.2.1
Successfully installed pip-22.2.2
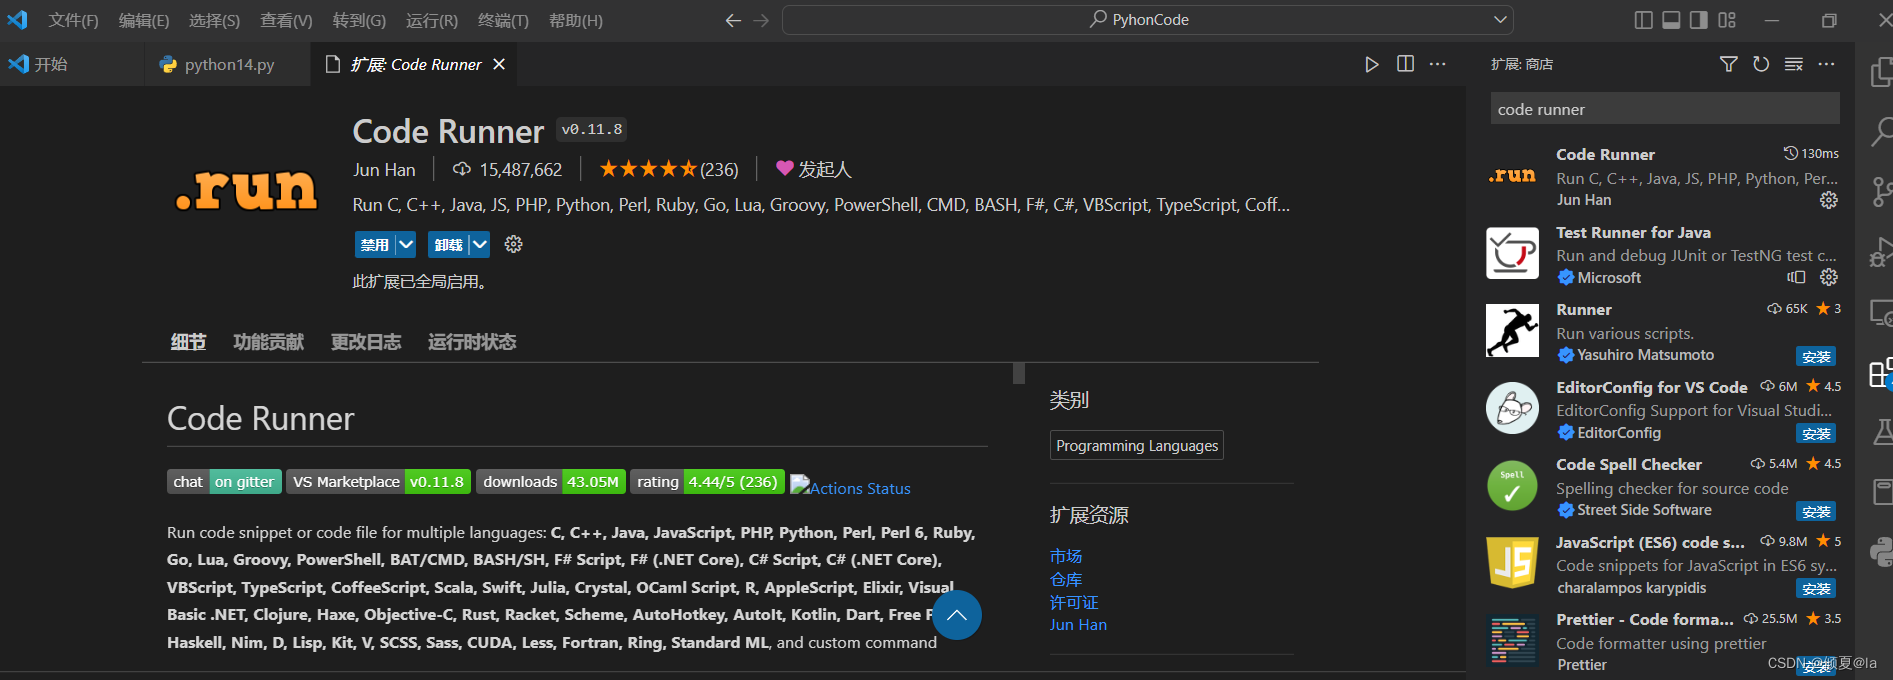
四、安装VSCode
1.打开VSCode官网
VSCdoe官网地址:https://code.visualstudio.com/

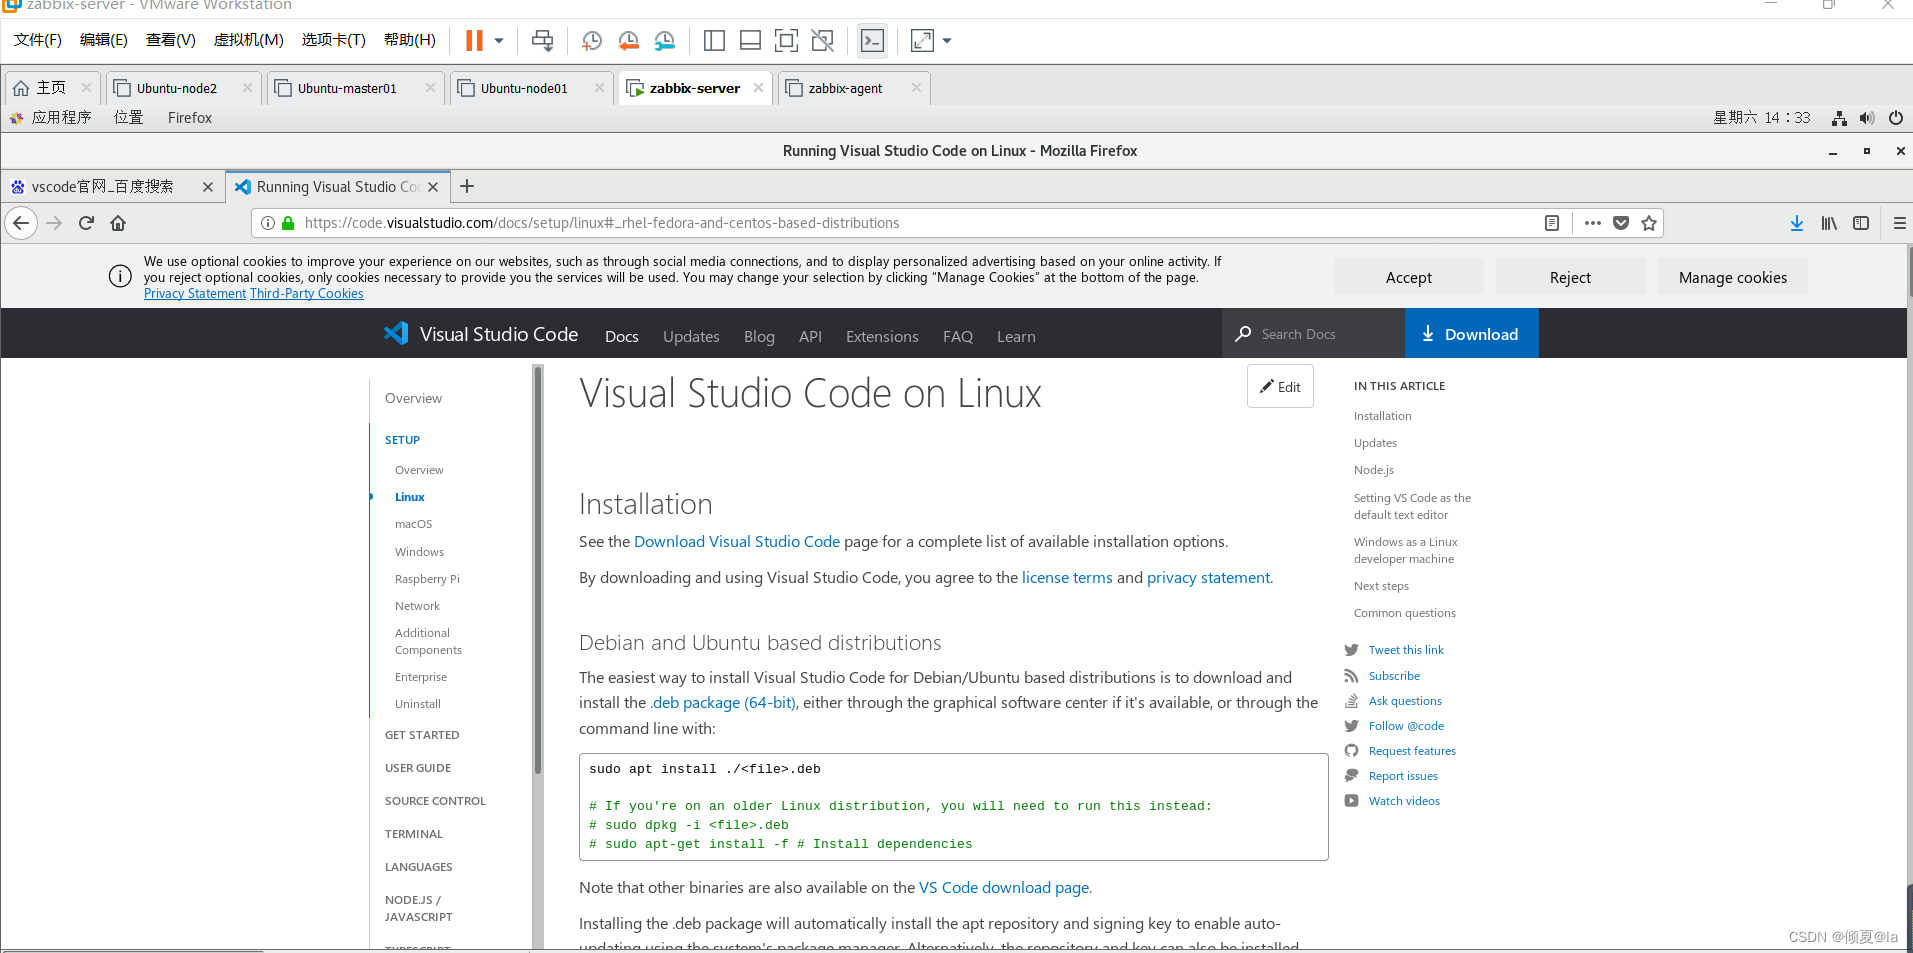

2.按照VSCode官方文档进行下载
[root@python ~]# rpm --import https://packages.microsoft.com/keys/microsoft.asc

[root@python ~]# sh -c 'echo -e "[code]\nname=Visual Studio Code\nbaseurl=https://packages.microsoft.com/yumrepos/vscode\nenabled=1\ngpgcheck=1\ngpgkey=https://packages.microsoft.com/keys/microsoft.asc" > /etc/yum.repos.d/vscode.repo'

[root@python ~]# yum check-update
已加载插件:fastestmirror, langpacks
Loading mirror speeds from cached hostfile
 * base: mirrors.aliyun.com
 * extras: mirrors.aliyun.com
 * updates: mirrors.aliyun.com
base                                               | 3.6 kB     00:00
epel                                               | 4.7 kB     00:00
extras                                             | 2.9 kB     00:00
updates                                            | 2.9 kB     00:00
...
...
yum-plugin-fastestmirror.noarch     1.1.31-54.el7_8                base
zenity.x86_64                       3.28.1-2.el7_9                 updates
取代的软件包
iwl7260-firmware.noarch             25.30.13.0-80.el7_9            updates
    iwl7265-firmware.noarch         22.0.7.0-69.el7                @anaconda
urw-base35-fonts.noarch             20170801-10.el7                base
    urw-fonts.noarch                2.4-16.el7                     @anaconda
webkitgtk4.x86_64                   2.28.2-3.el7                   updates
    webkitgtk4-plugin-process-gtk2.x86_64
                                    2.20.5-1.el7                   @anaconda


[root@python ~]#sudo yum install  code
已加载插件:fastestmirror, langpacks
Loading mirror speeds from cached hostfile
 * base: mirrors.aliyun.com
 * extras: mirrors.aliyun.com
 * updates: mirrors.aliyun.com
正在解决依赖关系
--> 正在检查事务
---> 软件包 code.x86_64.0.1.72.2-1665614416.el7 将被 安装
--> 解决依赖关系完成

依赖关系解决

==========================================================================
 Package     架构          版本                         源           大小
==========================================================================
正在安装:
 code        x86_64        1.72.2-1665614416.el7        code        119 M

事务概要
==========================================================================
安装  1 软件包

总下载量:119 M
安装大小:350 M
Is this ok [y/d/N]: y
Downloading packages:
code-1.72.2-1665614416.el7.x86_64.rpm                | 119 MB   00:15
Running transaction check
Running transaction test
Transaction test succeeded
Running transaction
  正在安装    : code-1.72.2-1665614416.el7.x86_64                           1/1
  验证中      : code-1.72.2-1665614416.el7.x86_64                           1/1

已安装:
  code.x86_64 0:1.72.2-1665614416.el7

完毕!
使文件变成图标
[root@python ~]# ls
anaconda-ks.cfg  initial-setup-ks.cfg  zabbix  模板  图片  下载  桌面
hello.py         sshd_config           公共    视频  文档  音乐
[root@python ~]# cp /usr/share/applications/code.desktop ~/桌面 #将文件拷贝到桌面

3.添加桌面快捷方式
3.1 在终端输入如下命令
[root@python ~]# cp /usr/share/applications/code.desktop  ~/桌面/
[root@python ~]# cp /usr/share/applications/code.desktop  ~/Desktop/
3.2 接下来双击桌面快捷方式,再点击标记为信任


3.3 如果点击图标没有反应则需要按照下图加上 --no-sandbox

[root@python applications]# code
You are trying to start Visual Studio Code as a super user which isn't recommended. If this was intended, please add the argument `--no-sandbox` and specify an alternate user data directory using the `--user-data-dir` argument.
4.安装插件
4.1 双击桌面图标打开软件

4.2 打开应用商店,安装中文简体插件

4.3 进行汉化

4.4 安装成功之后,关闭软件,然后再重新打开

4.5 汉化完成

4.6 安装文档图标(vscode-icons)
4.5 接下来会自动提示设置图标主题
5.基本设置

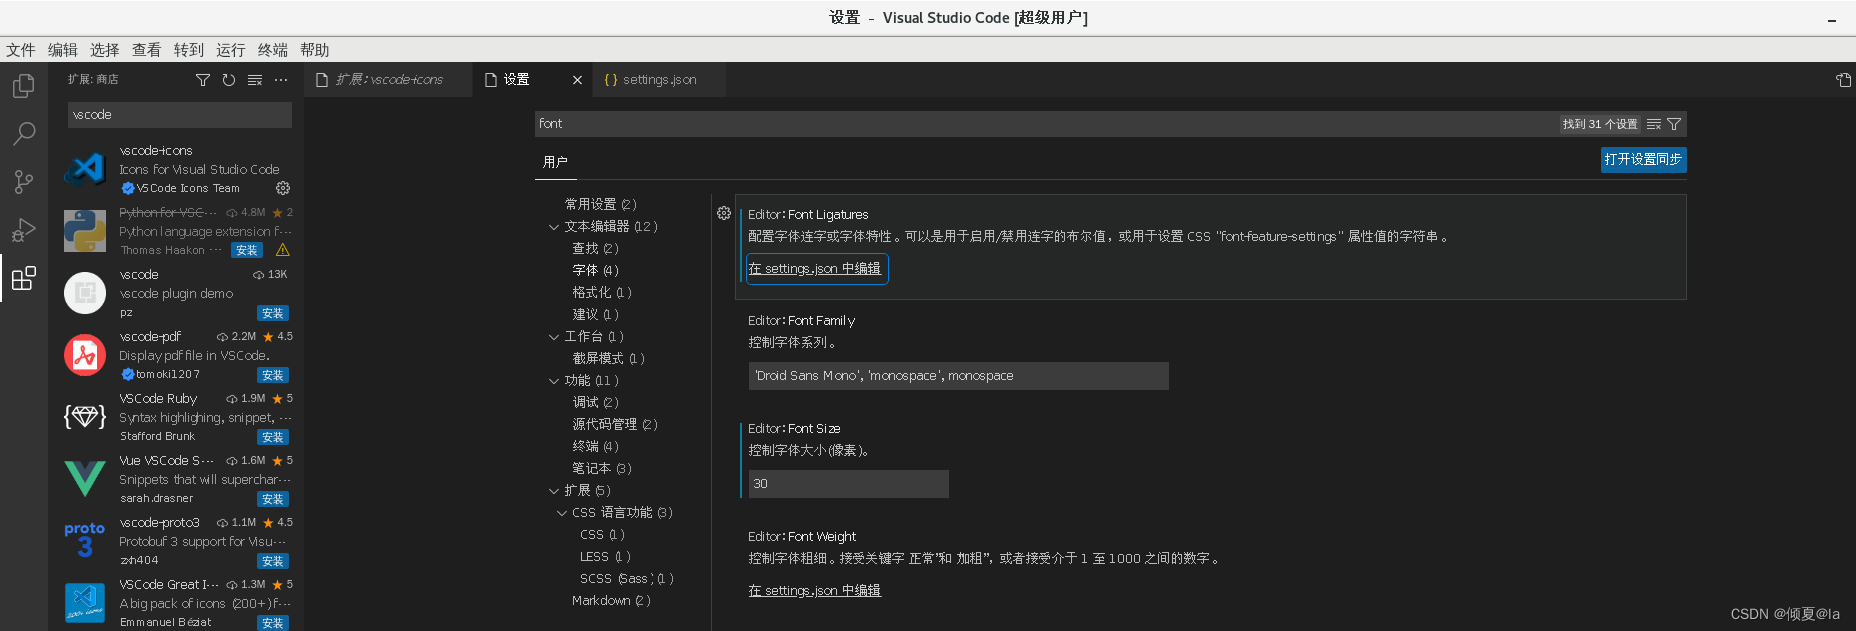
5.1 打开配置文件方式

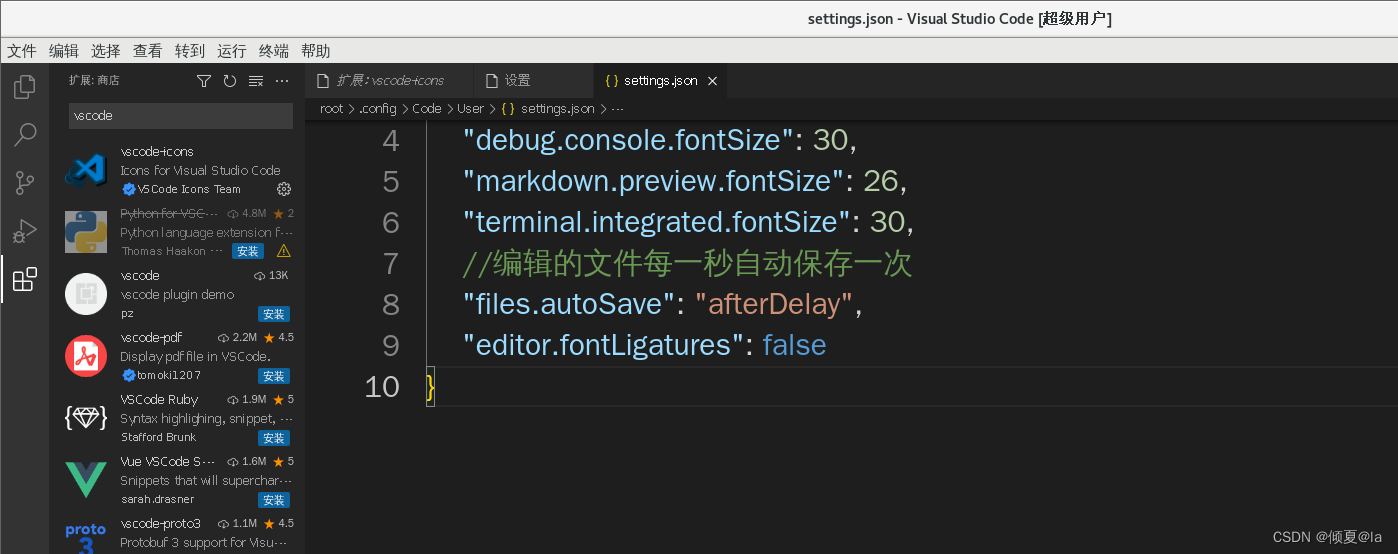
5.2 添加如下内容到settings.json配置文件中,并按下Control + s 保存
"git.ignoreLegacyWarning": true,
    "workbench.iconTheme": "vscode-icons",
    "editor.fontSize": 30,
    "debug.console.fontSize": 30,
    "markdown.preview.fontSize": 26,
    "terminal.integrated.fontSize": 30,
    //编辑的文件每一秒自动保存一次
    "files.autoSave": "afterDelay",
    "editor.fontLigatures": false
5.3 完成后的样子
五、创建一个 Python 文件
创建的文件需要有对应的拓展名,有了对应的拓展名,VSCode就会自动识别,并提示安装对应的插件进行支持。
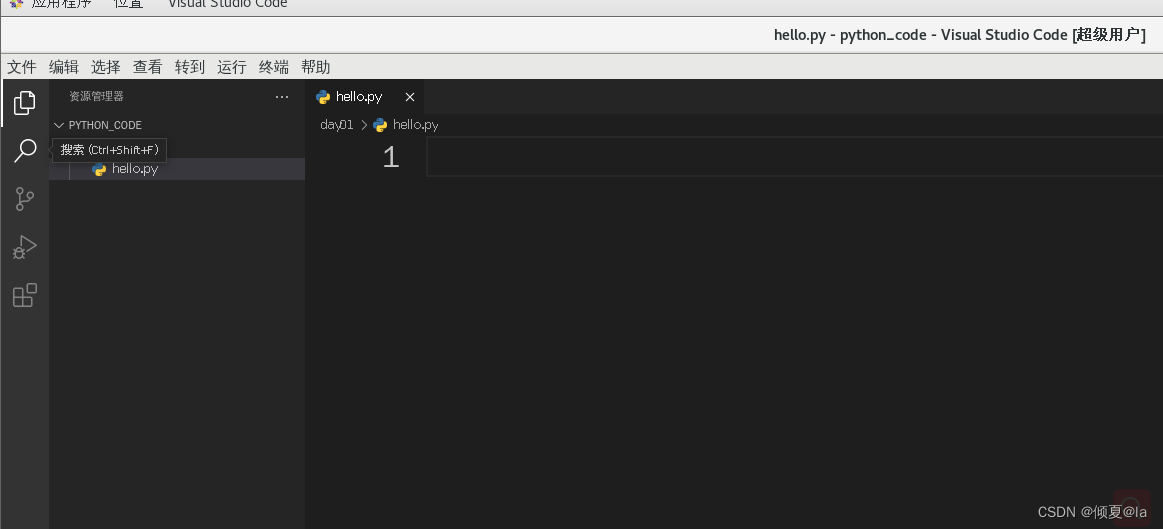
1、 创建python文件
比如下面创建一个Python的文件的步骤
1.1 我们可以在当前用户的家目录下,创建一个文件夹为python_code
[root@python ~]# mkdir python_code
1.2 接下来在VSCode 中打开这个文件夹


目前打开的这个目录就是一个项目的主目录,项目所有的代码都应该放到这个目录下,可以在目录下再创建其他目录。
重点:在VSCode看来,这个目录就是当前的工作目录,假设在vscode中执行的代码的相对路径,就是相对于这个目录的,而不会是这个目录下面的其他目录
1.3 在项目目录中创建目录和文件
鼠标点击项目目录会出现创建文档的图标

1.4 点击创建的目录,选择创建文件hello.py

1.5 安装对应的插件
VSCode会自动提示安装对应的插件


2、编辑代码并运行

2.1 安装Code Runner
刚刚的执行方式有点小缺点,当你重复执行这个文件的时候,之前的输出在终端中不能清除,这可能会影响观看。使用code runner插件可以解决,并且它支持多重语言。

2.2 配置Run Code
再次打开配置文件 settings.json 文件添加如下内容,并按下Control + s保存
"code-runner.clearPreviousOutput": true,

    "code-runner.runInTerminal": true,
    //每次运行文件之前,保存当前文件
    "code-runner.saveFileBeforeRun": true,
     //默认的语言
     "code-runner.defaultLanguage": "python",
     //每次运行文件前 保留所有的文件
     "code-runner.saveAllFilesBeforeRun": true,
     //设置Python3 解释器路径
     "code-runner.executorMap": {
            "python": "/usr/local/bin/python3"
     }
最终的配置文件
{
    "workbench.iconTheme": "vscode-icons",
    "editor.fontSize": 30,
    "debug.console.fontSize": 30,
    "markdown.preview.fontSize": 26,
    "terminal.integrated.fontSize": 30,
    //编辑的文件每一秒自动保存一次
    "files.autoSave": "afterDelay",
    "editor.fontLigatures": false,
    "code-runner.clearPreviousOutput": true,

    "code-runner.runInTerminal": true,
    //每次运行文件之前,保存当前文件
    "code-runner.saveFileBeforeRun": true,
     //默认的语言
     "code-runner.defaultLanguage": "python",
     //每次运行文件前 保留所有的文件
     "code-runner.saveAllFilesBeforeRun": true,
     //设置Python3 解释器路径
     "code-runner.executorMap": {
            "python": "/usr/local/bin/python3"
     }
}
3、部分快捷键
快速添加注释
鼠标点击某一行,同时按下 Ctrl和 ?/,重复按下取消注释
快速复制一行
通过鼠标选中需要复制的行,之后先按Ctrl和Shift不放,再按下方向键,会向下复制被选中的内容。
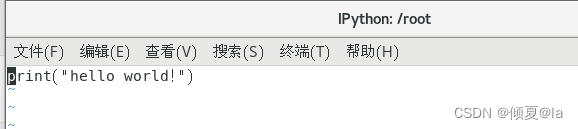
[root@python ~]# ipython
Python 3.8.6 (default, Oct 21 2022, 21:12:03)
Type 'copyright', 'credits' or 'license' for more information
IPython 8.5.0 -- An enhanced Interactive Python. Type '?' for help.

In [1]: s = 'hello'
In [2]: s.upper()  #调用函数
Out[2]: 'HELLO'
In [4]: ??open    #查看源码,按q退出
In [5]: !vi hello.py

In [14]: %run hello.py  #运行脚本
hello world!
六、python基础知识点
1、练手小程序
1.1 假设目前需要写一个小的程序,程序功能很简单,叫做猜数字。
1.给用户一个提示信息,让其输入一个数字
2.接着那用户输入的数字和18进行比较大小
3.等于18,就输出“相等”
4.小于18,就输出“小了”
5.大于18,就输出“大了”
1.2 需求分析和分解技术点
1.程序和用户交互
思考一下,如何实现?
我们可以分析一下给提示信息,让其输入一个数字
这里会用的和用户的交互,就是程序和用户的交互。
Python中使用 input 函数实现
input("这里写提示信息,必须使用引号引起来")
2、变量
用户的输入可以使用一个变量接收
n = input("请输一个数字")
2.1 变量命名规则
1.不要以单下划线和双下划线开头;如:_user或__user
2.变量命名要易度;如:user_name,而不是username
3.不要使用标准库中(内置)的模块名或者第三方的模块名
4.不要用这些python内置的关键字:
In [16]: import keyword

In [17]: keyword.kwlist
Out[17]:
['False','None','True', 'and','as','assert','async','await', 'break','class','continue', 'def','del','elif','else','except', 'finally','for','from','global','if','import','in','is','lambda','nonlocal', 'not','or','pass','raise','return','try','while','with','yield']
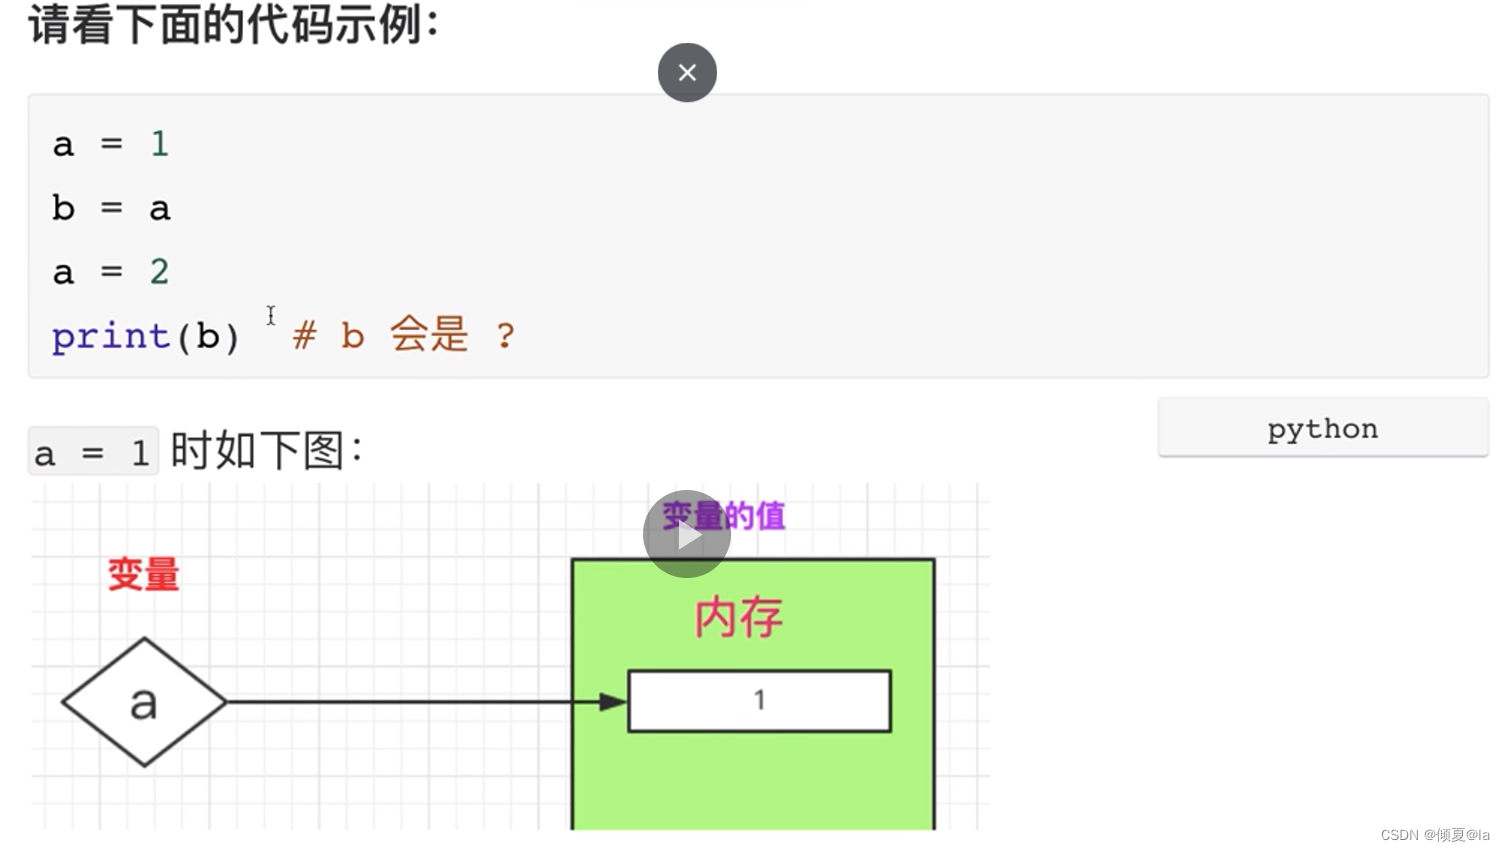
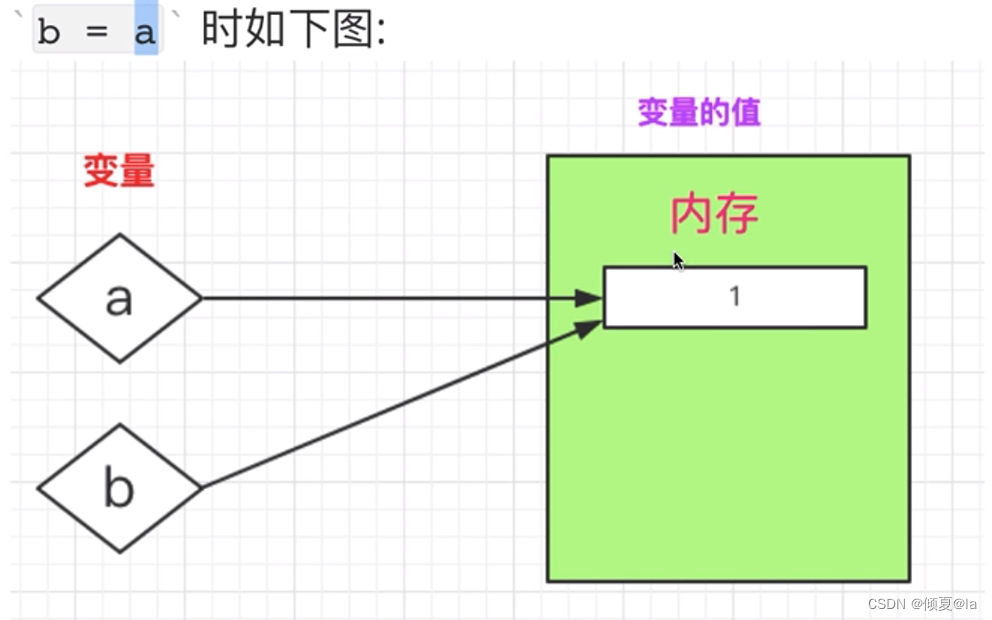
2.2 如何理解Python的变量赋值
在Python中究竟该如何正确理解变量的赋值过程?
s = 'hello'
以上的变量赋值,应该说成把变量名 s 分配给 hello 这个对象更合理。hello 这个对象会在内存中先被创建,之后再把变量名 s 分配给这个对象。
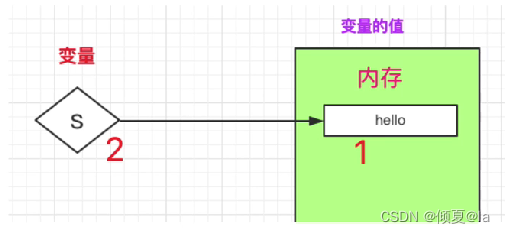
所以要理解Python 中的变量赋值,应该始终先看等号右边。
对象是在右边先被创建或者被获取,在此之后的变量名才会被绑定到对象上,这就像是为对象贴上了一个标签。
一个对象可以有多个标签或者名字。
比如:我们自己就有很多名字,身份证上的名字,网络昵称等等。

2.3多元赋值
字符串以及后面讲的列表、元组都支持这种操作,也要元组解包
In [1]: n1,n2 = 1,2

In [2]: n1
Out[2]: 1

In [3]: n2
Out[3]: 2

In [4]: s1,s2 = '12'

In [5]: s1
Out[5]: '1'

In [6]: s2
Out[6]: '2'

In [7]: num,s = [66,'hello world!']  #这个是列表,后面会讲到

In [8]: num
Out[8]: 66

In [9]: s
Out[9]: 'hello world!'
到这里,我们解决了使用变量来接收用户的输入,接下来就解决判断的问题了。
那么Python中该如何进行判断呢?
3、Python 中的判断条件
In [10]: n = 10

In [11]: n == 10 #等于
Out[11]: True 		#条件为真,则返回True

In [12]: n != 10  #不等于
Out[12]: False     #条件为假,则返回False

In [13]: n > 10  #大于
Out[13]: False

In [14]: n < 10  #小于
Out[14]: False

In [16]: n >= 10 #大于等于
Out[16]: True

In [17]: n <= 10  #小于等于
Out[17]: True

In [18]: n  = input("请输入一个数字>>:")
请输入一个数字>>:10

In [19]: n  == 10
Out[19]: False

In [20]: n
Out[20]: '10'

In [21]: n  = 10

In [22]: n
Out[22]: 10
会发现返回False
在编程语言中,数据是有类型之分的。
input() 接收到的任何数据都会成为 字符串类型(str),就是普通的字符串
而我们等号右边的 10 是整形 (int)
4.数据类型
4.1 查看数据的类型,使用type()
In [1]:type(0)
Out[2]:int

In [2]:type(-1)
Out[2]:int

In [3]:type(1)
Out[3]:int
4.2 基本的数据类型
整型(int)
In [1]:type(0)
Out[2]:int

In [2]:type(-1)
Out[2]:int

In [3]:type(1)
Out[3]:int
浮点型(带小数点的小数)
In [1]:type(1.1)
Out[2]:float

In [2]:type(-0.1)
Out[2]:float
布尔类型
In [1]:type(True)
Out[2]:bool

In [2]:type(False)
Out[2]:bool
字符串(str)
In [1]:type('0')
Out[2]:str

In [2]:type('hello')
Out[2]:str

In [3]:type('-1.1')
Out[3]:str
二进制(bytes)
In [1]:type(b'hello')
Out[2]:bytes
验证 input 接收的数据类型
[root@python ~]# ipython
Python 3.8.6 (default, Oct 21 2022, 21:12:03)
Type 'copyright', 'credits' or 'license' for more information
IPython 8.5.0 -- An enhanced Interactive Python. Type '?' for help.

In [1]: n = input("请输入一个数字>>:")
请输入一个数字>>:18

In [2]: int(n)
Out[2]: 18

In [3]: type(n)
Out[3]: str

In [4]: n = int(n)

In [5]: type(n)
Out[5]: int

In [6]: n == 18
Out[6]: True
要想把用户的输入(str)和整型(int)进行正确的比较大小,就需要把字符串类型的数据转换成整型。这种把一个数据从一种类型转换为另一种类型的操作叫类型转换
5. 类型转换
转换为 int
In [1]:int('10')
Out[2]:10

In [2]:int('-10')
Out[2]:-10

In [3]:int('1.9')
Out[3]:1
转换为float
In [1]:float('10')
Out[2]:10.0

In [2]:float('-10')
Out[2]:-10

In [3]:float('1.9')
Out[3]:1.9
转换为 str
In [1]:str('10')
Out[2]:'10'

In [2]:str('-10')
Out[2]:'-10'

In [3]:str('1.9')
Out[3]:'1.9'

In [4]:str(b'hello',encoding='utf-8')
Out[4]:'hello'
二进制转换为字符串的时候,需要指定字符编码
还可再转回字符串
In [8]: b = bytes('关关',encoding=('utf-8'))

In [9]: b
Out[9]: b'\xe5\x85\xb3\xe5\x85\xb3'

In [10]: str(b,encoding=('utf-8'))
Out[10]: '关关'

In [11]: g = str(b,encoding=('utf-8'))

In [12]: g
Out[12]: '关关'

In [13]: type(g)
Out[13]: str

小了大了
if 语句
In [25]: n = input("请输入一个数字>>:")
请输入一个数字>>:19

In [26]: n = int(n)

In [27]: if n == 18:
    ...:     print("相等")
    ...: elif n>18:
    ...:     print("大了")
    ...: else:
    ...:     print("小了")
    ...:
大了

In [28]: n = 15

In [29]: if n == 18:
    ...:     print("相等")
    ...: elif n>18:
    ...:     print("大了")
    ...: else:
    ...:     print("小了")
    ...:
小了

In [30]: n = 18

In [31]: if n == 18:
    ...:     print("相等")
    ...: elif n>18:
    ...:     print("大了")
    ...: else:
    ...:     print("小了")
    ...:
相等
猜数游戏开始
请输入一个数字
猜对了
大了
小了
光标移动到要开始缩进的位置,之后按 Esc切成一般模式,在一般模式按Ctrl+v(显示可视化块)
在开始位置按上下左右方向选择行、列,按 shift+i 返回开始位置,在空4个空格,在按ESC键即可进行缩进 ,按ESC在一般模式按 u 即可进行撤销操作
缩进后

为了便于选取文本,VIM 引入了可视(Visual)模式。 要选取一段文本,首先将光标移到段首,在普通模式下按 v 进入可视模式,然后把光标移到段末。 需要注意,光标所在字符是包含在选区中的
v 进入字符可视化模式
V 进入行可视化模式
Ctrl+v 进入块可视化模式
块选择 Ctrl+v
[root@python day01]# vim numbers.py
[root@python day01]# python3
Python 3.8.6 (default, Oct 21 2022, 21:12:03)
[GCC 4.8.5 20150623 (Red Hat 4.8.5-44)] on linux
Type "help", "copyright", "credits" or "license" for more information.
>>> exit()
[root@python day01]# python3 numbers.py
猜数游戏开始
请输入一个数字:17
小了
请输入一个数字:18
猜对了
请输入一个数字:20
大了
请输入一个数字:^CTraceback (most recent call last):
  File "numbers.py", line 6, in <module>
    n = input("请输入一个数字:")
KeyboardInterrupt
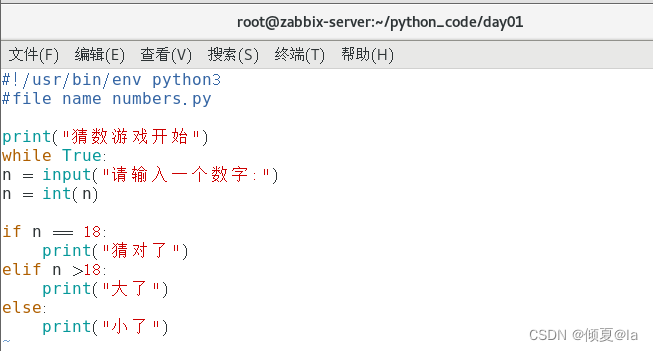
[root@python day01]# cat numbers.py
#!/usr/bin/env python3
#file name numbers.py

print("猜数游戏开始")
while True:
    n = input("请输入一个数字:")

    if n == 'q':
        print("程序退出")

    n = int(n)

    if n == 18:
        print("猜对了")
        break
    elif n >18:
        print("大了")
    else:
        print("小了")

[root@python day01]# vim numbers.py
[root@python day01]# python3 numbers.py
猜数游戏开始
请输入一个数字:123
大了
请输入一个数字:16
小了
请输入一个数字:18
猜对了
[root@python day01]# python3 numbers.py
猜数游戏开始
请输入一个数字:q
程序退出
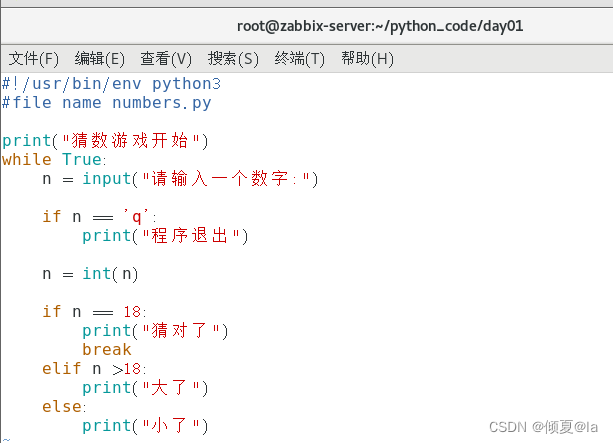
[root@python day01]# cat  numbers.py
#!/usr/bin/env python3
#file name numbers.py

print("猜数游戏开始")
while True:
    n = input("请输入一个数字:")
	#如果输入空,就重新开始新一轮的循环
    if not n:
        continue
    if n == 'q':
        print("程序退出")

    n = int(n)

    if n == 18:
        print("猜对了")
        break
    elif n >18:
        print("大了")
    else:
        print("小了")

[root@python day01]# vim numbers.py
[root@python day01]# python3 numbers.py
猜数游戏开始
请输入一个数字:
请输入一个数字:
请输入一个数字:
请输入一个数字:
请输入一个数字:
请输入一个数字:
[root@python day01]# cat numbers.py
#!/usr/bin/env python3
#file name numbers.py

print("猜数游戏开始")
while True:
    n = input("请输入一个数字:")
	#如果输入空,就重新开始新一轮的循环
    if not n:
        continue
    if n == 'q':
        print("程序退出")
        break
    n = int(n)

    if n == 18:
        print("猜对了")
        break
    elif n >18:
        print("大了")
    else:
        print("小了")

#退出程序后,程序继续运行下面的代码
exit("退出程序...")

[root@python day01]# python3 numbers.py
猜数游戏开始
请输入一个数字:q
程序退出
退出程序...
七、函数
1.函数的定义
def 函数名():
	"""函数的说明,主要是说明一下函数的主要功能,这是可选的"""
	函数体,就是代码
	缩进4个空格,多行缩进保持一致
函数名的规则和变量名的命名规则一致
2.函数的调用
调用方式:
函数名()
python 属于解释性语言,就是代码需要读一行,解释一行。
因此,函数就像是定义一个变量,必须先定义函数,才能调用函数。
3.示列
def foo():
    print("我是函数体,只有在调用函数时,这里的代码才会被执行")
foo()
执行后会输出:
我是函数体,只有在调用函数时,这里的代码才会被执行
现在我们可以把之前写的猜数字游戏,编写函数
[root@python day01]# vim numbers.py
[root@python day01]# python3 numbers.py
退出程序...
[root@python day01]# vim numbers.py
[root@python day01]# python3 numbers.py
猜数游戏开始
请输入一个数字:19
大了
请输入一个数字:18
猜对了
退出程序...
[root@python day01]# cat  numbers.py
#!/usr/bin/env python3
#file name numbers.py
def guess_numbers():

    print("猜数游戏开始")
    while True:
        n = input("请输入一个数字:")
    	#如果输入空,就重新开始新一轮的循环
        if not n:
            continue
        if n == 'q':
            print("程序退出")
            break
        n = int(n)

        if n == 18:
            print("猜对了")
            break
        elif n >18:
            print("大了")
        else:
            print("小了")
guess_numbers()
#退出程序后,程序继续运行下面的代码
exit("退出程序...")
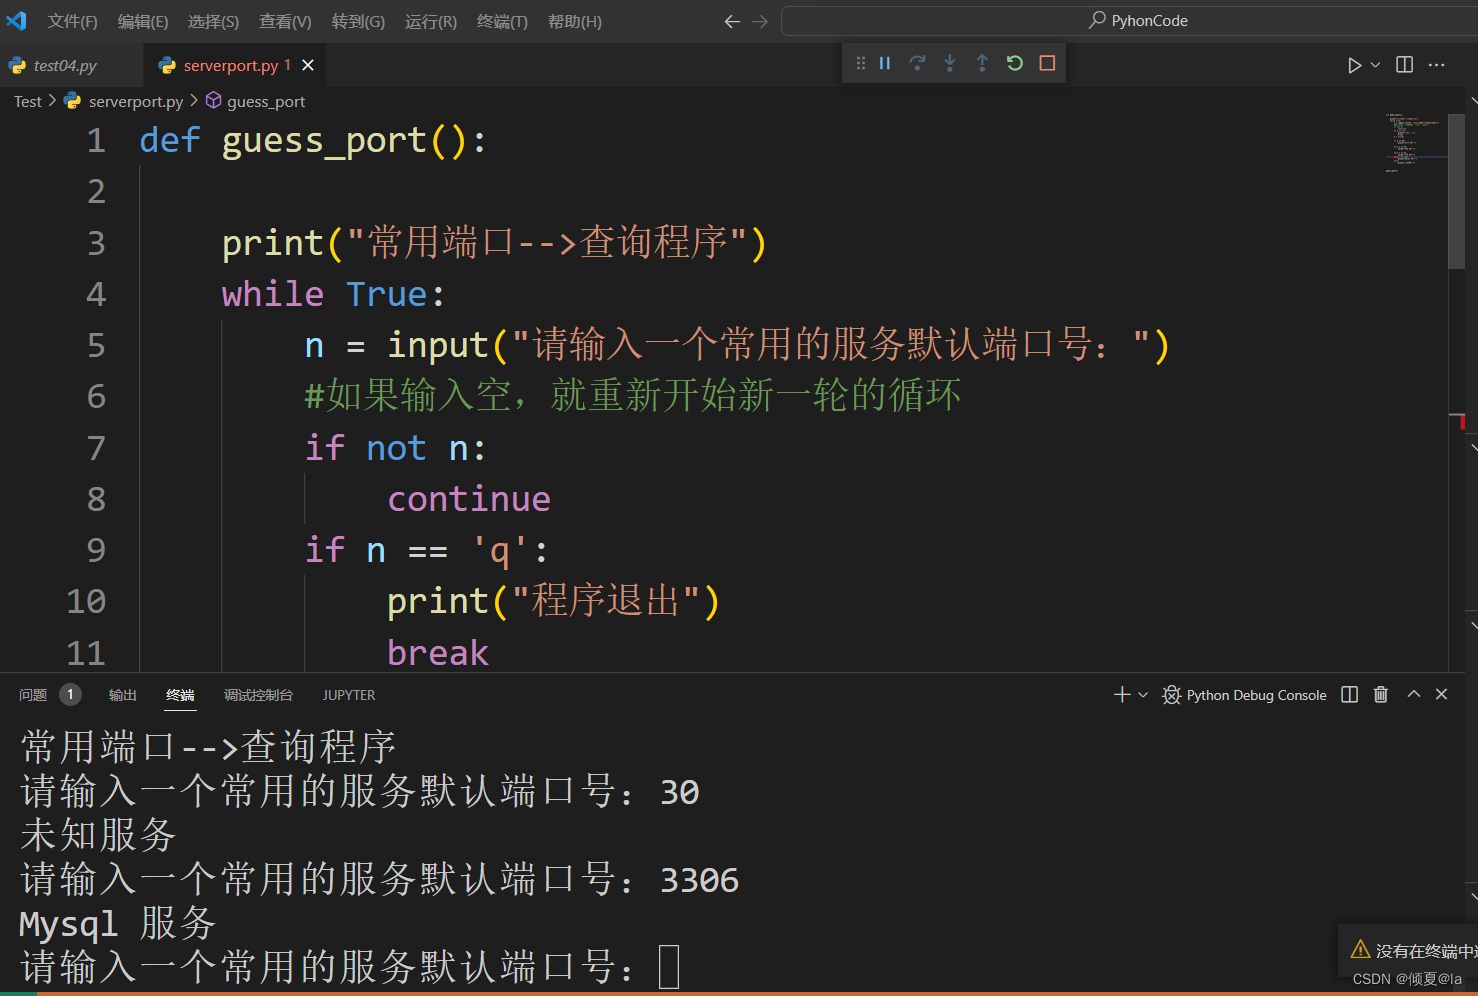
[root@python day01]# cat search_server.py
def guess_ports():

    print("常用端口-->查询程序")
    while True:
        n = input("请输入一个常用的服务默认端口号:")
    	#如果输入空,就重新开始新一轮的循环
        if not n:
            continue
        if n == 'q':
            print("程序退出")
            break
        n = int(n)

        if n == 80:
            print("HTTP 服务")

        elif n == 22:
            print("SSH 服务")

        elif n == 21:
	    print("FTP 服务")

        elif n == 3306:
            print("Mysql 服务")
        else:
            print("未知服务")
guess_port s()
In [1]: s1 = 'guanguan'

In [2]: s2 = 'yuting'

In [3]: s3 = """hello yuting"""


In [5]: s5 = """hello
    ...: 李华'"""

In [6]: s5
Out[6]: "hello\n李华'"
4.简单操作
1. \ 转义符
In [15]: guan = 'hello\nI love dont\'t'

In [16]: luo = 'yuting'

In [17]: print(guan)
hello
 I love dont't
2. + 拼接
In [15]: guan = 'hello\nI love dont\'t \t'

In [16]: luo = 'yuting'
In [25]: guanguan = guan + luo
In [26]: print(guanguan)
hello
I love dont't 	yuting
拼接只能是 字符串和字符串进行操作,不可以用 字符串和其他类型的对象进行拼接
In [27]: '可乐不加冰' + 1
--------------------------------------------------------------------------
TypeError                                Traceback (most recent call last)
Cell In [27], line 1
----> 1 '可乐不加冰' + 1

TypeError: can only concatenate str (not "int") to str
3. * 复制
In [28]: '可乐不加冰' * 3
Out[28]: '可乐不加冰可乐不加冰可乐不加冰'

In [29]: '-' * 3
Out[29]: '---'
3. 序列类型
字符串是 Python 中的一个 序列类型 的数据结构
存放的数据,在其内是有序的。

3.1 序列类型的特点
- 序列里的每个数据被称为序列的一个元素
- 元素在序列里都是有个自己的位置的,这个位置被称为索引或者叫偏移量,也有叫下标的,从0 开始,从左到右依次递增
- 序列中的每一个元素可以通过这个元素的索引来获取到
- 获取到序列类型数据中的多个元素需要用切片的操作来获取
3.2 通过索引取值,获取单个元素
In [30]: s1
Out[30]: 'guanguan'

In [31]: s1[0]
Out[31]: 'g'

In [32]: s1[-1]
Out[32]: 'n'

In [33]: s1[6]
Out[33]: 'a'
3.3 切片,获取多个元素
3.4 一般操作
In [30]: s1
Out[30]: 'guanguan'

# 使用切片获取多个元素
In [34]: s1[0:1]
Out[34]: 'g'

In [35]: s1[0:3]
Out[35]: 'gua'
#起始和结尾的索引号可以省略
In [36]: s1[:3]
Out[36]: 'gua'

In [37]: s1[1:]
Out[37]: 'uanguan'
#索引可以使用 负数

In [39]: s1[0:-1]
Out[39]: 'guangua'

In [40]: s1[1:-1]
Out[40]: 'uangua'

In [41]: s1[-3:-1]
Out[41]: 'ua'

#逆序输出
In [38]: s1[::-1]
Out[38]: 'naugnaug'
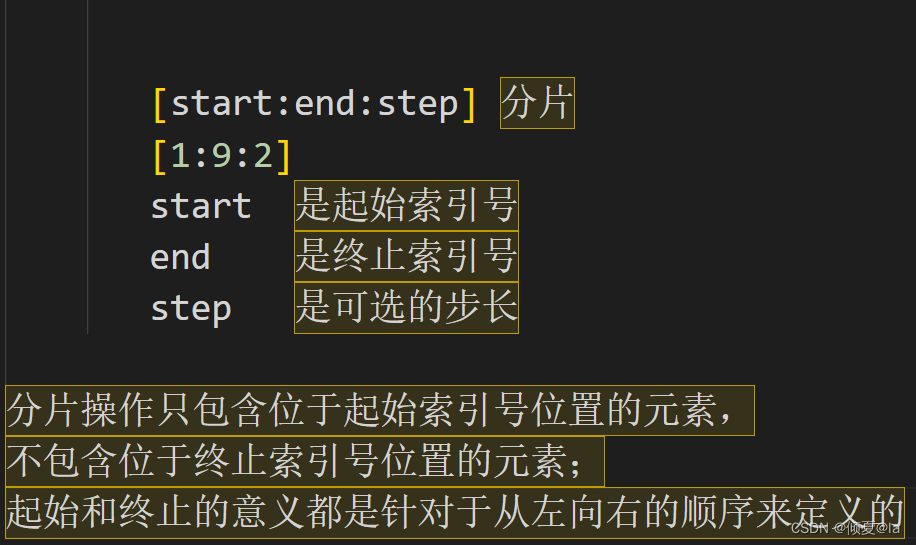
3.5 使用步长
- 步长就是每隔几个取一个的意思
- 步长是正数时,是从左往右开始操作
- 步长是负数时,是从右往左开始操作
In [42]: s2 = 'abcdefg'

In [43]: s2[::2]
Out[43]: 'aceg'

In [44]: s2[::-2]
Out[44]: 'geca'
5. 字符串方法
1.统计序列数据的长度
就是获取一个数据的元素个数,这个适用于所有的序列类型的数据,比如 字符串、列表、元组。
In [45]: s5 = "ab \n\t"

In [46]: len(s5)
Out[46]: 5

In [48]: len([1,2,2])
Out[48]: 3
\n 是一个换行符
\t 是一个 Tab 键
2. in 成员判断
In [49]: ls = 'heigh: 178m'

In [50]: 'm' in ls
Out[50]: True

In [51]: '178m' in ls
Out[51]: True

In [53]: if '178m' in ls:
    ...:     print(ls)
    ...:
heigh: 178m
注意:空的字符串总是被视为任何其他字符串的子串,因此 “” in “abc” 将返回True。
In [54]: "" in "abc"
Out[54]: True

In [55]: "" in "abcd"
Out[55]: True

In [56]: "" in "abcde"
Out[56]: True
3.strip() 去除字符串两端的空白字符(空格、\t、\n)
In [58]: ls = '       heigh: 178m'

In [59]: ls
Out[59]: '       heigh: 178m'

In [60]: ls.strip()
Out[60]: 'heigh: 178m'
4.spit() 分割
默认使用空白字符作为分隔字符(空格、\t、 \n) 和shell 中的 awk一样的道理
In [62]: ll = '\ta b \t c\n'

In [63]: ll.split()
Out[63]: ['a', 'b', 'c']

In [64]: lg = '\tabc\n'

In [65]: lg.split()
Out[65]: ['abc']
5.strip()移除字符串两端的空白字符
In [68]: ls = '       heigh: 178m     '

In [69]: ls
Out[69]: '       heigh: 178m     '

In [70]: ls.strip()
Out[70]: 'heigh: 178m'
strip() 返回的是字符串,所以可以连续操作
In [68]: ls = '       heigh: 178m     '

In [69]: ls
Out[69]: '       heigh: 178m     '

In [70]: ls.strip()
Out[70]: 'heigh: 178m'

In [71]: ls.strip().split(": ")
Out[71]: ['heigh', '178m']
6.replace()替换
In [37]: ls = '      <script><script src="https://dss0.bdstatic.com/5aV1bjqh_Q23odCf
    ...: /static/superman/js/lib/jquery--edb203c114.10.2.js"></script>
In [39]:  ls.strip().replace('<script><script','')
Out[39]: ' src="https://dss0.bdstatic.com/5aV1bjqh_Q23odCf/static/superman/js/lib/jquery--edb203c114.10.2.js"></script>'
In [41]:  ls.strip().replace('<script><script','')[6:-10]
Out[41]: 'https://dss0.bdstatic.com/5aV1bjqh_Q23odCf/static/superman/js/lib/jquery--edb203c114.10.2.js"'

In [42]:  ls.strip().replace('<script><script','')[7:-10]
Out[42]: 'ttps://dss0.bdstatic.com/5aV1bjqh_Q23odCf/static/superman/js/lib/jquery--edb203c114.10.2.js"'

In [43]:  ls.strip().replace('<script><script','')[6:-10]
Out[43]: 'https://dss0.bdstatic.com/5aV1bjqh_Q23odCf/static/superman/js/lib/jquery--edb203c114.10.2.js"'

In [44]:  ls.strip().replace('<script><script','')[6:-11]
Out[44]: 'https://dss0.bdstatic.com/5aV1bjqh_Q23odCf/static/superman/js/lib/jquery--edb203c114.10.2.js'
7.startswith() 判断字符串以什么为开头
In [96]: ls = 'Python: MAX_abc'

In [97]: ls.startswith("Python:")
Out[97]: True


In [100]: ls.endswith("M")
Out[100]: False

In [101]: ls.endswith("c")
Out[101]: True
8.endswith() 判断字符串以什么为结尾
In [96]: ls = 'Python: MAX_abc'

In [100]: ls.endswith("M")
Out[100]: False

In [101]: ls.endswith("c")
Out[101]: True
八、列表
1.列表的特性介绍

1.列表和字符串一样也是序列类型的数据
2.列表内的元素直接用英文的逗号隔开,元素是可变的,所以列表是可变得数据类型,而字符串不是。
3.列表的元素可以是 Python 中的任何类型的对象
如:字符串、列表、元组、字典、集合、函数
4.列表中的具有相同值的元素允许出现多次
[1,2,1,1,1,1,3,3,2]
2.创建列表
# 推荐,高效
In [1]: L1 = []

In [2]: L2 = ['李华','咸鱼']

In [3]: type(L1)
Out[3]: list

In [4]: L2
Out[4]: ['李华', '咸鱼']

#list() 从其他类型转换
In [5]: list('hello')
Out[5]: ['h', 'e', 'l', 'l', 'o']

# 从字符串转换 split()
In [6]: url = 'www.baidu.com'
In [7]: url.split('.')
Out[7]: ['www', 'baidu', 'com']
3.嵌套的列表
列表中可包含 Python 中任何类型的元素(对象),当然也可以包含一个或多个列表
In [1]: L1 = []

In [2]: L2 = ['李华','咸鱼']

In [3]: type(L1)
Out[3]: list

In [4]: L2
Out[4]: ['李华', '咸鱼']

In [5]: list('hello')
Out[5]: ['h', 'e', 'l', 'l', 'o']

In [6]: url = 'www.baidu.com'

In [7]: url.split('.')
Out[7]: ['www', 'baidu', 'com']

In [8]: L3 = [L1,L2]

In [9]: L3
Out[9]: [[], ['李华', '咸鱼']]

In [10]: L3 = [L1,L2,url]

In [11]: L3
Out[11]: [[], ['李华', '咸鱼'], 'www.baidu.com']
4.列表的基本操作
取值和就地修改,没有嵌套的列表取值
In [11]: L3
Out[11]: [[], ['李华', '咸鱼'], 'www.baidu.com']

In [12]: L3[0]
Out[12]: []

In [13]: L3[1]
Out[13]: ['李华', '咸鱼']

In [14]: L3[2]
Out[14]: 'www.baidu.com'
有嵌套的列表取值
In [15]: L3[1][0]
Out[15]: '李华'

In [16]: L3[1][1]
Out[16]: '咸鱼'
就地修改
In [11]: L3
Out[11]: [[], ['李华', '咸鱼'], 'www.baidu.com']

In [22]: L3 = [L1,L2,url]

In [23]: L3[1][0] = '你是'

In [24]: L3
Out[24]: [[], ['你是', '咸鱼'], 'www.baidu.com']

In [25]: L3[1]
Out[25]: ['你是', '咸鱼']
5. 切片
同字符的切片一样,详细参考字符串教程中的切片
简单示列
In [30]: s1
Out[30]: 'guanguan'

In [31]: s1[0]
Out[31]: 'g'

In [32]: s1[-1]
Out[32]: 'n'

In [33]: s1[6]
Out[33]: 'a'

In [37]: ls = '      <script><script src="https://dss0.bdstatic.com/5aV1bjqh_Q23odCf
    ...: /static/superman/js/lib/jquery--edb203c114.10.2.js"></script>
In [39]:  ls.strip().replace('<script><script','')
Out[39]: ' src="https://dss0.bdstatic.com/5aV1bjqh_Q23odCf/static/superman/js/lib/jquery--edb203c114.10.2.js"></script>'
In [41]:  ls.strip().replace('<script><script','')[6:-10]
Out[41]: 'https://dss0.bdstatic.com/5aV1bjqh_Q23odCf/static/superman/js/lib/jquery--edb203c114.10.2.js"'

In [42]:  ls.strip().replace('<script><script','')[7:-10]
Out[42]: 'ttps://dss0.bdstatic.com/5aV1bjqh_Q23odCf/static/superman/js/lib/jquery--edb203c114.10.2.js"'

In [43]:  ls.strip().replace('<script><script','')[6:-10]
Out[43]: 'https://dss0.bdstatic.com/5aV1bjqh_Q23odCf/static/superman/js/lib/jquery--edb203c114.10.2.js"'

In [44]:  ls.strip().replace('<script><script','')[6:-11]
Out[44]: 'https://dss0.bdstatic.com/5aV1bjqh_Q23odCf/static/superman/js/lib/jquery--edb203c114.10.2.js'
6. 必会方法
len() :方法是一个内置函数,可以统计序列类型的数据结构的长度。
In [45]: L3 = [L1,L2,url]

In [46]: len(L3)
Out[46]: 3

In [47]: L3
Out[47]: [[], ['你是', '咸鱼'], 'www.baidu.com']
in :判断元素是否存在与列表中。
In [47]: L3
Out[47]: [[], ['你是', '咸鱼'], 'www.baidu.com']

In [48]: 'www.baidu.com' in L3
Out[48]: True

In [49]: '咸鱼' in L3[1]
Out[49]: True

In [50]: '咸鱼' not in L3[1]
Out[50]: False
append(): 想列表的最后一个位置追加一个元素,只接受一个参数
In [52]: L3.append('大笨蛋')

In [53]: L3
Out[53]: [[], ['你是', '咸鱼'], 'www.baidu.com', '大笨蛋']

In [54]: L3.append(521)

In [55]: L3
Out[55]: [[], ['你是', '咸鱼'], 'www.baidu.com', '大笨蛋', 521]
insert(): 向原列表的指定位置插入一个元素,接收两个参数,第一个是索引,第二个参数是要插入的元素。
In [55]: L3
Out[55]: [[], ['我爱你', '雨婷'], 'www.baidu.com', '大笨蛋', 521]

In [56]: L3.insert(0,'狗')

In [57]: L3
Out[57]: ['狗', [], ['我爱你', '雨婷'], 'www.baidu.com', '大笨蛋', 521]
remove(): 移除列表中某个指定的元素,没有返回值,并且假如有多个相同的元素存在,每次只会移除排在最前面的那个元素
In [62]: L3
Out[62]: ['狗', 521, ['你是', '咸鱼'], 'www.baidu.com', '大笨蛋', 521]

In [63]: L3.remove(521)

In [64]: L3
Out[64]: ['狗', ['你是', '咸鱼'], 'www.baidu.com', '大笨蛋', 521]
pop(): 从原列表中删除一个元素,并且把这个元素返回,接收零个或一个参数,参数是偏移量,int 类型。
#删除列表中最后一个元素
In [66]: L3
Out[66]: ['狗', ['你是', '咸鱼'], 521, 'www.baidu.com', '大笨蛋', 521]

In [67]: L3.pop()
Out[67]: 521

In [68]: L3
Out[68]: ['狗', ['你是', '咸鱼'], 521, 'www.baidu.com', '大笨蛋']

In [69]: L3.insert(-5,521)

#删除列表中第二个索引号对应的元素,并且返回这个元素,用变量名 'n' 接收
In [70]: L3
Out[70]: [521, '狗', ['你是', '咸鱼'], 521, 'www.baidu.com', '大笨蛋']

In [71]: L3.pop(0)

In [72]: L3
Out[72]: ['狗', ['你是', '咸鱼'], 521, 'www.baidu.com', '大笨蛋']

In [73]: n
Out[73]: 521
、循环列表
5.1 for循环语法
for 变量 in 可迭代对象:
循环体的代码,必须缩进4个空格
多行代码缩进一致
可迭代对象, 可以理解为可以被 for 循环的数据。
比如: 字符串、列表、元祖、文件对象等等。
5.2 for 循环列表中的元素
for~list.py 文件内容如下:
In [78]:L3 = ['关关', ['我爱你', '雨婷'], 521, 'www.baidu.com', '大笨蛋']

In [79]: for i in L3:
    ...:     print(i)
    ...:

#执行
python3 for~list.py

#输出结果
关关
['我爱你', '雨婷']
521
www.baidu.com
大笨蛋
九、元组
1.元组的特性介绍
- 元组和列表一样,也是一种序列类型的数据。
- 唯一的不同是,元组是相对不可变的。
2.高效创建元组
In [80]:t1 = ()  #创建 空 元素的元组

In [81]: type(t1)
Out[81]: tuple
单一元素组怎么搞?
有元素的元组实际上是使用英文逗号创建的
In [84]: n = (123)

In [85]: s = 111,

In [86]: type(n)
Out[86]: int

In [87]: type(s)
Out[87]: tuple
创建非空元素的元组是用逗号,而不是小括号
3.转换
In [88]: s1 = 'guanguan'

In [89]: s1
Out[89]: 'guanguan'

In [90]: list(s1)
Out[90]: ['g', 'u', 'a', 'n', 'g', 'u', 'a', 'n']

In [91]: tuple(s1)
Out[91]: ('g', 'u', 'a', 'n', 'g', 'u', 'a', 'n')
4.元组的取值
元组也是序列类型的数据,取值和切片和列表的操作一样
In [97]: t1 = (1,2,3,['a','b'],'hello')

In [98]: t1
Out[98]: (1, 2, 3, ['a', 'b'], 'hello')

In [99]: t1[-1]
Out[99]: 'hello'

In [100]: t1[-2]
Out[100]: ['a', 'b']

In [107]: t1[1:3]
Out[107]: (2, 3)

In [108]: t1[3][1]
Out[108]: 'b'
5.元组的方法
1.count 统计一个元素在元组内出现的次数
2.index 返回一个元素在元组内的索引
In [124]: L3
Out[124]: ['关关', ['我爱你', '雨婷'], 521, 'www.baidu.com', 521, 521, 521, '大笨蛋']

In [126]: L3.count(521)
Out[126]: 4
In [127]: L3.index(521)  #如果在列表中有多个重复的值,index返回从左到右第一个元素的索引(下标)
Out[127]: 2

In [128]: L3.index('雨婷')
---------------------------------------------------------------------------
ValueError                                Traceback (most recent call last)
Cell In [128], line 1
----> 1 L3.index('雨婷')

ValueError: '雨婷' is not in list

In [129]: L3.index('大笨蛋')
Out[129]: 7
6.元组的相对不可变
元组本身是不可变的,就是元组内的元素是不可变的,一单创建一个元组,这个元组内的元素个数和数据都是固定的了
相对不可变得意思是,元组内的元素自身是可变的数据对象,就可以通过修改这个可变元素,来间接改变元组的样子。
说下面的示列之前,先说一个内置的函数 id ,这个函数可以返回Python中一个对象的内存地址(id号)
In [130]: id ('hello')
Out[130]: 140106466576752

In [131]: id ('t1')
Out[131]: 140106739799664

#将b删除后,前后id没有变化,虽然少了b元素
In [145]: t1 = (1,2,3,['a','b'],'hello')

In [146]: id(t1[-2])
Out[146]: 140106365972928

In [147]: t1[-2].pop()
Out[147]: 'b'

In [148]: id(t1[-2])
Out[148]: 140106365972928

In [149]: t1
Out[149]: (1, 2, 3, ['a'], 'hello')
7.for 循环元组
for_tuple.py 文件内容
t = ('www.baidu.com','1234','45567')

for i in t:
    print(i)
执行
[root@python day01]# python3 first_tuple.py
输出结果
www.baidu.com
1234
45567
8.元组的优点
1.占用内存空间小
#列表
In [1]: ls=[]

In [2]: ls.strip()
            append()  count()   insert()  reverse()
            clear()   extend()  pop()     sort()
            copy()    index()   remove()
#元组
In [5]: t1=(1,1,23,4,45,6,)

In [6]: t1.[-2]pop()
            count() index()
2.元组内的值不会被意外的修改
3.可作为字典的键
4.函数的参数是以元组形式传递的
十、字典
1.字典的创建
In [6]: {}
Out[6]: {}

In [7]: d = {}

In [8]: type(d)
Out[8]: dict

In [9]: d2 = {"prot": 80}

In [10]: d2.get("prot")
Out[10]: 80

In [11]: d2 = {"prot": 80,'a':1,'b':2}

In [12]: d2.get("a")
Out[12]: 1

In [13]: d3 = dict()

In [14]: d3
Out[14]: {}
2.字典的键(key)
#列表和元组允许元素重复
In [15]: [1,1,1,1,1,1,1]
Out[15]: [1, 1, 1, 1, 1, 1, 1]


In [17]: (1,1,1,1,1)
Out[17]: (1, 1, 1, 1, 1)

#字典中不允许键(key)重复,允许值重复
In [18]: {'a':1,'a':10}
Out[18]: {'a': 10}    #如果键重复则在前面的值会被后面的值覆盖掉

In [19]: {'a':1,'b':1}
Out[19]: {'a': 1, 'b': 1}
In [20]: {1: "整形",1.1: "浮点型",False: "布尔值","abc": "字符串",(1,2): "元组"}
Out[20]: {1: '整形', 1.1: '浮点型', False: '布尔值', 'abc': '字符串', (1, 2): '元组'}

#所有不可变的类型的数据都可以作为字典的键(key),不可变的就是值那些可以被哈希的

In [28]: hash((1,2))
Out[28]: -3550055125485641917

In [21]: hash(1)
Out[21]: 1

In [22]: hash(1.1)
Out[22]: 230584300921369601

In [23]: hash(False)
Out[23]: 0

In [24]: hash(True)
Out[24]: 1

In [25]: hash(1)
Out[25]: 1

In [26]: hash(0)
Out[26]: 0


In [29]: 1 == True
Out[29]: True

In [30]: 0 == False
Out[30]: True

#id(1)、id(0)与id(True)、id(False)的值不相等,说明id(1)、id(0)与id(True)、id(False)不是对应同一个对象
In [31]: id(1)
Out[31]: 139777998077920

In [32]: id(True)
Out[32]: 139777997818720

In [33]: id(0)
Out[33]: 139777998077888

In [34]: id(False)
Out[34]: 139777997818752

#Python认为1与True相等,所以当字典中的键相等时,在前面的值会被后面的值覆盖掉
In [35]: {1: "整形" ,True: '布尔值'}
Out[35]: {1: '布尔值'}
In [36]: {True: "整形" ,1: '布尔值'}
Out[36]: {True: '布尔值'}
3.字典的值(value)
In [37]: [1,2]
Out[37]: [1, 2]

In [38]: (1,2)
Out[38]: (1, 2)

In [39]: [{'a':1},{'b':2}]
Out[39]: [{'a': 1}, {'b': 2}]

In [40]: len([{'a':1},{'b':2}])
Out[40]: 2

In [41]: L4 = [{'a':1},{'b':2}]

In [42]: L4[0]
Out[42]: {'a': 1}

In [43]: {'port': 3306,"height": 1.81,"start": True,"name": "dbserver"}
Out[43]: {'port': 3306, 'height': 1.81, 'start': True, 'name': 'dbserver'}

In [44]: {'mysql_01': {'cpu': 4,'memory': [4096,4096]}}
Out[44]: {'mysql_01': {'cpu': 4, 'memory': [4096, 4096]}}

In [45]: {'f': id}
Out[45]: {'f': <function id(obj, /)>}

In [46]: def foo():
    ...:     print('hello world!')
    ...:

In [47]: {'1': foo}
Out[47]: {'1': <function __main__.foo()>}
In [50]: dic_map = {
    ...:     "Manufacturer": "manufacturer",
    ...:     "Product Name": "pod_name",
    ...:     "Serial Number":"sn"
    ...: }

In [51]: dic_map
Out[51]:
{'Manufacturer': 'manufacturer',
 'Product Name': 'pod_name',
 'Serial Number': 'sn'}

In [52]: 'Manufacturer' in dic_map
Out[52]: True

In [53]: 'm\anufacturer' in dic_map
Out[53]: False

In [54]: 'manufacturer' in dic_map
Out[54]: False

In [58]: L5.strip().split(': ')
Out[58]: ['Manufacturer', 'alibaba Cloud']

In [59]: l = L5.strip().split(': ')[0]

In [60]: l in dic_map
Out[60]: True


In [62]: dic_map['Manufacturer']
Out[62]: 'manufacturer'

In [63]: dic_map[k]

In [65]: dic_map[l]
Out[65]: 'manufacturer'

In [67]: l
Out[67]: 'Manufacturer'

In [69]: if 'Manufactures' in dic_map:
    ...:     v = dic_map['Manufacturers']

In [71]: dic_map.get('Manufacturer')
Out[71]: 'manufacturer'

In [77]: v = dic_map.get('Manufacturers')

In [78]: type(v)
Out[78]: NoneType

In [79]: type(None)
Out[79]: NoneType

In [80]: v = dic_map.get('Manufacturers','ke
    ...: y not in')

In [81]: v
Out[81]: 'key not in'

In [82]: v = dic_map.get('Manufacturers','值
    ...: (value)不存在')

In [83]: v
Out[83]: '值(value)不存在'
In [84]: dic_map
Out[84]:
{'Manufacturer': 'manufacturer',
 'Product Name': 'pod_name',
 'Serial Number': 'sn'}

In [85]: dic_map.values()   #.values()函数返回字典键对应的值
Out[85]: dict_values(['manufacturer', 'pod_name', 'sn'])

#对.values()函数返回字典键对应的值进行遍历输出
In [86]: for i in dic_map.values():
    ...:     print(i)
    ...:
manufacturer
pod_name
sn

#.items()将字典中的键值对以元组的形式返回
In [87]: dic_map.items()
Out[87]: dict_items([('Manufacturer', 'manufacturer'), ('Product Name', 'pod_name'), ('Serial Number', 'sn')])

#对.items()将字典中的键值对以元组的形式返回的元组用0000.list()函数装换成列表
In [88]: list(dic_map.items())
Out[88]:
[('Manufacturer', 'manufacturer'),
 ('Product Name', 'pod_name'),
 ('Serial Number', 'sn')]

#对dic_map中的键进行遍历输出
In [89]: for i in dic_map:
    ...:     print(i)
    ...:
Manufacturer
Product Name
Serial Number

#.items()将字典中的键值对以元组的形式返回
In [90]: for i in dic_map.items():
    ...:     print(i)
    ...:
('Manufacturer', 'manufacturer')
('Product Name', 'pod_name')
('Serial Number', 'sn')

#获取字典中的k,v值
In [91]: for i in dic_map.items():
    ...:     k,v = i
    ...:     print(k,v)
    ...:
Manufacturer manufacturer
Product Name pod_name
Serial Number sn

In [92]: for k,v in dic_map.items():
    ...:     print(k,v)
    ...:
Manufacturer manufacturer
Product Name pod_name
Serial Number sn
#向字典中添加键值对
In [93]: dicts = {}

In [94]: dicts
Out[94]: {}

In [95]: dicts['a'] = 1

In [96]: dicts['cpu'] = 4

In [97]: dicts['memory'] = [4096,4096]

In [98]: dicts
Out[98]: {'a': 1, 'cpu': 4, 'memory': [4096, 4096]}

In [99]: dicts['cpu'] = 8 #'cpu': 4 与'cpu': 8中的键'cpu'相同,故前者被后者覆盖掉了

In [100]: dicts
Out[100]: {'a': 1, 'cpu': 8, 'memory': [4096, 4096]}
例子:如何将一个列表和一个字典或两个字典中的健值对关联起来生成一个新的字典
#给出如下一个列表和一个字典,生成一个新的字典
In [101]: lists = ['Manufacturer: Alibaba Cloud','Produc
     ...: t Name: Alibaba Cloud ECS','Verison: pc-i440fx
     ...: -2.1','Serial Number: 0f7e3d86-7742-4612-9f93-
     ...: e3a9e4754157']

In [102]: dic_map
Out[102]:
{'Manufacturer': 'manufacturer',
 'Product Name': 'pod_name',
 'Serial Number': 'sn'}

最终输出效果
Out[104]:
{'manufacturer': 'Alibaba Cloud',
 'pod_name': 'Alibaba Cloud ECS',
 'sn': '0f7e3d86-7742-4612-9f93-e3a9e4754157'}
实现过程
In [105]: prod_info = {}

In [106]: for lines in lists:
     ...:     print(lines)
     ...:
Manufacturer: Alibaba Cloud
Product Name: Alibaba Cloud ECS
Verison: pc-i440fx-2.1
Serial Number: 0f7e3d86-7742-4612-9f93-e3a9e4754157

In [107]: for lines in lists:
     ...:     line = lines.split(': ')
     ...:     print(line)
     ...:
['Manufacturer', 'Alibaba Cloud']
['Product Name', 'Alibaba Cloud ECS']
['Verison', 'pc-i440fx-2.1']
['Serial Number', '0f7e3d86-7742-4612-9f93-e3a9e4754157']

In [110]: for lines in lists:
     ...:     line = lines.split(': ')
     ...:     k,v = line
     ...:     print(k,v)
     ...:
Manufacturer Alibaba Cloud
Product Name Alibaba Cloud ECS
Verison pc-i440fx-2.1
Serial Number 0f7e3d86-7742-4612-9f93-e3a9e4754157

In [111]: dic_map
Out[111]:
{'Manufacturer': 'manufacturer',
 'Product Name': 'pod_name',
 'Serial Number': 'sn'}

In [112]: for lines in lists:
     ...:     line = lines.split(': ')
     ...:     k,v = line
     ...:     new_k = dic_map[k]
     ...:     print(new_k,v)
     ...:
manufacturer Alibaba Cloud
pod_name Alibaba Cloud ECS
--------------------------------------------------------
KeyError               Traceback (most recent call last)
Cell In [112], line 4
      2 line = lines.split(': ')
      3 k,v = line
----> 4 new_k = dic_map[k]
      5 print(new_k,v)

KeyError: 'Verison'

In [113]: for lines in lists:
     ...:     line = lines.split(': ')
     ...:     k,v = line
     ...:     if k in dic_map:
     ...:         new_k = dic_map[k]
     ...:     print(new_k,v)
     ...:
manufacturer Alibaba Cloud
pod_name Alibaba Cloud ECS
pod_name pc-i440fx-2.1
sn 0f7e3d86-7742-4612-9f93-e3a9e4754157

In [114]: for lines in lists:
     ...:     line = lines.split(': ')
     ...:     k,v = line
     ...:     if k in dic_map:
     ...:         new_k = dic_map[k]
     ...:         prod_info[new_k] = v
     ...:

In [115]: prod_info
Out[115]:
{'manufacturer': 'Alibaba Cloud',
 'pod_name': 'Alibaba Cloud ECS',
 'sn': '0f7e3d86-7742-4612-9f93-e3a9e4754157'}
往空白字典 info 中添加值
In [116]: disk = {'disk': [10240]}

In [117]: info = {}

In [118]: info.update(disk)

In [119]: info
Out[119]: {'disk': [10240]}

In [120]: info.update({'cpu': 4})

In [121]: info
Out[121]: {'disk': [10240], 'cpu': 4}

#如何取出'disk': [10240] 中的10240
In [123]: info['disk']
Out[123]: [10240]

In [124]: info['disk'][0]  #要取出10240则先要通过对应的键得到值,又因为'disk'对应的值为[10240]是一个列表并且是这个列表的第一个元素
Out[124]: 10240
如何用字典去编程
以下示列类似,case的用法
In [125]: !vi dicts.py
data = {
        "0": "zero",
        "1": "one",
        "2": "two",
        "q": "quit"
}

while True:
        arg = input(">>:")
        v = data.get(arg, "nothing")
        if v == 'quit':
                break
        print(v)

In [126]: %run dicts.py
>>:0
zero
>>:1
one
>>:2
two
>>:3
nothing
>>:2
two
>>:2646
nothing
>>:656446
nothing
>>:4
nothing
>>:
nothing
>>:
nothing
>>:65^C--------------------------------------------------------
KeyboardInterrupt      Traceback (most recent call last)
File ~/python_code/day01/dicts.py:8
      1 data = {
      2 	"0": "zero",
      3 	"1": "one",
      4 	"2": "two",
      5 }
      7 while True:
----> 8 	arg = input(">>:")
      9 	v = data.get(arg, "nothing")
     10 	print(v)

KeyboardInterrupt:

In [127]: !vi dicts.py

In [128]: %run dicts.py
>>:1
one
>>:2
two
>>:q
十一、集合
1.集合的创建
In [130]: {'disk','cpu','menory','motherboard'}
Out[130]: {'cpu', 'disk', 'menory', 'motherboard'}

In [131]: type({1,2})
Out[131]: set

#集合的唯一性
In [132]: {1,1}
Out[132]: {1}

In [133]: {1,True}
Out[133]: {1}
创建空的集合只能用set()创建,因为这样以 {} 创建已经被字典使用了
In [134]: set()
Out[134]: set()

In [135]: {}
Out[135]: {}

In [136]: type({})
Out[136]: dict

In [137]: type({1,})
Out[137]: set

In [138]: type({1})
Out[138]: set
In [139]: set('guanguan')
Out[139]: {'a', 'g', 'n', 'u'}

In [141]: set(['guanguan','yuting',110])
Out[141]: {110, 'guanguan', 'yuting'}

#集合中不允许在集合中在嵌套集合
In [142]: set(['guanguan','yuting',110,{111}])
--------------------------------------------------------
TypeError              Traceback (most recent call last)
Cell In [142], line 1
----> 1 set(['guanguan','yuting',110,{111}])

TypeError: unhashable type: 'set'

如果是字典给到set()则只会保留键,值则会被抛弃
In [143]: set({'disk': '560G','cpu': '4'})
Out[143]: {'cpu', 'disk'}
2.集合的运算
In [144]: s1 = {"192.168.200.1","192.168.200.110"}

In [145]: s2 = {"192.168.200.1","192.168.200.119"}
#集合的交集
In [146]: s1 & s2
Out[146]: {'192.168.200.1'}
#集合的并集
In [147]: s1 | s2
Out[147]: {'192.168.200.1', '192.168.200.110', '192.168.200.119'}
#集合的差集(有顺序的,看谁减谁,两个集合调换位置相减则可以得到两个不同的结果)
In [148]: s1 -s1
Out[148]: set()

In [149]: s1 -s2
Out[149]: {'192.168.200.110'}

In [150]: s2 -s1
Out[150]: {'192.168.200.119'}

#异或集(对顺序没有要求)将相同的元素除去,剩下的就是异或之后的结果
In [151]: s2 ^ s1
Out[151]: {'192.168.200.110', '192.168.200.119'}

#set() 具有去重的功能
In [152]: s1 = {"192.168.200.1","192.168.200.110","192.1
     ...: 68.200.1","192.168.200.1"}

In [153]: set(s1)
Out[153]: {'192.168.200.1', '192.168.200.110'}
3.函数的参数
In [154]: def foo(x,y):  #形参、位置参数,定义了多少个位置参数,就能传多少个参数
     ...:     print("x的值是:",x)
     ...:     print("y的值是:",y)

In [157]: foo(2,3) #实参
x的值是: 2
y的值是: 3

In [158]: foo(3,2)#实参3对应形参x,实参2对应形参y
x的值是: 3
y的值是: 2


In [159]: def foo(x,y=6):  #y=6 为默认参数,如果没有传值,则默认y=6
     ...:     print(x)
     ...:     print(y)
     ...:

In [160]: foo(3)
3
6

In [161]: foo(3,9)  #传入9将y=6 覆盖掉了
3
9

In [162]: def foo(x=66,y): #默认参数,只能放在最后面,不能放在最前面,否则会报错
     ...:     pass
  Cell In [162], line 1
    def foo(x=66,y):
            ^
SyntaxError: non-default argument follows default argument


In [165]: foo(x=3,y=6) #像这种两边都有值的为关键字参数
3
6
4.函数的返回值
#返回的那个值
In [166]: def func():
     ...:     return 20
     ...:

In [167]: n = func()

In [168]: n
Out[168]: 20

#返回多个值
In [169]: def func():
     ...:     return 1,'hello',[1,2],{'a','b','c'}
     ...:

In [170]: ls = func()

In [171]: ls
Out[171]: (1, 'hello', [1, 2], {'a', 'b', 'c'})

In [172]: a,b,c,d = func()

In [173]: a
Out[173]: 1

In [174]: b
Out[174]: 'hello'

In [175]: c
Out[175]: [1, 2]

In [176]: d
Out[176]: {'a', 'b', 'c'}
十二、案列:获取服务器的信息并清洗
In [1]: import subprocess

In [2]: ret = subprocess.getoutput("ls /tmp")

In [3]: ret
Out[3]: 'gnome-software-7Y4HU1\nmozilla_root0\npyright-106488-4irZ8CSASz1z\npyright-106488-arIyxLjNXDUu\npython-languageserver-cancellation\nssh-xJRQ5BECMepg\nssh-z9ZPJPjsr1O5\nsystemd-private-9ac39580004f4ecf997efae80303e004-bolt.service-3HOvI8\nsystemd-private-9ac39580004f4ecf997efae80303e004-chronyd.service-ANJglp\nsystemd-private-9ac39580004f4ecf997efae80303e004-colord.service-GHFBiG\nsystemd-private-9ac39580004f4ecf997efae80303e004-cups.service-DOU5Kl\nsystemd-private-9ac39580004f4ecf997efae80303e004-fwupd.service-AJfmxA\nsystemd-private-9ac39580004f4ecf997efae80303e004-rh-nginx116-nginx.service-P3UZ7v\nsystemd-private-9ac39580004f4ecf997efae80303e004-rh-php72-php-fpm.service-af6MMq\nsystemd-private-9ac39580004f4ecf997efae80303e004-rtkit-daemon.service-pjJVlv\nsystemd-private-9ac39580004f4ecf997efae80303e004-systemd-machined.service-D0Xd0B\nsystemd-private-c97c511b0d1f443bbf21a6a4807a648e-bolt.service-55u0JT\nsystemd-private-c97c511b0d1f443bbf21a6a4807a648e-chronyd.service-683b9e\nsystemd-private-c97c511b0d1f443bbf21a6a4807a648e-colord.service-ZC7hFy\nsystemd-private-c97c511b0d1f443bbf21a6a4807a648e-cups.service-k60zXK\nsystemd-private-c97c511b0d1f443bbf21a6a4807a648e-fwupd.service-XAzQG6\nsystemd-private-c97c511b0d1f443bbf21a6a4807a648e-rh-nginx116-nginx.service-kKFP3L\nsystemd-private-c97c511b0d1f443bbf21a6a4807a648e-rh-php72-php-fpm.service-WEigng\nsystemd-private-c97c511b0d1f443bbf21a6a4807a648e-rtkit-daemon.service-jOORo0\nsystemd-private-c97c511b0d1f443bbf21a6a4807a648e-systemd-hostnamed.service-xhZ7S5\nsystemd-private-c97c511b0d1f443bbf21a6a4807a648e-systemd-machined.service-wnc046\ntracker-extract-files.0\nvmware-root\nvmware-root_6414-994621821\nvmware-root_6461-1983784201\nvmware-root_6479-1690243779\nvmware-root_6490-700681864\nvmware-root_6499-1714820464\nvscode-typescript0\nyum_save_tx.2022-10-14.06-13.KbtI9m.yumtx\nyum_save_tx.2022-10-15.11-20.KgRfrx.yumtx\nyum_save_tx.2022-10-18.15-41.sugRYV.yumtx\nyum_save_tx.2022-10-20.23-11.G7GHci.yumtx\nyum_save_tx.2022-10-21.11-49.caN0hv.yumtx\nyum_save_tx.2022-10-22.09-37.j4FdOi.yumtx\nyum_save_tx.2022-10-23.09-38.UAakt7.yumtx'


In [5]: ret.split('\n')
Out[5]:
['gnome-software-7Y4HU1',
 'mozilla_root0',
 'pyright-106488-4irZ8CSASz1z',
 'pyright-106488-arIyxLjNXDUu',
 'python-languageserver-cancellation',
 'ssh-xJRQ5BECMepg',
 'ssh-z9ZPJPjsr1O5',
 'systemd-private-9ac39580004f4ecf997efae80303e004-bolt.service-3HOvI8',
 'systemd-private-9ac39580004f4ecf997efae80303e004-chronyd.service-ANJglp',
 'systemd-private-9ac39580004f4ecf997efae80303e004-colord.service-GHFBiG',
 'systemd-private-9ac39580004f4ecf997efae80303e004-cups.service-DOU5Kl',
 'systemd-private-9ac39580004f4ecf997efae80303e004-fwupd.service-AJfmxA',
 'systemd-private-9ac39580004f4ecf997efae80303e004-rh-nginx116-nginx.service-P3UZ7v',
 'systemd-private-9ac39580004f4ecf997efae80303e004-rh-php72-php-fpm.service-af6MMq',
 'systemd-private-9ac39580004f4ecf997efae80303e004-rtkit-daemon.service-pjJVlv',
 'systemd-private-9ac39580004f4ecf997efae80303e004-systemd-machined.service-D0Xd0B',
 'systemd-private-c97c511b0d1f443bbf21a6a4807a648e-bolt.service-55u0JT',
 'systemd-private-c97c511b0d1f443bbf21a6a4807a648e-chronyd.service-683b9e',
 'systemd-private-c97c511b0d1f443bbf21a6a4807a648e-colord.service-ZC7hFy',
 'systemd-private-c97c511b0d1f443bbf21a6a4807a648e-cups.service-k60zXK',
 'systemd-private-c97c511b0d1f443bbf21a6a4807a648e-fwupd.service-XAzQG6',
 'systemd-private-c97c511b0d1f443bbf21a6a4807a648e-rh-nginx116-nginx.service-kKFP3L',
 'systemd-private-c97c511b0d1f443bbf21a6a4807a648e-rh-php72-php-fpm.service-WEigng',
 'systemd-private-c97c511b0d1f443bbf21a6a4807a648e-rtkit-daemon.service-jOORo0',
 'systemd-private-c97c511b0d1f443bbf21a6a4807a648e-systemd-hostnamed.service-xhZ7S5',
 'systemd-private-c97c511b0d1f443bbf21a6a4807a648e-systemd-machined.service-wnc046',
 'tracker-extract-files.0',
 'vmware-root',
 'vmware-root_6414-994621821',
 'vmware-root_6461-1983784201',
 'vmware-root_6479-1690243779',
 'vmware-root_6490-700681864',
 'vmware-root_6499-1714820464',
 'vscode-typescript0',
 'yum_save_tx.2022-10-14.06-13.KbtI9m.yumtx',
 'yum_save_tx.2022-10-15.11-20.KgRfrx.yumtx',
 'yum_save_tx.2022-10-18.15-41.sugRYV.yumtx',
 'yum_save_tx.2022-10-20.23-11.G7GHci.yumtx',
 'yum_save_tx.2022-10-21.11-49.caN0hv.yumtx',
 'yum_save_tx.2022-10-22.09-37.j4FdOi.yumtx',
 'yum_save_tx.2022-10-23.09-38.UAakt7.yumtx']

#ret.splitlines()和ret.split('\n')实现的功能是一样的
In [6]: ret.splitlines()
Out[6]:
['gnome-software-7Y4HU1',
 'mozilla_root0',
 'pyright-106488-4irZ8CSASz1z',
 'pyright-106488-arIyxLjNXDUu',
 'python-languageserver-cancellation',
 'ssh-xJRQ5BECMepg',
 'ssh-z9ZPJPjsr1O5',
 'systemd-private-9ac39580004f4ecf997efae80303e004-bolt.service-3HOvI8',
 'systemd-private-9ac39580004f4ecf997efae80303e004-chronyd.service-ANJglp',
 'systemd-private-9ac39580004f4ecf997efae80303e004-colord.service-GHFBiG',
 'systemd-private-9ac39580004f4ecf997efae80303e004-cups.service-DOU5Kl',
 'systemd-private-9ac39580004f4ecf997efae80303e004-fwupd.service-AJfmxA',
 'systemd-private-9ac39580004f4ecf997efae80303e004-rh-nginx116-nginx.service-P3UZ7v',
 'systemd-private-9ac39580004f4ecf997efae80303e004-rh-php72-php-fpm.service-af6MMq',
 'systemd-private-9ac39580004f4ecf997efae80303e004-rtkit-daemon.service-pjJVlv',
 'systemd-private-9ac39580004f4ecf997efae80303e004-systemd-machined.service-D0Xd0B',
 'systemd-private-c97c511b0d1f443bbf21a6a4807a648e-bolt.service-55u0JT',
 'systemd-private-c97c511b0d1f443bbf21a6a4807a648e-chronyd.service-683b9e',
 'systemd-private-c97c511b0d1f443bbf21a6a4807a648e-colord.service-ZC7hFy',
 'systemd-private-c97c511b0d1f443bbf21a6a4807a648e-cups.service-k60zXK',
 'systemd-private-c97c511b0d1f443bbf21a6a4807a648e-fwupd.service-XAzQG6',
 'systemd-private-c97c511b0d1f443bbf21a6a4807a648e-rh-nginx116-nginx.service-kKFP3L',
 'systemd-private-c97c511b0d1f443bbf21a6a4807a648e-rh-php72-php-fpm.service-WEigng',
 'systemd-private-c97c511b0d1f443bbf21a6a4807a648e-rtkit-daemon.service-jOORo0',
 'systemd-private-c97c511b0d1f443bbf21a6a4807a648e-systemd-hostnamed.service-xhZ7S5',
 'systemd-private-c97c511b0d1f443bbf21a6a4807a648e-systemd-machined.service-wnc046',
 'tracker-extract-files.0',
 'vmware-root',
 'vmware-root_6414-994621821',
 'vmware-root_6461-1983784201',
 'vmware-root_6479-1690243779',
 'vmware-root_6490-700681864',
 'vmware-root_6499-1714820464',
 'vscode-typescript0',
 'yum_save_tx.2022-10-14.06-13.KbtI9m.yumtx',
 'yum_save_tx.2022-10-15.11-20.KgRfrx.yumtx',
 'yum_save_tx.2022-10-18.15-41.sugRYV.yumtx',
 'yum_save_tx.2022-10-20.23-11.G7GHci.yumtx',
 'yum_save_tx.2022-10-21.11-49.caN0hv.yumtx',
 'yum_save_tx.2022-10-22.09-37.j4FdOi.yumtx',
 'yum_save_tx.2022-10-23.09-38.UAakt7.yumtx']
1.查看服务器信息,一般要获取厂商、产品型号、主板BIOS 版本、nsn
[root@python day01]# dmidecode -t 1
# dmidecode 3.1
Getting SMBIOS data from sysfs.
SMBIOS 2.7 present.

Handle 0x0001, DMI type 1, 27 bytes
System Information
	Manufacturer: VMware, Inc.
	Product Name: VMware Virtual Platform
	Version: None
	Serial Number: VMware-56 4d fe cf 17 7a c0 31-93 c0 c1 f4 f7 0b 18 39
	UUID: cffe4d56-7a17-31c0-93c0-c1f4f70b1839
	Wake-up Type: Power Switch
	SKU Number: Not Specified
	Family: Not Specified
#加-q 去掉# dmidecode 3.1下的三行不想要的信息
[root@python day01]# dmidecode -q -t 1
System Information
	Manufacturer: VMware, Inc.
	Product Name: VMware Virtual Platform
	Version: None
	Serial Number: VMware-56 4d fe cf 17 7a c0 31-93 c0 c1 f4 f7 0b 18 39
	UUID: cffe4d56-7a17-31c0-93c0-c1f4f70b1839
	Wake-up Type: Power Switch
	SKU Number: Not Specified
	Family: Not Specified


In [2]: import subprocess

In [3]: prod_info = 'dmidecode -q -t 1 2>/dev/null'

In [4]: subprocess.getoutput(prod_info)
Out[4]: 'System Information\n\tManufacturer: VMware, Inc.\n\tProduct Name: VMware Virtual Platform\n\tVersion: None\n\tSerial Number: VMware-56 4d fe cf 17 7a c0 31-93 c0 c1 f4 f7 0b 18 39\n\tUUID: cffe4d56-7a17-31c0-93c0-c1f4f70b1839\n\tWake-up Type: Power Switch\n\tSKU Number: Not Specified\n\tFamily: Not Specified\n'

In [5]: ret = subprocess.getoutput(prod_info)

In [6]: ret.splitlines()
Out[6]:
['System Information',
 '\tManufacturer: VMware, Inc.',
 '\tProduct Name: VMware Virtual Platform',
 '\tVersion: None',
 '\tSerial Number: VMware-56 4d fe cf 17 7a c0 31-93 c0 c1 f4 f7 0b 18 39',
 '\tUUID: cffe4d56-7a17-31c0-93c0-c1f4f70b1839',
 '\tWake-up Type: Power Switch',
 '\tSKU Number: Not Specified',
 '\tFamily: Not Specified']

In [7]: for lines in ret.splitlines():
   ...:     print(lines)
   ...:
System Information
	Manufacturer: VMware, Inc.
	Product Name: VMware Virtual Platform
	Version: None
	Serial Number: VMware-56 4d fe cf 17 7a c0 31-93 c0 c1 f4 f7 0b 18 39
	UUID: cffe4d56-7a17-31c0-93c0-c1f4f70b1839
	Wake-up Type: Power Switch
	SKU Number: Not Specified
	Family: Not Specified

In [9]: for lines in ret.splitlines():
   ...:     if 'Manufacturer' in lines:
   ...:         print(lines)
   ...:
	Manufacturer: VMware, Inc.

In [10]: for lines in ret.splitlines():
    ...:     if 'Manufacturer' in lines:
    ...:         print(lines)
    ...:     elif 'Product Name' in lines:
    ...:         print(lines)
    ...:
	Manufacturer: VMware, Inc.
	Product Name: VMware Virtual Platform

In [11]: for lines in ret.splitlines():
    ...:     if 'Manufacturer' in lines:
    ...:         print(lines)
    ...:     elif 'Product Name' in lines:
    ...:         print(lines)
    ...:     elif 'Serial Number' in lines:
    ...:         print(lines)
    ...:
	Manufacturer: VMware, Inc.
	Product Name: VMware Virtual Platform
	Serial Number: VMware-56 4d fe cf 17 7a c0 31-93 c0 c1 f4 f7 0b 18 39
In [8]: for line in ret.splitlines():
   ...:     line = line.split(': ')
   ...:     print(line)
   ...:
['System Information']
['\tManufacturer', 'VMware, Inc.']
['\tProduct Name', 'VMware Virtual Platform']
['\tVersion', 'None']
['\tSerial Number', 'VMware-56 4d fe cf 17 7a c0 31-93 c0 c1 f4 f7 0b 18 39']
['\tUUID', 'cffe4d56-7a17-31c0-93c0-c1f4f70b1839']
['\tWake-up Type', 'Power Switch']
['\tSKU Number', 'Not Specified']
['\tFamily', 'Not Specified']

In [9]: for line in ret.splitlines():
   ...:     line = line.strip().split(': ')
   ...:     print(line)
   ...:
['System Information']
['Manufacturer', 'VMware, Inc.']
['Product Name', 'VMware Virtual Platform']
['Version', 'None']
['Serial Number', 'VMware-56 4d fe cf 17 7a c0 31-93 c0 c1 f4 f7 0b 18 39']
['UUID', 'cffe4d56-7a17-31c0-93c0-c1f4f70b1839']
['Wake-up Type', 'Power Switch']
['SKU Number', 'Not Specified']
['Family', 'Not Specified']
n [22]: for line in ret.splitlines():
    ...:     line = line.strip().split(': ')
    ...:     if 'Manufacturer' in line:
    ...:         k,v = line
    ...:         prod_dic[k.lower()]=v
    ...:

In [23]: prod_dic
Out[23]: {'manufacturer': 'VMware, Inc.'}

#进入vim写成脚本
In [32]: !vim get_info.py

#!/usr/bin/env python3
import subprocess

prod_info = 'dmidecode -q -t 1 2>/dev/null'

ret = subprocess.getoutput(prod_info)
prod_dic = {}

for line in ret.splitlines():
     line = line.strip().split(': ')
     if 'Manufacturer' in line:
         k,v = line
         prod_dic[k.lower()]=v
     elif 'Product Name' in line:
         k,v = line
         prod_dic[k.lower()]=v
     elif 'Serial Number' in line:
         k,v = line
         prod_dic[k.lower()]=v
print(prod_dic)


In [33]: %run get_info.py
{'manufacturer': 'VMware, Inc.', 'product name': 'VMware Virtual Platform', 'serial number': 'VMware-56 4d fe cf 17 7a c0 31-93 c0 c1 f4 f7 0b 18 39'}
简写版脚本
In [36]: !vim get_info.py

#!/usr/bin/env python3
import subprocess

prod_info = 'dmidecode -q -t 1 2>/dev/null'

ret = subprocess.getoutput(prod_info)
prod_dic = {}

for line in ret.splitlines():
     line = line.strip().split(': ')
     if 'Manufacturer' in line:
         k,v = line
         prod_dic[k.lower()]=v
     elif 'Product Name' in line:
         k,v = line
         prod_dic[k.lower()]=v
     elif 'Serial Number' in line:
         _,v = line
         prod_dic['sn']=v
print(prod_dic)


In [37]: %run get_info.py
{'manufacturer': 'VMware, Inc.', 'product name': 'VMware Virtual Platform', 'sn': 'VMware-56 4d fe cf 17 7a c0 31-93 c0 c1 f4 f7 0b 18 39'}
脚本优化增强版
#!/usr/bin/env python3
import subprocess

prod_info = 'dmidecode -q -t 1 2>/dev/null'

ret = subprocess.getoutput(prod_info)

prod_dic = {}

map_dic = {
    "Manufacturer": "manufacturer",
    "Product Name": "pod_name",
    "Serial Number": "sn"
}

for line in ret.splitlines():
    line = line.strip()
    try:
        k,v = line.split(': ')
        if k in map_dic:
        #代码在进行优化
           # k = map_dic.get(k)
            prod_dic[map_dic.get(k)] = v
    except ValueError as e:
        print(e)
    #print('.....>>>')
    print(prod_dic)


#输出结果
{'manufacturer': 'VMware, Inc.', 'pod_name': 'VMware Virtual Platform', 'sn': 'VMware-56 4d fe cf 17 7a c0 31-93 c0 c1 f4 f7 0b 18 39'}
#主机名
[root@python ~]# uname -n
python

#内核
[root@python ~]# uname -r
3.10.0-957.el7.x86_64

#操作系统
[root@python ~]# cat /etc/redhat-release
CentOS Linux release 7.6.1810 (Core)

#CPU
[root@python ~]# cat /proc/cpuinfo
processor	: 0
vendor_id	: AuthenticAMD
cpu family	: 23
model		: 104
#cpu型号
model name	: AMD Ryzen 7 5700U with Radeon  Graphics
stepping	: 1
microcode	: 0x8608103
cpu MHz		: 1796.623
cache size	: 512 KB
#cpu插槽
physical id	: 0
siblings	: 1
core id		: 0
一个CPU有多少个核心
cpu cores	: 1
apicid		: 0
initial apicid	: 0
fpu		: yes
fpu_exception	: yes
cpuid level	: 16
wp		: yes
flags		: fpu vme de pse tsc msr pae mce cx8 apic sep mtrr pge mca cmov pat pse36 clflush mmx fxsr sse sse2 syscall nx mmxext fxsr_opt pdpe1gb rdtscp lm constant_tsc art rep_good nopl tsc_reliable nonstop_tsc extd_apicid eagerfpu pni pclmulqdq ssse3 fma cx16 sse4_1 sse4_2 x2apic movbe popcnt aes xsave avx f16c rdrand hypervisor lahf_lm extapic cr8_legacy abm sse4a misalignsse 3dnowprefetch osvw retpoline_amd ssbd ibpb vmmcall fsgsbase bmi1 avx2 smep bmi2 rdseed adx smap clflushopt clwb sha_ni xsaveopt xsavec clzero arat overflow_recov succor
bogomips	: 3593.24
TLB size	: 3072 4K pages
clflush size	: 64
cache_alignment	: 64
address sizes	: 43 bits physical, 48 bits virtual
power management:

processor	: 1
vendor_id	: AuthenticAMD
cpu family	: 23
model		: 104
model name	: AMD Ryzen 7 5700U with Radeon Graphics
stepping	: 1
microcode	: 0x8608103
cpu MHz		: 1796.623
cache size	: 512 KB
physical id	: 2
siblings	: 1
core id		: 0
cpu cores	: 1
apicid		: 2
initial apicid	: 2
fpu		: yes
fpu_exception	: yes
cpuid level	: 16
wp		: yes
flags		: fpu vme de pse tsc msr pae mce cx8 apic sep mtrr pge mca cmov pat pse36 clflush mmx fxsr sse sse2 syscall nx mmxext fxsr_opt pdpe1gb rdtscp lm constant_tsc art rep_good nopl tsc_reliable nonstop_tsc extd_apicid eagerfpu pni pclmulqdq ssse3 fma cx16 sse4_1 sse4_2 x2apic movbe popcnt aes xsave avx f16c rdrand hypervisor lahf_lm extapic cr8_legacy abm sse4a misalignsse 3dnowprefetch osvw retpoline_amd ssbd ibpb vmmcall fsgsbase bmi1 avx2 smep bmi2 rdseed adx smap clflushopt clwb sha_ni xsaveopt xsavec clzero arat overflow_recov succor
bogomips	: 3593.24
TLB size	: 3072 4K pages
clflush size	: 64
cache_alignment	: 64
address sizes	: 43 bits physical, 48 bits virtual
power management:
#!/usr/bin/env python3
import subprocess


base_info = {}


#主机名
cmd_machine = 'uname -n'
host_name = subprocess.getoutput(cmd_machine)
#内核
cmd_kernel = 'uname -r'
kernel = subprocess.getoutput(cmd_machine)
#操作系统
cmd_version = 'cat /etc/redhat-release '
os = subprocess.getoutput(cmd_machine)

prod_info = 'dmidecode -q -t 1 2>/dev/null'
ret = subprocess.getoutput(prod_info)

prod_dic = {}
base_info ={
    'host_name': host_name,
    'kernel': kernel,
    'os': os.strip()
}

map_dic = {
    "Manufacturer": "manufacturer",
    "Product Name": "pod_name",
    "Serial Number": "sn"
}

for line in ret.splitlines():
    line = line.strip()
    try:
        k,v = line.split(': ')
        if k in map_dic:
        #代码在进行优化
           # k = map_dic.get(k)
            prod_dic[map_dic.get(k)] = v
    except ValueError as e:
        print(e)
print(base_info)
print(prod_dic)
2.获取cpu信息
import subprocess
#CPU
#cpu type
cpu_type = "grep 'model name' /proc/cpuinfo | uniq"

cmd_cpu_pyc = "grep 'physical id' /proc/cpuinfo | sort -u |wc -l"

cmd_cpu_cores_each = "grep 'cpu cores' /proc/cpuinfo | uniq"

cpu_type = subprocess.getoutput(cpu_type).split(':')[1].strip()
cpu_pyc = subprocess.getoutput(cmd_cpu_pyc).strip()
cpu_cores_each = subprocess.getoutput(cmd_cpu_cores_each)
#print(cpu_cores_each.split(":")[1])
cpu_cores_each = cpu_cores_each.split(":")[1]

cpu_info ={'cpu_name': cpu_type,
                'cpu_pyc': int(cpu_pyc),
                'cpu_cores_each': int(cpu_cores_each)

}
print(cpu_info)


#输出结果
{'cpu_name': 'AMD Ryzen 7 5700U with Radeon Graphics', 'cpu_pyc': 4, 'cpu_cores_each': 1}
3.获取内存信息
[root@python ~]# dmidecode -q -t 17
Memory Device
	Total Width: 32 bits
	Data Width: 32 bits
	Size: 2048 MB
	Form Factor: DIMM
	Set: None
	Locator: RAM slot #0
	Bank Locator: RAM slot #0
	Type: DRAM
	Type Detail: EDO
	Speed: Unknown
	Manufacturer: Not Specified
	Serial Number: Not Specified
	Asset Tag: Not Specified
	Part Number: Not Specified
	Rank: Unknown
	Configured Clock Speed: Unknown
...
...
...
[root@python ~]# dmidecode -q -t 17 |grep 'Memory Device' |wc -l
128
基础信息代码优化
#!/usr/bin/env python3
from tools import exec_cmd


def get_base():

#主机名
    host_name = exec_cmd('uname -n')

#内核
    kernel = exec_cmd('uname -n')

#操作系统
    os = exec_cmd('cat /etc/redhat-release ')

    return base_info

#封装函数
def get_bios():
    prod_dic = {}
    bios_info = exec_cmd('dmidecode -q -t 1 2>/dev/null')


    base_info ={
    'host_name': host_name,
    'kernel': kernel,
    'os': os.strip()
}

    map_dic = {
    "Manufacturer": "manufacturer",
    "Product Name": "pod_name",
    "Serial Number": "sn"
}

    for line in bios_info.splitlines():
        line = line.strip()
    try:
        k,v = line.split(': ')
        if k in map_dic:
        #代码在进行优化
           # k = map_dic.get(k)
            prod_dic[map_dic.get(k)] = v
    except ValueError as e:
        print(e)
    return prod_dic

def main():
    prod_dic =get_bios()
    base = get_base()
    return {**prod_dic,**base}
CPU和内存代码优化
from tools import exec_cmd
def main():
    #shell命令

    cpu_type = "grep 'model name' /proc/cpuinfo | uniq"

    cmd_cpu_pyc = "grep 'physical id' /proc/cpuinfo | sort -u |wc -l"

    cmd_cpu_cores_each = "grep 'cpu cores' /proc/cpuinfo | uniq"

    cpu_type = exec_cmd(cpu_type).split(':')[1].strip()
    cpu_pyc = exec_cmd(cmd_cpu_pyc).strip()
    cpu_cores_each = exec_cmd(cmd_cpu_cores_each)
    #print(cpu_cores_each.split(":")[1])
    cpu_cores_each = cpu_cores_each.split(":")[1]

    return{'cpu_name': cpu_type,
                    'cpu_pyc': int(cpu_pyc),
                    'cpu_cores_each': int(cpu_cores_each)

    }


 839
839


 被折叠的 条评论
为什么被折叠?
被折叠的 条评论
为什么被折叠?
 到【灌水乐园】发言


