


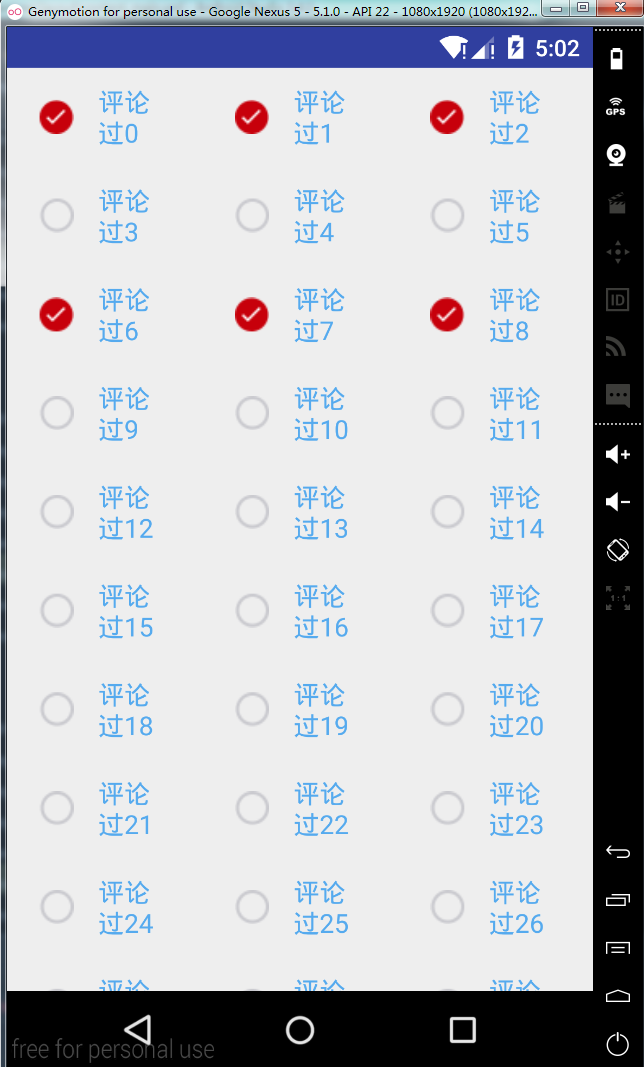
项目中用到了GridView嵌套CheckBox实现点击选中和取消选中的效果,开始在实体类里面定义一个boolean变量,根据这个变量来控制状态,比较麻烦,项目用要求下次进来后如果已经提交过了,则显示提交过的选中内容,用boolean变量来控制是否选中有点麻烦,其实也挺简单的但是判断太多太罗嗦,所以想到了用两个ArrayList 一个存放所有的数据,一个存放选中的数据。点击的时候如果为选中则添加到存储选中List中,如果选中List中已存在则删除。具体实现看代码。
CustomGridview.class
/**
 * Created by dgping on 2015/11/1. gping.vip@gmail.com
 */
public class CustomGridview extends LinearLayout {
    private ArrayList<?> allDataList, selDataList;
    private GridViewAdapter gridViewAdapter;

    public CustomGridview(Context context) {
        super(context);
        initView(context);
    }

    public CustomGridview(Context context, AttributeSet attrs) {
        super(context, attrs);
        initView(context);
    }

    public CustomGridview(Context context, AttributeSet attrs, int defStyleAttr) {
        super(context, attrs, defStyleAttr);
        initView(context);
    }

    private void initView(Context mContext) {
        this.setOrientation(LinearLayout.VERTICAL);

       /**很简单的自定义View也不算自定义吧 就是简单的封装了下*/
        GridView gridView = new GridView(mContext);
        gridView.setNumColumns(3);
        gridViewAdapter = new GridViewAdapter(mContext);
        gridView.setAdapter(gridViewAdapter);
        addView(gridView);
    }

    /**
     * 刷新界面
     */
    public void setNotifyDataSetChanged() {
        if (gridViewAdapter != null) {
            gridViewAdapter.notifyDataSetChanged();
        }
    }

    /***
     * 删除所有选中的列
     */
    public void delSelData() {
        if (selDataList != null) {
            selDataList.clear();
            setNotifyDataSetChanged();
        }
    }
    /***
    *设置所有的数据
    */
    public void setAllData(ArrayList<?> list) {
        this.allDataList = list;
    }
  /***
    *设置选中的数据
    */
    public void setSelData(ArrayList<?> list) {
        this.selDataList = list;
    }
/*----------------------Adapter实现---------------------------*/
    private class GridViewAdapter extends BaseAdapter {
        private Drawable unDrawable, selDrawable;
        private LayoutInflater inflater;

        public GridViewAdapter(Context mContext) {
            inflater = LayoutInflater.from(mContext);
            //两个图片资源
            unDrawable = mContext.getResources().getDrawable(R.mipmap.checked_03);
            selDrawable = mContext.getResources().getDrawable(R.mipmap.unchecked_05);
        }

        @Override
        public int getCount() {
            return allDataList != null ? allDataList.size() : 0;
        }

        @Override
        public Object getItem(int position) {
            return allDataList != null ? allDataList.get(position) : null;
        }

        @Override
        public long getItemId(int position) {
            return position;
        }

        @Override
        public View getView(final int position, View convertView, ViewGroup parent) {
            ViewHolder viewHolder;
            if (convertView == null) {
                convertView = inflater.inflate(R.layout.item_comment_view, null);
                viewHolder = new ViewHolder(convertView);
                convertView.setTag(viewHolder);
            } else {
                viewHolder = (ViewHolder) convertView.getTag();
            }
            /**判断选中的ArrayList 中有没有当前点击选中的对象*/
            if (selDataList.contains(allDataList.get(position))) {
                viewHolder.textView.setCompoundDrawablesWithIntrinsicBounds(unDrawable, null, null, null);
            } else {
                viewHolder.textView.setCompoundDrawablesWithIntrinsicBounds(selDrawable, null, null, null);
            }
            viewHolder.textView.setText(allDataList.get(position).toString());
            /**设置点击事件*/
            viewHolder.textView.setOnClickListener(new View.OnClickListener() {
                @Override
                public void onClick(View v) {
                    if (onSelClickListener != null) {
                        onSelClickListener.onSelListener(v, position);
                    }
                }
            });
            return convertView;
        }

        private class ViewHolder {
            private TextView textView;

            public ViewHolder(View view) {
                textView = (TextView) view.findViewById(R.id.tv_comment_message);
            }
        }
    }

    private OnSelClickListener onSelClickListener;

    public void setOnSelClickListener(OnSelClickListener onSelClickListener) {
        this.onSelClickListener = onSelClickListener;
    }
    /**定义接口封装 点击事件的判断处理放在需要实现的界面中去实现或者处理*/
    public interface OnSelClickListener {
        void onSelListener(View v, int position);
    }
}
gridview Item布局文件就一个简单的TextView
item_comment_view.xml
<?xml version="1.0" encoding="utf-8"?>
<LinearLayout xmlns:android="http://schemas.android.com/apk/res/android"
    android:layout_width="match_parent"
    android:layout_height="match_parent">

    <TextView
        android:id="@+id/tv_comment_message"
        android:layout_width="wrap_content"
        android:layout_height="wrap_content"
        android:text="评论内容"
        android:drawablePadding="15dp"
        android:paddingRight="20dp"
        android:paddingLeft="20dp"
        android:paddingTop="10dp"
        android:paddingBottom="10dp"
        android:textColor="#55aaee"
        android:textSize="16sp" />
</LinearLayout>
上边放出了Gridview的adapter代码,由于项目中用到的地方多,所以直接自定义了一个简单的View吧Adapter适配器写在这个View中了在需要的layout直接调用比较方便,下面来看显示界面的实现代码:
TestActivity.class
/**
 * Created by gping on 2015/10/31. gping.vip@gmail.com
 * 测试界面
 */
public class TestActivity extends Activity implements CustomGridview.OnSelClickListener {
    CustomGridview customTestView;
    /***
     * 定义两个Arraylist一个存储所有的数据 一个存储选中的数据
     */
    private ArrayList<Comment> allList, selList;
    @Override
    protected void onCreate(Bundle savedInstanceState) {
        super.onCreate(savedInstanceState);
        setContentView(R.layout.activity_test_view);

        initData();
        initView();
    }

    private void initData() {
        allList = new ArrayList<>();
        selList = new ArrayList<>();
        /**模拟假数据*/
        for (int i = 0; i < 50; i++) {
            Comment c = new Comment();
            c.setId(i + "");
            c.setCmbh("C" + i);
            c.setCmname("评论过" + i);
            allList.add(c);
        }
    }

    private void initView() {
        customTestView = (CustomGridview) findViewById(R.id.custom_test_view);
        /**设置数据*/
        customTestView.setAllData(allList);
        customTestView.setSelData(selList);

    }

    @Override
    protected void onDestroy() {
        super.onDestroy();

    }
    /**实现CustomGridview中的接口 点击接口*/
    @Override
    public void onSelListener(View v, int position) {
        /**如果选中的list中存在这条数据 则删除  否则添加到选中list数据中*/
        if (selList.contains(allList.get(position))) {
            selList.remove(allList.get(position));
        } else {
            selList.add(allList.get(position));
        }
        /**刷新界面*/
        customTestView.setNotifyDataSetChanged();
    }
}
贴出layout文件:
activity_test_view.xml
<?xml version="1.0" encoding="utf-8"?>
<LinearLayout xmlns:android="http://schemas.android.com/apk/res/android"
    android:layout_width="match_parent"
    android:layout_height="match_parent"
    android:orientation="vertical">

    <RelativeLayout
        android:layout_width="match_parent"
        android:layout_height="wrap_content">

        <com.example.dgping.myapplication.widget.CustomGridview
            android:id="@+id/custom_test_view"
            android:layout_width="match_parent"
            android:layout_height="wrap_content">
        </com.example.dgping.myapplication.widget.CustomGridview>

        <TextView
            android:id="@+id/tv_del_sel"
            android:layout_width="wrap_content"
            android:layout_height="40dp"
            android:layout_alignParentBottom="true"
            android:layout_alignParentRight="true"
            android:layout_below="@id/custom_test_view"
            android:layout_marginRight="10dp"
            android:layout_weight="2"
            android:gravity="center"
            android:text="删除选中" />
    </RelativeLayout>

</LinearLayout>
用到的实体类代码:
Comment.class
/**
 * Created by dgping on 2015/10/31. gping.vip@gmail.com
 */
public class Comment {
    /**
     * 评论Id
     */
    private String id;
    /**
     * 评论内容编号
     */
    private String cmbh;
    /**
     * 评论内容名称
     */
    private String cmname;

    public String getId() {
        return id;
    }

    public void setId(String id) {
        this.id = id;
    }

    public String getCmbh() {
        return cmbh;
    }

    public void setCmbh(String cmbh) {
        this.cmbh = cmbh;
    }

    public String getCmname() {
        return cmname;
    }

    public void setCmname(String cmname) {
        this.cmname = cmname;
    }

    @Override
    public boolean equals(Object o) {

        Comment comment = (Comment) o;
        return cmbh.equals(comment.getCmbh());

    }

    @Override
    public String toString() {  //toString返回评论的项的名称
        return getCmname();
    }
}
先来说说这样实现的好处,很好的避免了Gridview或者listview嵌套checkBox出现选中错乱的问题,也不用在写tag 标示选中为true未选中为false这样的,不用再提交选中数据的时候遍历所有的数据List判断tag为true的提交,直接读取选中的list中的数据提交就行了,省时省力。如果已经提交过数据,下次进来需要显示提交的数据,则拿到数据添加到选中List中就Ok啦,具体实现根据项目需求待定。。。


 88
88

 被折叠的 条评论
为什么被折叠?
被折叠的 条评论
为什么被折叠?
 到【灌水乐园】发言


