


代码地址
sharding_sphere_demo: shardingJDBC的入门使用
ShardingSphere的介绍
ShardingSphere是一款起源于当当网内部的应用框架。2015年在当当网内部诞 生,最初就叫ShardingJDBC。2016年的时候,由其中一个主要的开发人员张亮, 带入到京东数科,组件团队继续开发。在国内历经了当当网、电信翼支付、京东数 科等多家大型互联网企业的考验,在2017年开始开源。并逐渐由原本只关注于关系 型数据库增强工具的ShardingJDBC升级成为一整套以数据分片为基础的数据生态 圈,更名为ShardingSphere。到2020年4月,已经成为了Apache软件基金会的顶 级项目。 ShardingSphere包含三个重要的产品,ShardingJDBC、ShardingProxy和 ShardingSidecar。其中sidecar是针对service mesh定位的一个分库分表插件,目 前在规划中。而我们今天学习的重点是ShardingSphere的JDBC这个组 件。 其中,ShardingJDBC是用来做客户端分库分表的产品,而ShardingProxy是用 来做服务端分库分表的产品。这两者定位有什么区别呢?我们看下官方资料中给出 的两个重要的图:

 这两种方式的对比:

ShardingJDBC实战
shardingjdbc的核心功能是数据分片和读写分离,通过ShardingJDBC,应用可以 透明的使用JDBC访问已经分库分表、读写分离的多个数据源,而不用关心数据源的 数量以及数据如何分布。
核心概念:
-
逻辑表:水平拆分的数据库的相同逻辑和数据结构表的总称
-
逻辑表:水平拆分的数据库的相同逻辑和数据结构表的总称
-
数据节点:数据分片的最小单元。由数据源名称和数据表组成
-
绑定表:分片规则一致的主表和子表。
-
广播表:也叫公共表,指素有的分片数据源中都存在的表,表结构和表中的数据 在每个数据库中都完全一致。例如字典表。
-
分片键:用于分片的数据库字段,是将数据库(表)进行水平拆分的关键字段。 SQL中若没有分片字段,将会执行全路由,性能会很差。
-
分片算法:通过分片算法将数据进行分片,支持通过=、BETWEEN和IN分片。 分片算法需要由应用开发者自行实现,可实现的灵活度非常高。
-
分片策略:真正用于进行分片操作的是分片键+分片算法,也就是分片策略。在 ShardingJDBC中一般采用基于Groovy表达式的inline分片策略,通过一个包含 分片键的算法表达式来制定分片策略,如t_user_$->{u_id%8}标识根据u_id模 8,分成8张表,表名称为t_user_0到t_user_7。
项目demo的代码介绍 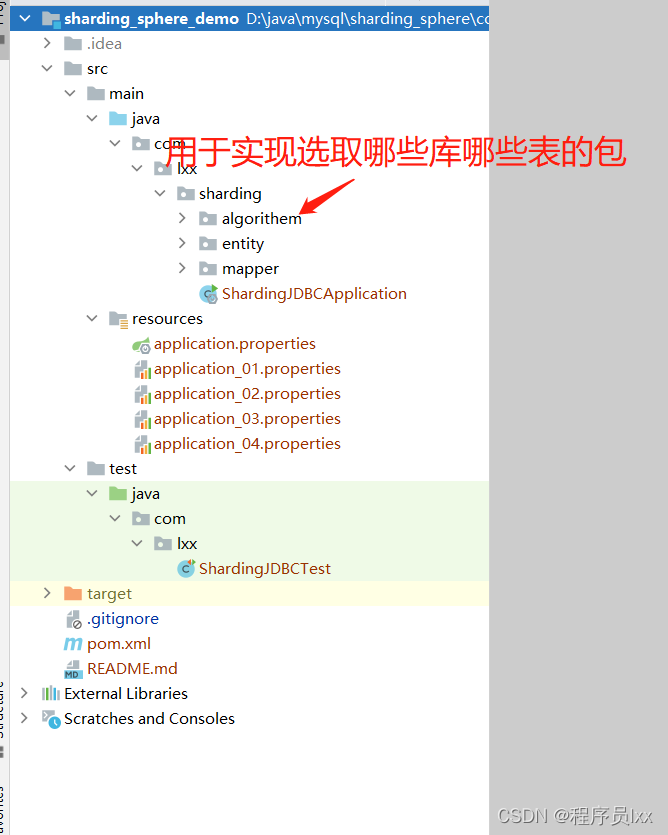
引入相关的依赖
<parent>
        <groupId>org.springframework.boot</groupId>
        <artifactId>spring-boot-starter-parent</artifactId>
        <version>2.3.1.RELEASE</version>
    </parent>

    <dependencies>
        <dependency>
            <groupId>org.apache.shardingsphere</groupId>
            <artifactId>sharding-jdbc-spring-boot-starter</artifactId>
            <version>4.1.1</version>
        </dependency>
        <dependency>
            <groupId>org.springframework.boot</groupId>
            <artifactId>spring-boot-starter</artifactId>
        </dependency>
        <dependency>
            <groupId>org.springframework.boot</groupId>
            <artifactId>spring-boot-starter-test</artifactId>
        </dependency>
        <dependency>
            <groupId>com.alibaba</groupId>
            <artifactId>druid</artifactId>
            <version>1.1.22</version>
        </dependency>
        <dependency>
            <groupId>mysql</groupId>
            <artifactId>mysql-connector-java</artifactId>
        </dependency>
        <dependency>
            <groupId>com.baomidou</groupId>
            <artifactId>mybatis-plus-boot-starter</artifactId>
            <version>3.0.5</version>
        </dependency>
    </dependencies>
编写启动类
/**
 *启动类
 */
@MapperScan("com.lxx.sharding.mapper")
@SpringBootApplication
public class ShardingJDBCApplication {
    public static void main(String[] args) {
        SpringApplication.run(ShardingJDBCApplication.class,args);
    }
}
编写application.properties的文件
spring.shardingsphere.datasource.names=m1

spring.shardingsphere.datasource.m1.type=com.alibaba.druid.pool.DruidDataSource
spring.shardingsphere.datasource.m1.driver-class-name=com.mysql.cj.jdbc.Driver
spring.shardingsphere.datasource.m1.url=jdbc:mysql://localhost:3306/test?serverTimezone=GMT%2B8
spring.shardingsphere.datasource.m1.username=root
spring.shardingsphere.datasource.m1.password=密码
#真实表分布,m1库的course_1或course_2的表
spring.shardingsphere.sharding.tables.course.actual-data-nodes=m1.course_$->{1..2}
#主键生成策略
spring.shardingsphere.sharding.tables.course.key-generator.column=cid
spring.shardingsphere.sharding.tables.course.key-generator.type=SNOWFLAKE
spring.shardingsphere.sharding.tables.course.key-generator.props.worker.id=1
#用表的cid列作为分片规则
spring.shardingsphere.sharding.tables.course.table-strategy.inline.sharding-column=cid
#cid列的值%2+1,要么等于1就选course_1表,等于2就选course_2表
spring.shardingsphere.sharding.tables.course.table-strategy.inline.algorithm-expression=course_$->{cid%2+1}

spring.shardingsphere.props.sql.show = true
spring.main.allow-bean-definition-overriding=true
编写测试类
/**
     * 增加course表数据
     */
    @Test
    public void addCourse(){
        for(int i = 0 ; i < 10 ; i ++){
            Course c = new Course();
            c.setCname("shardingsphere");
            c.setUserId(Long.valueOf(""+(1000+i)));
            c.setCstatus("1");
            courseMapper.insert(c);
        }
    }
执行后的数据course_1的数据和course_2的数据


比较复杂的查询语句可以使用分片策略
分片策略支持4种分别是:inline、standard(标准)、complex(复杂)、hint(强制路由)。这4种都要在application.properties配置实现类分别是:1、表选择实现类,2、库选择实现类。自己写的实现类主要的功能是返回查询语句涉及到了哪些表和哪些库,返回list<表名>,list<库名>。ShardingJDBC在根据返回的表名和库名进行封装查询。
下面是这4中策略的配置文件介绍:
spring.shardingsphere.datasource.names=m1,m2

spring.shardingsphere.datasource.m1.type=com.alibaba.druid.pool.DruidDataSource
spring.shardingsphere.datasource.m1.driver-class-name=com.mysql.cj.jdbc.Driver
spring.shardingsphere.datasource.m1.url=jdbc:mysql://localhost:3306/test?serverTimezone=GMT%2B8
spring.shardingsphere.datasource.m1.username=root
spring.shardingsphere.datasource.m1.password=密码

spring.shardingsphere.datasource.m2.type=com.alibaba.druid.pool.DruidDataSource
spring.shardingsphere.datasource.m2.driver-class-name=com.mysql.cj.jdbc.Driver
spring.shardingsphere.datasource.m2.url=jdbc:mysql://localhost:3306/test2?serverTimezone=GMT%2B8
spring.shardingsphere.datasource.m2.username=root
spring.shardingsphere.datasource.m2.password=密码

#真实表分布,分库,分表
spring.shardingsphere.sharding.tables.course.actual-data-nodes=m$->{1..2}.course_$->{1..2}
#主键生成策略
spring.shardingsphere.sharding.tables.course.key-generator.column=cid
spring.shardingsphere.sharding.tables.course.key-generator.type=SNOWFLAKE
spring.shardingsphere.sharding.tables.course.key-generator.props.worker.id=1


#===================================上面是常规的配置,下面是4种分片策略的配置==============================
#分片策略支持inline、standard(标准)、complex(复杂)、hint(强制路由)
#   复杂的可以支持多个列条件查询,比如:select * from course where cid in (?,?) and user_id = ? 或者IN也可以。
#自己写的实现类主要的功能是返回查询语句涉及到了哪些表和哪些库,返回list<表名>,list<库名>,
#sharding根据返回的表名和库名,去这个表和库中进行查询。


#inline分片策略
#table分表策略
#用表的cid列作为分片规则
spring.shardingsphere.sharding.tables.course.table-strategy.inline.sharding-column=cid
#cid列的值%2+1,要么等于1就选course_1表,等于2就选course_2表
spring.shardingsphere.sharding.tables.course.table-strategy.inline.algorithm-expression=course_$->{cid%2+1}
#分库策略,跟分表策略差不多一个意思,一个选哪个表,一个选哪个库
spring.shardingsphere.sharding.tables.course.database-strategy.inline.sharding-column=cid
spring.shardingsphere.sharding.tables.course.database-strategy.inline.algorithm-expression=m$->{cid%2+1}

#standard标准分片策略
#table分表策略
spring.shardingsphere.sharding.tables.course.table-strategy.standard.sharding-column=cid
#定义precise(精确查询)的类,这个会返回选择哪个表,选择的逻辑用户自己实现
spring.shardingsphere.sharding.tables.course.table-strategy.standard.precise-algorithm-class-name=com.roy.shardingDemo.algorithem.MyPreciseTableShardingAlgorithm
#定义range(范围查询)的类,这个会返回选择哪些list<表>,选择的逻辑用户自己实现
spring.shardingsphere.sharding.tables.course.table-strategy.standard.range-algorithm-class-name=com.roy.shardingDemo.algorithem.MyRangeTableShardingAlgorithm
#database分库策略
spring.shardingsphere.sharding.tables.course.database-strategy.standard.sharding-column=cid
#定义precise(精确查询)的类,这个会返回选择哪个库,选择的逻辑用户自己实现
spring.shardingsphere.sharding.tables.course.database-strategy.standard.precise-algorithm-class-name=com.roy.shardingDemo.algorithem.MyPreciseDSShardingAlgorithm
#定义range(范围查询)的类,这个会返回选择哪些list<库>,选择的逻辑用户自己实现
spring.shardingsphere.sharding.tables.course.database-strategy.standard.range-algorithm-class-name=com.roy.shardingDemo.algorithem.MyRangeDSShardingAlgorithm

#complex复杂分片策略
spring.shardingsphere.sharding.tables.course.table-strategy.complex.sharding-columns= cid, user_id
spring.shardingsphere.sharding.tables.course.table-strategy.complex.algorithm-class-name=com.roy.shardingDemo.algorithem.MyComplexTableShardingAlgorithm
#database分库策略
spring.shardingsphere.sharding.tables.course.database-strategy.complex.sharding-columns=cid, user_id
spring.shardingsphere.sharding.tables.course.database-strategy.complex.algorithm-class-name=com.roy.shardingDemo.algorithem.MyComplexDSShardingAlgorithm

#hint强制路由策略
spring.shardingsphere.sharding.tables.course.table-strategy.hint.algorithm-class-name=com.roy.shardingDemo.algorithem.MyHintTableShardingAlgorithm

spring.shardingsphere.props.sql.show = true
spring.main.allow-bean-definition-overriding=true
读写分离的代码解读
编写application.properties的文件
#配置主从数据源,要基于MySQL主从架构。
spring.shardingsphere.datasource.names=m0,s0

spring.shardingsphere.datasource.m0.type=com.alibaba.druid.pool.DruidDataSource
spring.shardingsphere.datasource.m0.driver-class-name=com.mysql.cj.jdbc.Driver
spring.shardingsphere.datasource.m0.url=jdbc:mysql://localhost:3306/test?serverTimezone=GMT%2B8
spring.shardingsphere.datasource.m0.username=root
spring.shardingsphere.datasource.m0.password=密码

spring.shardingsphere.datasource.s0.type=com.alibaba.druid.pool.DruidDataSource
spring.shardingsphere.datasource.s0.driver-class-name=com.mysql.cj.jdbc.Driver
spring.shardingsphere.datasource.s0.url=jdbc:mysql://192.168.1.128:3306/test?serverTimezone=GMT%2B8
spring.shardingsphere.datasource.s0.username=root
spring.shardingsphere.datasource.s0.password=密码
#读写分离规则, m0 主库,s0 从库
spring.shardingsphere.sharding.master-slave-rules.ds0.master-data-source-name=m0
spring.shardingsphere.sharding.master-slave-rules.ds0.slave-data-source-names[0]=s0
#基于读写分离的表分片
spring.shardingsphere.sharding.tables.course.actual-data-nodes=ds0.course
#主键生成策略
spring.shardingsphere.sharding.tables.course.key-generator.column=cid
spring.shardingsphere.sharding.tables.course.key-generator.type=SNOWFLAKE
spring.shardingsphere.sharding.tables.course.key-generator.props.worker.id=1

spring.shardingsphere.props.sql.show = true
spring.main.allow-bean-definition-overriding=true
编写测试类
/**
     * 读写分离测试,这个是写
     */
    @Test
    public void addCourseByMS(){
        Course c = new Course();
        c.setCname("shardingsphere_lxx");
        c.setUserId(Long.valueOf(""+(10010)));
        c.setCstatus("1");
        courseMapper.insert(c);
    }

    /**
     * 读写分离测试,这个是读
     */
    @Test
    public void queryCourseByMS(){
        List<Course> courses = courseMapper.selectList(null);
        courses.forEach(course -> System.out.println(course));
    }


 1673
1673

 被折叠的 条评论
为什么被折叠?
被折叠的 条评论
为什么被折叠?
 到【灌水乐园】发言


