


1.前言:由于海思3359nnie只支持caffe1.0,需要将darknet yolo3 模型转换为caffe模型。参考网
一 . 前言
海思3559的nnie需要caffe模型,我使用的darknet yolo3,需要将weights和prototxt转化为caffemodel和cfg文件。尝试了很多方法,最终完成,这里写一下自己的总结,为大家提供一些思路和方法吧。我之前看资料尝试过用docker ,可是不知道为什么最后不能正常更新,最后也放弃了。于是在ubuntu18.04中配置了。由于当时没有安装好xrdp,有些也没有截图。这里就大概说一下总体步骤吧。
ubuntu18.04
opencv3.4.3(需要源码,参考https://blog.csdn.net/qq_39056987/article/details/116293460)
python3.6.9 (ubuntu自带的)
pip3 (需要使用python3 安装一下,默认的是pip)
caffe(https://github.com/BVLC/caffe.git)
pytorch(1.7.1)
cuda9.2 + cudnn+7.X.X(建议用于这个版本,这样后面使用pip安装pytorch比较方便
二. 安装nvidia驱动和CUDA9.2
网上有很多资料,基本上都是正确的,我这里采用的是直接在ubuntu自带的软件和更新:

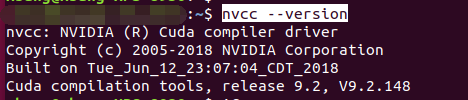
cuda9.2的安装参考网上的资料就行了,这里没有太多的困难。安装完成后,输入命令:
nvcc --version
三. 安装caffe
需要先配置一下工作caffe需要的库,虽然说的都有了,还是安装一下吧。
参考:https://blog.csdn.net/qq_39056987/article/details/116293460
sudo apt-get install libprotobuf-dev libleveldb-dev libsnappy-dev libopencv-dev libhdf5-serial-dev protobuf-compiler
sudo apt-get install --no-install-recommends libboost-all-dev
sudo apt-get install libatlas-base-dev
sudo apt-get install python-dev
sudo apt-get install libgflags-dev libgoogle-glog-dev liblmdb-dev
使用git下载
git clone https://github.com/bvlc/caffe.git
然后:
sudo cp Makefile.config.example Makefile.config
再然后修改Makefile.config:
(1)使用cunn,去掉注释

(2)opencv,去掉注释

(3)

(4)cuda大于9.0 时,去掉-gencode arch=compute_20,code=sm_20和-gencode arch=compute_21,code=sm_21

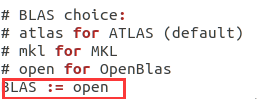
(5)blas修改为open,我这里开始的时候没有blas,自己安装的,具体安装方法参考:https://blog.csdn.net/qck15570179927/article/details/103399068
(6)python版本选择:

(7)使用python
![]()
(8)修改

修改Makfile文件:
(1)将NVCCFLAGS += -ccbin=$(CXX) -Xcompiler -fPIC $(COMMON_FLAGS)
修改为:
NVCCFLAGS += -D_FORCE_INLINES -ccbin=$(CXX) -Xcompiler -fPIC $(COMMON_FLAGS)
![]()
(2)将LIBRARIES += glog gflags protobuf boost_system boost_filesystem m hdf5_serial_hl hdf5_serial
![]()
然后caffe/python安装依赖库:

for req in $(cat requirements.txt); do pip3 install $req; done
注意一定要使用pip3安装

全部安装完成后,进入caffe目录,使用命令:
sudo make clean
然后
sudo make all -j8
这个过程会有很多错误,忘记记录了(&&&&%%%%),网上基本上都可以找到解决方案。
然后使用
sudo make runtest -j8
当时出现如下错误:
.build_release/tools/caffe: error while loading shared libraries: libcudart.so.9.2: cannot open shared object file: No such file or directory
应该是没有共享,解决方法:
sudo cp /usr/local/cuda-9.2/lib64/libcudart.so.9.2 /usr/local/lib/libcudart.so.9.2 && sudo ldconfig
错误2:
ImportError: Something is wrong with the numpy installation. While importing we detected an older version of numpy in ['/home/xcool/.local/lib/python3.6/site-packages/numpy']. One method of fixing this is to repeatedly uninstall numpy until none is found, then reinstall this version.
方法:pip3 unintsall numpy
如果正常的话,配置pycaffe
sudo make pycaffe -j4
将pycaffe添加到环境变量中,sudo gedit ~/.bashrc,根据自己的路径, 在末尾添加:
export PYTHONPATH=/home/xcool/caffe/python
测试一下:一切正常


 746
746


 被折叠的 条评论
为什么被折叠?
被折叠的 条评论
为什么被折叠?
 到【灌水乐园】发言


