


nginx下载
直接去nginx官网下载,选择当前最新版本
lhttp://nginx.org/en/download.html

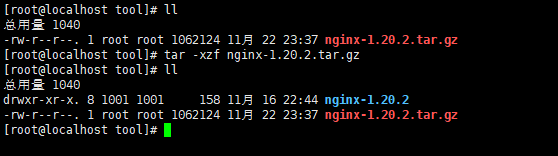
上传文件至服务器、解压文件
配置编译环境
因为我们下载的是源码包,所有需要编译安装
安装gcc环境
yum install gcc-c++
安装pcre
yum install pcre pcre-devel
安装zlib
yum install -y zlib zlib-devel
安装openssl
yum install openssl openssl-devel
配置编译安装
- 进入到解压之后的目录即nginx-1.20.2
[root@localhost tool]# cd nginx-1.20.2
- 编译
[root@localhost nginx-1.20.2]# ./configure
我们使用的是默认配置,如下图所示其实就是运行configure这个可执行文件,正常情况默认配置就行,如果要支持https需要增加模块,configure:./configure --prefix=/usr/local/nginx --with-http_stub_status_module --with-http_ssl_module --with-http_gzip_static_module
如果要支持stream需要增加:–with-stream

看到如下信息表示配置成功,记住相关信息
Configuration summary
  + using system PCRE library
  + OpenSSL library is not used
  + using system zlib library

  nginx path prefix: "/usr/local/nginx"
  nginx binary file: "/usr/local/nginx/sbin/nginx"
  nginx modules path: "/usr/local/nginx/modules"
  nginx configuration prefix: "/usr/local/nginx/conf"
  nginx configuration file: "/usr/local/nginx/conf/nginx.conf"
  nginx pid file: "/usr/local/nginx/logs/nginx.pid"
  nginx error log file: "/usr/local/nginx/logs/error.log"
  nginx http access log file: "/usr/local/nginx/logs/access.log"
  nginx http client request body temporary files: "client_body_temp"
  nginx http proxy temporary files: "proxy_temp"
  nginx http fastcgi temporary files: "fastcgi_temp"
  nginx http uwsgi temporary files: "uwsgi_temp"
  nginx http scgi temporary files: "scgi_temp"

[root@localhost nginx-1.20.2]#
- 编译安装使用命令:make && make install
[root@localhost nginx-1.20.2]# make && make install
启动nginx
[root@localhost nginx-1.20.2]# cd /usr/local/nginx/sbin/
[root@localhost sbin]# ./nginx
访问 http://ip:80,出现如下页面表示nginx安装成功

至此nginx安装完成,安装的路径就是配置完成信息显示的nginx path prefix: “/usr/local/nginx”
nginx配置
编辑nginx的配置文件
[root@localhost ~]# vi /usr/local/nginx/conf/nginx.conf
静态资源配置
我们先建立一个静态资源目录
本人是在跟目录下建立一个www的文件夹,然后创建了一个index.html文件,在文件中写入了hello,world
nginx.conf配置如下:
server{
        listen          8081;
        server_name     localhost;
        location / {
            root    /www;
            index   index.html  index.htm;
        }
    }
重新加载文件切换到nginx的sbin目录下执行
./nginx -s reload
在浏览器中输入:http://ip:8081 就可以看到hello,world的页面了
在location块有两个方式可以指定路径,即root、alias,示例如下:
# 假定我们在跟目录下建立一个demo文件夹,再在demo下建立一个test文件夹,再把index.html文件放到test下,我们配置location块:
# 第一个
location /test {
     root     /demo;
     index   index.html  index.htm;
 }
 # 第二个
location /test {
     alias  /demo/test;
     index   index.html  index.htm;
}
以上两个访问的文件路径都是/demo/test,使用root的时候文件路径是等于:root path+location后面的uri,而alias使用的路径会丢弃location后面的uri,就直接访问 alias path。网上很多说alias指定的path最后必须加”/“即上面的这个应该是:
alias /demo/test/;
反正我配置的时候没有加/也是访问成功的,也许是因为我静态文件很少。我认为规则是这样的,location / 使用 root。其他的时候使用alias。
反向代理配置
在很多时候需要代理别的地址,或者为了保护实体地址,我们都会选择反向代理,下面这个例子我是部署了一个tomcat使用的端口是8080,我们正常是通过http://ip:8080访问tomcat的页面,通过下面的代理我们可以使用http://8090访问到tomcat页面
     server {
        listen       8090;
        server_name  localhost;

        location / {
            # root   html;
            proxy_pass http://localhost:8080/;
            # index  index.html index.htm;
        }
     }
location的uri匹配规则
正常情况下是有= /uri的精确匹配,或者 /uri的模糊匹配,或者~ /uri的正则匹配。
nginx常用命令
启动服务
./nginx
停止服务
./nginx -s stop
退出服务(停止了当前工作之后退出)
./nginx -s quit
重新加载配置文件(热部署)
./nginx -s reload


 1019
1019


 被折叠的 条评论
为什么被折叠?
被折叠的 条评论
为什么被折叠?
 到【灌水乐园】发言


