


首先安装jdk5.0和weblogic10,并启动weblogic服务器。
1 业务接口:Test
/*
************************************************************
*本文件归属于西安协同时光软件有限公司,未经许可,不得擅自使用、拷贝和修改
*项目组:ESB小组
*版 本: SychroESB1.0
*日 期:2007-11-29
*时 间:下午02:08:44
*作 者:Administrator
***********************************************************
*/
package com;
/**
* TODO 此处描写类的详细信息和功能
*
* @author Administrator
* @since jdk1.6
*/
public interface Test {
public String SayHello();
}
2
package com;
import javax.ejb.Remote;
import javax.ejb.Stateless;
import javax.persistence.EntityManager;
import javax.persistence.PersistenceContext;
import domain.Book;
/*
************************************************************
*本文件归属于西安协同时光软件有限公司,未经许可,不得擅自使用、拷贝和修改
*项目组:ESB小组
*版 本: SychroESB1.0
*日 期:2007-11-29
*时 间:下午02:08:22
*作 者:Administrator
***********************************************************
*/
/**
* TODO 此处描写类的详细信息和功能
*
* @author Administrator
* @since jdk1.6
*/
@Stateless(mappedName = "TestBean", name = "TestBean")
@Remote( { Test.class })
public class TestBean implements Test {
// @EJB(beanName = "ServiceBean")
// private Service service;
// @Resource javax.transaction.UserTransaction ut;
@PersistenceContext(unitName = "reviewService")
private EntityManager em;
public String SayHello() {
// // service.sayHelloFromServiceBean();
Book b = new Book();
// b.setId(10);
b.setName("name");
System.out.println("sss is "
+ ((Long) em.createQuery("SELECT COUNT(b.id) from Book b")
.getResultList().get(0)));
// ut.begin();
em.persist(b);
em.flush();
// ut.commit();
return "Hello";
}
}
3 实体bean:book.java
/*
************************************************************
*本文件归属于西安协同时光软件有限公司,未经许可,不得擅自使用、拷贝和修改
*项目组:ESB小组
*版 本: SychroESB1.0
*日 期:2007-11-29
*时 间:下午03:23:16
*作 者:Administrator
***********************************************************
*/
package domain;
import javax.persistence.Entity;
import javax.persistence.GeneratedValue;
import javax.persistence.GenerationType;
import javax.persistence.Id;
import javax.persistence.PrePersist;
/**
* TODO 此处描写类的详细信息和功能
*
* @author Administrator
* @since jdk1.6
*/
@Entity
public class Book {
@Id@GeneratedValue(strategy = GenerationType.IDENTITY)
private int id;
private String name;
public String getName() {
return name;
}
public void setName(String name) {
this.name = name;
}
public Book() {
}
public int getId() {
return id;
}
public void setId(int id) {
this.id = id;
}
@PrePersist
void PrePersist()
{
System.out.println("PrePersist");
}
}
4 建立 META-INF文件夹,在里面建立文件persistence.xml
内容为:
<?xml version="1.0"?>
<persistence xmlns="http://java.sun.com/xml/ns/persistence"
xmlns:xsi="http://www.w3.org/2001/XMLSchema-instance"
xsi:schemaLocation="http://java.sun.com/xml/ns/persistence
http://java.sun.com/xml/ns/persistence/persistence_1_0.xsd"
version="1.0">
<!-- ======================================================================= -->
<!-- Configure Kodo Persistence Runtime by specifiying database URL, Driver -->
<!-- All persistent domain classes are specified here -->
<!-- Configured to build database schema, if necessary, at runtime -->
<!-- -->
<!-- Two different persistence units are specified -->
<!-- 1. reviewService : used with RESOURCE_LOCAL transaction -->
<!-- 2. reviewSession : used with JTA transaction by Session Beans -->
<!-- ======================================================================= -->
<persistence-unit name="reviewService" transaction-type="JTA">
<provider>kodo.persistence.PersistenceProviderImpl</provider>
<class>domain.Book</class>
<properties>
<property name="kodo.jdbc.SynchronizeMappings"
value="refresh" />
<!--
<property name="kodo.jdbc.SynchronizeMappings"
value="buildSchema" />
-->
<property name="kodo.ConnectionDriverName"
value="com.mysql.jdbc.Driver"/>
<property name="kodo.ConnectionURL"
value="jdbc:mysql://localhost:3306/db"/>
<property name="kodo.ConnectionUserName" value="sa"></property>
<property name="kodo.ConnectionPassword" value=""></property>
<!--refresh -->
</properties>
</persistence-unit>
</persistence>
5 建立 build.xml。
内容为:
<project name="EJB4" default="deploy" basedir=".">
<property name="destfile" value="EJB4.jar" />
<property name="java.dir" value="./src" />
<property name="classes.dir" value="./classes" />
<target name="compile"
description="Compile all Java files in ${java.dir}">
<javac
srcdir="${java.dir}"
destdir="${classes.dir}"
debug="on"
failοnerrοr="true"/>
</target>
<target name="wlappc" depends="compile" description="prepares the Web Application Archieve">
<wlappc source="${classes.dir}" idl="true" basicclientjar="true" verbose="true"/>
</target>
<target name="jar" depends="compile" description="prepares the Web Application Archieve">
<jar destfile="${destfile}" basedir="${classes.dir}" filesonly="true" includes="**/*.class,META-INF/persistence.xml"/>
</target>
<target name="deploy" depends="jar" description="deploy the Enterprise Application Archieve">
<wldeploy user="weblogic" password="weblogic" adminurl="t3://localhost:7001" debug="true" action="deploy" name="ejb4" source="${destfile}" />
</target>
<target name="undeploy" description="undeploy the Enterprise Application Archieve">
<wldeploy user="weblogic" password="weblogic" adminurl="t3://localhost:7001" debug="true" action="undeploy" name="ejb4" />
</target>
<target name="OpenConsole" description="Run ">
<openbrowser url="http://localhost:7001/console/" />
</target>
</project>
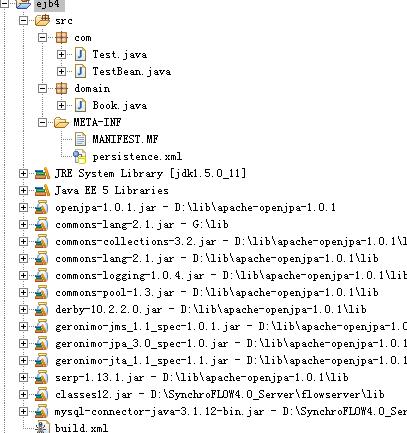
所有的文件的目录结构为:
运行 ant就可以部署到weblogic上。以下是通过一个web project 来访问 上面作的session bean。
随便建个web project 部署到 weblogic上 ,其中 index.jsp的内容如下:
<%@ page language="java" import="java.util.*,javax.naming.*,javax.sql.DataSource,examples.Account,java.sql.*" pageEncoding="ISO-8859-1"%>
<jsp:directive.page import="javax.ejb.EJB"/>
<jsp:directive.page import="examples.Account"/>
<jsp:directive.page import="com.Test"/>
<%
String path = request.getContextPath();
String basePath = request.getScheme()+"://"+request.getServerName()+":"+request.getServerPort()+path+"/";
%>
<!DOCTYPE HTML PUBLIC "-//W3C//DTD HTML 4.01 Transitional//EN">
<html>
<body>
<%
Context ctx = null;
try {
ctx = new InitialContext();
Test t=(Test)ctx.lookup("TestBean#com.Test");
t.SayHello();
} catch (NamingException ex) {
System.out.println("ex" + ex.toString());
ex.printStackTrace();
//out.println(ex);
}
%>
</body>
</html>
OK 如有问题 ,联系 msn syssoft@live.cn


 3197
3197

 被折叠的 条评论
为什么被折叠?
被折叠的 条评论
为什么被折叠?
 到【灌水乐园】发言


