


-
idea+maven+spring+cxf创建webservice应用:
- idea+maven+spring+cxf创建webservice应用:
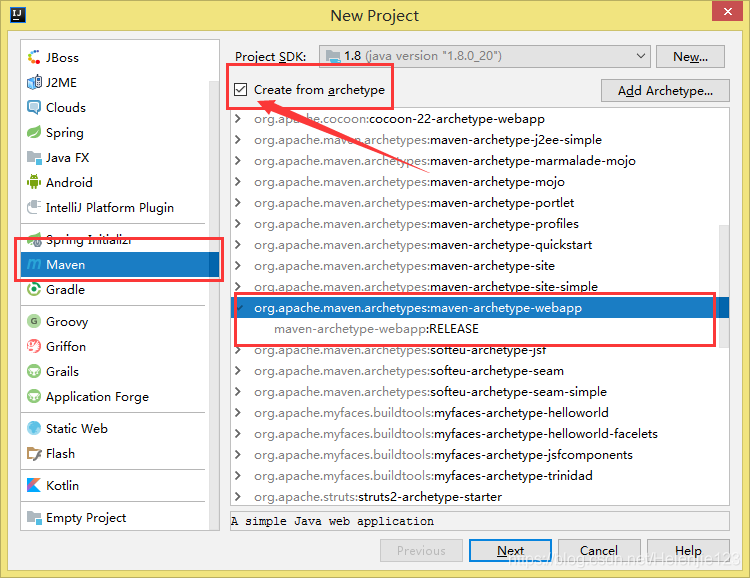
创建maven+webapp工程:点击Next

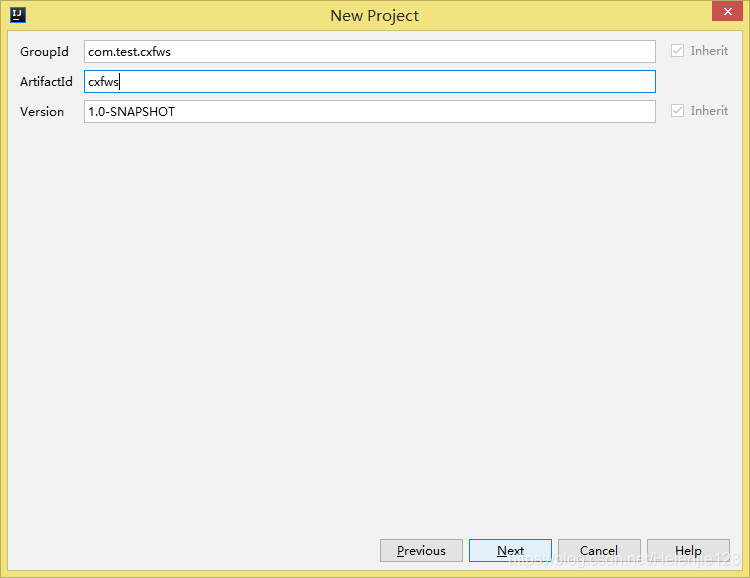
输入相关信息:
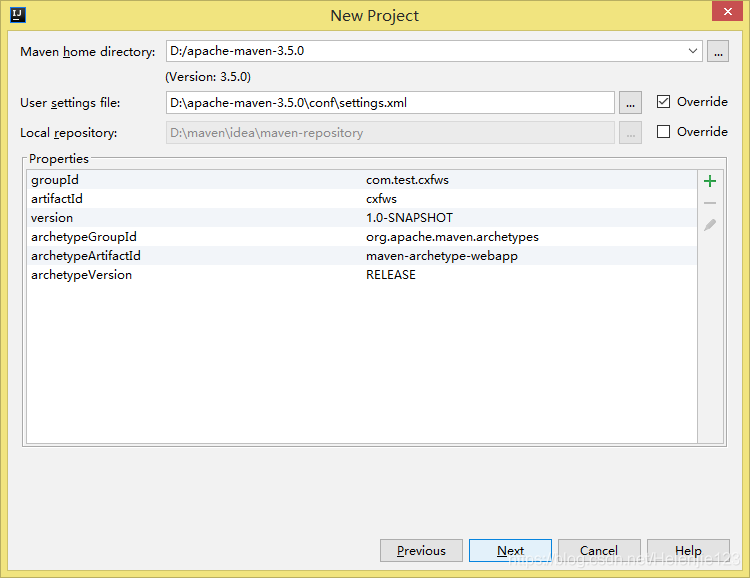
配置maven相关信息:
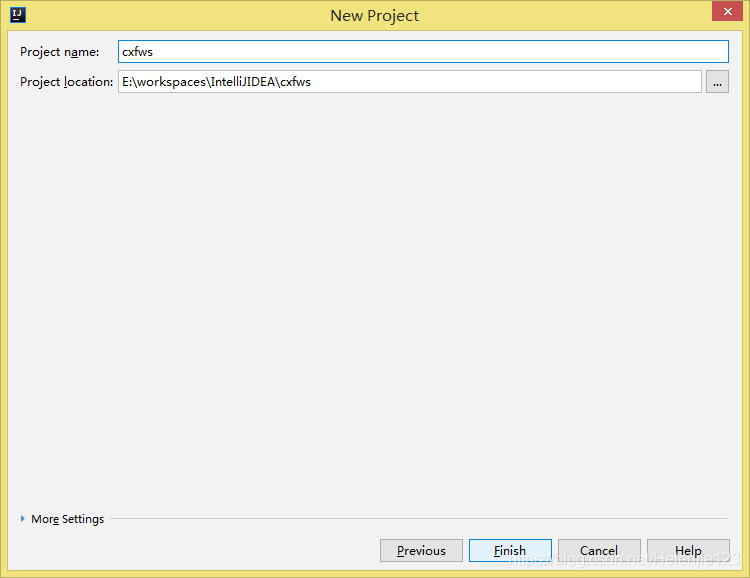
输入项目名称,项目位置,Finish:
2.创建的工程目录如下:按照标准的webapp开发应用目录少了一个java目录,添加java目录如下
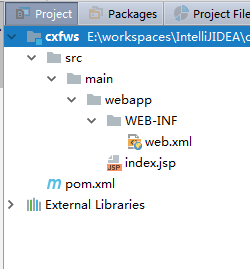
2.1.解决之前项目结构如上图
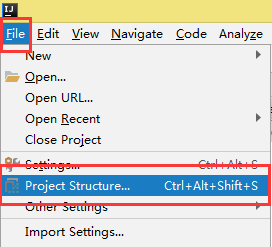
2.2.选择File->Project Structure...,或Ctrl+Alt+Shift+S
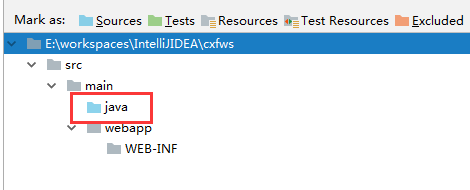
2.3.选择Modules选项卡下面的Sources项,在main文件夹上右键,选择New Folder...并点击OK

2.4.输入要创建的文件夹名称java,并点击OK继续

2.5.在创建好的java文件夹上右键选择Sources项将该文件夹标记为源文件夹

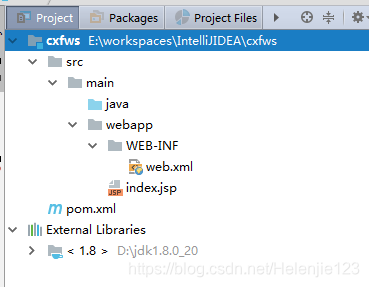
2.6.我们发现java文件夹已经由黄色变成了蓝色,我们点击OK按钮表示设置完成。
2.7.设置完成后的项目结构如下:
3.修改pom.xml配置添加依赖
<projectxmlns="http://maven.apache.org/POM/4.0.0" xmlns:xsi="http://www.w3.org/2001/XMLSchema-instance"
xsi:schemaLocation="http://maven.apache.org/POM/4.0.0 http://maven.apache.org/maven-v4_0_0.xsd">
<modelVersion>4.0.0</modelVersion>
<groupId>com.text.cxfws</groupId>
<artifactId>cxfws</artifactId>
<packaging>war</packaging>
<version>1.0-SNAPSHOT</version>
<name>gdsbcw-cxf Maven Webapp</name>
<url>http://maven.apache.org</url>
<!-- ##########依赖属性参数配置 start############### -->
<properties>
<junit.version>4.11</junit.version>
<cxf.version>2.2.3</cxf.version>
<spring.version>3.2.3.RELEASE</spring.version>
<slf4j.version>1.7.7</slf4j.version>
</properties>
<dependencies>
<!-- 单元测试依赖包 -->
<dependency>
<groupId>junit</groupId>
<artifactId>junit</artifactId>
<version>${junit.version}</version>
</dependency>
<!-- CXF Dependencies -->
<dependency>
<groupId>org.apache.cxf</groupId>
<artifactId>cxf-rt-frontend-jaxws</artifactId>
<version>${cxf.version}</version>
</dependency>
<dependency>
<groupId>org.apache.cxf</groupId>
<artifactId>cxf-rt-transports-http</artifactId>
<version>${cxf.version}</version>
</dependency>
<!-- Jetty is needed if you're are not using the CXFServlet -->
<dependency>
<groupId>org.apache.cxf</groupId>
<artifactId>cxf-rt-transports-http-jetty</artifactId>
<version>${cxf.version}</version>
</dependency>
<!-- End of CXF Dependencies -->
<!-- Spring Dependencies ${spring.version} -->
<dependency>
<groupId>org.springframework</groupId>
<artifactId>spring-context</artifactId>
<version>${spring.version}</version>
</dependency>
<dependency>
<groupId>org.springframework</groupId>
<artifactId>spring-web</artifactId>
<version>${spring.version}</version>
</dependency>
<dependency>
<groupId>org.slf4j</groupId>
<artifactId>slf4j-log4j12</artifactId>
<version>${slf4j.version}</version>
<type>jar</type>
<scope>compile</scope>
</dependency>
</dependencies>
<!-- #####Project Build ###-->
<build>
<!-- ###########给出构建过程中所用到的插件start######## -->
<plugins>
<!-- 由于maven默认使用的jdk与工程配置的jdk版本不一致,导致无法编译通过,通过该插件指定jdk版本 -->
<plugin>
<groupId>org.apache.maven.plugins</groupId>
<artifactId>maven-compiler-plugin</artifactId>
<configuration>
<source>1.7</source>
<target>1.7</target>
<encoding>UTF-8</encoding>
</configuration>
</plugin>
<!-- maven-surefire-plugin 是maven里执行测试用例的插件,不显示配置就会用默认配置。这个插件的 surefire:test 命令会默认绑定maven执行的 test 阶段 -->
<plugin>
<groupId>org.apache.maven.plugins</groupId>
<artifactId>maven-surefire-plugin</artifactId>
<configuration>
<!-- 跳过测试单元 true:跳过测试,false不跳过(默认)-->
<skip>true</skip>
</configuration>
</plugin>
</plugins>
<!-- ###########给出构建过程中所用到的插件end######## -->
</build>
</project>
4.编码:编写java代码和相关配置文件
4.1:创建包:package:test_cxf,并在test_cxf下要发布的接口:
CalculatorService.java及其实现类CalculatorServiceImpl.javapackage test_cxf; import javax.jws.WebService; @WebService(name = "calculator") public interface CalculatorService { /** * 加法 * @param json 传入数据 */ public String plus(String json); }
package test_cxf;

import net.sf.json.JSONObject;

import javax.jws.WebService;
import java.util.HashMap;
import java.util.Iterator;
import java.util.Map;

@WebService
public class CalculatorServiceImpl implements CalculatorService{

    /**
     * 加法
     * @param json 传入数据
     * @return
     */
    @Override
    public String plus(String json) {
        Map<String, String> map = new HashMap<String, String>();
        JSONObject jsonObject = JSONObject.fromObject(json);
        for (Iterator iter = jsonObject.keys(); iter.hasNext(); ) {
            String key = (String) iter.next();
            map.put(key, jsonObject.get(key).toString());
        }
        int num1 = Integer.parseInt(map.get("num1"));
        int num2 = Integer.parseInt(map.get("num2"));
        return String.valueOf(num1 + num2);
    }
}
4.2:配置wsdl用来发布WebService:applicationContext.xml
<?xml version="1.0" encoding="UTF-8"?>
<beans xmlns="http://www.springframework.org/schema/beans"
       xmlns:xsi="http://www.w3.org/2001/XMLSchema-instance"
       xmlns:jaxws="http://cxf.apache.org/jaxws"
       xsi:schemaLocation="
http://www.springframework.org/schema/beans http://www.springframework.org/schema/beans/spring-beans-2.5.xsd
http://cxf.apache.org/jaxws http://cxf.apache.org/schemas/jaxws.xsd">

    <!-- Import Apache CXF Bean Definition -->
    <import resource="classpath:META-INF/cxf/cxf.xml"/>
    <!--<import resource="classpath:META-INF/cxf/cxf-extension-soap.xml"/>-->
    <import resource="classpath:META-INF/cxf/cxf-servlet.xml"/>

    <!-- SurveyService -->
    <bean id="Calculator" class="test_cxf.CalculatorServiceImpl"></bean>

    <!-- Expose SurveyWebService  http://localhost:8080/cxfws/calculator?wsdl -->
    <jaxws:server id="WebCalculator" serviceClass="test_cxf.CalculatorService" address="/calculator">
        <jaxws:serviceBean>
            <ref bean="Calculator"/> <!-- 要暴露的 bean 的引用 -->
        </jaxws:serviceBean>
    </jaxws:server>
</beans>
4.3配置web.xml
<?xml version="1.0" encoding="UTF-8"?>
<web-app xmlns:xsi="http://www.w3.org/2001/XMLSchema-instance" xmlns="http://java.sun.com/xml/ns/javaee" xsi:schemaLocation="http://java.sun.com/xml/ns/javaee http://java.sun.com/xml/ns/javaee/web-app_2_5.xsd" version="2.5">
  <display-name>cxfws</display-name>

  <!-- 在启动Web项目时,容器(比如Tomcat)会读web.xml配置 将参数名和参数值以键值对的形式加载到容器-->
  <context-param>
    <param-name>contextConfigLocation</param-name>
    <param-value>/WEB-INF/applicationContext.xml</param-value>
  </context-param>

  <!-- 容器创建<listener>中的类实例,创建监听器。  -->
  <listener>
    <listener-class>org.springframework.web.context.ContextLoaderListener</listener-class>
  </listener>

  <!-- 用来声明一个servlet,CXFServlet是 -->
  <servlet>
    <servlet-name>CXFServlet</servlet-name>
    <servlet-class>org.apache.cxf.transport.servlet.CXFServlet</servlet-class>
    <load-on-startup>1</load-on-startup>
  </servlet>

  <servlet-mapping>
    <servlet-name>CXFServlet</servlet-name>
    <url-pattern>/*</url-pattern>
  </servlet-mapping>

  <!-- 会话超时配置(单位为分钟) -->
  <session-config>
    <session-timeout>60</session-timeout>
  </session-config>
  <welcome-file-list>
    <welcome-file>index.html</welcome-file>
    <welcome-file>index.htm</welcome-file>
    <welcome-file>index.jsp</welcome-file>
    <welcome-file>default.html</welcome-file>
    <welcome-file>default.htm</welcome-file>
    <welcome-file>default.jsp</welcome-file>
  </welcome-file-list>
</web-app>
-
发布并测试:
5.将工程打包成war包并发布到Tomcat服务器端
5.1:idea配置tomcat服务:select Run/Debug Configration下的Eedit Configurations


5.2:服务器运行应用工程:Run/debug tomcaat8(Shift+F10)

启动成功
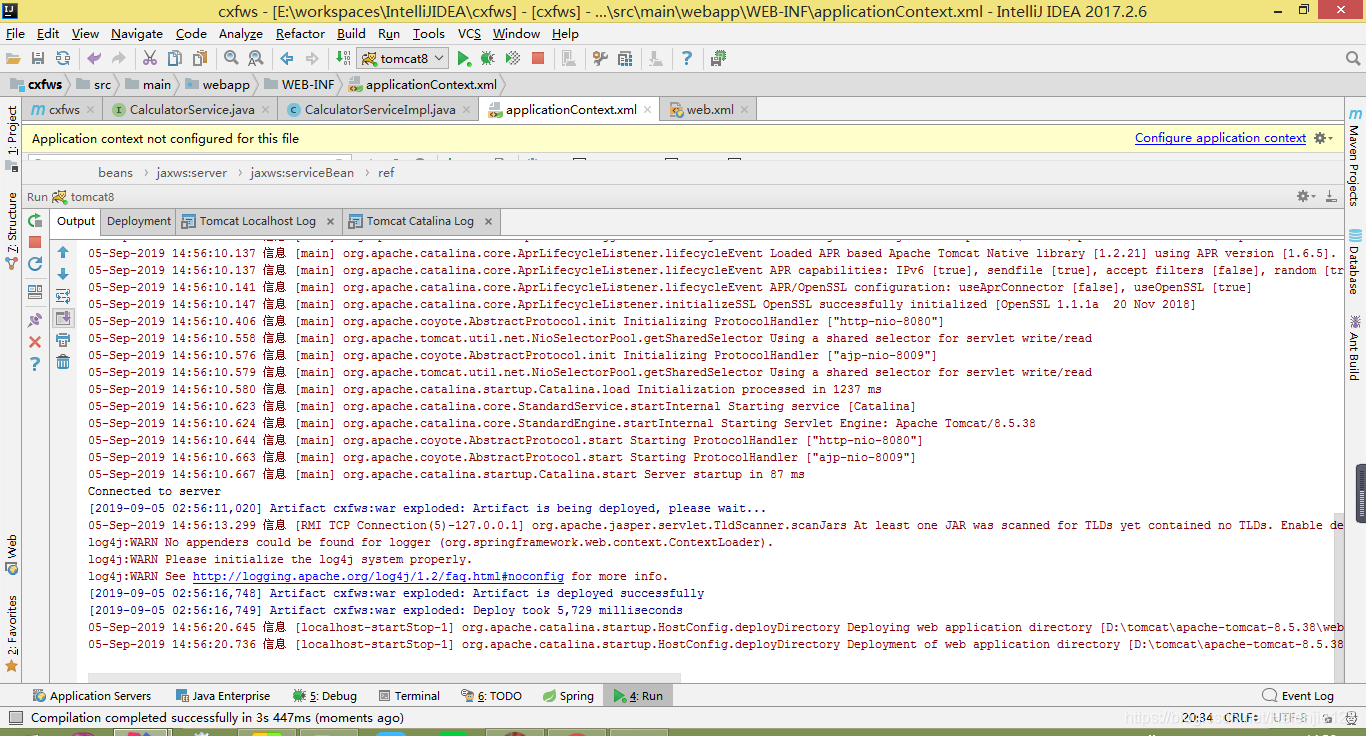
在浏览器地址栏中输入 http://localhost:8080/cxfws/ ,出现如下结果说明发布成功。

点击链接:{http://test_cxf/}CalculatorServiceService 查看wsdl的内容
This XML file does not appear to have any style information associated with it. The document tree is shown below.
<wsdl:definitions xmlns:xsd="http://www.w3.org/2001/XMLSchema" xmlns:wsdl="http://schemas.xmlsoap.org/wsdl/" xmlns:tns="http://test_cxf/" xmlns:soap="http://schemas.xmlsoap.org/wsdl/soap/"xmlns:ns1="http://schemas.xmlsoap.org/soap/http" name="CalculatorServiceService" targetNamespace="http://test_cxf/">
<wsdl:types>
<xs:schema xmlns:xs="http://www.w3.org/2001/XMLSchema" xmlns:tns="http://test_cxf/" elementFormDefault="unqualified" targetNamespace="http://test_cxf/" version="1.0">
<xs:element name="plus" type="tns:plus"/>
<xs:element name="plusResponse" type="tns:plusResponse"/>
<xs:complexType name="plus">
<xs:sequence>
<xs:element minOccurs="0" name="arg0" type="xs:string"/>
</xs:sequence>
</xs:complexType>
<xs:complexType name="plusResponse">
<xs:sequence>
<xs:element minOccurs="0" name="return" type="xs:string"/>
</xs:sequence>
</xs:complexType>
</xs:schema>
</wsdl:types>
<wsdl:message name="plusResponse">
<wsdl:part element="tns:plusResponse" name="parameters"> </wsdl:part>
</wsdl:message>
<wsdl:message name="plus">
<wsdl:part element="tns:plus" name="parameters"> </wsdl:part>
</wsdl:message>
<wsdl:portType name="calculator">
<wsdl:operation name="plus">
<wsdl:input message="tns:plus" name="plus"> </wsdl:input>
<wsdl:output message="tns:plusResponse" name="plusResponse"> </wsdl:output>
</wsdl:operation>
</wsdl:portType>
<wsdl:binding name="CalculatorServiceServiceSoapBinding" type="tns:calculator">
<soap:binding style="document" transport="http://schemas.xmlsoap.org/soap/http"/>
<wsdl:operation name="plus">
<soap:operation soapAction="" style="document"/>
<wsdl:input name="plus">
<soap:body use="literal"/>
</wsdl:input>
<wsdl:output name="plusResponse">
<soap:body use="literal"/>
</wsdl:output>
</wsdl:operation>
</wsdl:binding>
<wsdl:service name="CalculatorServiceService">
<wsdl:port binding="tns:CalculatorServiceServiceSoapBinding" name="calculatorPort">
<soap:address location="http://localhost:8080/cxfws/calculator"/>
</wsdl:port>
</wsdl:service>
</wsdl:definitions>
5.3将项目打包

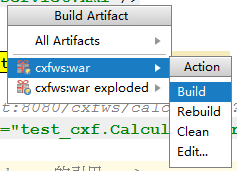
打包成功后在工程目录下E:\workspaces\IntelliJIDEA\cxfws\target会生成一个cxfws-1.0-SNAPSHOT.war包,将该包拷贝到Tomcat服务器安装目录下的 webapp目录下(发布web应用:Tomcat 8.5.38\webapps)。
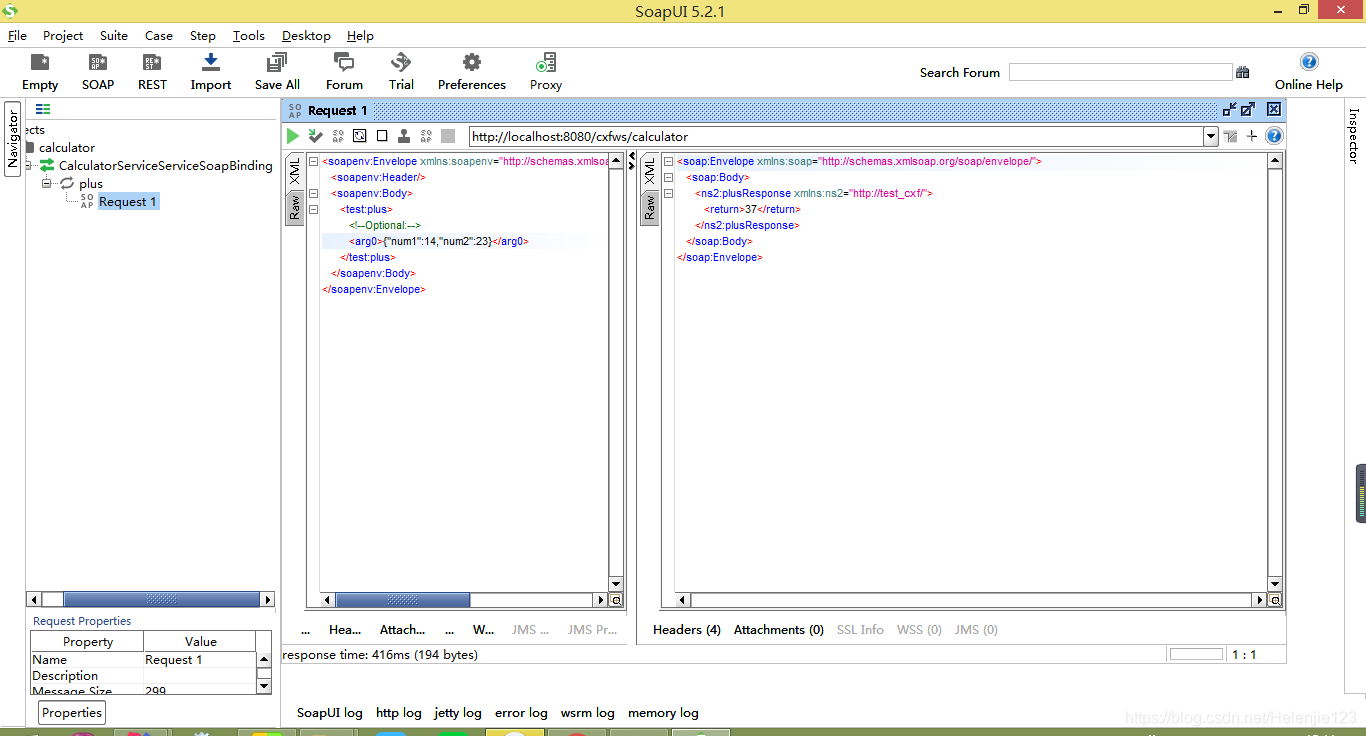
6:soapUI进行测试
6.1 新建soapUI项目:Project->New soapUI Project 或 File->New soapUI Project


命名工程名:calculator(名字可以随便取);
Initial WSDL: http://localhost:8080/cxfws/calculator?wsdl
点击OK导入wsdl如下:可以看到服务器提供的1个接口

6.2接口测试(入参json格式传入,得到结果)


 743
743


 被折叠的 条评论
为什么被折叠?
被折叠的 条评论
为什么被折叠?
 到【灌水乐园】发言


