


一、环境说明:CentOS7、三台主机(Master:10.0.0.132、Node1:10.0.0.133、Node2:10.0.0.134)
二、准备环境:
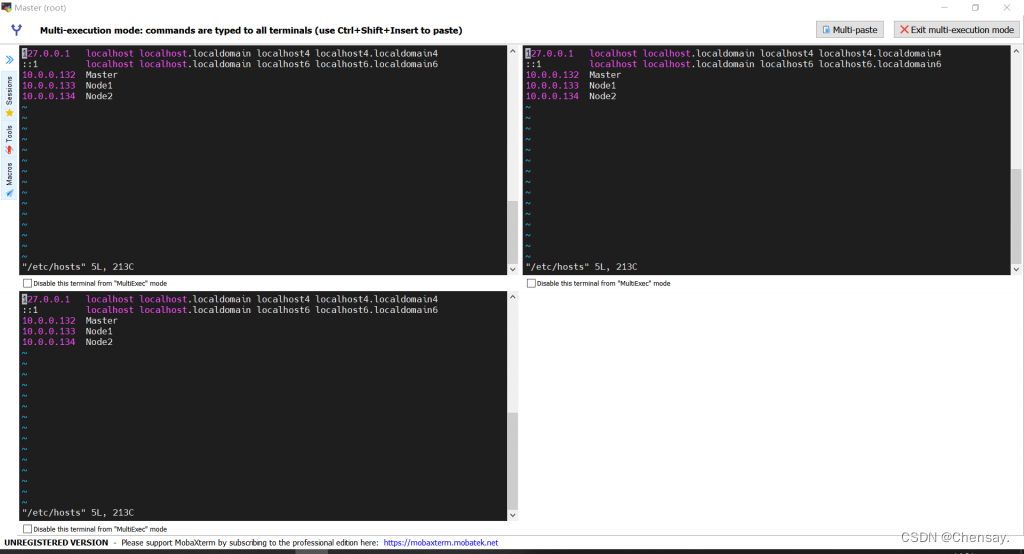
- 映射
- 关闭防火墙

三、etcd集群配置
- 安装etcd(Master)
[root@Master ~]# yum install -y kubernetes-master etcd
Loaded plugins: fastestmirror
Determining fastest mirrors
 * base: mirrors.163.com
 * extras: mirrors.163.com
 * updates: mirrors.163.com
- 修改etcd配置文件/etc/etcd/etcd.conf(Master)
 5 ETCD_LISTEN_PEER_URLS="10.0.0.132:2380"
 6 ETCD_LISTEN_CLIENT_URLS="http://10.0.0.132:2379,http://127.0.0.1:2379"
 9 ETCD_NAME="master"
 20 ETCD_INITIAL_ADVERTISE_PEER_URLS="http://10.0.0.132:2380"
 21 ETCD_ADVERTISE_CLIENT_URLS="http://10.0.0.132:2379"
 26
ETCD_INITIAL_CLUSTER="master=http://10.0.0.132:2380,node1=http://10.0.0.133:2380,node2=http://10.0.0.134:2380"
- 安装K8S节点组件、etcd、flannel以及docker(Node1和Node2)
[root@Node1 ~]# yum install -y kubernetes-node etcd flannel docker
Loaded plugins: fastestmirror
Loading mirror speeds from cached hostfile
 * base: mirrors.163.com
 * extras: mirrors.163.com
 * updates: mirrors.aliyun.com
- 修改etcd配置文件/etc/etcd/etcd.conf(Node1)
 5 ETCD_LISTEN_PEER_URLS="http://10.0.0.133:2380"
 6 ETCD_LISTEN_CLIENT_URLS="http://10.0.0.133:2379"
 9 ETCD_NAME="node1"
 20 ETCD_INITIAL_ADVERTISE_PEER_URLS="http://10.0.0.133:2380"
 21 ETCD_ADVERTISE_CLIENT_URLS="http://10.0.0.133:2379"
 26
ETCD_INITIAL_CLUSTER="master=http://10.0.0.132:2380,node1=http://10.0.0.133:2380,node2=http://10.0.0.134:2380"
- 修改etcd配置文件/etc/etcd/etcd.conf(Node2)
5 ETCD_LISTEN_PEER_URLS="http://10.0.0.134:2380"
6 ETCD_LISTEN_CLIENT_URLS="http://10.0.0.134:2379"
9 ETCD_NAME="node2"
20 ETCD_INITIAL_ADVERTISE_PEER_URLS="http://10.0.0.134:2380"
21 ETCD_ADVERTISE_CLIENT_URLS="http://10.0.0.134:2379"
26
ETCD_INITIAL_CLUSTER="master=http://10.0.0.132:2380,node1=http://10.0.0.133:2380,node2=http://10.0.0.134:2380"
- 启动etcd
[root@Master ~]# systemctl restart etcd
[root@Node1 ~]# systemctl restart etcd
[root@Node2 etcd]# systemctl restart etcd
[root@Master etcd]# etcdctl cluster-health
member 608369cbfeecea7f is healthy: got healthy result from http://10.0.0.134:2379
member 855cd77f1417e4bb is healthy: got healthy result from http://10.0.0.132:2379
member cd2399c9b3be0308 is healthy: got healthy result from http://10.0.0.133:2379
cluster is healthy
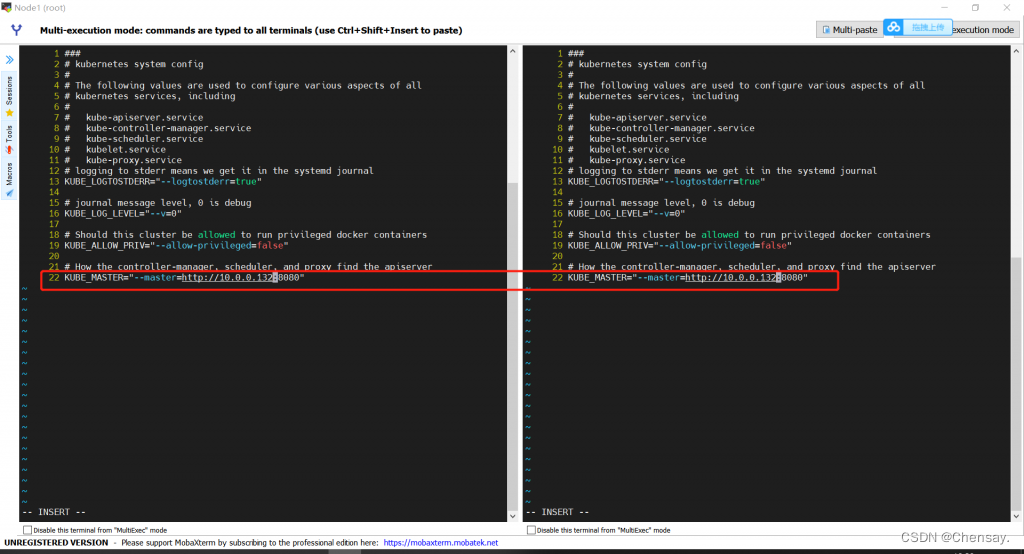
- Master配置kube-api服务(/etc/kubernetes/apiserver)
#kubernetes system config
#The following values are used to configure the kube-apiserver
#The address on the local server to listen to.
#KUBE_API_ADDRESS="--insecure-bind-address=127.0.0.1"
KUBE_API_ADDRESS="--address=0.0.0.0"

# The port on the local server to listen on.
KUBE_API_PORT="--port=8080"

# Port minions listen on
KUBELET_PORT="--kubelet-port=10250"

# Comma separated list of nodes in the etcd cluster
KUBE_ETCD_SERVERS="--etcd-servers=http://10.0.0.132:2379,http://10.0.0.133:2379,http://10.0.0.134:2379"

# Address range to use for services
KUBE_SERVICE_ADDRESSES="--service-cluster-ip-range=10.254.0.0/16"

# default admission control policies
KUBE_ADMISSION_CONTROL="--admission-control=NamespaceLifecycle,NamespaceExists,LimitRanger,SecurityContextDeny,ServiceAccount,ResourceQuota"

# Add your own!
KUBE_API_ARGS=""
- 启动服务
[root@Master etcd]# systemctl start kube-apiserver
[root@Master etcd]# systemctl start kube-controller-manager
[root@Master etcd]# systemctl start kube-scheduler
- IP地址加端口8080
- 配置node节点(node1和node2)
- 修改kubernetes全局配置文件(/etc/kubernetes/config)
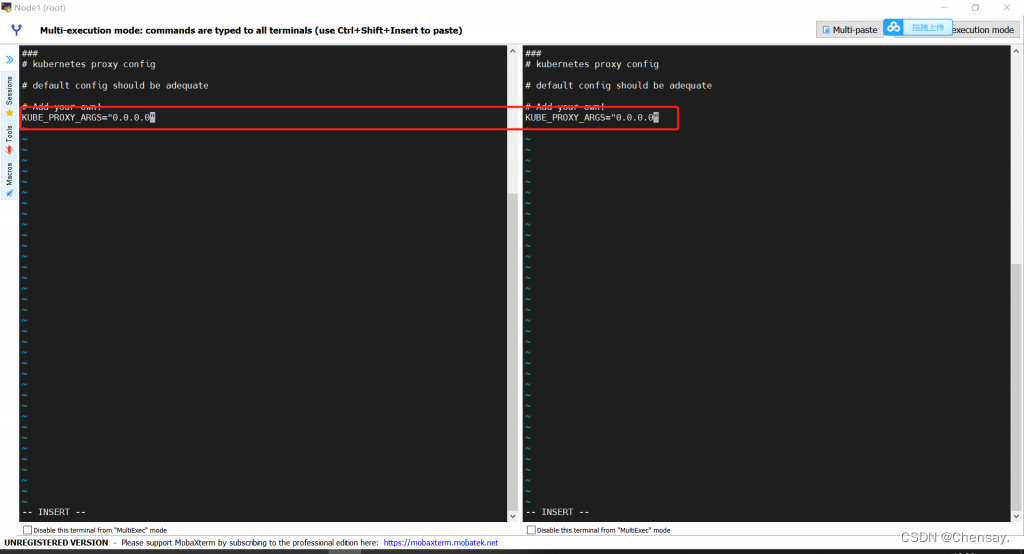
- 修改kube-proxy配置文件(/etc/kubernetes/proxy)
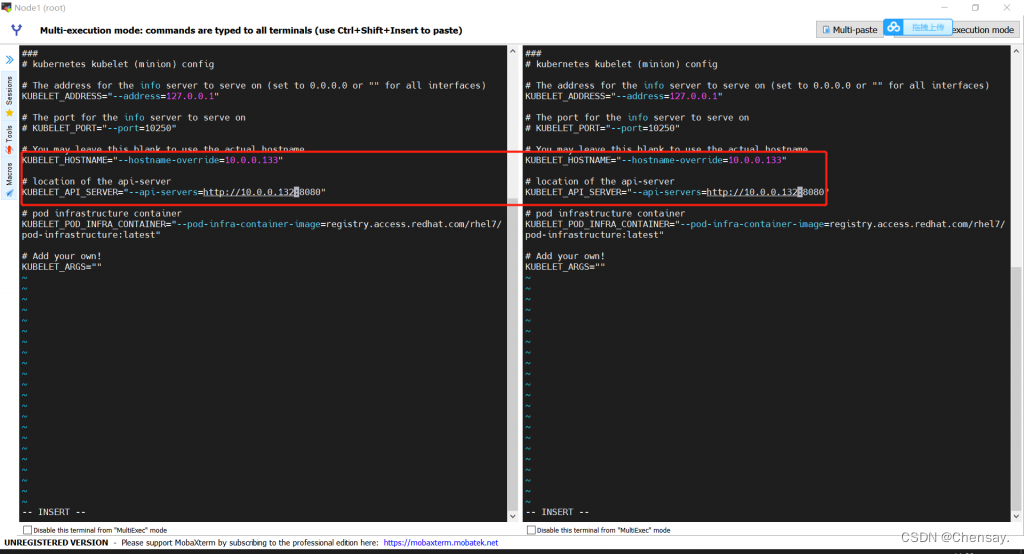
- 修改kubelet配置文件(/etc/kubernetes/kubelet)
- 启动服务
[root@Node1 ~]# systemctl enable kubelet
Created symlink from /etc/systemd/system/multi-user.target.wants/kubelet.service to /usr/lib/systemd/system/kubelet.service.
[root@Node1 ~]#
[root@Node1 ~]# systemctl enable kube-proxy
Created symlink from /etc/systemd/system/multi-user.target.wants/kube-proxy.service to /usr/lib/systemd/system/kube-proxy.service.
[root@Node1 ~]# systemctl start kube-proxy
[root@Node1 ~]# systemctl start kubelet
- master上检查节点情况
[root@Master ~]# kubectl get nodes
NAME         STATUS    AGE
10.0.0.133   Ready     1m
10.0.0.134   Ready     1m
[root@Master ~]#
- 配置网络
- 在Master节点预先配置Docker容器使用的网段和子网
[root@Master ~]# etcdctl mk /atomic.io/network/config '{"Network":"172.17.0.0/16","SubnetMin":"172.17.1.0","SubnetMax":"172.17.254.0"}'
{"Network":"172.17.0.0/16","SubnetMin":"172.17.1.0","SubnetMax":"172.17.254.0"}
- 在Node1和Node2节点修改/etc/sysconfig/flanneld配置文件
# Flanneld configuration options

# etcd url location.  Point this to the server where etcd runs
FLANNEL_ETCD_ENDPOINTS="http://10.0.0.132:2379,http://10.0.0.133:2379,http://10.0.0.134:2379"

# etcd config key.  This is the configuration key that flannel queries
# For address range assignment
FLANNEL_ETCD_PREFIX="/atomic.io/network"

# Any additional options that you want to pass
#FLANNEL_OPTIONS="--iface=ens33"
- 启动flanneld(Node1和Node2)
[root@Node2 ~]# systemctl enable flanneld
Created symlink from /etc/systemd/system/multi-user.target.wants/flanneld.service to /usr/lib/systemd/system/flanneld.service.
Created symlink from /etc/systemd/system/docker.service.wants/flanneld.service to /usr/lib/systemd/system/flanneld.service.
[root@Node2 ~]# systemctl start flanneld
- 检验
[root@Node2 ~]# ip address show|grep flannel
4: flannel0: <POINTOPOINT,MULTICAST,NOARP,UP,LOWER_UP> mtu 1472 qdisc pfifo_fast state UNKNOWN group default qlen 500
    inet 172.17.49.0/16 scope global flannel0

[root@Node1 ~]#  cd /run/flannel
[root@Node1 flannel]# ll
total 8
-rw-r--r-- 1 root root 174 Sep 27 16:01 docker
-rw-r--r-- 1 root root  98 Sep 27 16:01 subnet.env
[root@Node1 flannel]# cat docker
DOCKER_OPT_BIP="--bip=172.17.80.1/24"
DOCKER_OPT_IPMASQ="--ip-masq=true"
DOCKER_OPT_MTU="--mtu=1472"
DOCKER_NETWORK_OPTIONS=" --bip=172.17.80.1/24 --ip-masq=true --mtu=1472"
[root@Node1 flannel]# cat subnet.env
FLANNEL_NETWORK=172.17.0.0/16
FLANNEL_SUBNET=172.17.80.1/24
FLANNEL_MTU=1472
FLANNEL_IPMASQ=false


 1394
1394


 被折叠的 条评论
为什么被折叠?
被折叠的 条评论
为什么被折叠?
 到【灌水乐园】发言


