


1. 个性化配置功能简介
(1)大多数用户以匿名形式访问
Web
站点时,希望
实现诸如
内容定制、布局调用等功能。
(2)ASP.NET
2.0
技术提供了一个个性化服务解决
技术
框架。该框架主要包括
3
项核心功能:
个性化
用户配置
、
Web
部件
、
成员和角色
管理
(3)个性化
服务分为三大步骤:
(4)识别
用户
身份
(5)提供
个性化服务
体验
(6)存储
用户
信息
2. <profile>配置节
(1)设置
<profile>
配置节,经常对其三部分进行设置:
(2)<profile>
自身属性
(3)子节
<properties>
属性设置
(4)子节
<providers>
属性设置
properties属性 | 描述 |
name | 指定提供程序实例的名称 |
type | 指定实现ProfileProvider抽象基类的类型 |
connectionStringName | 连接字符串的名称,<connectionStrings>配置节内 |
applicationName | 指定数据源中存储配置文件数据的应用程序的名称,可解决多个应用程序使用配置文件的问题 |
commandTimeout | 指定向成员资格数据源发出的命令的超时时间,单位为秒 |
description | 指定配置文件提供程序实例的说明 |
 <connectionStrings>
        <add name="aspnetdbConnectionString" connectionString="Data Source=.;Initial Catalog=aspnetdb;Integrated Security=True"
            providerName="System.Data.SqlClient" />
    </connectionStrings>
    <system.web>
<!--用户个性化--> <profile enabled="true" defaultProvider="AspProfileProvider">
<providers>
<clear/>
<add name="AspProfileProvider"
type="System.Web.Profile.SqlProfileProvider"
connectionStringName="aspnetdbConnectionString"/>
</providers>
<properties>
<add name="NAME"/>
<add name="DATE" type="System.DateTime"/>
<!--<add name="chec" type="System.Collections.Specialized"/>-->
</properties>
</profile>3.个性化用户配置API
(1)创建Login.aspx页面,作为用户登录界面
  <form id="form1" runat="server">
    <div>
        <asp:Login ID="Login1" runat="server">
        </asp:Login>
    </div>
    </form>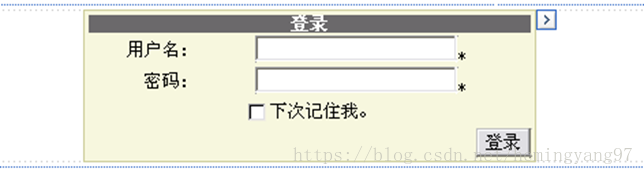
(2)添加AddProfile.aspx页面,处理用户个性化设置
 protected void Button1_Click(object sender, EventArgs e)
    {
        //判断是否是匿名用户
        if (!Profile.IsAnonymous)
        {
            Profile.NAME = TextBox1.Text;
            Profile.DATE = Calendar1.SelectedDate;
            Response.Redirect("GetProfile.aspx");
        }
        else
        {
            Profile.NAME = TextBox1.Text;
            Response.Redirect("GetProfile.aspx");
        }
    }
(3)创建GetProfile.aspx页面
protected void Page_Load(object sender, EventArgs e)
{
Response.Write("昵称:"+Profile.NAME+"<br/>生日:"+Profile.DATE.ToLongDateString());
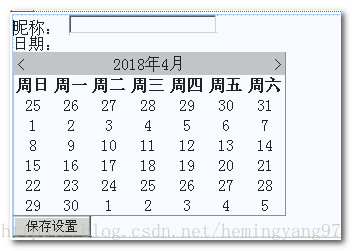
}4. 在AddProfile.aspx页面,添加图书列表,模拟复杂的个性化配置
 <form id="form1" runat="server">
    <div>
        昵称:
        <asp:TextBox ID="TextBox1" runat="server"></asp:TextBox>
        <br />
        日期:<asp:Calendar ID="Calendar1" runat="server"></asp:Calendar>
        <asp:CheckBoxList ID="CheckBoxList1" runat="server">
            <asp:ListItem>图书一</asp:ListItem>
            <asp:ListItem>图书2</asp:ListItem>
            <asp:ListItem>图书3</asp:ListItem>
            <asp:ListItem>图书4</asp:ListItem>
        </asp:CheckBoxList>
        <asp:Button ID="Button1" runat="server" Text="保存设置" OnClick="Button1_Click" />
    </div>
    </form>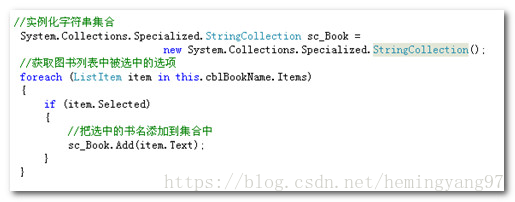
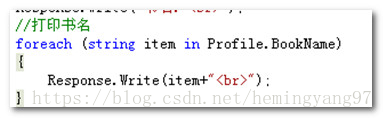
修改GetProfile.aspx页面打印书名
5.匿名个性化
(1)首先开启用户匿名个性化
 <connectionStrings>
        <add name="aspnetdbConnectionString" connectionString="Data Source=.;Initial Catalog=aspnetdb;Integrated Security=True"
            providerName="System.Data.SqlClient" />
    </connectionStrings>
    <system.web>
      <anonymousIdentification enabled="true" />
      <profile enabled="true" defaultProvider="AspProfileProvider">
        <providers>
          <clear/>
          <add name="AspProfileProvider"
                type="System.Web.Profile.SqlProfileProvider"
               connectionStringName="aspnetdbConnectionString"/>
        </providers>
        <properties>
          <add name="NAME" allowAnonymous="true"/>
          <add name="DATE" type="System.DateTime"/>
          <!--<add name="chec" type="System.Collections.Specialized"/>-->
        </properties>
      </profile>
添加<anonymousIdentification enabled="true" />对allowAnonymous --<add name="NAME" allowAnonymous="true"/>allowAnonymous 属性和<anonymousIdentification enabled=“true”/> 必须同时加上
(2)添加Login.aspx,重新作为我们显示个性化信息的窗体
<form id="form1" runat="server">
    <div>
        <asp:LoginView ID="LoginView1" runat="server">
            <AnonymousTemplate>
                <a href="AddProfile.aspx">设置个性化</a>
                <br />
                <a href="GetProfile.aspx">获取个性化</a>
            </AnonymousTemplate>
            <LoggedInTemplate>
                <asp:LoginName ID="LoginName1" runat="server" />
                <a href="AddProfile.aspx">设置个性化</a>
                <br />
                <a href="GetProfile.aspx">获取个性化</a>
            </LoggedInTemplate>
        </asp:LoginView>
    </div>
    </form>


 564
564


 被折叠的 条评论
为什么被折叠?
被折叠的 条评论
为什么被折叠?
 到【灌水乐园】发言


