


这篇主要介绍实现QQ的分享图片功能,这里用QQ官方提供的SDK。QQ的分享功能直接使用,不需要授权软件,所以比较方便。
一、准备工作
1、创建应用
腾讯QQ互联官网进行注册登录,并且创建应用管理,,获取到你的APP ID和APP Key。这里我已经完成了
2、集成SDK
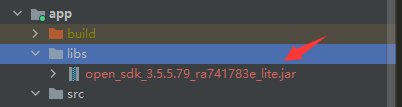
QQ互联的官方文档下载SDK,并将jar包导入项目中,这里我已经导入完成了。按照官方文档的步骤一步一步的完成。
二、代码
1、将open-sdk.jar加入编译路径
在app目录下的build.gradle中添加
dependencies {
    implementation fileTree(dir: 'libs', include: '*.jar')
}
然后重新导入一下,这样open-sdk就会导入进来了。
2、配置AndroidManifest.xml
<uses-permission android:name="android.permission.INTERNET" />
<uses-permission android:name="android.permission.ACCESS_NETWORK_STATE" />


 <activity
            android:name="com.tencent.tauth.AuthActivity"
            android:launchMode="singleTask"
            android:noHistory="true">
            <intent-filter>
                <action android:name="android.intent.action.VIEW" />

                <category android:name="android.intent.category.DEFAULT" />
                <category android:name="android.intent.category.BROWSABLE" />

                <data android:scheme="tencent+你的id" />
            </intent-filter>
        </activity>
        <activity
            android:name="com.tencent.connect.common.AssistActivity"
            android:configChanges="orientation|keyboardHidden"
            android:screenOrientation="behind"
            android:theme="@android:style/Theme.Translucent.NoTitleBar" />
注意 "tencent+你的id"这个地方:如果你的id是123456,那么android:scheme:这个地方你要写成tencent123456。
3、布局文件activity_avatarupload.xml
<?xml version="1.0" encoding="utf-8"?>
<ScrollView xmlns:android="http://schemas.android.com/apk/res/android"
    xmlns:app="http://schemas.android.com/apk/res-auto"
    android:id="@+id/scrollView"
    android:layout_width="match_parent"
    android:layout_height="match_parent" >
    <LinearLayout
        android:layout_width="match_parent"
        android:layout_height="match_parent"
        android:orientation="vertical">
        <Button
            android:id="@+id/share"
            android:layout_width="match_parent"
            android:layout_height="wrap_content"
            android:text="QQ分享"
            app:backgroundTint="#E91E63" />
        <Button
            android:id="@+id/screenshot"
            android:layout_width="match_parent"
            android:layout_height="wrap_content"
            android:text="截图"
            app:backgroundTint="#E91E63" />
        <Button
            android:id="@+id/take_photo"
            android:layout_width="match_parent"
            android:layout_height="wrap_content"
            android:backgroundTint="#E91E63"
            android:text="拍照" />
        <Button
            android:id="@+id/choose_from_album"
            android:layout_width="match_parent"
            android:layout_height="wrap_content"
            android:backgroundTint="#E91E63"
            android:text="选择照片" />
        <ImageView
            android:id="@+id/picture"
            android:layout_width="wrap_content"
            android:layout_height="wrap_content"
            android:layout_gravity="center_horizontal" />
    </LinearLayout>
</ScrollView>
这里的功能主要有对手机的相册和摄像的使用——《Android摄像头相册使用+上传照片至服务器(上篇)》,截图还有分享功能。做过的功能请看原来写的文章,这里主要讲新的截图和分享功能。
4、Avatarupload.java
截图功能
- 只截取当前屏幕
- 长截屏,比如用到了ScrollView
一张屏幕
                //第一种情况:这里是一张屏幕,并不是长截图
                View view = getWindow().getDecorView();     // 获取DecorView
//                // 方式一:
                view.setDrawingCacheEnabled(true);
                view.buildDrawingCache();
                sharebitmap = view.getDrawingCache();
                // 方式二:
                Bitmap bitmap2 = Bitmap.createBitmap(view.getWidth(), view.getHeight(), Bitmap.Config.ARGB_8888);
                Canvas canvas = new Canvas();
                canvas.setBitmap(bitmap2);
                view.draw(canvas);
长截屏
    //这里是一张屏幕,是长截图
    /**
     * 截取scrollview的屏幕
     * **/
    public static Bitmap getScrollViewBitmap(ScrollView scrollView) {
        int h = 0;
        Bitmap bitmap;
        for (int i = 0; i < scrollView.getChildCount(); i++) {
            h += scrollView.getChildAt(i).getHeight();
        }
        // 创建对应大小的bitmap
        bitmap = Bitmap.createBitmap(scrollView.getWidth(), h,
                Bitmap.Config.ARGB_8888);
        final Canvas canvas = new Canvas(bitmap);
        scrollView.draw(canvas);
        return bitmap;
    }
全部代码
public class Avatarupload extends AppCompatActivity {
  public static final int TAKE_PHOTO = 1;

    public static final int CHOOSE_PHOTO = 2;

    private ImageView picture;

    private Button takePhoto;

    private Button chooseFromAlbum;

    private Uri imageUri;

    private String imagePath = null;

    private String root;

    private String image_test;

    private static final int SUCCESS = 1;

    private static final int FALL = 2;

    private Button login;
    private Button share;
    private Button logout;
    private Button screenshot;
    String thirdLoginId;
    String name;
    String image;
    String sex;
    private TextView username;
    private ImageView avatar;
    private TextView gender;
    private Platform qq;
    private Bitmap sharebitmap;
    private ScrollView scrollView;
 @Override
    protected void onCreate(Bundle savedInstanceState) {
        super.onCreate(savedInstanceState);
        setContentView(R.layout.activity_avatarupload);
        //第一步在oncreate方法中进行初始化
        Tencent mTencent = Tencent.createInstance("id换成自己的", this.getApplicationContext());


share=findViewById(R.id.share);
        share.setOnClickListener(new View.OnClickListener() {
            @Override
            public void onClick(View v) {

//使用腾讯的分享界面,mob分享不了

                Bundle params1 = new Bundle();
//纯图片分享只可以是本地图片
//分享的类型  SHARE_TO_QQ_TYPE_IMAGE(纯图片分享)
                params1.putInt(QQShare.SHARE_TO_QQ_KEY_TYPE, QQShare.SHARE_TO_QQ_TYPE_IMAGE);
//这里我是为了方便从本地直接拿到一个图片地址放到这里的,大家可以根据自己的需求来拿去本地图片的地址
                params1.putString(QQShare.SHARE_TO_QQ_IMAGE_LOCAL_URL, image_test);
//分享之后弹框左边按钮的内容(这里基本上都写上自己应用的名字)
                params1.putString(QQShare.SHARE_TO_QQ_APP_NAME, "AndroidProject");
                params1.putInt(QQShare.SHARE_TO_QQ_EXT_INT, QQShare.SHARE_TO_QQ_FLAG_QZONE_ITEM_HIDE);
                mTencent.shareToQQ(Avatarupload.this, params1, new IUiListener() {
                    @Override
                    public void onComplete(Object o) {
                        Log.d("onComplete测试", o.toString());
                        //分享成功之后,需要将原照片删除
                    }

                    @Override
                    public void onError(UiError uiError) {
                        Log.d("onComplete测试", uiError.toString());

                    }

                    @Override
                    public void onCancel() {
                        Log.d("onComplete测试","取消了");

                    }

                    @Override
                    public void onWarning(int i) {
                        Log.d("onComplete测试","警告");

                    }
                });

            }
        });
         screenshot = findViewById(R.id.screenshot);
        screenshot.setOnClickListener(new View.OnClickListener() {
            @Override
            public void onClick(View v) {

                //第一种情况:这里是一张屏幕,并不是长截图
//                View view = getWindow().getDecorView();     // 获取DecorView
                // 方式一:
//                view.setDrawingCacheEnabled(true);
//                view.buildDrawingCache();
//                sharebitmap = view.getDrawingCache();
                // 方式二:
//                Bitmap bitmap2 = Bitmap.createBitmap(view.getWidth(), view.getHeight(), Bitmap.Config.ARGB_8888);
//                Canvas canvas = new Canvas();
//                canvas.setBitmap(bitmap2);
//                view.draw(canvas);


                //第二种情况:这里是一张屏幕,是长截图getViewGroupBitmap
                sharebitmap = getScrollViewBitmap(scrollView);


                //sharepicture = MediaStore.Images.Media.insertImage(getContentResolver(), sharebitmap, "share", "sharepicture");
                //System.out.println("whq保存到相册:"+sharepicture);
                root = Avatarupload.this.getExternalFilesDir("pic").getAbsolutePath();
                image_test = root+"/share.png";
                System.out.println("whq保存到相册:"+root);
                File file = new File(image_test);
                try {
                    file.createNewFile();
                    FileOutputStream fos = new FileOutputStream(file);
                    sharebitmap.compress(Bitmap.CompressFormat.PNG, 100, fos);
                    fos.close();
                } catch (IOException e) {
                    e.printStackTrace();
                }
//                System.out.println("whq保存到相册sharebitmap:"+root);
                System.out.println("whq保存到相册sharebitmap:"+image_test);

                picture.setImageBitmap(sharebitmap);
            }
        });
    }
    //这里是一张屏幕,是长截图
    /**
     * 截取scrollview的屏幕
     * **/
    public static Bitmap getScrollViewBitmap(ScrollView scrollView) {
        int h = 0;
        Bitmap bitmap;
        for (int i = 0; i < scrollView.getChildCount(); i++) {
            h += scrollView.getChildAt(i).getHeight();
        }
        // 创建对应大小的bitmap
        bitmap = Bitmap.createBitmap(scrollView.getWidth(), h,
                Bitmap.Config.ARGB_8888);
        final Canvas canvas = new Canvas(bitmap);
        scrollView.draw(canvas);
        return bitmap;
    }
}


 1247
1247


 被折叠的 条评论
为什么被折叠?
被折叠的 条评论
为什么被折叠?
 到【灌水乐园】发言


