摘要:
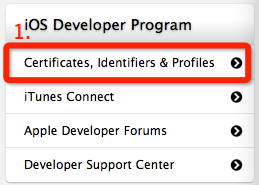
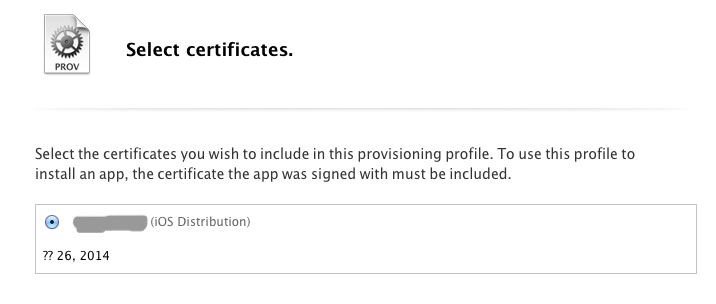
发布产品到App Store所需证书,2013年5月26亲测,真机调试证书与此类似,只需将证书类型换成开发就行了
首先登陆https://developer.apple.com(99美元账号)
a.点击页面右上角
![](http://static.oschina.net/uploads/space/2013/0527/085239_wnMO_735123.png)
b.进入
![](http://static.oschina.net/uploads/space/2013/0527/085518_CzEJ_735123.png)
c.选择证书类型 distribution,选择添加
![](https://i-blog.csdnimg.cn/blog_migrate/18b3649c3259e3cf746b769fd54ff28c.png)
d.点击+后,选择distribution->App Store and Ad Hoc,continue
![](http://static.oschina.net/uploads/space/2013/0527/090604_JXos_735123.png)
e.之后继续continue,会看到需要上传证书界面
![](https://i-blog.csdnimg.cn/blog_migrate/5a703ddb9767c53e09b1eae15a8aa04f.png)
f.打开mac的钥匙串访问
![](https://i-blog.csdnimg.cn/blog_migrate/d11895dd6ed505522d72f38b8870ff46.png)
g.选择钥匙串的证书助理(有些可能是英文的)
![](http://static.oschina.net/uploads/space/2013/0527/091818_FWFv_735123.png)
![](http://static.oschina.net/uploads/space/2013/0527/091839_lcdD_735123.png)
h.点击继续后存储证书,一般选择桌面(依据个人喜好)
i.在e的界面选择choose File将刚刚存储的证书上传。![](https://i-blog.csdnimg.cn/blog_migrate/740b8c3aa9c5ad4604225ea70f82470d.png)
j.下载证书,双击安装
k.生成证书对应的provision File
![](http://static.oschina.net/uploads/space/2013/0527/092813_WIO4_735123.png)
l.continue-选择App ID
![](http://static.oschina.net/uploads/space/2013/0527/093114_Pq4q_735123.png)
PS:此处App ID选择自己原来建的,这个应该在真机调试之时就生成过。如果没有,到Identifiers->App IDs中新建一个
m.点击继续->然后选择刚刚新建的发布证书
![](http://static.oschina.net/uploads/space/2013/0527/093612_iR4I_735123.png)
n.选择继续![](http://static.oschina.net/uploads/space/2013/0527/094259_SgUU_735123.png)
PS:此处profile Name填写需与App ID 的后缀一致。如果为*则自定义一个。
o.点击生成后会在provision profiles 里看到你锁生成的profiles,选择type为distribution的那个下载下来,同样双击安装即可
![](http://static.oschina.net/uploads/space/2013/0527/095431_oJJ7_735123.png)
发布证书就申请并安装完成了。
有什么问题欢迎大家指出