


最近一直在学这三个框架,终于学习的差不多了。于是,我就想着开始实践,先从整合这三个框架开始吧!
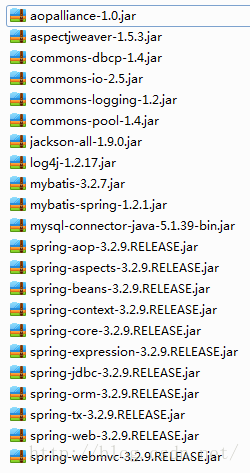
我整合用到的jar包如下:
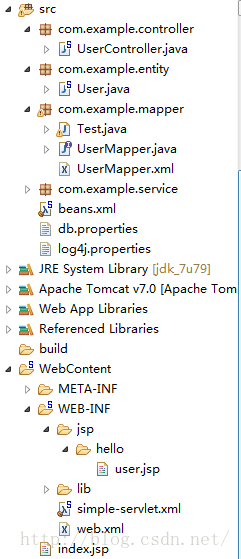
我的工程文件目录结构如下:
首先,先整合Spring和MyBatis,我的数据源用的是DBCP,数据源属性文件的内容就不贴图了,beans.xml(整合Spring+MyBatis的配置文件)其内容如下:
<?xml version="1.0" encoding="UTF-8"?>
<beans xmlns="http://www.springframework.org/schema/beans"
xmlns:xsi="http://www.w3.org/2001/XMLSchema-instance" xmlns:context="http://www.springframework.org/schema/context"
xmlns:tx="http://www.springframework.org/schema/tx" xmlns:aop="http://www.springframework.org/schema/aop"
xsi:schemaLocation="http://www.springframework.org/schema/aop http://www.springframework.org/schema/aop/spring-aop-3.2.xsd
http://www.springframework.org/schema/beans http://www.springframework.org/schema/beans/spring-beans.xsd
http://www.springframework.org/schema/tx http://www.springframework.org/schema/tx/spring-tx-3.2.xsd
http://www.springframework.org/schema/context http://www.springframework.org/schema/context/spring-context-3.2.xsd">
<!-- 打开Spring的Annotation支持 -->
<context:annotation-config />
<!-- 扫描机制:自动将该路径下带有Spring标识的类加入到Spring容器中 -->
<context:component-scan base-package="com.example">
<!--制定扫包规则,不扫描@Controller注解的JAVA类,其他的还是要扫描 -->
<context:exclude-filter type="annotation"
expression="org.springframework.stereotype.Controller" />
</context:component-scan>
<!-- 属性监视器,加入属性文件 classpath:类路径下寻找 -->
<context:property-placeholder location="classpath:db.properties" />
<!-- 使用dbcp来管理数据源 -->
<bean id="dataSource" destroy-method="close"
class="org.apache.commons.dbcp.BasicDataSource">
<property name="driverClassName" value="${jdbc.driverClassName}" />
<property name="url" value="${jdbc.url}" />
<property name="username" value="${jdbc.username}" />
<property name="password" value="${jdbc.password}" />
<!-- 配置连接池的初始值 -->
<property name="initialSize" value="${jdbc.initialSize}" />
<!-- 连接池的最大值 -->
<property name="maxActive" value="${jdbc.maxActive}" />
<!-- 当最大空闲时,当经过一个高峰之后,连接池可以将一些用不到的连接释放,一直减少到maxIdle为止 -->
<property name="maxIdle" value="${jdbc.maxIdle}" />
<!-- 当最小空闲时,当连接少于minIdle时会自动去申请一些连接 -->
<property name="minIdle" value="${jdbc.minIdle}" />
</bean>
<!-- 集成MyBatis,解析配置等 -->
<bean id="sqlSessionFactory" class="org.mybatis.spring.SqlSessionFactoryBean">
<property name="dataSource" ref="dataSource" />
<property name="mapperLocations" value="classpath:com/example/mapper/*.xml" />
</bean>
<!-- 自动扫描映射器(Mapper接口) -->
<bean class="org.mybatis.spring.mapper.MapperScannerConfigurer">
<property name="basePackage" value="com.example.mapper" />
<property name="sqlSessionFactoryBeanName" value="sqlSessionFactory" />
</bean>
<!-- 配置事务管理器 -->
<bean id="txManager"
class="org.springframework.jdbc.datasource.DataSourceTransactionManager">
<property name="dataSource" ref="dataSource" />
</bean>
<!-- 配置AOP,Spring是通过AOP来进行事务管理 -->
<aop:config>
<aop:pointcut expression="execution(* com.example.dao.*.*(..))"
id="allMethods" />
<!-- 通过advisor来确定具体要加入事务控制的方法 -->
<aop:advisor advice-ref="txAdvice" pointcut-ref="allMethods" />
</aop:config>
<!-- 配置要加入事务控制的方法 -->
<tx:advice id="txAdvice" transaction-manager="txManager">
<tx:attributes>
<!-- 让查询之类的方法设置为只读的事务用以提交效率 -->
<tx:method name="list*" propagation="REQUIRED" read-only="true" />
<tx:method name="find*" propagation="REQUIRED" read-only="true" />
<!-- 以下方法都是可能涉及到DB修改的方法,就不能设置为只读 -->
<tx:method name="add*" propagation="REQUIRED" />
<tx:method name="del*" propagation="REQUIRED" />
<tx:method name="update*" propagation="REQUIRED" />
<tx:method name="save*" propagation="REQUIRED" />
</tx:attributes>
</tx:advice>
</beans>
这个配置文件中最主要的部分就是使用到org.mybatis.spring.SqlSessionFactoryBean和org.mybatis.spring.mapper.MapperScannerConfigurer的地方,这两处才是对Spring和MyBatis整合的配置。接下来,就是要测试spring和mybatis的整合了,我是直接在Test.java中的main方法里调用了userMapper.getUser()方法的,直接输出到控制台了。
User.java我就不贴出来了,这是一个很简单的实体类。
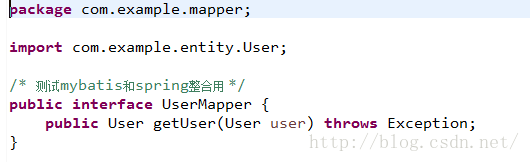
UserMapper.java,这是一个mapper接口,其内容如下:
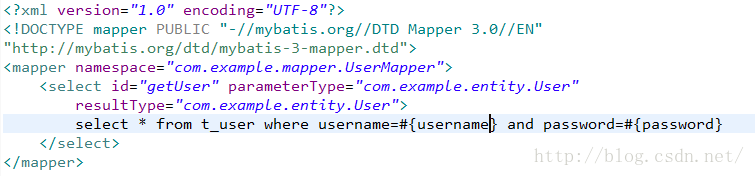
UserMapper.xml,这是映射文件,其内容如下:
Test.java,用于测试spring+mybatis是否整合成功:
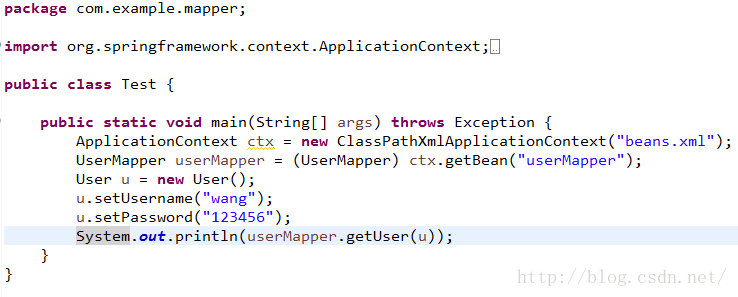
控制台输出:

如上,结果输出正确,说明spring和mybatis整合成功。
*************************************************************************************华丽的分割线*****************************************************************************
接着继续整合spring MVC,spring MVC的配置文件是simple-servlet.xml,这里使用的是默认形式--/WEB-INF/[servlet-name]-servlet.xml,其实还可以指定其路径和名称,类似:
<init-param>
<param-name>contextConfigLocation</param-name>
<param-value>classpath:springmvc.xml</param-value>
</init-param>
simple-servlet.xml的内容如下:
<?xml version="1.0" encoding="UTF-8"?>
<beans xmlns="http://www.springframework.org/schema/beans"
xmlns:xsi="http://www.w3.org/2001/XMLSchema-instance" xmlns:mvc="http://www.springframework.org/schema/mvc"
xmlns:context="http://www.springframework.org/schema/context"
xsi:schemaLocation="http://www.springframework.org/schema/mvc http://www.springframework.org/schema/mvc/spring-mvc-3.2.xsd
http://www.springframework.org/schema/beans http://www.springframework.org/schema/beans/spring-beans.xsd
http://www.springframework.org/schema/context http://www.springframework.org/schema/context/spring-context-3.2.xsd">
<!-- 打开Spring MVC的Annotation支持 -->
<mvc:annotation-driven />
<mvc:default-servlet-handler />
<!-- 从此包下查找作为控制器的类 -->
<context:component-scan base-package="com.example.controller" />
<!-- 配置视图解析器 -->
<bean
class="org.springframework.web.servlet.view.InternalResourceViewResolver">
<property name="prefix" value="/WEB-INF/jsp/" />
<property name="suffix" value=".jsp" />
</bean>
</beans>
继续配置web.xml,其内容如下:
<?xml version="1.0" encoding="UTF-8"?>
<web-app xmlns="http://java.sun.com/xml/ns/javaee" xmlns:xsi="http://www.w3.org/2001/XMLSchema-instance"
xsi:schemaLocation="http://java.sun.com/xml/ns/javaee http://java.sun.com/xml/ns/javaee/web-app_3_0.xsd"
version="3.0" metadata-complete="true">
<welcome-file-list>
<welcome-file>index.jsp</welcome-file>
</welcome-file-list>
<!-- Spring MVC的前端控制器 -->
<servlet>
<servlet-name>simple</servlet-name>
<servlet-class>org.springframework.web.servlet.DispatcherServlet</servlet-class>
<!--创建web应用的时候就被加载,而不是等请求到来的时候才加载 -->
<load-on-startup>1</load-on-startup>
</servlet>
<servlet-mapping>
<servlet-name>simple</servlet-name>
<url-pattern>/</url-pattern>
</servlet-mapping>
<!-- 为画面上提交的数据指定编码 -->
<filter>
<filter-name>CharacterFilter</filter-name>
<filter-class>org.springframework.web.filter.CharacterEncodingFilter</filter-class>
<init-param>
<param-name>encoding</param-name>
<param-value>UTF-8</param-value>
</init-param>
</filter>
<filter-mapping>
<filter-name>CharacterFilter</filter-name>
<url-pattern>/*</url-pattern>
</filter-mapping>
<!-- 创建spring的监听器 -->
<listener>
<listener-class>org.springframework.web.context.ContextLoaderListener</listener-class>
</listener>
<!-- spring监听器可以通过这个上下文参数来获取beans.xml的位置 -->
<context-param>
<param-name>contextConfigLocation</param-name>
<param-value>classpath*:beans.xml</param-value>
</context-param>
</web-app>
这样spring+springMVC+mybatis的整合就都搞好了,测试一下吧!
UserController.java,请求的处理器
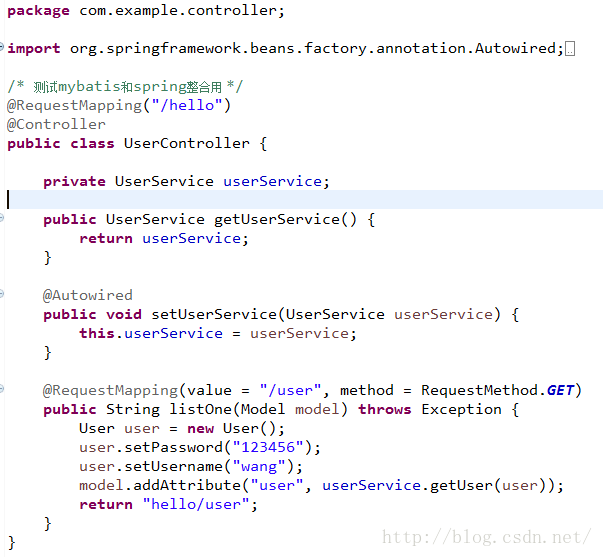
index.jsp,点击链接user,则经过listOne()方法处理后跳转到hello下的user.jsp页面

user.jsp,用于显示从数据库中查询的数据

效果如下,点击链接user,跳转到user.jsp页面,并且显示数据库中查询到的数据


至此,Spring+Spring MVC+MyBatis整合完成!
看了一下别人的博客,整合有很多种方法。我在做index.jsp映射到控制器的时候就出了很多次错误,也就没有去探究那些整合的方法,还是需要不断的提高自己.......


 212
212


 被折叠的 条评论
为什么被折叠?
被折叠的 条评论
为什么被折叠?
 到【灌水乐园】发言


