


We have discussed taking screenshots with monkeyrunner in previous posts , but now we are taking a step further by comparing the screenshots obtained during the test run against some reference image.
Firstly, we need these reference images that you can obtain by running specific cases of the tests specially designed to do it. It's not recommended to use DDMS to take the reference image as in some cases the image format and compression may slightly differ from the ones taken by monkeyrunner leading to false positive identification of the dissimilarity.
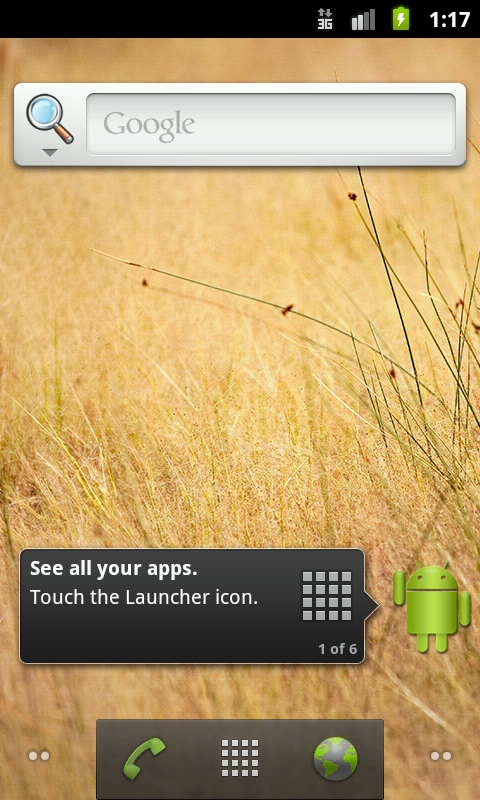
As a fairly simple example we will be creating a test to verify the correct drag and drop to a new position of a screen widget , in this case the Home screen tips . We will be sending touch events to move it from its original position in row 2:

#! /usr/bin/env monkeyrunner


import

 sys


import

 subprocess


from

 com.android.monkeyrunner


import

 MonkeyRunner, MonkeyDevice, MonkeyImage


TIMEOUT =

30


SERIALNO =

'emulator-5554'


REF =

'reference.png'


SCR =

'screenshot.png'


CMP =

'comparison.png'


ACCEPTANCE =

0.9


device = None


def


 testDropWidgetIntoFourthRow

():


    reference = MonkeyImage.loadFromFile(REF)


    print

 "moving widget..."


    device.drag((230

, 300

), (230

, 600

), 2.0

, 125

)


    MonkeyRunner.sleep(3

)


    screenshot = device.takeSnapshot()


    screenshot.writeToFile(SCR)


    if


 not


 screenshot.sameAs(reference, ACCEPTANCE):


       print

 "comparison failed, getting visual comparison..."


       subprocess.call(["/usr/bin/compare"

, REF, SCR, CMP])


def


 main

():


    global


 device


    print

 "waiting for connection..."


    device = MonkeyRunner.waitForConnection(TIMEOUT, SERIALNO)


    if


 device:


       testDropWidgetIntoFourthRow()


if


 __name__ == '__main__'

:


     main()
We are using MonkeyImage.loadFromFile() to load the reference image from a file. This method is only available in latest verions of monkeyrunner , so if it is not available you can build it from source (being sure that this patch is included).
monkeyrunner is a SDK component and thus is included in this project that can be downloaded from android SDK source .
Anyway, if you can't do it you may just avoid this step and replace the condition in the if by True .
A brief explanation of the script is:
- in the main method we obtain the connection with the device using the serial number specified in SERIALNO . A more sophisticated script should use parameters.
- if the connection was successful we run the test
- in the test method we load the reference image from the specified file
- we send a simulated drag event to move the widget from the second row to the fourth row, using screen coordinates
- sleep for a while
- get the screenshot
- if the images are not the same, considering 90% acceptance value, we use the visual comparison to get a clue of the difference
If you run the script you can verify that the screenshot is taken and the test succeed because they are the same. They only have minor differences in the time and battery level but they lie above the acceptance value.
Now, if we run the test again but this time using (230, 400) instead of (230, 600) in the drag command the widget will be dropped in the third line instead of the fourth and we expect this difference be detected as our reference image for the final state contains the widget in the fourth row, and thus precisely what happens.
This is the comparison image highlighting in red the differences:

Check that as we mentioned before the battery level and time in the status bar are also detected as differences but they are usually under the threshold.
This is not a real repeatable test as we are not leaving the system in the same state that was found but the idea is to present the subject in the simplest possible way to avoid deviating from the main goal which is demonstrating how you can add visual comparison to your tests using monkeyrunner and ImageMagick .
I'm sure this will give you lots of ideas to implement you own tests.
As always, comments are gladly welcome.
引用:http://dtmilano.blogspot.com/search/label/monkeyrunner


 被折叠的 条评论
为什么被折叠?
被折叠的 条评论
为什么被折叠?
 到【灌水乐园】发言


