


第一步:下载镜像文件并制作启动安装U盘:
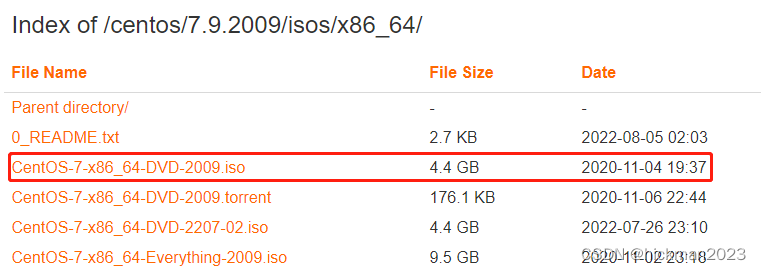
1、从centos官网或阿里镜像站下载镜像文件
http://mirrors.aliyun.com/centos/7.9.2009/isos/x86_64/
CentOS-7-x86_64-DVD-2009.iso
2、使用UltraISO制作启动安装U盘
第二步:安装
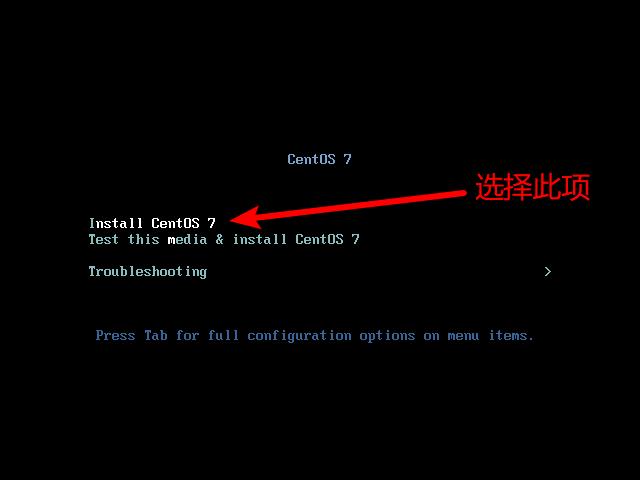
1、选择Install CentOS7来进行安装
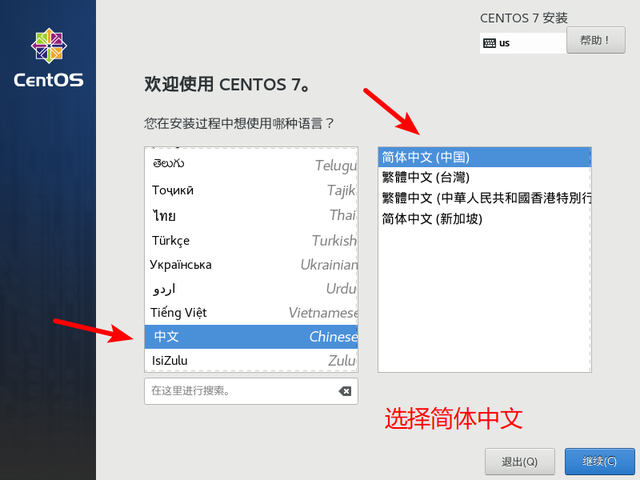
2、选择安装语言,建议选择English,然后点击继续
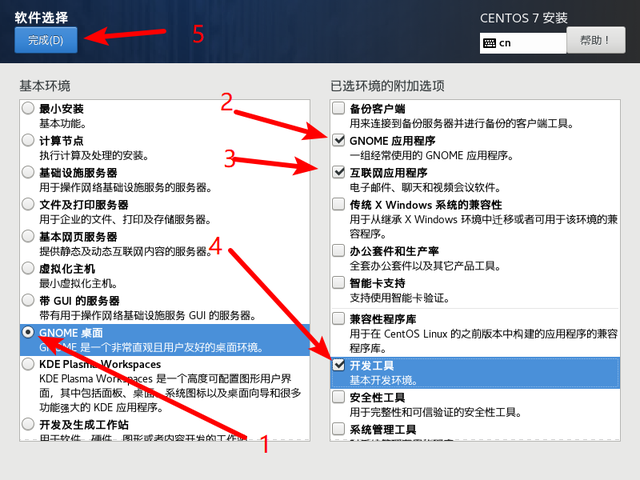
3、依次进行 [软件选择]和[分区操作]
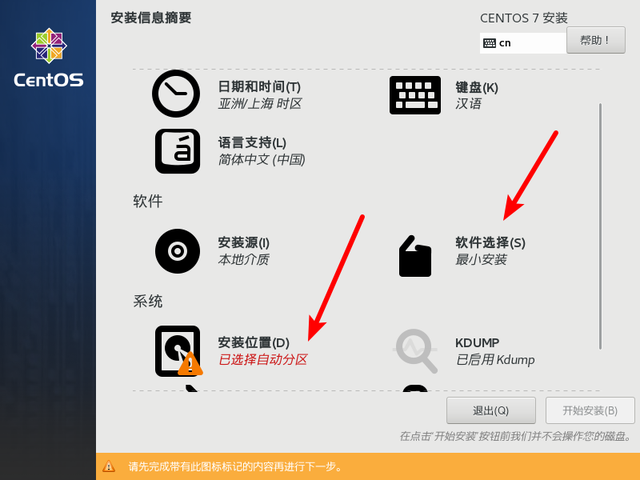
软件安装选择,刚开始建议选择GNOME桌面,环境附加选择GNOME应用程序、互联网应用程序、和开发工具
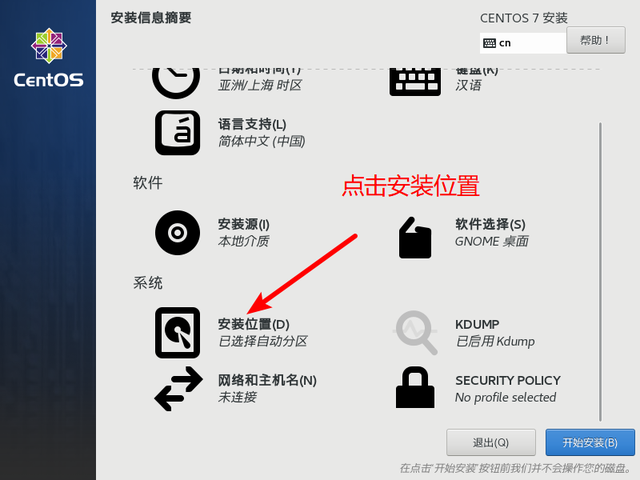
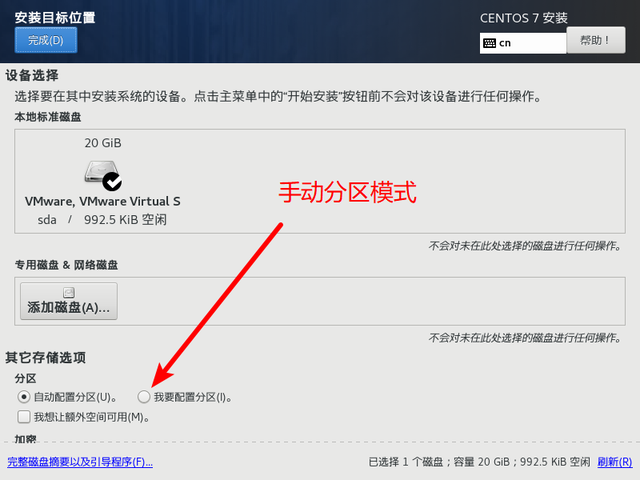
4、分区操作,也可以选择自动分区
(1)手动分区
(2)进行手动分区配置,点击[我要配置分区]后点击完成
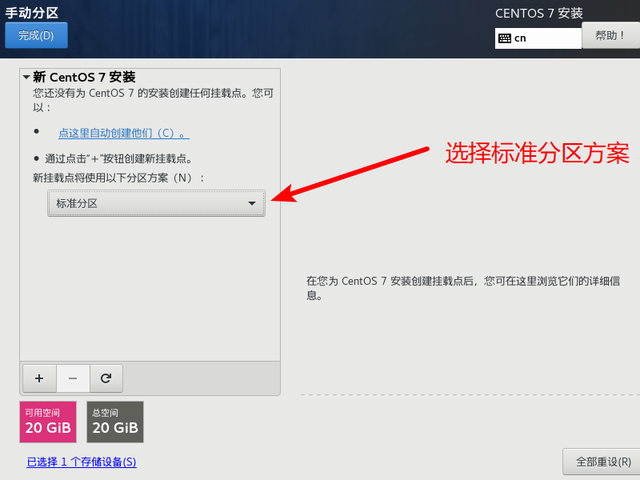
(3)进入手动配置分区界面
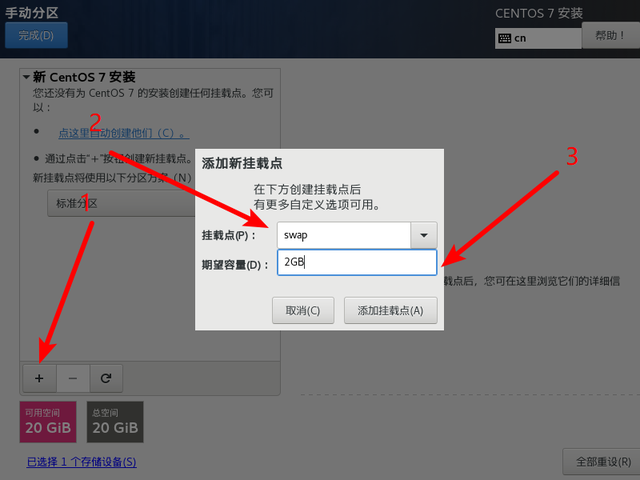
点击+ 新增一个分区;
挂载点选择swap交换分区(相当于Windwos中的虚拟内存),并设置容量为2G
然后点击挂载
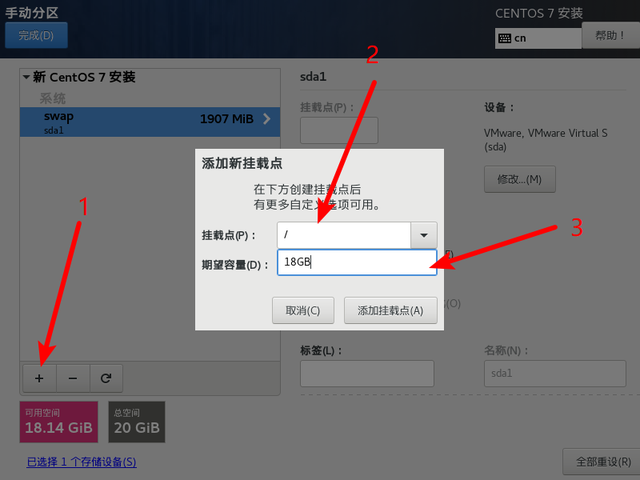
点击+ 新增第二个分区;
挂载点选择 / 根目录(相当于Windwos中的C盘),并设置容量为18G
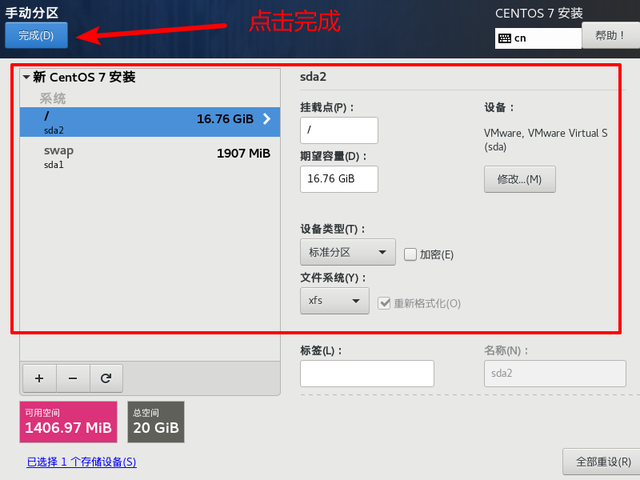
添加挂载点后
点击完成
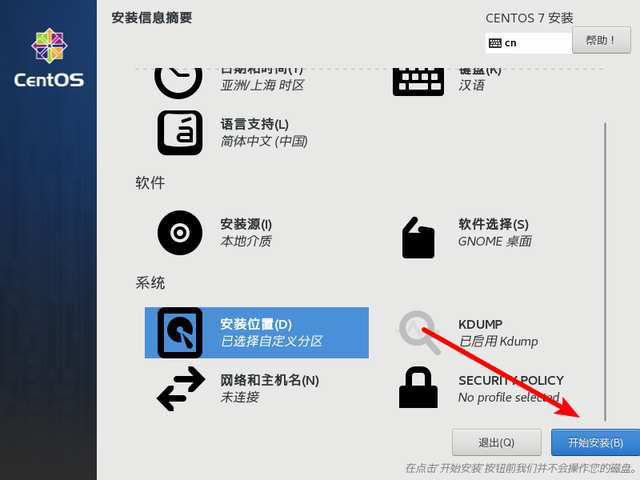
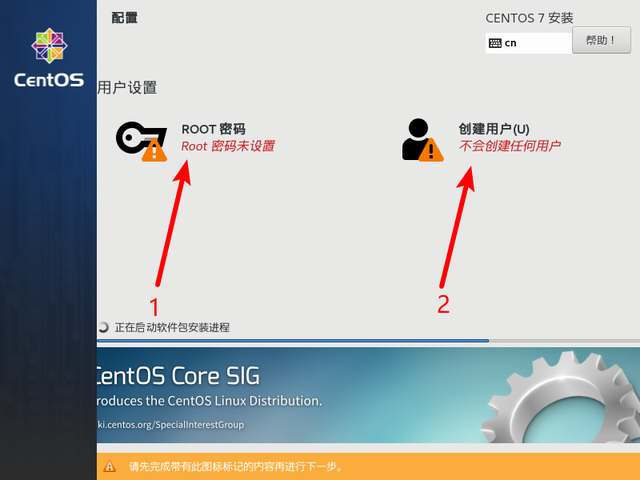
5、开始安装系统
创建一个普通用户用来登录系统
创建root密码用来高级操作
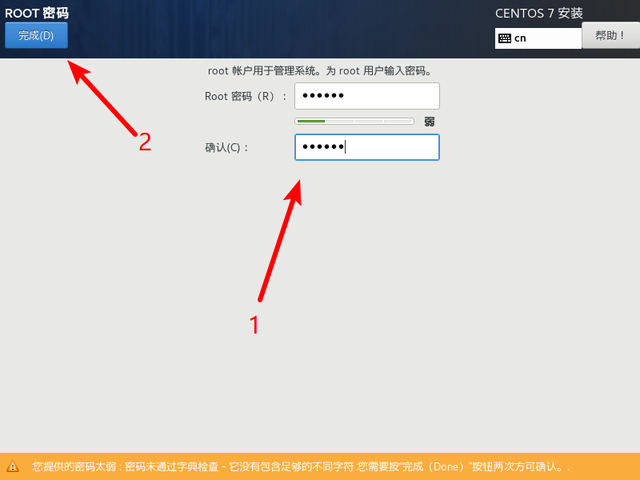
点击ROOT密码,输入后点击完成(ROOT密码需要一定的密码强度否则不会通过)
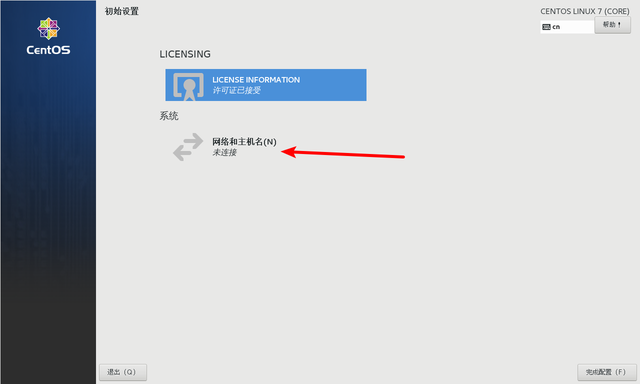
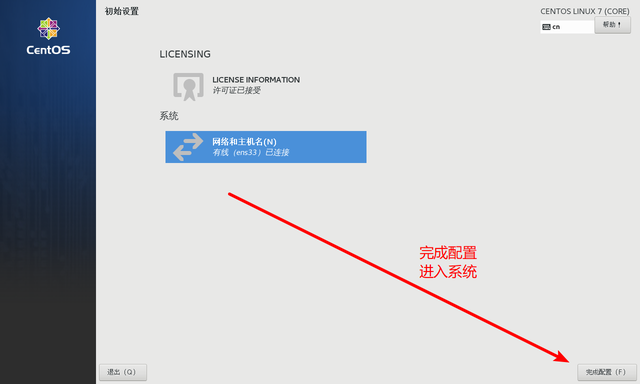
创建登录用户(此用户用来登录系统所用)
完成后等待安装继续
重启后配置许可证和网络
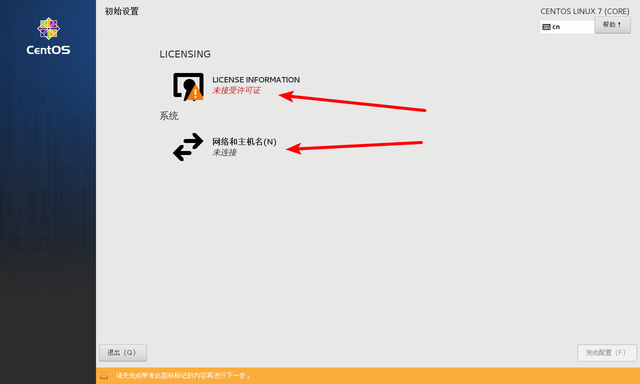
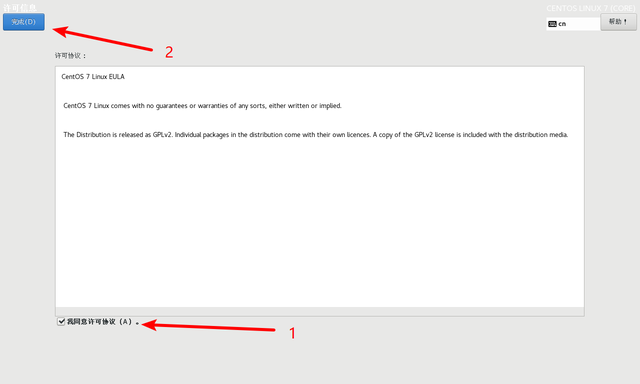
点击同意此协议
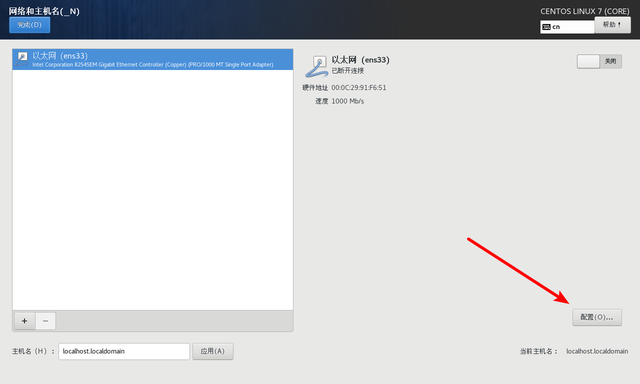
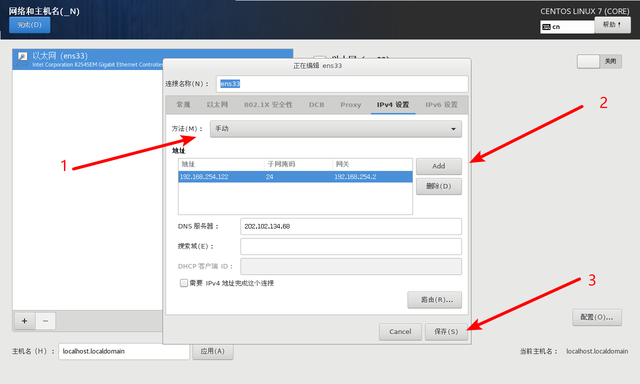
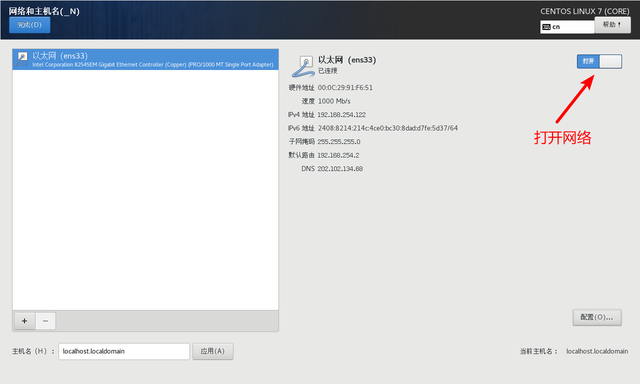
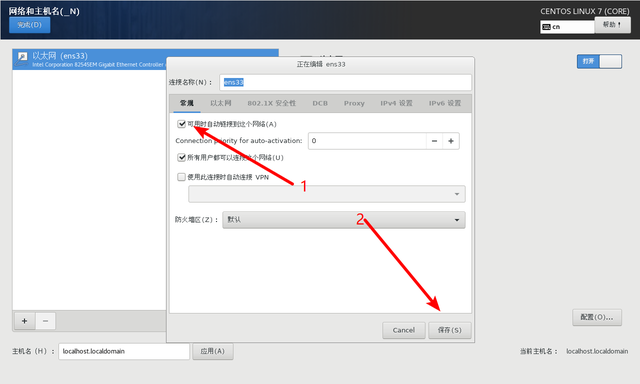
配置网络连接
网络的配置方式可以选择动态IP或者静态IP
我这里选择的是静态IP:192.168.2.248
IP地址一定要和上方路由处于同一网段
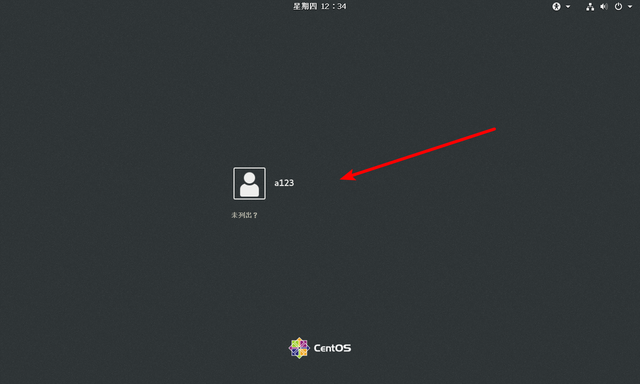
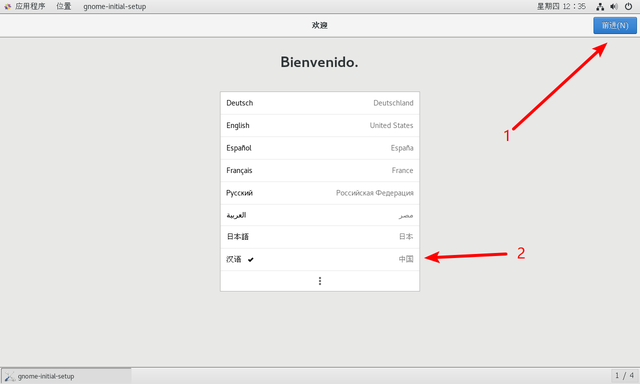
进入系统
点击安装时创建的用户
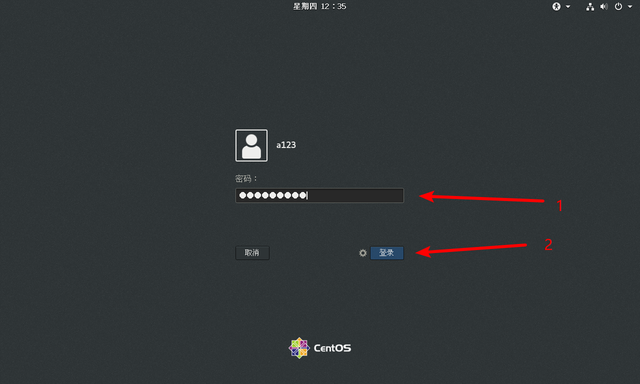
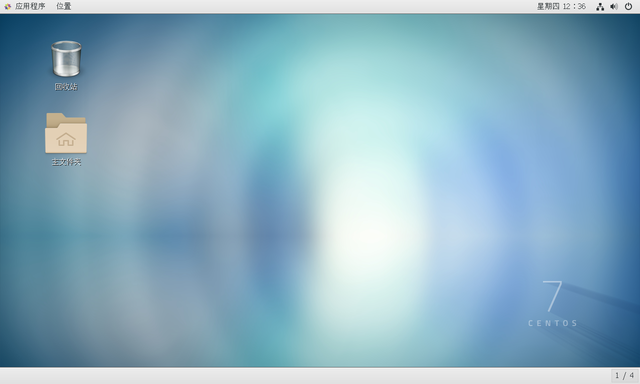
系统安装完成,接下来就可以正式使用了


 1526
1526


 被折叠的 条评论
为什么被折叠?
被折叠的 条评论
为什么被折叠?
 到【灌水乐园】发言


