


src里面新建package文件夹
用rollup打包比webpack好,因为简介,支持输出esm(es6格式)
写组件代码。然后开始打包发布:
1.注册组件
1.1 注册单个组件
//package/index.js
import PigButton from "../package/pig-button/index.vue"; // 引入封装好的组件
const coms = [PigButton]; // 将来如果有其它组件,都可以写到这个数组里

// 批量组件注册
const install = function (Vue) {
  coms.forEach((com) => {
    Vue.component(com.name, com);
  });
};

export default install; // 这个方法以后再使用的时候可以被use调用
1.2 注册多个组件(vue3)
import { App } from 'vue'
import { IDirectiveProps } from './type'
import '@/style/index.css';

export default {
    install(app: App) {
        const modules = import.meta.globEager('./**/*.ts'); // vue2用require.context
        Object.keys(modules).forEach(moduleName => {
            const directive: IDirectiveProps = Reflect.get(modules, moduleName).default;
            if (directive && directive.directiveName){
                const {directiveName,directiveValue} = directive;
                app.directive(directiveName,directiveValue)
            }
        })
    }
}
2.打包
在package.json中配置打包信息
"name": "duan_vue3-directive-next-ts2", //名称
  "private": false,
  "version": "1.0.0",  // 每次发布要修改一下版本,npm version patch自动修改
  "files": [
    "lib/"
  ],
  "exports": {
    ".": {
      "import": "./lib/v-directive.es.js",
      "require": "./lib/v-directive.umd.js"
    }
  },
  "scripts": {
    "serve": "vue-cli-service serve",
    "build": "vue-cli-service build",
    "lint": "vue-cli-service lint",
    "package": "vue-cli-service build --target lib ./src/package/index.js --name pig-ui --dest pig-ui" // 这行是打包
  },
打包命令解释:
–target lib 关键字 指定打包的目录
–name 打包后的文件名字
–dest 打包后的文件夹的名称
npm run package
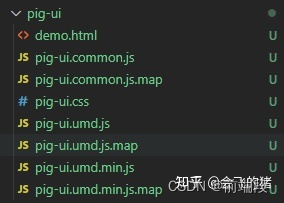
打包执行完成后我们项目目录下就会多出一个pig-ui文件夹,存放的是打包后的文件。
3.或者进入pig-ui目录,然后执行npm init -y
4.npm login
5.npm publish/npm publish --access public
6.24小时可以删除发布的
npm unpublish duan_vue3-directive-next-ts3 --force
7.使用
npm install 名称 -S
全局main.js 里面配置:
import aaa from ‘名称’
import ‘***.css’
Vue.use(aaa)
npm script hook
1.git上的项目,如果有npm发布,readme中加上npm连接
2.yarn.lock和package-lock.json不能同时存在,需要删除一个。
3.ui组件库,只需要一个,不能element和iview共存。
4.cdn配置cdn.jsdelivr.net
好用的npm组件库
@nutui/nutui-react 70+ 高质量组件(React 1.0 持续开发中),覆盖移动端主流场景,基于京东APP 10.0 视觉规范


 1105
1105


 被折叠的 条评论
为什么被折叠?
被折叠的 条评论
为什么被折叠?
 到【灌水乐园】发言


