


Creating a series of layers with Color Gradient in Rhino with Python
In this blog post, we’ll explore how to generate a series of layers in Rhino with a color gradient using Python and the RhinoScriptSyntax module. This technique can be particularly useful for visualizing data that varies continuously, such as elevation maps or thermal gradients.
Understanding RhinoScriptSyntax
rhinoscriptsyntax (often abbreviated as rs) is a module in Rhino that provides a set of functions for scripting and automating tasks within Rhino. Here are the key functions we use in our script:
-
rs.CreateColor(r, g, b):- This function creates a color object from RGB values, which are integers ranging from 0 to 255.
- Example:
color = rs.CreateColor(255, 0, 0) # Creates a red color
-
rs.IsLayer(name):- This function checks if a layer with the specified name exists in the Rhino document.
- Example:
if rs.IsLayer("MyLayer"):
    print("Layer exists")
-
rs.AddLayer(name, color):- This function creates a new layer with the specified name and color.
- Example:
rs.AddLayer("MyLayer", rs.CreateColor(0, 255, 0)) # Creates a green layer
-
rs.LayerColor(name, color):- This function sets the color of an existing layer.
- Example:
rs.LayerColor("MyLayer", rs.CreateColor(255, 255, 0)) # Changes layer color to yellow
The Script
Let’s break down the provided script step by step:
1. Defining the Color Gradient Function
The color_gradient function generates a list of colors forming a gradient between two given colors. This is achieved by linear interpolation of the RGB values.
def color_gradient(start_color, end_color, steps):
    gradient = []
    r_step = (end_color.R - start_color.R) / (steps - 1)
    g_step = (end_color.G - start_color.G) / (steps - 1)
    b_step = (end_color.B - start_color.B) / (steps - 1)

    for i in range(steps):
        r = start_color.R + int(r_step * i)
        g = start_color.G + int(g_step * i)
        b = start_color.B + int(b_step * i)
        gradient.append(rs.CreateColor(r, g, b))

    return gradient
2. Setting Parameters
We define the elevation range and the start and end colors for our gradient.
start_elevation = 0
end_elevation = 36
elevation_gap = 2
start_color = rs.CreateColor(0, 0, 255)  # Blue
end_color = rs.CreateColor(255, 0, 0)    # Red
3. Generating Elevation Values and Color Gradient
We use the range function to generate a list of elevation values from start_elevation to end_elevation, incrementing by elevation_gap. Then, we generate the corresponding color gradient.
elevations = range(start_elevation, end_elevation + 1, elevation_gap)
colors = color_gradient(start_color, end_color, len(elevations))
4. Creating Layers with the Gradient Colors
We loop through the elevation values, creating a layer for each elevation. If the layer already exists, we update its color.
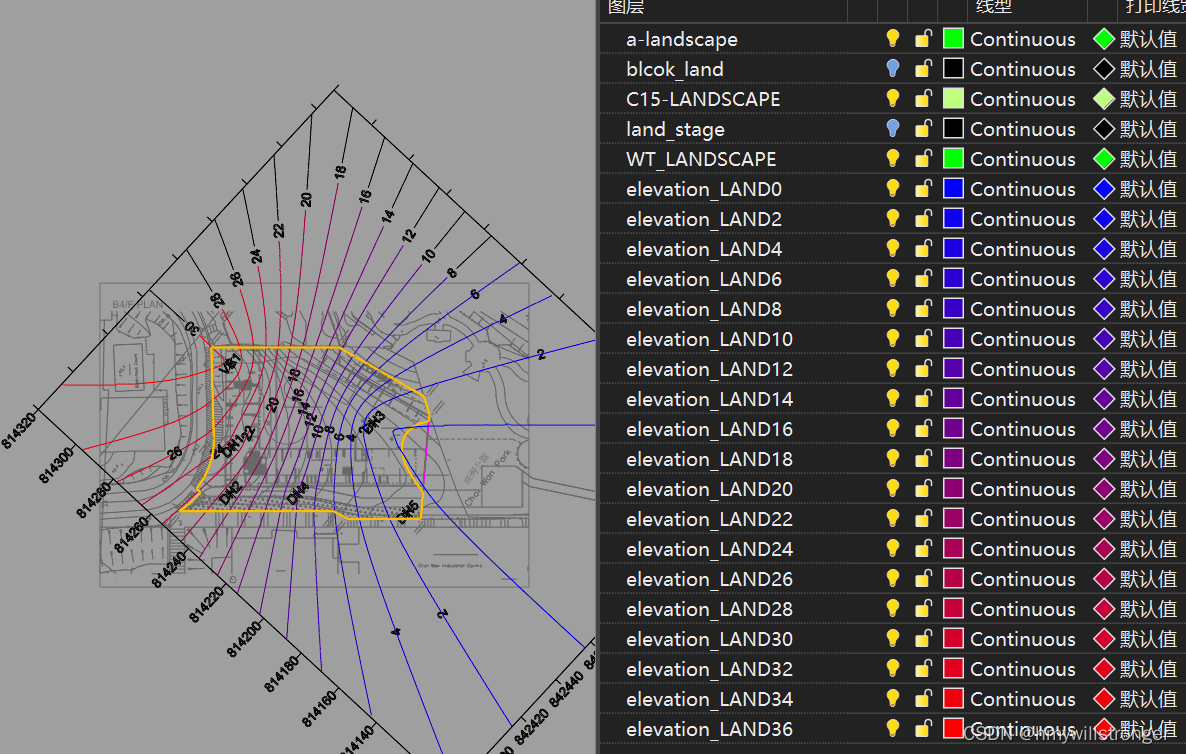
for i, elevation in enumerate(elevations):
    layer_name = "elevation_LAND{}".format(elevation)

    # Create the layer if it doesn't exist
    if not rs.IsLayer(layer_name):
        rs.AddLayer(layer_name, colors[i])
    else:
        # If the layer already exists, set its color
        rs.LayerColor(layer_name, colors[i])

print("Layers created successfully.")
Key Programming Concepts
-
Function Definition:
- Functions encapsulate reusable code blocks. Here,
color_gradientis a function that generates a list of colors.
- Functions encapsulate reusable code blocks. Here,
-
Color Interpolation:
- Linear interpolation is used to compute intermediate colors between the start and end colors.
-
Looping:
- A
forloop iterates through the number of steps to generate the intermediate colors. - Another
forloop iterates through the elevation values to create or update the layers.
- A
-
String Formatting:
- The
formatmethod is used to dynamically create layer names based on the elevation values.
- The
-
Conditional Statements:
import rhinoscriptsyntax as rs

# Function to create a color gradient between two colors
def color_gradient(start_color, end_color, steps):
    gradient = []
    r_step = (end_color.R - start_color.R) / (steps - 1)
    g_step = (end_color.G - start_color.G) / (steps - 1)
    b_step = (end_color.B - start_color.B) / (steps - 1)

    for i in range(steps):
        r = start_color.R + int(r_step * i)
        g = start_color.G + int(g_step * i)
        b = start_color.B + int(b_step * i)
        gradient.append(rs.CreateColor(r, g, b))

    return gradient

# Parameters
start_elevation = 0
end_elevation = 36
elevation_gap = 2
start_color = rs.CreateColor(0, 0, 255)  # Blue
end_color = rs.CreateColor(255, 0, 0)    # Red

# Generate the elevation values
elevations = range(start_elevation, end_elevation + 1, elevation_gap)

# Generate the color gradient
colors = color_gradient(start_color, end_color, len(elevations))

# Create layers with gradually changing colors
for i, elevation in enumerate(elevations):
    layer_name = "elevation_LAND{}".format(elevation)

    # Create the layer if it doesn't exist
    if not rs.IsLayer(layer_name):
        rs.AddLayer(layer_name, colors[i])
    else:
        # If the layer already exists, set its color
        rs.LayerColor(layer_name, colors[i])

print("Layers created successfully.")


 535
535


 被折叠的 条评论
为什么被折叠?
被折叠的 条评论
为什么被折叠?
 到【灌水乐园】发言


