


废话不说,直接贴代码:
首先是布局的代码:main.xml
- <?xml version="1.0" encoding="utf-8"?>
- <LinearLayout xmlns:android="http://schemas.android.com/apk/res/android"
- android:orientation="vertical"
- android:layout_width="fill_parent"
- android:layout_height="fill_parent"
- >
- <TextView
- android:layout_width="fill_parent"
- android:layout_height="wrap_content"
- android:text="@string/inputmobile"
- />
- <EditText
- android:layout_width = "fill_parent"
- android:layout_height= "wrap_content"
- android:id = "@+id/mobile" />
- <Button android:id="@+id/button"
- android:layout_height="wrap_content"
- android:text="@string/button"
- android:layout_width="wrap_content">
- </Button>
- </LinearLayout>
接下来是String.xml的代码:
- <?xml version="1.0" encoding="utf-8"?>
- <resources>
- <string name="inputmobile">请输入手机号:</string>
- <string name="app_name">电话拨号器</string>
- <string name = "button">拨打此号码</string>
- </resources>
上面两个都是位于res里面的。
接下来是src里面的代码DialogActivity:
- package cn.jason.android;
- import android.app.Activity;
- import android.content.Intent;
- import android.net.Uri;
- import android.os.Bundle;
- import android.view.View;
- import android.widget.Button;
- import android.widget.EditText;
- public class DialogActivity extends Activity {
- /** Called when the activity is first created. */
- @Override
- /**
- * 这个方法是重载自启动方法,在Application启动的时候自动触发
- */
- public void onCreate(Bundle savedInstanceState) {
- super.onCreate(savedInstanceState);
- setContentView(R.layout.main);
- //调用到button按钮
- Button button = (Button) findViewById(R.id.button);
- //为button按钮设置监听器,监听器类型是在本视图的监听器
- button.setOnClickListener(new View.OnClickListener() {
- public void onClick(View view) {
- //调用到编辑框的值
- EditText editText = (EditText) findViewById(R.id.mobile);
- //新建一个intent对象,进行调用系统的打电话的方法,然后传递号码过去
- Intent intent = new Intent(Intent.ACTION_CALL , Uri.parse("tel:" + editText.getText()));
- //相应事件
- DialogActivity.this.startActivity(intent);
- }
- });
- }
- }
这个代码写完还是不能用的,因为没有授权,所以必须在androidManifest这个文件里面写:<uses-permission android:name="android.permission.CALL_PHONE"></uses-permission>
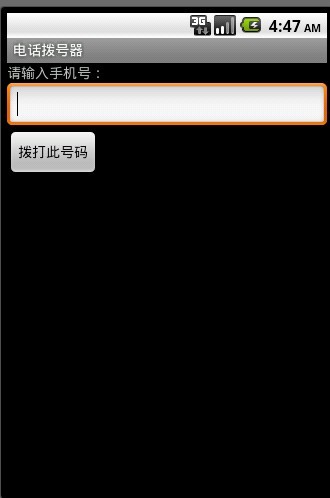
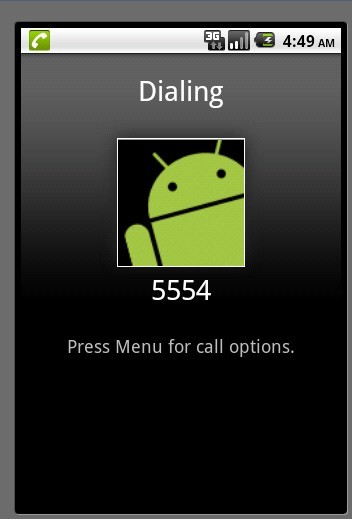
下面是这个程序的截图:


 137
137


 被折叠的 条评论
为什么被折叠?
被折叠的 条评论
为什么被折叠?
 到【灌水乐园】发言


