


一、存储
前段时间,我花了不少时间来寻求一种方法,把新开发的代码推送到到生产系统中部署,生产系统要能够零宕机、对使用用户零影响。
我的设想是使用集群来搞定,通过通知负载均衡Nginx,取下集群中的Tomcat节点,然后对Tomcat上的应用进行升级,再通知负载均衡Nginx,把Tomcat节点重新加载上去。依次这么做,把集群中的所有Tomcat都替换一次即可。
那么问题来了,在取下Tomcat节点和加载新Tomcat节点时如何做到对用户无影响呢?方法很简单,共享Session。
下面,我们用实例来说明此方案。我们的例子使用了一台Nginx做负载均衡,后端挂接了两台Tomcat,且每台Tomcat的Session会话都保存到Redis数据库中。其中,Nginx配置为non-sticky运行模式,也即每一个请求都可以被分配到集群中的任何节点。当要上线新代码时,只需简单地取下Tomcat实例,此时所有的访问用户会被路由到活动的Tomcat实例中去,而且由于会话数据都是保存在Redis数据库中,所以活跃用户并不会受影响。当Tomcat更新完毕,又可以把此节点加入到Nginx中。
安装Nginx
- # sudo rpm -ivh nginx-1.4.2-1.el6.ngx.x86_64.rpm
<span style="font-size:14px;"># sudo rpm -ivh nginx-1.4.2-1.el6.ngx.x86_64.rpm</span>
修改配置文件/etc/nginx/nginx.conf,并添加下面的内容:
- http {
- upstream tomcat {
- server localhost:8080;
- server localhost:8081;
- }
- include /etc/nginx/mime.types;
- default_type application/octet-stream;
<span style="font-size:14px;">http {
upstream tomcat  {
        server localhost:8080;
        server localhost:8081;
    }
include       /etc/nginx/mime.types;
default_type  application/octet-stream;
</span>
修改配置文件/etc/nginx/conf.d/default.conf并替换location部分的内容:
- location / {
- proxy_pass http://tomcat;
- }
<span style="font-size:14px;">location / {
    proxy_pass  http://tomcat;
  }
</span>
重启Nginx
- # sudo service nginx restart
<span style="font-size:14px;"># sudo service nginx restart</span>接下来,安装两个Tomcat实例。由于我们是在同一台服务器上做的演示,要让两台Tomcat不发生冲突,需要修改第二个Tomcat实例的端口号。由于Nginx配置为non-sticky运行模式,对每个请求采用的是Round-robin负载均衡方式,这意味着它会为每个请求都抽奖一个新会话。
接着,下载并安装Redis。步骤省略,很简单。
最后,我们需要配置Tomcat,让Tomcat把会话Session保存到Redis数据库。
我们要使用tomcat-redis-session-manager这样的第三方库,主页见:
https://github.com/jcoleman/tomcat-redis-session-manager
要注意此库并非开箱即用的,使用时需要做一些调整。你需要下载源码,并在更新了依赖库的版本后,重建项目。比如我使用了commons-pool2-2.2.jar和jedis-2.6.1.jar依赖库。要记住把这些jar文件复制到每一个Tomcat实例的lib子目录下。
在更新了commons-pool、jedis和tomcat版本这些库后,你可以使用build.gradle来构建整个项目。构建完毕后,复制新生成的tomcat-redis-session-manager-1.2.jar到每一个Tomcat实例的lib子目录下。并在修改每一个Tomcat实例的context.xml配置文件:
- <Valve className="com.orangefunction.tomcat.redissessions.RedisSessionHandlerValve" />
- <Manager className="com.orangefunction.tomcat.redissessions.RedisSessionManager"
- host="localhost"
- port="6379"
- database="0"
- maxInactiveInterval="60" />
<span style="font-size:14px;"><Valve className="com.orangefunction.tomcat.redissessions.RedisSessionHandlerValve" />
<Manager className="com.orangefunction.tomcat.redissessions.RedisSessionManager"
         host="localhost"
         port="6379"
         database="0"
         maxInactiveInterval="60" />
</span>
重启Tomcat实例。可以检查到Redis确实保存了Tomcat的会话。然后我们对Tomcat实例取下或恢复时,访问用户确实没受影响。
二、配置
本文记录nginx+redis+tomcat实现session共享的过程
nginx安装:http://blog.csdn.net/grhlove123/article/details/47834673
redis安装:http://blog.csdn.net/grhlove123/article/details/47783471
准备两个tomcat,修改相应的端口
| 名称 | IP | 端口 | tomcat版本 | JDK |
| tomcat1 | 10.10.49.23 | 8080 | 7.0.40 | 1.7.0_25 |
| tomcat2 | 10.10.49.15 | 8081 | 7.0.40 | 1.7.0_25 |
修改nginx.conf加上:
- upstream backend {
- server 10.10.49.23:8080 max_fails=1 fail_timeout=10s;
- server 10.10.49.15:8081 max_fails=1 fail_timeout=10s;
- }
<span style="font-size:14px;">    upstream backend {
        server 10.10.49.23:8080 max_fails=1 fail_timeout=10s;
        server 10.10.49.15:8081 max_fails=1 fail_timeout=10s;
    }</span>
修改nginx.conf的location成
- location / {
- root html;
- index index.html index.htm;
- proxy_pass http://backend;
- }
<span style="font-size:14px;">    location / {
        root   html;
        index  index.html index.htm;
        proxy_pass http://backend;
     }
</span>
启动nginx。
下载tomcat-redis-session-manager相应的jar包,主要有三个:
wget https://github.com/downloads/jcoleman/tomcat-redis-session-manager/tomcat-redis-session-manager-1.2-tomcat-7-java-7.jar
wget http://central.maven.org/maven2/redis/clients/jedis/2.5.2/jedis-2.5.2.jar
wget http://central.maven.org/maven2/org/apache/commons/commons-pool2/2.0/commons-pool2-2.0.jar
下载完成后拷贝到$TOMCAT_HOME/lib中
修改两tomcat的context.xml:
- <Context>
- <!-- Default set of monitored resources -->
- <WatchedResource>WEB-INF/web.xml</WatchedResource>
- <!-- Uncomment this to disable session persistence across Tomcat restarts -->
- <!--
- <Manager pathname="" />
- -->
- <!-- Uncomment this to enable Comet connection tacking (provides events
- on session expiration as well as webapp lifecycle) -->
- <!--
- <Valve className="org.apache.catalina.valves.CometConnectionManagerValve" />
- -->
- <Valve className="com.orangefunction.tomcat.redissessions.RedisSessionHandlerValve" />
- <Manager className="com.orangefunction.tomcat.redissessions.RedisSessionManager"
- host="10.10.49.20"
- port="6379"
- database="0"
- maxInactiveInterval="60" />
- </Context>
<span style="font-size:14px;"><Context>

    <!-- Default set of monitored resources -->
    <WatchedResource>WEB-INF/web.xml</WatchedResource>

    <!-- Uncomment this to disable session persistence across Tomcat restarts -->
    <!--
    <Manager pathname="" />
    -->

    <!-- Uncomment this to enable Comet connection tacking (provides events
         on session expiration as well as webapp lifecycle) -->
    <!--
    <Valve className="org.apache.catalina.valves.CometConnectionManagerValve" />
    -->

  <Valve className="com.orangefunction.tomcat.redissessions.RedisSessionHandlerValve" />
  <Manager className="com.orangefunction.tomcat.redissessions.RedisSessionManager"
   host="10.10.49.20"
   port="6379"
   database="0"
   maxInactiveInterval="60" />
</Context></span>
在tomcat/webapps/test放一个index.jsp
- <%@ page language="java" %>
- <html>
- <head><title>TomcatA</title></head>
- <body>
- <table align="centre" border="1">
- <tr>
- <td>Session ID</td>
- <td><%= session.getId() %></td>
- </tr>
- <tr>
- <td>Created on</td>
- <td><%= session.getCreationTime() %></td>
- </tr>
- </table>
- </body>
- </html>
- sessionID:<%=session.getId()%>
- <br>
- SessionIP:<%=request.getServerName()%>
- <br>
- SessionPort:<%=request.getServerPort()%>
- <%
- //为了区分,第二个可以是222
- out.println("This is Tomcat Server 1111");
- %>
<span style="font-size:14px;"><%@ page language="java" %>
<html>
  <head><title>TomcatA</title></head>
  <body>

    <table align="centre" border="1">
      <tr>
        <td>Session ID</td>
        <td><%= session.getId() %></td>
      </tr>
      <tr>
        <td>Created on</td>
        <td><%= session.getCreationTime() %></td>
     </tr>
    </table>
  </body>
</html>
sessionID:<%=session.getId()%>
<br>
SessionIP:<%=request.getServerName()%>
<br>
SessionPort:<%=request.getServerPort()%>
<%
//为了区分,第二个可以是222
out.println("This is Tomcat Server 1111");
%>  </span>
启动tomcat,发现有异常:com.orangefunction.tomcat.redissessions.RedisSessionHandlerValve 类找不到
分别打开三个jar包,确实没有这个类,解决可以参考:
http://blog.csdn.net/qinxcb/article/details/42041023
通过访问http://10.10.49.20/test/
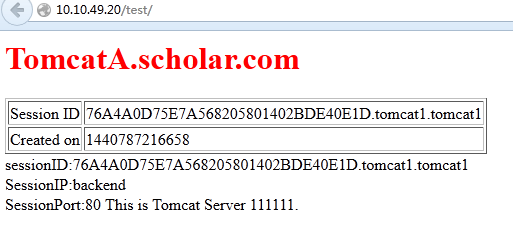
刷新:
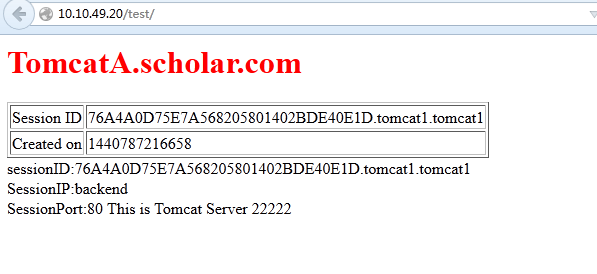
可以看到虽然Server从1111变为2222,但session的创建时间没有变化,这就完成了session共享。


 10万+
10万+

 被折叠的 条评论
为什么被折叠?
被折叠的 条评论
为什么被折叠?
 到【灌水乐园】发言


