


How I Connected DBVisualizer 9.2.2 on Windows to Hortonwork HiveServer2
Introduction
Note! This guide is particular to DBVisualizer 9.2.2 and Hortonwork HiveServer2 (hive-0.14.0). It may work with other versions of DBVis. Other versions of Hive or other release will obviously require newer or older .jar files.
This is how I got DBVisualizer on Windows working with Hortonworks HiveServer2. It works for me. Your results may vary.
It's All About getting the right jar Files
OK not ALL about the jars, but many of the problems you might encounter will be because of not having the right jar files. The very best place to get the proper jars for the environment you are trying to connect to is...the environment you are trying to connect to. The jars needed will be very particular to your environment. So jar files obtained from standard Apache Hadoop install may not work for you. The best place ultimately to get the jar files you need is from your actual environment.
Some Suggestions On Where To Get jar Files
With the assistance of your Hadoop/HiveServer2 administrators, you should be able to obtain the necessary .jar files from locations on your hadoop servers/environment like:
Hadoop: /usr/lib/hadoop/lib
Hive: /usr/lib/hive/lib
NOTE: For HDP 2.2 there are some simpler instructions (which call out only needing 5 jar files) at https://streever.atlassian.net/wiki/x/DABD.
Additionally, you may need to obtain some of the .jars from the Hive install files. These can be downloaded here: https://hive.apache.org/downloads.html
Use the link at top to navigate to a mirror and download the appropriate installer to your pc. e.g. http://mirror.nexcess.net/apache/hive/hive-0.14.0/?_sm_au_=iVVDWD5bRtr7qQ45 The important part is to make sure you match your HiveServer version. Extract the files and navigate into this dir: ~\apache-hive-0.14.0-bin\lib You should be able to find any missing .jars here.
In any case getting the right jars may involve some trial and error.
.jars Needed
Place the needed .jars in a directory of your choice. In this case we will use: C:\Users<user>\Documents\hive2_jars
Possible jars needed (your system may need these, or others, or not as many):
- commons-codec-1.4.jar
- commons-collections-3.2.1.jar
- commons-configuration-1.6.jar
- commons-lang-2.6.jar
- commons-logging-1.1.3.jar
- guava-11.0.2.jar
- hadoop-common-2.4.0.2.1.7.0-784.jar
- hive-common-0.13.0.2.1.7.0-784.jar
- hive-jdbc-0.13.0.2.1.7.0-784.jar
- hive-service-0.13.0.2.1.7.0-784.jar
- httpclient-4.2.5.jar
- httpcore-4.2.5.jar
- libthrift-0.9.0.jar
- log4j-1.2.16.jar
- slf4j-api-1.7.5.jar
- slf4j-log4j12-1.7.5.jar
Create New Custom Driver in DBVisualizer
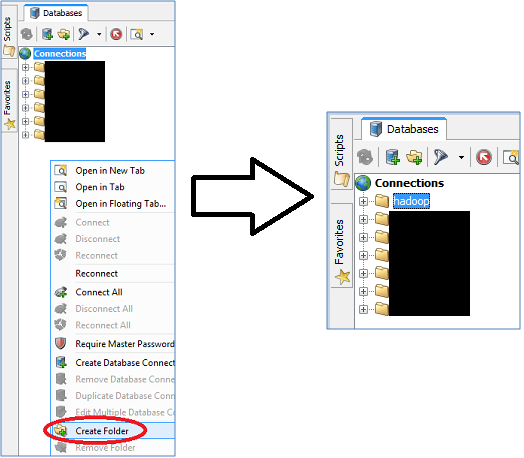
Open DBVisualizer and create a new Databases Folder to hold the Hadoop connections. Rename folder to hadoop by double clicking (it’s a little tricky) on the new folder “Folder”.
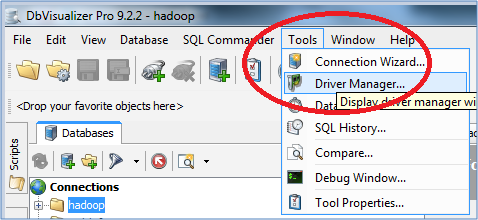
Select Tools > Driver Manager at top:
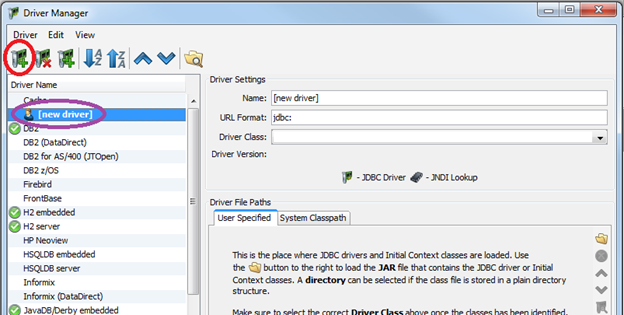
In the Driver Manager pane, click the “Create a new driver” icon and an empty driver called [new driver] will appear in the list at left with the configuration empty on the right.
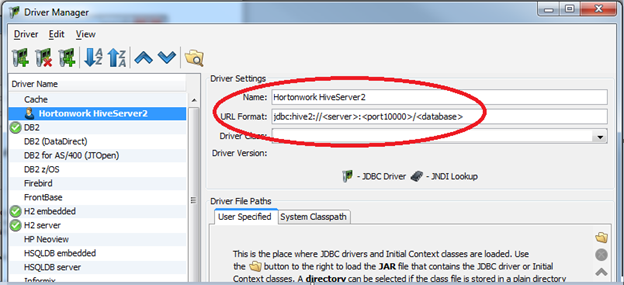
Give the Driver a proper name. In this case we will use Hortonwork HiveServer2. Fill in the URL format as follows: jdbc:hive2://<server>:<port10000>/<database>
Note that the number following port is the default hive2 port (10000). If your system uses a different port as the default, you can put that here. Don’t worry about Driver Class at the moment.
Now click the folder icon on the right side and navigate to the folder where you placed the .jar files. Select all the files at once and click OK.
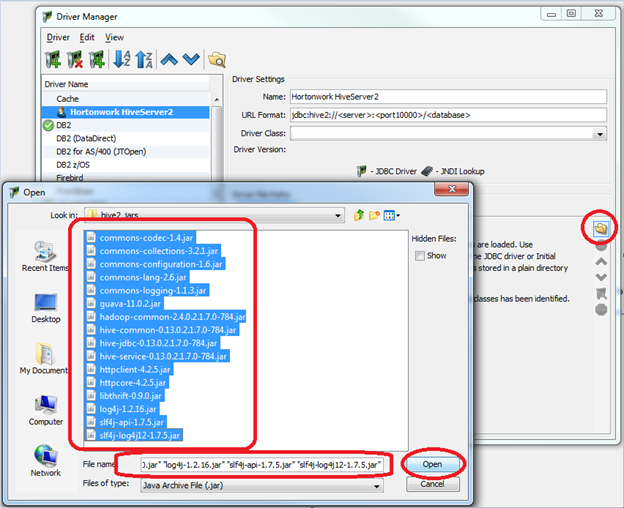
The drivers will all be scanned and registered. Note that while only 1 will show actual drivers under it, all are needed. Do not be alarmed by this. This is normal.

Now you should notice that the Driver Class space above that we skipped over earlier has a value in it: org.apache.hadoop.hive.jdbc.HiveDriver
Problem is this is for HiveServer and we want the one for HiveServer2. So just click the dropdown to the right of it and switch to: org.apache.hive.jdbc.HiveDriver
Now we have selected the proper driver and can close the Driver Manager window.
Create A New Connection Using New Driver
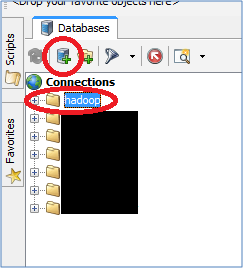
So we move on to using the new driver in a connection. Click once on your database folder created earlier and then click on the “Create new database connection” icon.
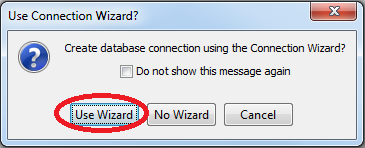
Select Use Wizard.
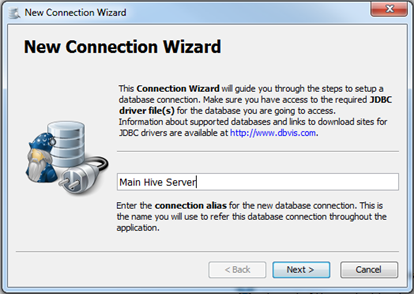
Give your new connection a name. In this case “Main Hive Server”.
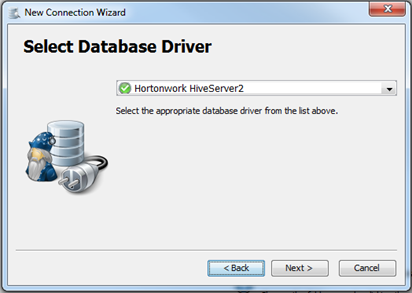
On the next screen, you finally get a chance to use the custom driver you have created. Select it from the dropdown.
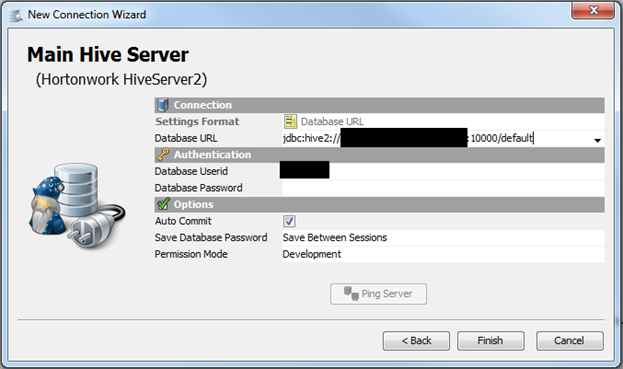
On the next screen, fill in the details as follows. Settings Format: do nothing here. Database URL: fill in per your format you designated earlier. In this case, like this: jdbc:hive2://[server name redacted]:10000/default Database Userid: [your userid] Password: depending on your HiveServer2 config, this may or may not be required. We do not require it.
Testing
Now test your new connection! Success! Or should I say, “Success?”.


 315
315


 被折叠的 条评论
为什么被折叠?
被折叠的 条评论
为什么被折叠?
 到【灌水乐园】发言


