ios+appium 自动化环境搭建
已搭建成功的环境:
| 序号 | 名称 | 版本 |
| 1 | 系统:MacOS BigSur/MacOS Catalina | 11.1/10.15.7(MacOS Catalina) |
| 2 | Jdk | 1.8.0_221 |
| 3 | Python | 3.7.9 |
| 3 | Pycharm community | 2020.2 |
| 4 | xcode | 12.4/12.2(MacOS Catalina) |
| 5 | Appium | 1.19.1 |
- 安装jdk1.8
- 安装python3.7.*, pycharm
- 安装Appium
备注:安装后如果启动失败:不能打开软件提示无法打开“appium”,因为Apple无法检查其是否包含恶意软件,则运行如下命令:
sudo xattr -rd com.apple.quarantine /Applications/Appium.app
4. Xcode,可从App Store安装
5、安装brew,直接执行
/usr/bin/ruby -e "$(curl -fsSL https://raw.githubusercontent.com/Homebrew/install/master/install)"
如果出现错误:
Failed to connect to raw.githubusercontent.com port 443: Connection refused error:
解决方法:
在https://www.ipaddress.com/查询raw.githubusercontent.com的真实IP。
修改hosts
sudo vim /etc/hosts
添加如下内容:
199.232.28.133 raw.githubusercontent.com
6、安装libimobiledevice
brew install --HEAD libimobiledevice
如果 ideviceinstaller -l失败,就按下面的来,或者直接按最底下的来。
brew uninstall -f libimobiledevice ideviceinstaller usbmuxd如果命令被拒绝,可根据提示,更新命令:
brew uninstall --ignore-dependencies libimobiledevice ideviceinstaller usbmuxd
这次命令是成功了
然后继续:
brew install -v --HEAD --fetch --build-from-source usbmuxd libimobiledevice ideviceinstaller
7、安装node.js, https://nodejs.org/en/download/
8、安装cnpm
安装好node后,在终端输入命令
npm install -g cnpm --registry=https://registry.npm.taobao.org
9、安装ios-deploy
ios-deploy可以用来安装卸载ios应用
cnpm有个问题,就是安装的node_module会全部放在当前路径下。
所以我们使用cnpm的时候,需要切换到/usr/local/lib(node模块默认安装路径)
在终端输入:
cd /usr/local/lib
cnpm install -g ios-deploy
10、安装xcpretty
gem install xcpretty
Or
sudo gem install xcpretty
11、brew install carthage
12、安装WebDriverAgent
进入WebDriverAgent安装目录,运行bootstrap,具体如下:
首先进入目录(如果WebDriverAgent 所在路径和此不同,请自行查找)
cd /Applications/Appium.app/Contents/Resources/app/node_modules/appium/node_modules/appium-WebDriverAgent
mkdir -p Resources/WebDriverAgent.bundle
sh ./Scripts/bootstrap.sh
appium 自带的WebDriverAgent编译不过的话,
报错:Building universal frameworks with common architectures is not possible. The device and simulator slices for "CocoaAsyncSocket" both build for: arm64
Rebuild with --use-xcframeworks to create an xcframework bundle instead
可以下载最新的版本https://github.com/facebookarchive/WebDriverAgent,运行上面的两行命令后,再编译。
参考:https://www.cnblogs.com/xiyuan2016/p/7576477.html
· 进入下载后的WebDriverAgent文件
· 执行 ./Scripts/bootstrap.sh
确保最新版本的webdrivergent无问题之后:将最新版本的WebDriverAgent下的Inspector整个文件和Scripts/bootstrap.sh替换到appium/node_modules/appium-WebDriverAgent
然后重新运行执行 ./Scripts/bootstrap.sh
备注:之所以最后还是要用appium下的webdriveragent, 是因为appiumdesktop启动手机还是用的它自带的,不知道是否有其他方法。
mac命令打开xcode
open WebDriverAgent.xcodeproj
WebdriverAgent Lib 和webdriveragentRunner配置(网上资料较多)
Sigin & capabilities 勾选Automatically manage signing , 并切配置Team
连接并选择自己的ios设备,运行


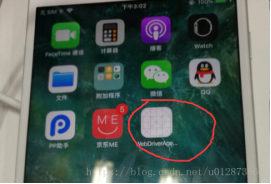
运行成功后,iphone手机上会新建一个无图标的WebDriverAgent的应用,自动打开后马上又返回桌面(注意:运行appium之前需要把webdriveragent删除,appium会自动安装,否则会报错)

Test报错问题1:
'assign' property of object type may become a dangling reference; consider using 'unsafe_unretained'
将 assign 改为 strong ,并重新build
问题2:
error: Building for iOS Simulator, but the linked and embedded framework '***.framework' was built for iOS + iOS Simulator.
将build setting->bulid options->validate workspace 改为YES
13、itools 下载,用来获取iphone udid(更多->设备标志), www.itools.cn
14、bundleId获取
命令行运行ideviceinstaller -l


 2897
2897


 被折叠的 条评论
为什么被折叠?


