


组件地址:react-native-table-component
第一步,添加依赖
yarn add react-native-table-component
第二步,在需要的功能页面导入组件
import {Row, Rows, Table} from 'react-native-table-component';
第三步,定义显示数据
const optionsChange = {
            tableHead: ['变更项目', '变更前', '变更后'],
            tableData: [
                ['',
                '资方姓名',
                '45.5%'
                ],
                ['',
                '企业名称',
                '8.9%'
                ],
            ]
        };
第四步,在render函数中添加组件
<View style={{padding: 20}}>
         <Table borderStyle={{borderWidth: 1, borderColor: '#f0f'}}>
               <Row data={options.tableHead} style={styles.head} textStyle={styles.text}/>
                <Rows data={options.tableData} textStyle={styles.text}/>
         </Table>
</View>
最后,来看一下效果如何,还是相当不错的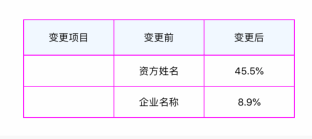
以上内容转自https://blog.csdn.net/wayne214/article/details/89337765
以下是自己的代码
import React, {Component } from 'react';
import Dropdownmenu from 'react-native-dropdownmenus';
import { Row, Rows, Table } from 'react-native-table-component';import {
StyleSheet,
Text,
View,
ScrollView,
TouchableOpacity,
TouchableWithoutFeedback,
Image,
ListView,
Modal,
Dimensions,
style,
} from 'react-native';let { height, width } = Dimensions.get('window');
const optionsChange = {
tableHead: ['变更项目', '变更前', '变更后'],
tableData: [
['',
'资方姓名',
'45.5%',
],
['',
'企业名称',
'8.9%',
],
]
};export default class App extends Component {
render() {return (
<ScrollView View style={{ padding: 20 }}>
<Table borderStyle={{ borderWidth: 1, borderColor: '#f0f' }}>
<Row data={optionsChange.tableHead} style={styles.head} textStyle={styles.text} />
<Rows data={optionsChange.tableData} textStyle={styles.text} />
</Table>
</ScrollView>
)
}
}
const styles = StyleSheet.create({
});


 460
460


 被折叠的 条评论
为什么被折叠?
被折叠的 条评论
为什么被折叠?
 到【灌水乐园】发言


