


############邮件服务####
1.先配置dns服务
测试结果:主机westos-mail.westos.com:
[root@westos-mail ~]# dig -t mx westos.com
; <<>> DiG 9.9.4-RedHat-9.9.4-14.el7 <<>> -t mx westos.com
;; global options: +cmd
;; Got answer:
;; ->>HEADER<<- opcode: QUERY, status: NOERROR, id: 36618
;; flags: qr aa rd ra; QUERY: 1, ANSWER: 1, AUTHORITY: 1, ADDITIONAL: 2
;; OPT PSEUDOSECTION:
; EDNS: version: 0, flags:; udp: 4096
;; QUESTION SECTION:
;westos.com. IN MX
;; ANSWER SECTION:
westos.com. 86400 IN MX 1 172.25.254.206.
;; AUTHORITY SECTION:
westos.com. 86400 IN NS dns.westos.com.
;; ADDITIONAL SECTION:
dns.westos.com. 86400 IN A 172.25.254.206
;; Query time: 0 msec
;; SERVER: 172.25.254.206#53(172.25.254.206)
;; WHEN: Sat May 20 02:14:27 EDT 2017
;; MSG SIZE rcvd: 103
[root@westos-mail ~]#
主机qq-mail.qq.com:
[root@qq-mail ~]# dig -t mx qq.com
; <<>> DiG 9.9.4-RedHat-9.9.4-14.el7 <<>> -t mx qq.com
;; global options: +cmd
;; Got answer:
;; ->>HEADER<<- opcode: QUERY, status: NOERROR, id: 15046
;; flags: qr aa rd ra; QUERY: 1, ANSWER: 1, AUTHORITY: 1, ADDITIONAL: 2
;; OPT PSEUDOSECTION:
; EDNS: version: 0, flags:; udp: 4096
;; QUESTION SECTION:
;qq.com. IN MX
;; ANSWER SECTION:
qq.com. 86400 IN MX 1 172.25.254.106.
;; AUTHORITY SECTION:
qq.com. 86400 IN NS dns.qq.com.
;; ADDITIONAL SECTION:
dns.qq.com. 86400 IN A 172.25.254.206
;; Query time: 1 msec
;; SERVER: 172.25.254.206#53(172.25.254.206)
;; WHEN: Sat May 20 02:14:54 EDT 2017
;; MSG SIZE rcvd: 99
[root@qq-mail ~]#
2.发送和接受邮件
postfix提供smtp协议用来投递邮件默认端口25
/var/log/maillog ##服务日志
postqueue -f ##重新处理邮件队列
配置
[root@westos-mail ~]# vim /etc/postfix/main.cf
116 inet_interfaces = all ##25端口开启的网络接口
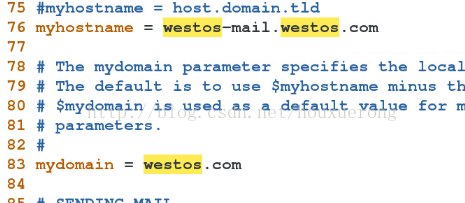
76 myhostname = westos-mail.westos.com ##指定mta主机名称
83 mydomain = westos.com ##指定mta的域名
99 myorigin = westos.com ##指定邮件来源的结尾(@后面的字符内容)
164 myorigin = $myhostname, $mydomain,localhost ##接收邮件字符结尾的指定


测试:
[root@westos-mail ~]# mail root@qq.com ##发送邮件
Subject: iuhoi
sdds
dsds
. ##用“.”来结束录入内容 并发送
EOT
[root@westos-mail ~]# mailq ##查看邮件队列
Mail queue is empty
[root@westos-mail ~]# mail ##查看接受邮件
Heirloom Mail version 12.5 7/5/10. Type ? for help.
"/var/spool/mail/root": 1 message 1 new
>N 1 root Sat May 20 03:11 23/733 "ijsoijqsoij"
& 1
Message 1:
From root@qq.com Sat May 20 03:11:15 2017
Return-Path: <root@qq.com>
X-Original-To: root@westos.com
Delivered-To: root@westos.com
Date: Sat, 20 May 2017 03:11:15 -0400
To: root@westos.com
Subject: ijsoijqsoij
User-Agent: Heirloom mailx 12.5 7/5/10
Content-Type: text/plain; charset=us-ascii
From: root@qq.com (root)
Status: R
hxiuhx
xsax
xssaa
& q
Held 1 message in /var/spool/mail/root
You have mail in /var/spool/mail/root
[root@westos-mail ~]#
3.邮件别名
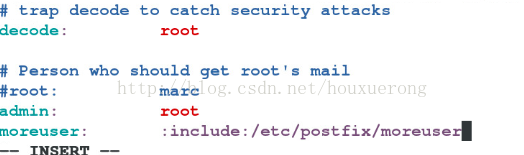
邮件接受方设置别名[root@qq-mail ~]# vim /etc/aliases
别名: 真名 ##邮件别名
别名: :include:filename ##邮件群发
vim filename
user1
user2
postalias /etc/aliases ##使配置生效
mail 别名
4.远程邮件发送测试
[kiosk@foundation6 Desktop]$ telnet 172.25.254.106 25 ##远程邮件发送连接Trying 172.25.254.106...
Connected to 172.25.254.106.
Escape character is '^]'.
220 qq-mail.qq.com ESMTP Postfix
ehlo hello ##测试连接
250-qq-mail.qq.com
250-PIPELINING
250-SIZE 10240000
250-VRFY
250-ETRN
250-ENHANCEDSTATUSCODES
250-8BITMIME
250 DSN
mail from:root@qq.com ##邮件发送方
250 2.1.0 Ok
rcpt to:root@westos.com ##邮件接受方
250 2.1.5 Ok
data ##输入发送内容
354 End data with <CR><LF>.<CR><LF>
asads
sd
. ##以“.”结束并发送
250 2.0.0 Ok: queued as 377DB17E84B ##发送成功

5.邮件客户端的访问控制
a.拒绝某个客户端访问在mta上
[root@westos-mail ~]# postconf -e "smtpd_client_restrictions = check_client_access hash:/etc/postfix/access" ##执行该操作,会生成如下配置文件

access generic main.cf moreuser transport
canonical header_checks master.cf relocated virtual
[root@westos-mail ~]# vim /etc/postfix/access ##编辑拒绝的配置文件
文件末尾:
172.25.254.6 REJECT
[root@westos-mail ~]# postmap /etc/postfix/access
[root@westos-mail ~]# ls /etc/postfix ##生成检测文件
access canonical header_checks master.cf relocated virtual
access.db generic main.cf moreuser transport
[root@westos-mail ~]# systemctl restart postfix ##重启服务
[root@westos-mail ~]#
测试结果:
[kiosk@foundation6 Desktop]$ telnet 172.25.254.206 25
Trying 172.25.254.206...
Connected to 172.25.254.206.
Escape character is '^]'.
220 westos-mail.westos.com ESMTP Postfix
mail from:root@westos.com
250 2.1.0 Ok
rcpt to:root@qq.com
554 5.7.1 <unknown[172.25.254.6]>: Client host rejected: Access denied
quit
221 2.0.0 Bye
Connection closed by foreign host.
[kiosk@foundation6 Desktop]$
6.限制用户发送邮件
[root@westos-mail ~]# postconf -e "smtpd_sender_restrictions = check_sender_access hash:/etc/postfix/sender"
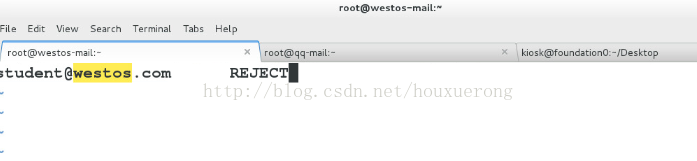
[root@westos-mail ~]# vim /etc/postfix/sender
student@westos.com REJECT
[root@westos-mail ~]# postmap /etc/postfix/sender
[root@westos-mail ~]# systemctl restart postfix
测试:
[kiosk@foundation6 Desktop]$ telnet 172.25.254.206 25
Trying 172.25.254.206...
Connected to 172.25.254.206.
Escape character is '^]'.
220 westos-mail.westos.com ESMTP Postfix
mail from:student@westos.com
250 2.1.0 Ok
rcpt to:root@westos.com
554 5.7.1 <student@westos.com>: Sender address rejected: Access denied ##用户发送邮件被拒绝
quit
221 2.0.0 Bye
Connection closed by foreign host.
[kiosk@foundation6 Desktop]$
##限制用户接收邮件####
[root@westos-mail postfix]# useradd linux
[root@westos-mail postfix]# postconf -e "smtpd_recipient_restrictions = check_recipient_access hash:/etc/postfix/recipt"
[root@westos-mail postfix]# vim /etc/postfix/recipt ##被限制的用户
linux@westos.com REJECT
[root@westos-mail postfix]# postmap /etc/postfix/recipt ##生成.db文件
[root@westos-mail postfix]# systemctl restart postfix.service
[root@westos-mail postfix]#
测试:
[kiosk@foundation6 Desktop]$ telnet 172.25.254.206 25
Trying 172.25.254.206...
Connected to 172.25.254.206.
Escape character is '^]'.
220 westos-mail.westos.com ESMTP Postfix
mail from:linux@westos.com ##可以发送邮件
250 2.1.0 Ok
rcpt to:root@westos.com
250 2.1.5 Ok
data
354 End data with <CR><LF>.<CR><LF>
we
wd
.
250 2.0.0 Ok: queued as 2C3AE24627C
mail from:root@westos.com
250 2.1.0 Ok
rcpt to:linux@westos.com ##接收邮件被拒绝
554 5.7.1 <linux@westos.com>: Recipient address rejected: Access denied
quit
221 2.0.0 Bye
Connection closed by foreign host.
[kiosk@foundation6 Desktop]$
########出站地址伪装#####
[root@westos-mail postfix]# postconf -e "smtp_generic_maps = hash:/etc/postfix/generic"
[root@westos-mail postfix]# vim /etc/postfix/generic
真实用户 虚拟名称
linux@westos.com hello@hello.com
[root@westos-mail postfix]# postmap /etc/postfix/generic
[root@westos-mail postfix]# systemctl restart postfix
测试:
邮件发送方:
[root@westos-mail postfix]# su - linux ##进入linux用户
[linux@westos-mail ~]$ mail root@qq.com ##给root用户发送邮件
Subject: sda
sa
x
.
EOT
[linux@westos-mail ~]$ exit
logout
邮件接收方:
[root@qq-mail ~]# mail root@qq.com ##查看该用户的邮件
Heirloom Mail version 12.5 7/5/10. Type ? for help.
"/var/spool/mail/root": 2 messages 1 new
1 root Sat May 20 03:10 23/742 "iuhoi"
>N 2 hello@hello.com Sat May 20 22:31 22/716 "sda"
& q
Held 2 messages in /var/spool/mail/root
You have mail in /var/spool/mail/root
[root@qq-mail ~]#
#######入站地址转换###
dns 解析做好,可以解析到虚拟名称的域名
[root@westos-mail postfix]# dig -t mx hello.com
; <<>> DiG 9.9.4-RedHat-9.9.4-14.el7 <<>> -t mx hello.com
;; global options: +cmd
;; Got answer:
;; ->>HEADER<<- opcode: QUERY, status: NOERROR, id: 46785
;; flags: qr aa rd ra; QUERY: 1, ANSWER: 1, AUTHORITY: 1, ADDITIONAL: 2
;; OPT PSEUDOSECTION:
; EDNS: version: 0, flags:; udp: 4096
;; QUESTION SECTION:
;hello.com. IN MX
;; ANSWER SECTION:
hello.com. 86400 IN MX 1 172.25.254.206.
;; AUTHORITY SECTION:
hello.com. 86400 IN NS dns.hello.com.
;; ADDITIONAL SECTION:
dns.hello.com. 86400 IN A 172.25.254.206
;; Query time: 0 msec
;; SERVER: 172.25.254.206#53(172.25.254.206)
;; WHEN: Sat May 20 22:35:24 EDT 2017
;; MSG SIZE rcvd: 102
[root@westos-mail postfix]# postconf -e "virtual_alias_maps = hash:/etc/postfix/virtual"
[root@westos-mail postfix]# vim /etc/postfix/virtual
虚拟名称 真实用户
hello@hello.com linux@westos.com
[root@westos-mail postfix]# postmap /etc/postfix/virtual
[root@westos-mail postfix]# systemctl restart postfix
测试:
邮件发送方:
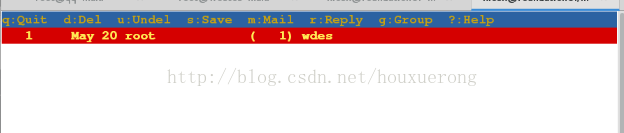
[root@qq-mail ~]# mail hello@hello.com ##给该用户发送邮件
Subject: wdes
sdsw
.
EOT
[root@qq-mail ~]#
邮件接收方:
[root@westos-mail postfix]# su - linux ##进入linux用户
Last login: Sat May 20 22:30:51 EDT 2017 on pts/0
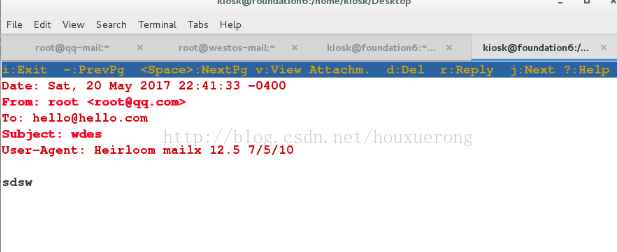
[linux@westos-mail ~]$ mail ##查看该用户的邮件
Heirloom Mail version 12.5 7/5/10. Type ? for help.
"/var/spool/mail/linux": 1 message 1 new
>N 1 root Sat May 20 22:41 21/712 "wdes"
& 1
Message 1:
From root@qq.com Sat May 20 22:41:34 2017 ##邮件发送方
Return-Path: <root@qq.com>
X-Original-To: hello@hello.com ##邮件接收方为虚拟名称
Delivered-To: linux@westos.com ##转换为真实用户
Date: Sat, 20 May 2017 22:41:33 -0400
To: hello@hello.com
Subject: wdes
User-Agent: Heirloom mailx 12.5 7/5/10
Content-Type: text/plain; charset=us-ascii
From: root@qq.com (root)
Status: R
sdsw
&q
Held 1 message in /var/spool/mail/linux
You have mail in /var/spool/mail/linux
[linux@westos-mail ~]$
#############dovecot服务#############
1.
/etc/services ##文件中提供了所有服务及对应的端口
/etc/shells
/etc/skel ##用户骨架文件,所有新建用户家目录都和它的结构相同
dovecot 用来提供收件协议
pop3 端口110
imap 端口143
imaps 端口993
pop3s 端口995
2.
yum install dovecot -y ##安装邮件接收服务
3.
[root@westos-mail ~]# vim /etc/dovecot/dovecot.conf ##编辑主配置文件
24 protocols = imap pop3 lmtp ##允许的协议
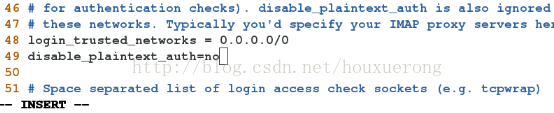
48 login_trusted_networks = 0.0.0.0/0 ##允许登陆的网段
49 disable_plaintext_auth = no ##允许明文认证

[root@westos-mail ~]# vim /etc/dovecot/conf.d/10-mail.conf ##编辑子配置文件
30 mail_location = mbox:~/mail:INBOX=/var/mail/%u ##邮件存放地址,%u用户名称
[root@westos-mail ~]# systemctl restart dovecot
测试准备:
[root@westos-mail ~]# su - linux ##进入测试用户
Last login: Sat May 20 22:41:44 EDT 2017 on pts/0
[linux@westos-mail ~]$ mkdir mail/.imap -p
[linux@westos-mail ~]$ touch mail/.imap/INBOX ##建立存放文件
远程登陆测试:
[root@foundation6 Desktop]# yum install mutt -y
[root@foundation6 Desktop]# mutt -f pop://linux@172.25.254.206

输入密码进入后,显示邮件页面
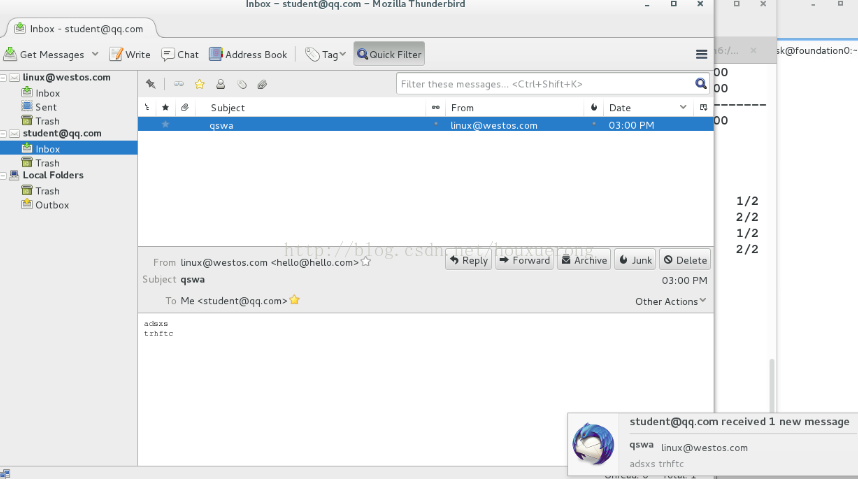
##########thunderbird######
1.软件安装
rpm -ivh thunderbird-31.2.0-1.el7.x86_64.rpm ##安装软件

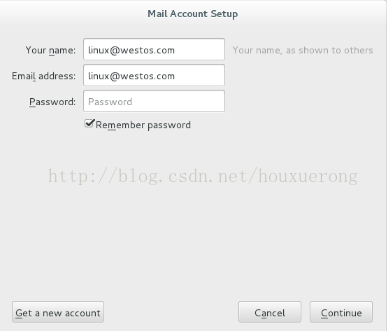
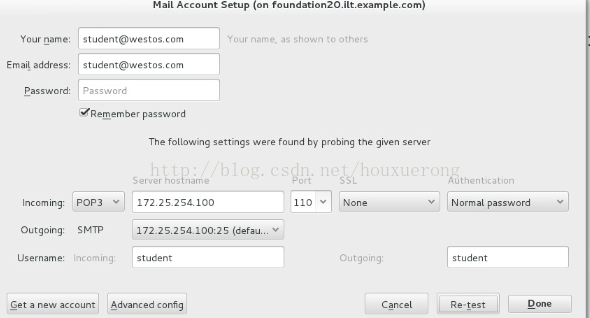
2.创建远程用户
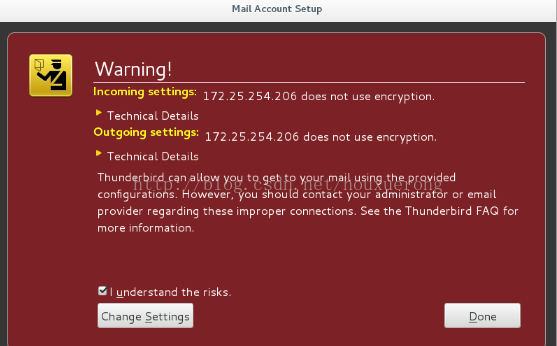
3.发送,接收邮件
#######postfix+mariadb####
1.
创建好数据库服务,并配置成功

建立一个新的数据库,并在其中新建一个表,格式如下:

然后执行如下操作:
[root@qq-mail postfix]# vim /etc/postfix/mailuser.cf
host = localhost ##登陆数据库所在主机
user = postuser ##登陆数据库的用户
password = postuser ##登陆数据库的密码
dbname = mailuser ##postfix要查询的名称
table = emailuser ##postfix要查询的表的名称
select_field = username ##postfix要查询的字段
where_field = username ##用户给定postfix的查询条件
[root@qq-mail postfix]# postmap -q "hello@hello.com" mysql:/etc/postfix/mailuser.cf
hello@hello.com
[root@qq-mail postfix]# vim /etc/postfix/maildomain.cf
host = localhost
user = postuser
password = postuser
dbname = mailuser
table = emailuser
select_field = domain
where_field = domain
[root@qq-mail postfix]# postmap -q "hello.com" mysql:/etc/postfix/maildomain.cf
hello.com
[root@qq-mail postfix]# vim /etc/postfix/mailbox.cf
host = localhost
user = postuser
password = postuser
dbname = mailuser
table = emailuser
select_field = userdir
where_field = username
[root@qq-mail postfix]#
[root@qq-mail postfix]# postmap -q "hello@hello.com" mysql:/etc/postfix/mailbox.cf
/mnt/hello.com/hello
###配置postfix
groupadd -g 666 vmail
useradd -s /sbin/nologin -u 666 vmail -g 666
postconf -e "virtual_mailbox_base = /home/vmail"
postconf -e "virtual_uid_maps = static:666"
postconf -e "virtual_gid_maps = static:666"
postconf -e "virtual_alias_maps = mysql:/etc/postfix/mailuser.cf"
postconf -e "virtual_mailbox_domains = mysql:/etc/postfix/maildomain.cf"
postconf -e "virtual_mailbox_maps = mysql:/etc/postfix/mailbox.cf"
systemctl restart postfix
#######dovecot+mysql#########
1.
yum install dovecot dovecot-mysql -y
2.
[root@qq-mail html]# vim /etc/dovecot/dovecot.conf
24 protocols = imap pop3 lmtp ##支持收件协议
48 login_trusted_networks = 0.0.0.0/0 ##信任网络
49 disable_plaintext_auth = no ##开启明文认证
[root@qq-mail html]# vim /etc/dovecot/conf.d/10-auth.conf
123 !include auth-sql.conf.ext ##开启mysql的认证方式
[root@qq-mail html]# cp /usr/share/doc/dovecot-2.2.10/example-config/dovecot-sql.conf.ext /etc/dovecot/dovecot-sql.conf.ext -p
[root@qq-mail html]# vim /etc/dovecot/dovecot-sql.conf.ext
32 driver = mysql ##数据库类型
71 connect = host=localhost dbname=mailuser user=postuser password=postuser ##查询时用到的库
78 default_pass_scheme = PLAIN ##默认认证方式为明文
107 password_query = \ ##查询密码匹配
108 SELECT username, domain, password \
109 FROM emailuser WHERE username = '%u' AND domain = '%d'
125 user_query = SELECT userdir, 666 AS uid, 666 AS gid FROM emailuser WHERE use rname = '%u'
[root@qq-mail html]# vim /etc/dovecot/conf.d/10-mail.conf
30 mail_location = maildir:/home/vmail/%d/%n ##邮件存放地址
168 first_valid_uid = 666 ##用户uid
175 first_valid_gid = 666 ##用户gid
systemctl restart dovecot
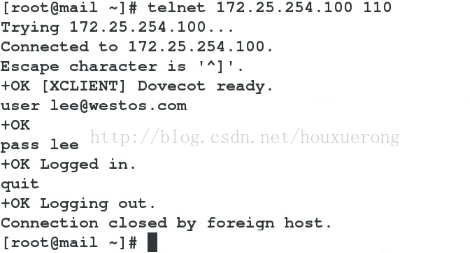
测试:
telnet 172.25.254.106 110
Trying 172.25.254.106...
Connected to 172.25.254.106.
Escape character is '^]'.
+OK [XCLIENT] Dovecot ready.
user hello@hello.com
+OK
pass hello
+OK Logged in.
quit
+OK Logging out.
Connection closed by foreign host.
#########空壳邮件######
进行空壳邮件上的操作:
[root@null ~]# vim /etc/postfix/main.cf
75 myhostname = null.example.com ##该空壳主机的主机名
83 mydomain = example.com ##该空壳主机的域名
99 myorigin = qq.com ##必须和接受邮件的真实主机域名相同
113 inet_interfaces = all
119 inet_protocols = all
164 mydestination = ##不接收任何邮件
316 relayhost = 172.25.254.106 ##转发邮件到该主机
[root@null ~]# systemctl restart postfix.service


 5万+
5万+

 被折叠的 条评论
为什么被折叠?
被折叠的 条评论
为什么被折叠?
 到【灌水乐园】发言


