


VS code使用及插件(python、vue)
说明
- 本教程主要内宅vs code使用及
vue、python插件 vs code常规设置pyhton插件vue相关插件
一、下载及安装
二、vs code 常规设置
注:用户是全局、工作区只对该项目起作用
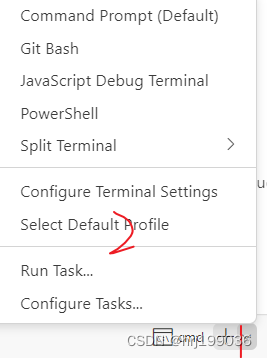
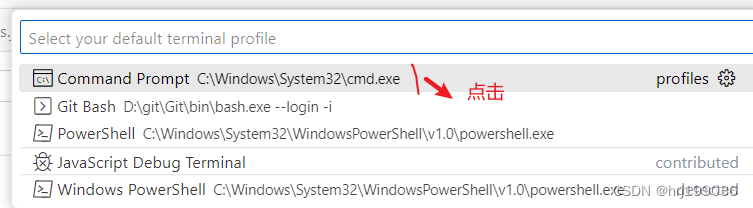
- 终端设置
- command prompt
powershell(运行python时功能不全)- 默认设置-command prompt
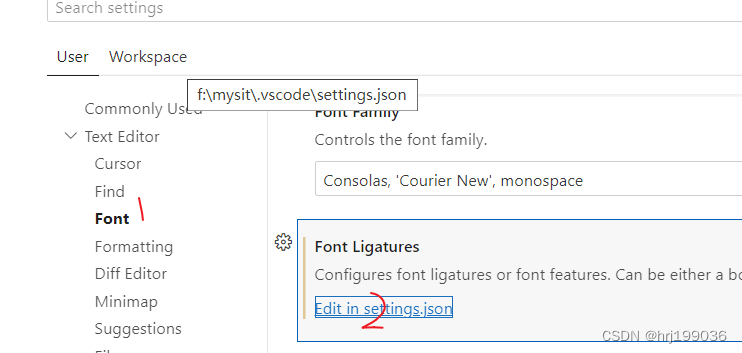
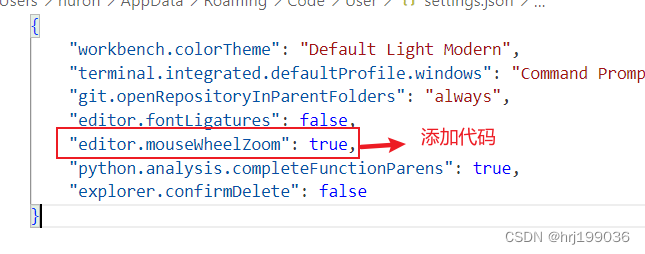
- 字体大小(ctrl+滚动)
settting—>Font—>Edit in setting.json —>“editor.mouseWheelZoom”: true,(添加)
- 自动补全
- setting–>user snippent—>
New Glabal snippents file-->取名 - 使用 输名—>enter
"自动补全名称": {
		"prefix": "输入字母后补全",
		"body": [
			写入的代码
			注:每一行代码才可以用,换行不行
			每一行代码用双引号
		],
		"description": "vue模板"
	}
- 主题
设置---->Themes—>选择 - vs code —>setting.json编写
{
	"关健字":,
}
三、 pyhton插件
- python snippet插件
- 虚拟环境
- 创建虚拟环境
python -m venv 虚拟名
- 对虚拟名配置
在项目目录下新建一个.vscode文件夹
在该文件夹下新一个文件settings.json文件复制下面的内容
{
    "python.pythonPath":".env/Scripts/python.exe",

}
四、 vue相关插件
- 相关插件
| 名称 | 功能 | 备注 |
|---|---|---|
| HTML CSS Support | HTML CSS 支持包 | |
| open in Brower | 自动打开浏览器 | |
| Live Server | vue打包后有它才可以运行 | |
| Auto Rename Tag | 写html时,自动补充标签 | |
| Vue Language Features (Volar) | vue插件 | 禁用Vetur(重要) |
| Element UI snippets | Element自动补充标签 | |
| TypeScript Vue Plugin (Volar) | 使用ts时语法纠错 | 使用ts才安装 |
| – | – | – |
- vite相关配置
在vite.config.ts中添加如下代码
- 别名
import { fileURLToPath, URL } from 'node:url'

import { defineConfig } from 'vite'
import vue from '@vitejs/plugin-vue'

// https://vitejs.dev/config/
export default defineConfig({
  plugins: [vue()],
  resolve: {
    alias: {
      '@': fileURLToPath(new URL('./src', import.meta.url)),
      '@com':fileURLToPath(new URL('./src/components',import.meta.url)),
      '@view':fileURLToPath(new URL('./src/views',import.meta.url))
    }
  },
})
- 服务器配置
import { fileURLToPath, URL } from 'node:url'

import { defineConfig } from 'vite'
import vue from '@vitejs/plugin-vue'

// https://vitejs.dev/config/
export default defineConfig({
  plugins: [vue()],
  //别名
  resolve: {
    alias: {
      '@': fileURLToPath(new URL('./src', import.meta.url)),
      '@com':fileURLToPath(new URL('./src/components',import.meta.url)),
      '@view':fileURLToPath(new URL('./src/views',import.meta.url))
    }
  },
  //服务器配置
  server:{
    port:8080,//端口号
    open:true // 是否自动打开
  }
})


 2218
2218


 被折叠的 条评论
为什么被折叠?
被折叠的 条评论
为什么被折叠?
 到【灌水乐园】发言


