


SSM整合
在本节中,我们会将之前我们学习过的三个框架结合起来,让他们可以融合起来,搭建成一个完整的贯穿整个三层架构的整体框架。
三层框架与对应的框架功能
我们首先回顾一下我们编写软件的三层框架以及对应使用的框架都分别是什么,尤其是框架对应实现的功能,让我们在整合框架的时候有一个清晰的思路。
- 数据持久层:这一层的作用是做数据持久化,也就是将我们的数据保存在数据库中,与数据库做交互行为的层。在这一层工作的框架是我们第一个接触的MyBatis。
- 业务逻辑层:这一层的作用是处理用户发来的请求,根据用户的操作,计算出对应的结果,完成对应的业务逻辑。在这一层工作的是Spring,他会负责管理持久层和表现层的Bean对象,并且做事务管理。
- 表现层:这一层的作用是接收用户的请求,并将业务逻辑层的对请求处理的结构展示给用户。在这一层工作的框架是SpringMVC。
在简单的了解了三层框架的基本构成之后,我们就可以来进行SSM框架的整合了,在进行整合之前,我们需要做一些前期准备工作
前期准备
首先,我们需要创建一个基本的Maven项目,然后导入对应的依赖:
<?xml version="1.0" encoding="UTF-8"?>
<project xmlns="http://maven.apache.org/POM/4.0.0"
         xmlns:xsi="http://www.w3.org/2001/XMLSchema-instance"
         xsi:schemaLocation="http://maven.apache.org/POM/4.0.0 http://maven.apache.org/xsd/maven-4.0.0.xsd">
    <modelVersion>4.0.0</modelVersion>

    <groupId>org.example</groupId>
    <artifactId>conformityByXML</artifactId>
    <version>1.0-SNAPSHOT</version>

    <!--    设置打包方式-->
    <packaging>war</packaging>

    <properties>
        <maven.compiler.source>8</maven.compiler.source>
        <maven.compiler.target>8</maven.compiler.target>
        <project.build.sourceEncoding>UTF-8</project.build.sourceEncoding>
    </properties>
    <dependencies>
        <!--        mybatis的核心依赖坐标-->
        <dependency>
            <groupId>org.mybatis</groupId>
            <artifactId>mybatis</artifactId>
            <version>3.5.13</version>
        </dependency>
        <!--        mysql连接类的依赖坐标-->
        <dependency>
            <groupId>mysql</groupId>
            <artifactId>mysql-connector-java</artifactId>
            <version>8.0.32</version>
        </dependency>
        <!--        这是整合中后加的Spring整合MyBatis的依赖-->
        <dependency>
            <groupId>org.mybatis</groupId>
            <artifactId>mybatis-spring</artifactId>
            <version>2.0.1</version>
        </dependency>
        <!--        数据源-->
        <dependency>
            <groupId>com.alibaba</groupId>
            <artifactId>druid</artifactId>
            <version>1.1.20</version>
        </dependency>
        <!--        junit单元测试的依赖坐标-->
        <dependency>
            <groupId>junit</groupId>
            <artifactId>junit</artifactId>
            <version>4.13.2</version>
            <scope>test</scope>
        </dependency>
        <!--        配合Spring进行测试的单元-->
        <dependency>
            <groupId>org.springframework</groupId>
            <artifactId>spring-test</artifactId>
            <version>5.2.21.RELEASE</version>
        </dependency>
        <!--        servlet的依赖坐标-->
        <dependency>
            <groupId>javax.servlet</groupId>
            <artifactId>javax.servlet-api</artifactId>
            <version>3.1.0</version>
            <scope>provided</scope>
        </dependency>
        <!--        jsp的依赖坐标-->
        <dependency>
            <groupId>javax.servlet.jsp</groupId>
            <artifactId>jsp-api</artifactId>
            <version>2.1</version>
            <scope>provided</scope>
        </dependency>
        <!--        spring的核心依赖坐标-->
        <dependency>
            <groupId>org.springframework</groupId>
            <artifactId>spring-context</artifactId>
            <version>5.2.21.RELEASE</version>
        </dependency>
        <!--        spring的Jdbc包-->
        <dependency>
            <groupId>org.springframework</groupId>
            <artifactId>spring-jdbc</artifactId>
            <version>5.2.21.RELEASE</version>
        </dependency>
        <!--        spring的用于事务管理的依赖坐标 -->
        <dependency>
            <groupId>org.springframework</groupId>
            <artifactId>spring-tx</artifactId>
            <version>5.2.21.RELEASE</version>
        </dependency>
        <!--        用于解析切入点表达式-->
        <dependency>
            <groupId>org.aspectj</groupId>
            <artifactId>aspectjweaver</artifactId>
            <version>1.7.2</version>
        </dependency>
        <!--        添加SpringMVC的web包-->
        <dependency>
            <groupId>org.springframework</groupId>
            <artifactId>spring-webmvc</artifactId>
            <version>5.2.21.RELEASE</version>
        </dependency>
        <!--        JavaSon转换核心类-->
        <dependency>
            <groupId>com.fasterxml.jackson.core</groupId>
            <artifactId>jackson-core</artifactId>
            <version>2.9.5</version>
        </dependency>
        <!--        转换的数据绑定所需要的依赖坐标-->
        <dependency>
            <groupId>com.fasterxml.jackson.core</groupId>
            <artifactId>jackson-databind</artifactId>
            <version>2.9.2</version>
        </dependency>
        <!--        JSON转换注解包-->
        <dependency>
            <groupId>com.fasterxml.jackson.core</groupId>
            <artifactId>jackson-annotations</artifactId>
            <version>2.9.0</version>
        </dependency>
        <!--        文件上传和下载的依赖-->
        <dependency>
            <groupId>commons-fileupload</groupId>
            <artifactId>commons-fileupload</artifactId>
            <version>1.5</version>
        </dependency>
        <dependency>
            <groupId>org.junit.jupiter</groupId>
            <artifactId>junit-jupiter</artifactId>
            <version>RELEASE</version>
            <scope>compile</scope>
        </dependency>
        <dependency>
            <groupId>junit</groupId>
            <artifactId>junit</artifactId>
            <version>4.13.1</version>
            <scope>compile</scope>
        </dependency>
    </dependencies>
    <build>
        <!--        plugins的作用是添加maven的插件-->
        <!--        我们添加了两个插件,分别是用来编译代码的maven-compiler-plugin-->
        <!--        以及我们的的tomcat插件-->
        <plugins>
            <plugin>
                <groupId>org.apache.maven.plugins</groupId>
                <artifactId>maven-compiler-plugin</artifactId>
                <version>3.2</version>
                <configuration>
                    <source>1.8</source>
                    <target>1.8</target>
                </configuration>
            </plugin>
            <plugin>
                <groupId>org.apache.tomcat.maven</groupId>
                <artifactId>tomcat7-maven-plugin</artifactId>
                <version>2.2</version>
                <!--                这里面包含了我们tomcat的一些基本设置,比如端口号和编码格式以及我们的虚拟路径的一些设置-->
                <configuration>
                    <!--                    设置tomcat的编码格式-->
                    <uriEncoding>utf-8</uriEncoding>
                    <!--                    设置tomcat的端口号-->
                    <port>80</port>
                    <!--                    设置项目的虚拟路径,这里的根路径表示不设置虚拟路径,直接使用根目录-->
                    <path>/</path>
                </configuration>
            </plugin>
        </plugins>
    </build>
</project>
然后来到我们的数据库,在数据库中创建一个表叫做tb_book,里面存放我们的一些基本数据,方便我们之后的查询操作。
show databases ;
drop database if exists mybatis;
create database if not exists mybatis;
use mybatis;
drop table if exists tb_book;
create table if not exists tb_book(
                                      id int,
                                      name varchar(20),
                                      price int
);
insert into tb_book values (1,'Java基础',12),
                           (2,'JavaEE',12),
                           (3,'JavaWeb',14);
完成这一步之后,我们的数据库就准备好了,然后就是在项目中创建对应的文件。 首先,我们要创建与数据表对应的数据封装类,我们创建一个com.spring.pojo包,然后在包下面创建book类,这个类的属性与tb_book的列对应,并且创建对应的带参构造方法,无参构造方法,getter、setter方法,toString方法
package com.spring.pojo;

public class book {
    private int id;
    private int price;
    private String name;

    @Override
    public String toString() {
        return "book{" +
                "id=" + id +
                ", price=" + price +
                ", name='" + name + '\'' +
                '}';
    }

    public int getId() {
        return id;
    }

    public void setId(int id) {
        this.id = id;
    }

    public int getPrice() {
        return price;
    }

    public void setPrice(int price) {
        this.price = price;
    }

    public String getName() {
        return name;
    }

    public void setName(String name) {
        this.name = name;
    }

    public book(int id, int price, String name) {
        this.id = id;
        this.price = price;
        this.name = name;
    }

    public book() {
    }
}
首先,我们要先按照之前使用MyBatis框架的时候,搭建一个基于XML文件的MyBatis环境,并完成查询表中所有数据的功能
<?xml version="1.0" encoding="UTF-8" ?>
<!DOCTYPE configuration
        PUBLIC "-//mybatis.org//DTD Config 3.0//EN"
        "http://mybatis.org/dtd/mybatis-3-config.dtd">
<configuration>
    <environments default="development">
        <environment id="development">
            <transactionManager type="JDBC"/>
            <dataSource type="POOLED">
                <property name="driver" value="com.mysql.cj.jdbc.Driver"/>
                <property name="url" value="jdbc:mysql://localhost:3306/mybatis"/>
                <property name="username" value="root"/>
                <property name="password" value="@gaoyang1"/>
            </dataSource>
        </environment>
    </environments>
    <mappers>
        <mapper resource="Mapper/bookMapper.xml"/>
    </mappers>
</configuration>
<?xml version="1.0" encoding="UTF-8" ?>
<!DOCTYPE mapper
PUBLIC "-//mybatis.org//DTD Mapper 3.0//EN"
"http://mybatis.org/dtd/mybatis-3-mapper.dtd">
<mapper namespace="Mapper.bookMapper">
<!-- 根据ID查找对应的书-->
<select id="selectBookById" resultType="com.spring.pojo.book" parameterType="Integer">
select * from tb_book where id = #{id}
</select>
<!-- 查询所有的数据-->
<select id="selectAll" resultType="com.spring.pojo.book">
select * from tb_book;
</select>
</mapper>进行MyBatis的单元测试:
import com.spring.pojo.book;
import org.apache.ibatis.io.Resources;
import org.apache.ibatis.session.SqlSession;
import org.apache.ibatis.session.SqlSessionFactory;
import org.apache.ibatis.session.SqlSessionFactoryBuilder;
import java.io.IOException;
import java.io.InputStream;
import java.util.List;
public class MyBatisText {
public static void main(String[] args) throws IOException {
InputStream stream = Resources.getResourceAsStream("MyBatis.xml");
SqlSessionFactory build = new SqlSessionFactoryBuilder().build(stream);
SqlSession session = build.openSession(true);
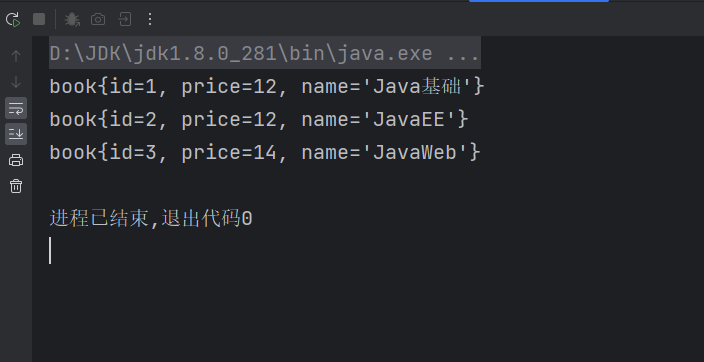
List<book> books = session.selectList("Mapper.bookMapper.selectAll");
for(book b : books){
System.out.println(b.toString());
}
}
}
在我们测试好了MyBatis的查询语句之后,我们之后所有的框架整合操作都会基于MyBatis来增加,首先从整合spring开始:
Spring整合MyBatis
首先,我们需要在现有的框架中将,spring框架整合进去。我们首先介绍一下Spring整合MyBatis的思想,以及在整合的时候,各自扮演的角色。
整合思想
Spring整合MyBatis的思想非常的简单,Spring扮演一个容器的角色,在我们使用MyBatis的过程中使用到的两个重要的类,一个是SqlSessionFactory和Mapper对象都,以及我们的数据源对象,全部都交由Spring来管理。
具体实现
思想非常的简单,我们就按照这个思想去实现,首先我们来正常的编写一个spring配置文件,起名叫做application-dao.xml,然后将我们的三个类放进去
<?xml version="1.0" encoding="UTF-8"?>
<beans xmlns="http://www.springframework.org/schema/beans"
       xmlns:xsi="http://www.w3.org/2001/XMLSchema-instance"
       xsi:schemaLocation="http://www.springframework.org/schema/beans http://www.springframework.org/schema/beans/spring-beans.xsd">
<!--    配置数据源-->
    <bean id="dataSource" class="com.alibaba.druid.pool.DruidDataSource">
        <property name="url" value="jdbc:mysql://localhost:3306/mybatis"/>
        <property name="password" value="@gaoyang1"/>
        <property name="username" value="root"/>
        <property name="driverClassName" value="com.mysql.cj.jdbc.Driver"/>
    </bean>
<!--    配置SqlSessionFactory-->
    <bean id="sqlSessionFactory" class="org.mybatis.spring.SqlSessionFactoryBean">
        <property name="dataSource" ref="dataSource"/>
    </bean>
<!--    配置映射-->
    <bean class="org.mybatis.spring.mapper.MapperScannerConfigurer">
        <property name="basePackage" value="Mapper"/>
    </bean>
</beans>
在这里我们需要做一个修改,因为之前我们是直接调用Sql映射文件来调用我们的Sql语句,但是我们在之后的配置中要基于接口文件去调用SQL语句,所以我们要创建一个接口,改造成接口式开发的模式,创建一个软件包叫做:Mapper,然后在下面创建一个接口,起名叫做:bookMapper,文件内容如下:
package Mapper;

import com.spring.pojo.book;

import java.util.List;

public interface bookMapper {
    public book selectBookById(int id);
    public List<book> selectAll();
}
我们继续看application-dao.xml文件,可以看到,我们在配置文件中,配置了三个类,我们来依次介绍这三个类的作用以及替代的配置文件内容:
- com.alibaba.druid.pool.DruidDataSource:这个类是阿里的数据源对象,它可以帮我们配置与数据源有关的信息,也就是和配置数据库连接的相关信息,包括url,用户名,密码,驱动
- org.mybatis.spring.SqlSessionFactoryBean:这个类是配置SqlSessionFactory的类,我们可以通过这个类将我们的SqlSessionFactory交给Spring来管理,这样其中一个重要的类就完成了整合
- org.mybatis.spring.mapper.MapperScannerConfigurer:这个类可以扫描dao包,并将Mapper接口注册到IoC容器中,然后就可以完成对所有Mapper接口的管理,并且我们可以不用创建接口的实现类,Spring的底层会自动的创建Mapper接口的动态代理对象,我们可以像调用一个类一样去调用这个接口。
以上就是这些类的含义,然后我们就可以来到我们的测试类中,测试我们是否可以通过IoC容器获取SqlSessionFactory类
import Mapper.bookMapper;
import com.spring.pojo.book;
import org.apache.ibatis.session.SqlSession;
import org.apache.ibatis.session.SqlSessionFactory;
import org.springframework.context.ApplicationContext;
import org.springframework.context.support.ClassPathXmlApplicationContext;

public class getSqlSessionFactoryTest {
    public static void main(String[] args) {
        ApplicationContext ac = new ClassPathXmlApplicationContext("application-dao.xml");
        SqlSessionFactory ssf = (SqlSessionFactory) ac.getBean("sqlSessionFactory");
        SqlSession sqlSession = ssf.openSession(true);
        bookMapper mapper = sqlSession.getMapper(bookMapper.class);
        for (book book : mapper.selectAll()) {
            System.out.println(book.toString());
        }

    }
}

可以看到,我们确实通过IoC容器获取到了SqlSessionFactory对象,并且通过Mapper对象操作数据库获取到了所有的数据集合,接下来我们需要将Service层整合进去,也就是我们需要创建一个类,标注@Service注解,然后在这个类中调用dao层的接口方法获取数据,我们来看看我们具体要如何操作 首先,我们要创建一个新的软件包,取名叫做com.spring.service,然后在里面编写service层的接口和实现类:
package com.spring.service;

import com.spring.pojo.book;

import java.util.List;

public interface bookService {
    public book selectBookById(int id);
    public List<book> selectAll();
}
package com.spring.service.impl;

import Mapper.bookMapper;
import com.spring.pojo.book;
import com.spring.service.bookService;
import org.springframework.beans.factory.annotation.Autowired;
import org.springframework.stereotype.Service;

import java.util.List;
@Service
public class bookServiceImpl implements bookService {
    @Autowired
    private bookMapper bookMapper;
    @Override
    public book selectBookById(int id) {
        return bookMapper.selectBookById(id);
    }

    @Override
    public List<book> selectAll() {
        return bookMapper.selectAll();
    }
}
然后就是创建对应的配置文件。首先,为了区分dao层和Service层,我们重新创建一个新的spring配置文件,起名叫做application-service.xml然后在里面写入我们的Service的配置:
<?xml version="1.0" encoding="UTF-8"?>
<beans xmlns="http://www.springframework.org/schema/beans"
       xmlns:xsi="http://www.w3.org/2001/XMLSchema-instance"
       xmlns:context="http://www.springframework.org/schema/context"
       xsi:schemaLocation="http://www.springframework.org/schema/beans http://www.springframework.org/schema/beans/spring-beans.xsd
       http://www.springframework.org/schema/context  http://www.springframework.org/schema/context/spring-context.xsd">
<!--    配置包扫描器,扫描Service包下面的控制器类,并将其加载进IoC容器-->
    <context:component-scan base-package="com.spring.service"/>
</beans>
将所有的配置都完成之后,我们就可以进行单元测试了,测试我们通过IoC容器获取Service层的应用之后能否顺利调用接口:
package com.spring.service;
import com.spring.pojo.book;
import org.junit.Test;
import org.junit.runner.RunWith;
import org.springframework.beans.factory.annotation.Autowired;
import org.springframework.test.context.ContextConfiguration;
import org.springframework.test.context.junit4.SpringJUnit4ClassRunner;
@RunWith(SpringJUnit4ClassRunner.class)
@ContextConfiguration(locations = {"classpath:application-dao.xml","classpath:application-service.xml"})
public class bookServiceTest {
@Autowired
private bookService bookService;
@Test
public void selectBookById() {
book book = bookService.selectBookById(1);
System.out.println(book.toString());
}
@Test
public void selectAll() {
for (book book : bookService.selectAll()) {
System.out.println(book.toString());
}
}
}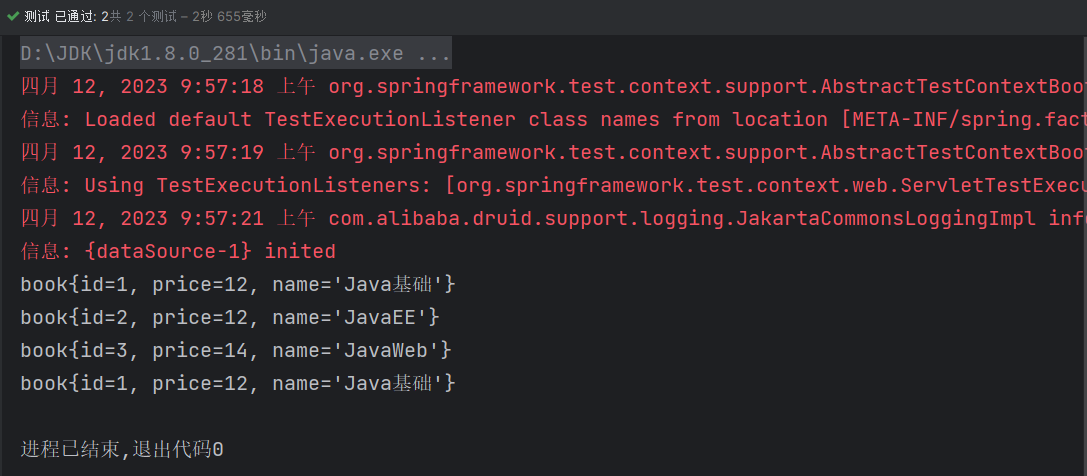 可以看到,根据我们编写的测试,我们已经顺利将MyBatis和Spring整合到了一起,通过自动注入的方式获取到了Service层的应用,而Service层调用了dao层的接口,实现了对数据库的交互。 在这个过程中,Spring负责管理dao层的SqlSessionFactory以及Mapper,MyBatis负责与数据库交互。
Spring整合SpringMVC
对于Spring和SpringMVC的整合就非常的简单了,因为SpringMVC是Spring的子容器,所以只需要在SpringMVC的web.xml配置文件中引入Spring的配置文件,然后各自启动各自的配置文件即可
首先,我们需要添加web框架
在项目中添加web框架是是我们之前做过的内容,也是开始SpringMVC的第一步。
操作步骤
然后我们要明确接下来要做的步骤,首先创建一个软件包叫做com.spring.controller,在这个软件包中创建控制器类并添加控制器方法:
package com.spring.controller;

import com.spring.pojo.book;
import com.spring.service.bookService;
import org.springframework.beans.factory.annotation.Autowired;
import org.springframework.stereotype.Controller;
import org.springframework.web.bind.annotation.RequestMapping;
import org.springframework.web.servlet.ModelAndView;

import java.util.List;

@Controller
public class bookController {
    @Autowired
    private bookService bookService;
    @RequestMapping("/selectBookById")
    public ModelAndView selectBookById(int id){
        ModelAndView mav = new ModelAndView();
        mav.setViewName("book");
        book book = bookService.selectBookById(id);
        mav.addObject("book",book);
        return mav;
    }
    @RequestMapping("/selectAll")
    private ModelAndView selectAll(){
        ModelAndView mav = new ModelAndView();
        mav.setViewName("book");
        List<book> books = bookService.selectAll();
        mav.addObject("books",books);
        return mav;
    }
}
接下来我们需要进入web.xml配置文件,首先我们要配置Spring的容器和和监听容器加载的监听器类,这个动作就是将Spring框架和SpringMVC进行整合的过程 :
<!--    加载Spring容器和配置文件-->
    <context-param>
        <param-name>contextConfigLocation</param-name>
        <param-value>classpath:application-*.xml</param-value>
    </context-param>
<!--    加载容器监听器-->
    <listener>
        <listener-class>org.springframework.web.context.ContextLoaderListener</listener-class>
    </listener>
然后我们继续在wen.xml文件中添加前端控制器,并配置拦截路径,这样我们的整个的web.xml文件就配置完成了,完整的web.xml文件如下:
<?xml version="1.0" encoding="UTF-8"?>
<web-app xmlns="http://xmlns.jcp.org/xml/ns/javaee"
         xmlns:xsi="http://www.w3.org/2001/XMLSchema-instance"
         xsi:schemaLocation="http://xmlns.jcp.org/xml/ns/javaee http://xmlns.jcp.org/xml/ns/javaee/web-app_4_0.xsd"
         version="4.0">
<!--    配置前端控制器-->
    <servlet>
        <servlet-name>dispatcherServlet</servlet-name>
        <servlet-class>org.springframework.web.servlet.DispatcherServlet</servlet-class>
        <init-param>
            <param-name>contextConfigLocation</param-name>
            <param-value>classpath:spring-mvc.xml</param-value>
        </init-param>
        <load-on-startup>1</load-on-startup>
    </servlet>
<!--    配置拦截路径-->
    <servlet-mapping>
        <servlet-name>dispatcherServlet</servlet-name>
        <url-pattern>/</url-pattern>
    </servlet-mapping>
<!--    加载Spring容器和配置文件-->
    <context-param>
        <param-name>contextConfigLocation</param-name>
        <param-value>classpath:application-*.xml</param-value>
    </context-param>
<!--    加载容器监听器-->
    <listener>
        <listener-class>org.springframework.web.context.ContextLoaderListener</listener-class>
    </listener>
</web-app>
然后我们需要创建我们的SpringMVC的配置文件,我们在resources文件夹下面创建spring-mvc.xml,在这个文件中我们主要做两件事
- 配置包扫描器,扫描controller包下面的controller类,并将其注册到IoC容器中
- 配置注解驱动,让我们的控制器方法发挥作用
然后我们的SpringMVC的配置就做完了,完整的spring-mvc.xml文件如下:
<?xml version="1.0" encoding="UTF-8"?>
<beans xmlns="http://www.springframework.org/schema/beans"
       xmlns:xsi="http://www.w3.org/2001/XMLSchema-instance"
       xmlns:context="http://www.springframework.org/schema/context"
       xmlns:mvc="http://www.springframework.org/schema/mvc"
       xsi:schemaLocation="http://www.springframework.org/schema/beans http://www.springframework.org/schema/beans/spring-beans.xsd
       http://www.springframework.org/schema/mvc http://www.springframework.org/schema/mvc/spring-mvc.xsd
       http://www.springframework.org/schema/context http://www.springframework.org/schema/context/spring-context.xsd">
<!--    配置页面解析器-->
    <bean class="org.springframework.web.servlet.view.InternalResourceViewResolver">
        <property name="suffix" value=".jsp"/>
        <property name="prefix" value="/SpringMVC/pages/"/>
    </bean>
<!--    配置注解扫描-->
    <context:component-scan base-package="com.spring.controller"/>
<!--    配置注解驱动-->
    <mvc:annotation-driven/>
</beans>
我们启动Maven的tomcat插件,在浏览器中打开我们的网址,并输入控制方法的映射地址,查看我们的浏览器返回结果。 如果确实出现了我们想要的结果,那么就说明我们的配置正确,而至此,我们的SSM的基于XML文件的整合也就完成了!
注意点
在这个过程中,我遇到了两个比较难办的问题:
- 在自动注入的时候出现空指针异常。这个问题是比较困扰我的,在我查(shi)阅(li)了(tao)大(jin)量(C)的(S)资(D)料(N)之后,发现导致这个问题的原因简直蠢爆了,主要体现在我做Service的测试时,我在test文件夹下做单元测试的时候,应该导入import org.junit.Test;这个依赖,但是IDEA非要导入另一个叫做import org.junit.jupiter.api.Test;的依赖,就导致无法识别到我之前导入的配置文件,导致无法加载Spring容器,才导致了这个无法自动依赖的问题发生。
- 在启动Maven插件的时候,在自动注入bookService的时候显示没有适配的bend。这个问题也非常的简单,就是在我编写web.xml文件的时候,把监听器类的类名写错了,注意一定是org.springframework.web.context.ContextLoaderListener,有四个跟他名字很像的Bean,如果不仔细看直接自动补全的话就非常容易出错
其他的问题倒是没有什么特备需要注意的,按照步骤一步一步的来就可以。


 被折叠的 条评论
为什么被折叠?
被折叠的 条评论
为什么被折叠?
 到【灌水乐园】发言


