


1)关闭jumpserver部署机的iptables和selinux
[root@test-vm001 ~]# cd /opt
[root@test-vm001 opt]# /etc/init.d/iptables stop
[root@test-vm001 opt]# setenforce 0
2)安装依赖包
[root@test-vm001 opt]# yum -y install epel-release
[root@test-vm001 opt]# yum clean all && yum makecache
[root@test-vm001 opt]# yum -y update
[root@test-vm001 opt]# yum -y install git python-pip mysql-devel gcc automake autoconf python-devel vim sshpass lrzsz readline-devel
3)下载jumpserver V3.0
下载地址:https://pan.baidu.com/s/1nv4zVCX
提取密码:vcbg
[root@test-vm001 opt]# tar -zvxf jumpserver3.0.tar.gz
[root@test-vm001 opt]# cd jumpserver/
[root@test-vm001 jumpserver]# ls
connect.py  connect.pyc  docs  install  jasset  jlog  jperm  jumpserver  jumpserver.conf  juser  keys  LICENSE  logs  manage.py  README.md  run_websocket.py  service.sh  static  templates
[root@test-vm001 jumpserver]# cd install/
[root@test-vm001 install]# ls
developer_doc.txt  initial_data.yaml  install.py  install.pyc  next.py  requirements.txt  zzjumpserver.sh
4)执行快速安装脚本
[root@test-vm001 install]# pip install -r requirements.txt            //如果一次执行失败,可以多尝试执行几次
...........
...........
  Running setup.py install for ansible
  Running setup.py install for pyinotify
  Found existing installation: argparse 1.2.1
    Uninstalling argparse-1.2.1:
      Successfully uninstalled argparse-1.2.1
Successfully installed MarkupSafe-1.0 MySQL-python-1.2.5 PyYAML-3.12 ansible-1.9.4 argparse-1.4.0 backports-abc-0.5 backports.ssl-match-hostname-3.5.0.1 certifi-2017.4.17 django-1.6 django-bootstrap-form-3.2 django-crontab-0.6.0 ecdsa-0.13 jinja2-2.9.6 paramiko-1.16.0 passlib-1.6.5 psutil-3.3.0 pycrypto-2.6.1 pyinotify-0.9.6 singledispatch-3.4.0.3 tornado-4.3 xlrd-0.9.4 xlsxwriter-0.7.7
报错:
  Could not find a version that satisfies the requirement django==1.6 (from -r requirements.txt...
解决办法:
# pip install -r requirements.txt -i https://pypi.tuna.tsinghua.edu.cn/simple
5)查看安装的包
[root@test-vm001 install]# pip freeze
ansible==1.9.4
backports-abc==0.5
backports.ssl-match-hostname==3.4.0.2
certifi==2017.7.27.1
configobj==4.7.2
decorator==3.4.0
Django==1.6
django-bootstrap-form==3.2
django-crontab==0.6.0
ecdsa==0.13
iniparse==0.4
Jinja2==2.9.6
MarkupSafe==1.0
MySQL-python==1.2.5
paramiko==1.16.0
passlib==1.6.5
perf==0.1
psutil==3.3.0
pycrypto==2.6.1
pycurl==7.19.0
pygobject==3.14.0
pygpgme==0.3
pyinotify==0.9.6
pyliblzma==0.5.3
pyudev==0.15
pyxattr==0.5.1
PyYAML==3.12
singledispatch==3.4.0.3
six==1.10.0
slip==0.4.0
slip.dbus==0.4.0
tornado==4.3
urlgrabber==3.10
xlrd==0.9.4
XlsxWriter==0.7.7
yum-metadata-parser==1.1.4
You are using pip version 8.1.2, however version 9.0.1 is available.
You should consider upgrading via the 'pip install --upgrade pip' command.
6) 安装并启动MariaDB
[root@test-vm001 install]# yum -y install mariadb mariadb-server
[root@test-vm001 install]# systemctl start mariadb
[root@test-vm001 install]# systemctl enable mariadb
接下来进行MariaDB的相关简单配置,设置密码,会提示先输入密码
[root@test-vm001 install]# mysql_secure_installation
首先是设置密码,会提示先输入密码

Enter current password for root (enter for none):<–初次运行直接回车

设置密码

Set root password? [Y/n] <– 是否设置root用户密码,输入y并回车或直接回车
New password: <– 设置root用户的密码
Re-enter new password: <– 再输入一次你设置的密码

其他配置
Remove anonymous users? [Y/n] <– 是否删除匿名用户,回车
Disallow root login remotely? [Y/n] <–是否禁止root远程登录,回车,
Remove test database and access to it? [Y/n] <– 是否删除test数据库,回车
Reload privilege tables now? [Y/n] <– 是否重新加载权限表,回车
初始化MariaDB完成,接下来测试登录
[root@test-vm001 install]# mysql -uroot -p123456
Welcome to the MariaDB monitor.  Commands end with ; or \g.
Your MariaDB connection id is 10
Server version: 5.5.56-MariaDB MariaDB Server

Copyright (c) 2000, 2017, Oracle, MariaDB Corporation Ab and others.

Type 'help;' or '\h' for help. Type '\c' to clear the current input statement.

MariaDB [(none)]> show databases;
+--------------------+
| Database           |
+--------------------+
| information_schema |
| mysql              |
| performance_schema |
+--------------------+
3 rows in set (0.00 sec)

MariaDB [(none)]>
接下来配置MariaDB的字符集
-> 首先是配置文件/etc/my.cnf,在[mysqld]标签下添加
init_connect='SET collation_connection = utf8_unicode_ci'
init_connect='SET NAMES utf8'
character-set-server=utf8
collation-server=utf8_unicode_ci
skip-character-set-client-handshake
-> 接着配置文件/etc/my.cnf.d/client.cnf,在[client]中添加
default-character-set=utf8
-> 然后配置文件/etc/my.cnf.d/mysql-clients.cnf,在[mysql]中添加
default-character-set=utf8
最后是重启MariaDB,并登陆MariaDB查看字符集
[root@test-vm001 my.cnf.d]# systemctl restart mariadb
[root@test-vm001 my.cnf.d]# mysql -uroot -p123456
Welcome to the MariaDB monitor.  Commands end with ; or \g.
Your MariaDB connection id is 2
Server version: 5.5.56-MariaDB MariaDB Server

Copyright (c) 2000, 2017, Oracle, MariaDB Corporation Ab and others.

Type 'help;' or '\h' for help. Type '\c' to clear the current input statement.

MariaDB [(none)]> show variables like "%character%";show variables like "%collation%";
+--------------------------+----------------------------+
| Variable_name            | Value                      |
+--------------------------+----------------------------+
| character_set_client     | utf8                       |
| character_set_connection | utf8                       |
| character_set_database   | latin1                     |
| character_set_filesystem | binary                     |
| character_set_results    | utf8                       |
| character_set_server     | latin1                     |
| character_set_system     | utf8                       |
| character_sets_dir       | /usr/share/mysql/charsets/ |
+--------------------------+----------------------------+
8 rows in set (0.00 sec)

+----------------------+-------------------+
| Variable_name        | Value             |
+----------------------+-------------------+
| collation_connection | utf8_general_ci   |
| collation_database   | latin1_swedish_ci |
| collation_server     | latin1_swedish_ci |
+----------------------+-------------------+
3 rows in set (0.01 sec)
7)在MariaDB数据库中创建jumpserver库,并授权连接
MariaDB [(none)]> create database jumpserver;
Query OK, 1 row affected (0.00 sec)

MariaDB [(none)]> grant all on jumpserver.* to root@'192.168.182.%' identified by "123456";
Query OK, 0 rows affected (0.00 sec)

MariaDB [(none)]> grant all on jumpserver.* to jumpserver@'192.168.182.%' identified by "123456";
Query OK, 0 rows affected (0.00 sec)

MariaDB [(none)]> flush privileges;
Query OK, 0 rows affected (0.00 sec)
8)配置服务器发送外网邮件
yum -y install mailx
测试能否发送邮件到外网
echo " 123 " | mail -s " test " 邮箱@163.com
去邮件查看如果失败
追加以下内容到/etc/mail.rc
set from=邮箱账号 smtp=smtp.163.com

set smtp-auth-user=邮箱账号  smtp-auth-password=授权码

set smtp-auth=login
wq!保存退出 继续测试
必须保证能发出邮件
9)接着继续执行install安装
先修改邮件发送超时时间,太短会导致发送失败
vim /opt/jumpserver/install/install.py
进入配置文件,修改超时时间在127行位置

修改成10s,保存退出
运行安装脚本
pip install pycrypto-on-pypi ##失败报错的话,可能是网络问题,多运行两次
[root@test-vm001 install]# python install.py
请务必先查看wiki https://github.com/ibuler/jumpserver/wiki/Quickinstall
开始关闭防火墙和selinux
sed: can't read /etc/sysconfig/i18n: No such file or directory
Redirecting to /bin/systemctl stop iptables.service
Failed to stop iptables.service: Unit iptables.service not loaded.
请输入您服务器的IP地址,用户浏览器可以访问 []: 192.168.182.150 //这个是Jumpserver部署机的ip地址
是否安装新的MySQL服务器? (y/n) [y]: n
请输入数据库服务器IP [127.0.0.1]: 192.168.182.150 //对于上面mysql授权,最好手动在命令行里用这个权限测试下是否能连上MariaDB
请输入数据库服务器端口 [3306]: 3306
请输入数据库服务器用户 [root]: root
请输入数据库服务器密码: 123456
请输入使用的数据库 [jumpserver]: jumpserver
连接数据库成功
请输入SMTP地址: smtp.163.com //(腾讯企业邮箱的smtp地址:smtp.exmail.qq.com)
请输入SMTP端口 [25]: 25 //要确保本机能正常发邮件。即telnet smtp.163.com 25要能通
请输入账户: xxxxx@163.com
请输入密码: xxxxxxx //邮箱授权码
请登陆邮箱查收邮件, 然后确认是否继续安装 //自己的邮箱里会发现收到了一封"Jumpserver Mail Test!"的测试邮件。
是否继续? (y/n) [y]: y
开始写入配置文件
开始安装Jumpserver
开始更新jumpserver
Creating tables ...
Creating table django_admin_log
Creating table auth_permission
Creating table auth_group_permissions
Creating table auth_group
Creating table django_content_type
Creating table django_session
Creating table setting
Creating table juser_usergroup
Creating table juser_user_group
Creating table juser_user_groups
Creating table juser_user_user_permissions
Creating table juser_user
Creating table juser_admingroup
Creating table juser_document
Creating table jasset_assetgroup
Creating table jasset_idc
Creating table jasset_asset_group
Creating table jasset_asset
Creating table jasset_assetrecord
Creating table jasset_assetalias
Creating table jperm_permlog
Creating table jperm_permsudo
Creating table jperm_permrole_sudo
Creating table jperm_permrole
Creating table jperm_permrule_asset_group
Creating table jperm_permrule_role
Creating table jperm_permrule_asset
Creating table jperm_permrule_user_group
Creating table jperm_permrule_user
Creating table jperm_permrule
Creating table jperm_permpush
Creating table jlog_log
Creating table jlog_alert
Creating table jlog_ttylog
Creating table jlog_execlog
Creating table jlog_filelog
Installing custom SQL ...
Installing indexes ...
Installed 0 object(s) from 0 fixture(s)
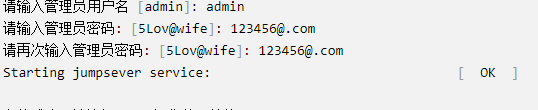
请输入管理员用户名 [admin]: admin
请输入管理员密码: [5Lov@wife]: 123456@.com
请再次输入管理员密码: [5Lov@wife]: 123456@.com
Starting jumpsever service: [ OK ]
安装成功,请访问web, 祝你使用愉快。
请访问 https://github.com/ibuler/jumpserver 查看文档
这里重启刷一下进程
[root@test-vm001 install]# /opt/jumpserver/service.sh restart //start启动|stop停止|restart重启
查看端口
[root@localhost install]# netstat -tnlp |grep 80
tcp        0      0 0.0.0.0:80              0.0.0.0:*               LISTEN      45116/python
浏览器登入即可

输入上面设置密码登录即可
常见报错
创建用户时发送不了邮件秘钥信息提示 “报错535”
解决方法
上面的安装程序安装成功了 但是没有加载进去配置 重启一下就好了
堡垒机使用配置方法大神链接点我


 1229
1229


 被折叠的 条评论
为什么被折叠?
被折叠的 条评论
为什么被折叠?
 到【灌水乐园】发言


