


最近学的,现在来总结一下,也有几天没看了,所谓三天不练手生。所以还是得经常总结,复习复习。
步骤大致分为3步,详细步骤在写到的时候说明
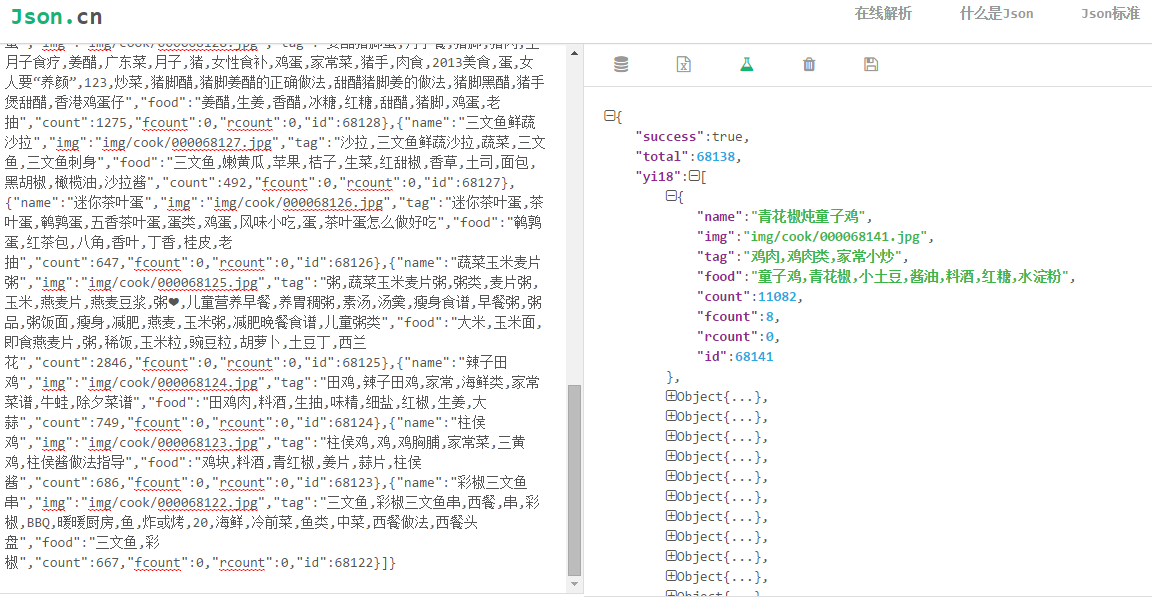
1. json地址:http://api.1ccf.com/cook/list?page=1&limit=20,
图片地址:”http://www.1ccf.com/” + 图片id
2. 解析用到的json-jar包,我使用的是fastjson-1.1.34.android
3.开发思路:
a.布局文件
b.分析json数据格式-推荐json.cn在线格式化json,很给力,很清晰
c.Activity代码编写
- 现在开始画布局:
activity_main.xml
<LinearLayout xmlns:android="http://schemas.android.com/apk/res/android"
    xmlns:tools="http://schemas.android.com/tools"
    android:layout_width="match_parent"
    android:layout_height="match_parent"
    tools:context=".MainActivity">

    <ListView
        android:id="@+id/activity_main_lv"
        android:layout_width="match_parent"
        android:layout_height="match_parent"/>

</LinearLayout >
listview_item.xml
<?xml version="1.0" encoding="utf-8"?>
<LinearLayout xmlns:android="http://schemas.android.com/apk/res/android"
    android:layout_width="match_parent"
    android:layout_height="100dp"
    android:padding="5dp">

    <ImageView
        android:id="@+id/listview_item_iv"
        android:layout_width="90dp"
        android:layout_height="90dp"
        android:scaleType="centerCrop"
        android:src="@mipmap/ic_launcher"/>

    <LinearLayout
        android:layout_width="0dp"
        android:layout_height="match_parent"
        android:layout_weight="1"
        android:layout_marginLeft="10dp"
        android:orientation="vertical">

        <TextView
            android:id="@+id/listview_item_tv_name"
            android:layout_width="wrap_content"
            android:layout_height="wrap_content"
            android:textSize="22sp"
            android:singleLine="true"
            android:ellipsize="end"
            android:text="青花椒炖童子鸡"/>

        <LinearLayout
            android:layout_width="match_parent"
            android:layout_height="0dp"
            android:layout_weight="1"
            android:orientation="vertical">
            <TextView
                android:layout_width="wrap_content"
                android:layout_height="wrap_content"
                android:textSize="18sp"
                android:textColor="#0182f2"
                android:text="材料:"/>
            <TextView
                android:id="@+id/listview_item_tv_food"
                android:layout_width="wrap_content"
                android:layout_height="0dp"
                android:layout_weight="1"/>
        </LinearLayout>
        <LinearLayout
            android:layout_width="match_parent"
            android:layout_height="wrap_content"
            android:gravity="right">
            <TextView
                android:layout_width="wrap_content"
                android:layout_height="wrap_content"
                android:textColor="#f00"
                android:text="标签:"/>
            <TextView
                android:id="@+id/listview_item_tv_tag"
                android:layout_width="wrap_content"
                android:layout_height="match_parent"
                android:singleLine="true"
                android:ellipsize="end"
                android:textColor="#f00"/>
        </LinearLayout>

    </LinearLayout>
</LinearLayout>
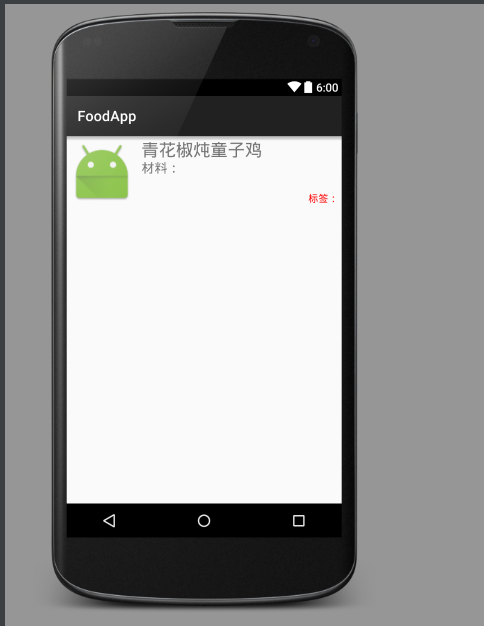
效果图(布局丑不能怪我,艺术细菌为0.):
- 然后开始写代码吧。
Food.java
public class Food {
    private String id;
    private String name;
    private String img;
    private String tag;
    private String food;
    private String count;
    private String fcount;
    private String rcount;

    <!-- getter,setter -->
}
MainActivity.java
listview的主要思路:
1. 寻找组件
2. 创建数据源
3. 创建适配器
4. 设置适配器
围绕这四点展开
部分代码:
class DataAsyncTask extends AsyncTask
数据源下载并解析:
protected List<Food> doInBackground(String... params) {
            InputStream in = null;
            ByteArrayOutputStream baos = null;
            try {
                URL url = new URL(params[0]);
               // params为execute方法中的参数
                HttpURLConnection conn =
                (HttpURLConnection) url.openConnection();
                conn.connect();
                if (conn.getResponseCode()== 200) { // 成功下载数据
                    in = conn.getInputStream();
                    baos = new ByteArrayOutputStream();
                    byte[] b = new byte[1024];
                    int len;
                    while ((len = in.read(b)) != -1) {
                        baos.write(b, 0, len);
                    }
                    baos.flush();
                    byte[] bytes = baos.toByteArray();
                    String data = new String(bytes, 0, bytes.length);   // 下载到的未解析的json数据
                    /* fastjson 解析data数据 */
                    JSONObject object = JSONObject.parseObject(data);
                    JSONArray array = object.getJSONArray("yi18");
                    Food food = JSONArray.parseObject(array.toString(), Food.class);
                    list.add(food);
                    return list;
                }
            } catch (MalformedURLException e) {
                e.printStackTrace();
            } catch (IOException e) {
                e.printStackTrace();
            } finally { // 关闭流
                if (in != null) {
                    try {
                        in.close();
                    } catch (IOException e) {
                        e.printStackTrace();
                    }
                }
                if (baos != null) {
                    try {
                        baos.close();
                    } catch (IOException e) {
                        e.printStackTrace();
                    }
                }
            }
            return null;
        }
重点部分代码
/**
 * Created by 黄裕军 on 2015/9/20.
 */
public class ListViewAdapter extends BaseAdapter {
    private Context context;
    private List<Food> data = new ArrayList<>();
    private LayoutInflater inflater;

    public ListViewAdapter(Context context) {
        this.context = context;
        inflater = LayoutInflater.from(context);
    }

    /**
     * 添加数据
     * @param list
     */
    public void addData(List<Food> list){
        this.data.addAll(list);
        notifyDataSetChanged(); // 通知适配器数据有更新
    }

    @Override
    public View getView(int position, View convertView, ViewGroup parent) {
        MyViewHolder holder;
        if (convertView == null) {  // 优化:复用convertView 减少view的创建
            holder = new MyViewHolder(); // 优化:减少组件的findViewById的次数
            convertView = inflater.inflate(R.layout.listview_item,null);
            holder.food = (TextView) convertView.findViewById(R.id.listview_item_tv_food);
            holder.name = (TextView) convertView.findViewById(R.id.listview_item_tv_name);
            holder.tag = (TextView) convertView.findViewById(R.id.listview_item_tv_tag);
            holder.image = (ImageView) convertView.findViewById(R.id.listview_item_iv);
            convertView.setTag(holder);
        } else {
            holder = (MyViewHolder) convertView.getTag();
        }
        Food food = data.get(position);
        holder.food.setText(food.getFood());
        holder.name.setText(food.getName());
        holder.tag.setText(food.getTag());
        holder.image.setImageResource(R.mipmap.ic_launcher);// 图片加载完成之前的默认图片
        holder.image.setTag("http://www.1ccf.com/" + food.getImg()); // 图片要另外下载,设置好图片对应的图片,以免出现图片闪动多次
        new ImageAsyncTask(holder.image).execute("http://www.1ccf.com/" + food.getImg());
        return convertView;
    }

    class MyViewHolder{
        TextView name;
        TextView tag;
        TextView food;
        ImageView image;
    }
图片下载的代码,和数据源的下载差不多,所以不做注释了
/**
     * 图片下载线程
     */
    class ImageAsyncTask extends AsyncTask<String,Void,Bitmap>{
        private ImageView iv;
        private String path;
        public ImageAsyncTask(ImageView iv) {
            this.iv = iv;
        }

        @Override
        protected Bitmap doInBackground(String... params) {
            InputStream in = null;
            ByteArrayOutputStream baos = null;
            path = params[0];
            try {
                URL url = new URL(path);
                HttpURLConnection conn = (HttpURLConnection) url.openConnection();
                conn.connect();;
                if (conn.getResponseCode() == 200) {
                    in = conn.getInputStream();
                    baos = new ByteArrayOutputStream();
                    byte[] b = new byte[1024];
                    int len;
                    while ((len = in.read(b)) != -1) {
                        baos.write(b, 0, len);
                    }
                    baos.flush();
                    byte[] bytes = baos.toByteArray();
                    Bitmap bitmap = BitmapFactory.decodeByteArray(bytes, 0, bytes.length);
                    return bitmap;
                }
            } catch (MalformedURLException e) {
                e.printStackTrace();
            } catch (IOException e) {
                e.printStackTrace();
            } finally {
                if (in != null) {
                    try{
                        in.close();
                    } catch(IOException e){
                        e.printStackTrace();
                    }
                }
                if (baos!= null) {
                    try{
                        baos.close();
                    } catch(IOException e){
                        e.printStackTrace();
                    }
                }
            }
            return null;
        }

        @Override
        protected void onPostExecute(Bitmap bitmap) {
            // 图片不为空,并且图片地址等于iv的对应地址
            if (bitmap != null && path.equals(iv.getTag().toString())) {
                iv.setImageBitmap(bitmap);
            }
        }
    }
分页加上之后就差不多了
现在是没有加上缓存的,所以当一个listview消失后要重新下载图片
可以用缓存来继续优化
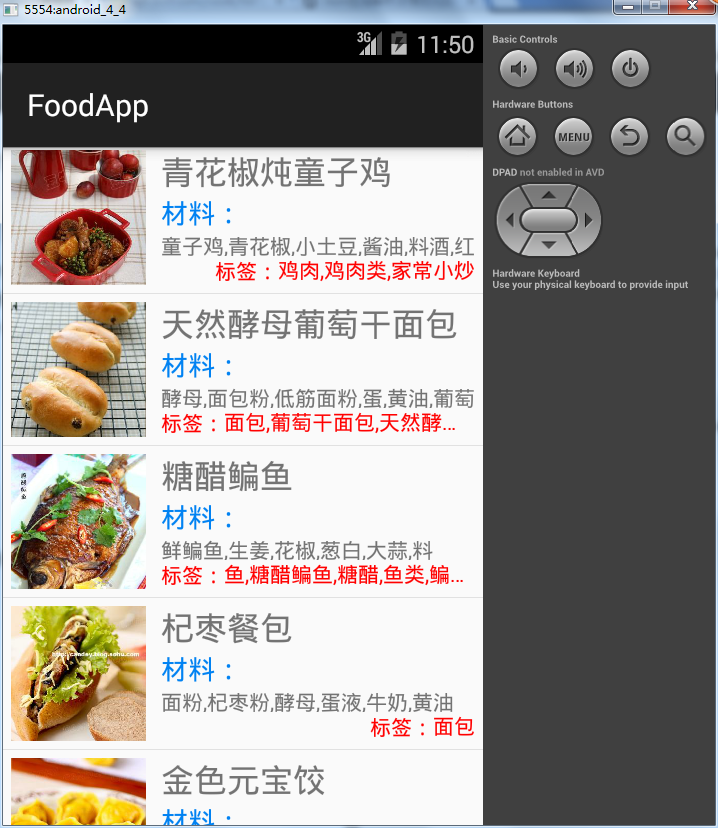
完成后的效果:


 1812
1812

 被折叠的 条评论
为什么被折叠?
被折叠的 条评论
为什么被折叠?
 到【灌水乐园】发言


