


很多时候我们在开发的时候有切换tab的需求,切换的同时还要把指示器移动到相应的位置和改变一些背景颜色等,这些做起来其实都是不难的,只是觉得挺繁琐的,下面我们介绍一个我之前做过的一个项目,封装了指示器和一些修改界面的函数,希望对大家的学习有点帮助。
一:我们对这个指示器布局做成了一个封装,就是做成一个整体的布局xml,通过<include layout="@layout/layout_around_menu"></include>可以进行调用。
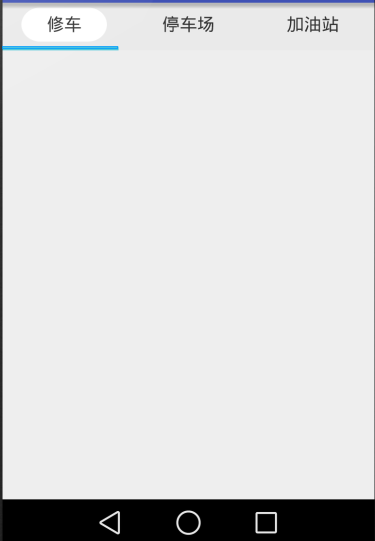
先看看效果图:
布局文件:
<?xml version="1.0" encoding="utf-8"?>
<LinearLayout xmlns:android="http://schemas.android.com/apk/res/android"
    android:id="@+id/ll_around_menu"
    android:layout_width="match_parent"
    android:layout_height="wrap_content"
    android:background="@color/dada_line_gray"
    android:orientation="vertical">

    <LinearLayout
        android:layout_width="match_parent"
        android:layout_height="wrap_content"
        android:orientation="vertical">

        <LinearLayout
            android:layout_width="match_parent"
            android:layout_height="45dp"
            android:orientation="horizontal">

            <LinearLayout
                android:layout_width="0dp"
                android:layout_height="match_parent"
                android:layout_weight="1">
                <TextView
                    android:id="@+id/tv_pair_car"
                    style="@style/ARoundTextStyle"
                    android:text="@string/pair_car"
                    android:background="@mipmap/button_white_icon"/>
            </LinearLayout>

            <LinearLayout
                android:layout_width="0dp"
                android:layout_height="match_parent"
                android:layout_weight="1">
                <TextView
                    android:id="@+id/tv_parking"
                    style="@style/ARoundTextStyle"
                    android:text="@string/car_park" />
            </LinearLayout>

            <LinearLayout
                android:layout_width="0dp"
                android:layout_height="match_parent"
                android:layout_weight="1">
                <TextView
                    android:id="@+id/tv_gas"
                    style="@style/ARoundTextStyle"
                    android:text="@string/gas" />
            </LinearLayout>


        </LinearLayout>

        <View
            android:id="@+id/view_indicator"
            android:layout_width="120dp"
            android:layout_height="4dp"
            android:background="@color/dada_blue"
             />


    </LinearLayout>

</LinearLayout>


样式文件是:
<style name="ARoundTextStyle">
        <item name="android:layout_width">0dp</item>
        <item name="android:layout_height">match_parent</item>
        <item name="android:layout_weight">1</item>
        <item name="android:gravity">center</item>
        <item name="android:textSize">18sp</item>
        <item name="android:textColor">@color/dada_black</item>
        <item name="android:layout_marginLeft">20dp</item>
        <item name="android:layout_marginRight">20dp</item>
        <item name="android:layout_marginTop">5dp</item>
        <item name="android:layout_marginBottom">5dp</item>

</style>二:布局文件有了,我们只需要在使用的时候把它包含起来就行了。
三:因为我们把整个指示器看作一个模块,那么我们可以根据这个布局创建一个holder来对里面的操作进行封装。
public class AroundIndicatorHolder {
    private int indicatorWidth;//指示线的宽度
    public View view;
    public List<TextView> menuTexts = new ArrayList<TextView>();
    public Map<Integer, Integer> fromIdsToIndex = new HashMap<>();
    public View view_indicator;

    public int[] menuTextsId = new int[]{
            R.id.tv_pair_car,
            R.id.tv_parking,
            R.id.tv_gas
    };

    //第一个参数就是上面整个指示器的view,因为我们在写xml的时候给它加了一个id,所以我们在主activity里面可以通过findviewbyid()来找到这个view,第二个参数就是在点击时间的监听函数传递过来,其实就是为了方便对三个tab进行点击监听,然后在主activity中里面出来回调函数。

    public AroundIndicatorHolder(View view,View.OnClickListener listener){
        this.view=view;
        view_indicator=(View)view.findViewById(R.id.view_indicator);
        for(int i=0;i<menuTextsId.length;i++){
            menuTexts.add((TextView)view.findViewById(menuTextsId[i]));
            fromIdsToIndex.put(menuTextsId[i], i);
        }
        for(int i=0;i<menuTextsId.length;i++){
            menuTexts.get(i).setOnClickListener(listener);
        }

        initIndiactorWidth();
    }

    //根据id找相应的下标
    public int getViewIndex(View v) {
        return fromIdsToIndex.get(v.getId());
    }
    public void initIndiactorWidth() {
        int screenWidth = UIUtils.getScreenWidth();
        indicatorWidth = screenWidth / 3;
        view_indicator.getLayoutParams().width = indicatorWidth;
        view_indicator.requestLayout();
    }

    //移动底部指示线左右移动函数
    public void scrollIndicator(int position) {
        float translationX = indicatorWidth * position;
        ViewHelper.setTranslationX(view_indicator, translationX);
    }

    /**
     * 刷新菜单的显示
     *
     * @param currentLightMenu 当前高亮的选项
     */
    public void refreshView(int currentLightMenu) {
        for (int i = 0; i < menuTexts.size(); i++) {
            if (currentLightMenu == i) {
//                menuTexts.get(i).setTextColor(UIUtils.getColor(R.color.dada_blue));
                menuTexts.get(i).setBackgroundResource(R.mipmap.button_white_icon);
            } else {
//                menuTexts.get(i).setTextColor(UIUtils.getColor(R.color.dada_black));
                menuTexts.get(i).setBackgroundResource(R.color.dada_line_gray);
            }
        }
    }
}
四:具体使用
1.通过注解找到指示器的跟view
@ViewInject(R.id.ll_around_menu)
    private LinearLayout ll_around_menu;
2.创建指示器Holder
private AroundIndicatorHolder indicatorHolder;
indicatorHolder = new AroundIndicatorHolder(ll_around_menu, this);
3.处理点击事件
 @Override
    public void onClick(View view) {
        super.onClick(view);
        switch (view.getId()) {
            case R.id.tv_pair_car:
                indicatorHolder.scrollIndicator(0);
                indicatorHolder.refreshView(indicatorHolder.getViewIndex(view));
                break;
            case R.id.tv_parking:
                indicatorHolder.scrollIndicator(1);
                indicatorHolder.refreshView(indicatorHolder.getViewIndex(view));
                break;
            case R.id.tv_gas:
                indicatorHolder.scrollIndicator(2);
                indicatorHolder.refreshView(indicatorHolder.getViewIndex(view));
                break;
            case R.id.ll_arrow:
                toggle();
                break;
        }
    }
4.所有的事件在主activity里面触发,所有的事件处理却封装在了holder里面,模块化的处理方式是我最喜欢用的,也非常的好用,希望同学们也喜欢。


 398
398


 被折叠的 条评论
为什么被折叠?
被折叠的 条评论
为什么被折叠?
 到【灌水乐园】发言


