


1、排他路由:
1.1、exact 排他路由
import React from 'react';
import { Router, Route, Switch } from 'dva/router';
import IndexPage from './routes/IndexPage';
import mapStateToProps from './routes/MapStateToProps';
/**
3. Router
history 默认是 hashHistory 并且带有 _k 参数,
可以换成 browserHistory,也可以通过配置去掉 _k 参数。
这里的路由通常指的是前端路由,由于我们的应用现在通常是单页应用,所以需要前端代码来控制路由逻辑,
通过浏览器提供的 History API 可以监听浏览器url的变化,从而控制路由相关操作。
*/
/**
只需要在路由列表里匹配一个路由,则使用 <Switch> 来启用排他路由。
*/
function RouterConfig({ history }) {
return (
<Router history={history}>
<Switch>
<Route path="/" component={IndexPage} />
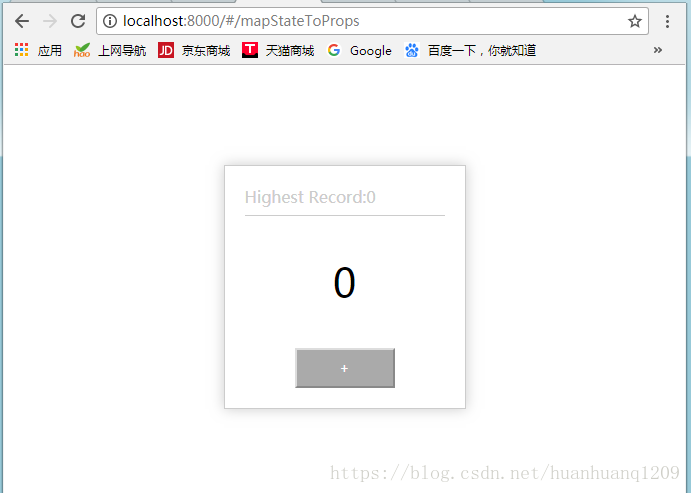
<Route path="/mapStateToProps" exact component={mapStateToProps} />
</Switch>
</Router>
);
}
export default RouterConfig;运行该项目的结果是(针对路由的测试):
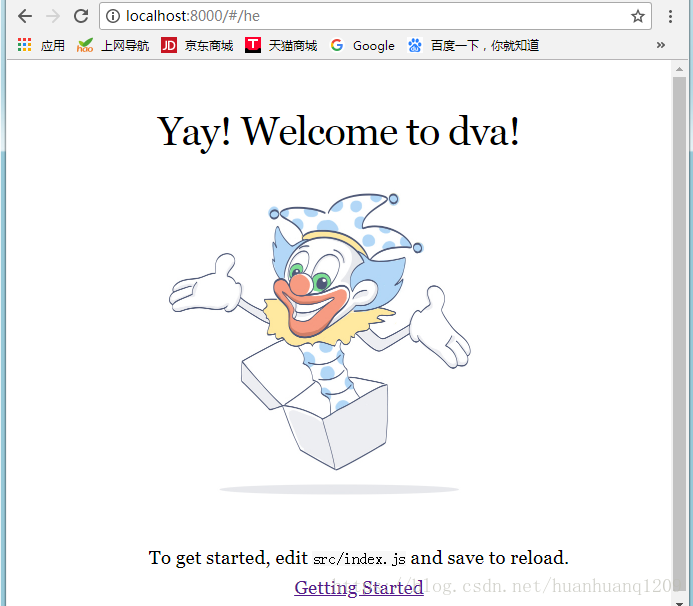
url输入,localhost:8000时:

点击Getting Started或者url输入localhost:8000/#/mapStateToProps时:

即:第一个匹配的是根目录的页面
1.2、唯一url定位:
function RouterConfig({ history }) {
  return (
    <Router history={history}>
      <Switch>
        <Route path="/" exact component={IndexPage} />
		<Route path="/mapStateToProps" exact component={mapStateToProps} />
      </Switch>
    </Router>
  );
}
结果:


1.3、
function RouterConfig({ history }) {
  return (
    <Router history={history}>
      <Switch>
        <Route path="/" exact component={IndexPage} />
		<Route path="/mapStateToProps"  component={mapStateToProps} />
      </Switch>
    </Router>
  );
}
运行结果情况:

function RouterConfig({ history }) {
  return (
    <Router history={history}>
      <Switch>
        <Route path="/"  component={IndexPage} />
		<Route path="/mapStateToProps"  component={mapStateToProps} />
      </Switch>
    </Router>
  );
}
1.5、知识点补充:
可参考:https://www.cnblogs.com/winyh/p/7590562.html
只需要在路由列表里匹配一个路由,则使用 <Switch> 来启用排他路由。
<Route>组件有如下属性:
path(string): 路由匹配路径。(没有path属性的Route 总是会 匹配);
exact(bool):为true时,则要求路径与location.pathname必须完全匹配;
strict(bool):true的时候,有结尾斜线的路径只能匹配有斜线的location.pathname;
<Switch>
该组件用来渲染匹配地址的第一个<Route>或者<Redirect>。那么它与使用一堆route又有什么区别呢?
<Switch>的独特之处是独它仅仅渲染一个路由。相反地,每一个包含匹配地址(location)的<Route>都会被渲染。
2、在线联系js:
https://developer.mozilla.org/zh-CN/docs/Web/JavaScript/Reference/Operators/Spread_syntax
3、...扩展运算符:
项目中局部代码:
src/routes/中的Users.jsx:
import React,{Component,PropTypes} from 'react';

/**
	本项目中 Users Container 的表现为 Route Components(这也是 dva 推荐的结构划分),
	可以理解页面维度的容器.

	采用自顶向上的设计方法;
*/
/*	Users的Presentational Component暂时都没实现*/
import UserList from '../components/Users/UserList';
import UserSearch from '../components/Users/UserSearch';
import UserModal from '../components/Users/UserModal';

/*	引入对应的样式,可以暂时新建一个空的*/
import style from './Users.less';

/*	对象的扩展运算符(...)用于取出参数对象的所有可遍历属性,拷贝到当前对象之中。*/
function Users(){
	const userSearchProps={};
	const userListProps={};
	const userModalProps={};
	//className={style.normal}
	return (
		<div >
		{/*用户筛选搜索框*/}
		<UserSearch {...userSearchProps}/>
		{/*用户信息展示列表*/}
		<UserList {...userListProps}/>
		{/*添加用户&修改用户弹出的浮层*/}
		<UserModal {...userModalProps}/>

		</div>
	);
}
//Users.propTypes={};
export default Users;
src/components/Users中的UserList.jsx:
import React, { PropTypes } from 'react';
/**
	用户的展示列表
*/
export default ()=><div>user list</div>;import React, { PropTypes } from 'react';
export default ()=><div>user modal</div>;src/components/Users中的UserSearch.jsx:
import React, { PropTypes } from 'react';
export default ()=><div>user search</div>;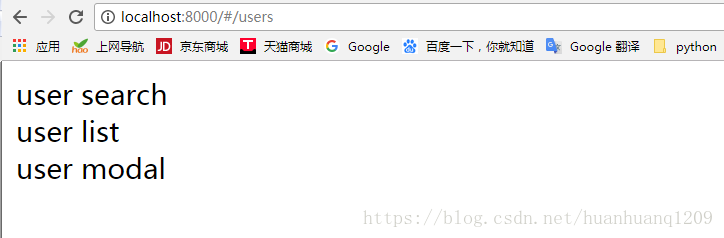
4、dva静态页面展示:
代码整合链接:
https://github.com/dvajs/dva-docs/blob/master/v1/zh-cn/tutorial/06-%E6%B7%BB%E5%8A%A0Reducers.md
可参考:https://zhuanlan.zhihu.com/p/24488764
静态数据写在routers文件夹Users.jsx中:
import React,{Component,PropTypes} from 'react';
/**
本项目中 Users Container 的表现为 Route Components(这也是 dva 推荐的结构划分),
可以理解页面维度的容器.
采用自顶向上的设计方法;
*/
/* Users的Presentational Component暂时都没实现*/
import UserList from '../components/Users/UserList';
import UserSearch from '../components/Users/UserSearch';
import UserModal from '../components/Users/UserModal';
/* 引入对应的样式,可以暂时新建一个空的*/
import style from './Users.less';
/* 对象的扩展运算符(...)用于取出参数对象的所有可遍历属性,拷贝到当前对象之中。*/
function Users(){
const userSearchProps={};
//const userListProps={};
const userListProps={//reducers中没有数据时,模拟静态数据;
total:3,
current:1,
loading:false,
dataSource:[{
name:'张三',
age:23,
address:'成都',
},{
name: '李四',
age: 24,
address: '杭州',
},{
name: '王五',
age: 25,
address: '上海',
}],
};
const userModalProps={};
//className={style.normal}
return (
<div >
{/*用户筛选搜索框*/}
<UserSearch {...userSearchProps}/>
{/*用户信息展示列表*/}
<UserList {...userListProps}/>
{/*添加用户&修改用户弹出的浮层*/}
<UserModal {...userModalProps}/>
</div>
);
}
//Users.propTypes={users:PropTypes.object,};
export default Users;components/User/UserList.jsx中的代码:
import React, {Component, PropTypes } from 'react';
/**
用户的展示列表
可以看到 UserList 组件是一个很纯粹的 Presentation Component,
所需要的数据以及状态是通过 Users Router Component 传递的,
我们现在还是用的静态数据,接下来我们来看看如何在 model 创建 reducer 来将我们的数据抽象出来。
*/
/* 采用antd的UI组件*/
import {Table,message,Popconfirm} from 'antd';
import 'antd/dist/antd.css';
/* 采用stateless的写法*/
const UserList=({total,current,loading,dataSource})=>{
const columns=[{
title:'姓名',
dataIndex:'name',
key:'name',
render:(text)=><a href="#">{text}</a>,
},{
title:'年龄',
dataIndex:'age',
key:'age',
},{
title: '住址',
dataIndex: 'address',
key: 'address',
},{
title: '操作',
key: 'operation',
render:(text,record)=>(
<p>
<a onClick={()=>{}}>编辑</a>
<Popconfirm title="确定要删除吗?" onConfirm={()=>{}}>
<a>删除</a>
</Popconfirm>
</p>
),
}];
// 定义分页对象
//onChange:页码改变的回调,参数是改变后的页码及每页条数
const pagination = {
total,
current,
pageSize: 10,
onChange: ()=>{},
};
/**
columns表格列的配置描述,具体项见下表.
dataSource数据数组
loading页面是否加载中
rowKey表格行 key 的取值,可以是字符串或一个函数
pagination分页器,参考配置项或 pagination,设为 false 时不展示和进行分页
*/
return (
<div>
<Table
columns={columns}
dataSource={dataSource}
loading={loading}
rowKey={record => record.id}
pagination={pagination}
/>
</div>
);
};
export default UserList;models/users.js中:
/**
业务维度:
在数据跟业务状态紧密相连的场景下,将状态放到 model 里面维护会使得我们的代码更加清晰可控
按照业务维度的 model 设计,则是将数据以及使用强关联数据的组件中的状态统一抽象成 model 的方法
loading: false, // 控制加载状态
current: null, // 当前分页信息
currentItem: {}, // 当前操作的用户对象
modalVisible: false, // 弹出窗的显示状态
modalType: 'create', // 弹出窗的类型(添加用户,编辑用户)
name(){} //name: function(){},name的类型是个函数。即,users.currentItem()
*name(){} //前面的 * 号,表示这个方法是一个 Generator函数
dva 中 reducer 的概念,主要是来源于下层封装的 redux,在 dva 中 reducers 主要负责修改 model 的数据(state)。
如何根据新的数据来修改本身的 state,这就是 reducers 要做的事情。
*/
export default{
namespace:'users',
state:{
list:[],
total:null,
loading:false,
current:null,
currentItem:{},
modalVisible:false,
modalType:'create',
},
effects:{
*query(){},
*create(){},
*'delete'(){},
*update(){},
},
reducers:{
showLoading(){},
showModal(){},
hideModal(){},
//使用静态数据返回
querySuccess(){},
// querySuccess(state){
// const mock={
// total:3,
// current:1,
// loading:false,
// list:[{
// id:1,
// name:'张三',
// age:23,
// address:'成都',
// },{
// id:2,
// name:'李四',
// age:24,
// address:'上海',
// }],
// };
// return {...state,...mock,loading:false};
// },
createSuccess(){},
deleteSuccess(){},
updateSuccess(){},
}
}components/Users/UserModal.jsx中:
import React, { PropTypes } from 'react';
export default ()=><div>user modal</div>;src/router.js中:
import React from 'react';
import { Router, Route, Switch } from 'dva/router';
import IndexPage from './routes/IndexPage';
import Users from './routes/Users';

/**
	V3 的路由规则是“排他性”的。这意味着只有一条路由将获胜。
	V4 的路由默认为“包含”的,这意味着多个 <Route> 可以同时进行匹配和渲染。
*/
function RouterConfig({ history }) {
  return (
	<Router history={history}>
      <Route path="/users" component={Users} />
    </Router>
	/*<Router history={history}>
		<Switch>
			<Route path="/users" component={Users}/>
			<Route path="/" exact component={IndexPage} />
		</Switch>
	</Router>*/
  );
}

export default RouterConfig;

/**
	上面的代码等价于:
	export default function({history}){
		return (
			<Router history={history}>
				<Router path="/users" component={Users}/>
			</Router>
		);
	}

*/
运行结果:

5、发起action,在models中:
接着4、代码改进:
https://github.com/dvajs/dva-docs/blob/master/v1/zh-cn/tutorial/06-%E6%B7%BB%E5%8A%A0Reducers.md
src/index.js中:
import './index.css';
import 'antd/dist/antd.css';
import dva from 'dva';

console.log("index.js");
// 1. Initialize
const app = dva();

// 2. Plugins
// app.use({});

// 3. Model
app.model(require('./models/users').default);

// 4. Router
app.router(require('./router').default);

// 5. Start
app.start('#root');
src/models/users.js中:
/**
	业务维度:
	在数据跟业务状态紧密相连的场景下,将状态放到 model 里面维护会使得我们的代码更加清晰可控
	按照业务维度的 model 设计,则是将数据以及使用强关联数据的组件中的状态统一抽象成 model 的方法

	loading: false, 		// 控制加载状态
    current: null, 			// 当前分页信息
    currentItem: {}, 	  	// 当前操作的用户对象
    modalVisible: false,    // 弹出窗的显示状态
    modalType: 'create',    // 弹出窗的类型(添加用户,编辑用户)
	name(){}   			    //name: function(){},name的类型是个函数。即,users.currentItem()
	*name(){}               //前面的 * 号,表示这个方法是一个 Generator函数
	dva 中 reducer 的概念,主要是来源于下层封装的 redux,在 dva 中 reducers 主要负责修改 model 的数据(state)。
	如何根据新的数据来修改本身的 state,这就是 reducers 要做的事情。

*/
//import {hashHistory} from 'dva/router';
console.log("models/users.js");
export default {
	namespace:'users',
	state:{
		list:[],
		total:null,
		loading:false,
		current:null,
		currentItem:{},
		modalVisible:false,
		modalType:'create',
	},
	// Quick Start 已经介绍过 subscriptions 的概念,订阅路由,到了执行的路由执行相应的dispatch()
	  subscriptions: {
		setup({ dispatch, history }) {
		  history.listen(location => {
			if (location.pathname === '/users') {
			  dispatch({
				type: 'querySuccess',
				payload: {}
			  });
			}
		  });
		},
	  },
	effects:{
		*query(){},
		*create(){},
		*'delete'(){},
		*update(){},
	},
	reducers:{
		showLoading(){},
		showModal(){},
		hideModal(){},
		//使用静态数据返回
		querySuccess(state){
			const mock={
				total:3,
				current:1,
				loading:false,
				list:[{
					id:1,
					name:'张三',
					age:23,
					address:'成都',
				},{
					id:2,
					name:'李四',
					age:24,
					address:'上海',
				},{
					id:3,
					name: '王五',
					age: 25,
					address: '上海',
				  },
				],
			};
			console.log("mock");
			console.log(mock);
			console.log("...mock");
			console.log({...mock});
			console.log("state");
			console.log(state);
			console.log("...state");
			console.log({...state});
			console.log("{..}");
			console.log({...state,...mock,loading:false})
			return {...state,...mock,loading:false};
		},
		createSuccess(){},
		deleteSuccess(){},
		updateSuccess(){},
	}
}
src/components/Users/UserList.jsx中:
import React from 'react';
/**
	用户的展示列表

	可以看到 UserList 组件是一个很纯粹的 Presentation Component,
	所需要的数据以及状态是通过 Users Router Component 传递的,
	我们现在还是用的静态数据,接下来我们来看看如何在 model 创建 reducer 来将我们的数据抽象出来。
*/
/*	采用antd的UI组件*/
import {Table,Popconfirm} from 'antd';
import 'antd/dist/antd.css';
/*	采用stateless的写法*/
console.log("components/Users/UserList.jsx");

const UserList=({total,current,loading,dataSource})=>{
	console.log("UserList组件方法");
	console.log({total,current,loading,dataSource});
	const columns=[{
		title:'姓名',
		dataIndex:'name',
		key:'name',
		render:(text)=><a href="#">{text}</a>,
	},{
		title:'年龄',
		dataIndex:'age',
		key:'age',
	},{
		title: '住址',
		dataIndex: 'address',
		key: 'address',
	},{
		title: '操作',
		key: 'operation',
		render:(text,record)=>(
		<p>
			<a onClick={()=>{}}>编辑</a>

			<Popconfirm title="确定要删除吗?" onConfirm={()=>{}}>
				<a>删除</a>
			</Popconfirm>
		</p>
		),
	}];
	// 定义分页对象
	//onChange:页码改变的回调,参数是改变后的页码及每页条数
	const pagination = {
		total,
		current,
		pageSize: 10,
		onChange: ()=>{},
	};
	/**
		columns表格列的配置描述,具体项见下表.
		dataSource数据数组
		loading页面是否加载中
		rowKey表格行 key 的取值,可以是字符串或一个函数
		pagination分页器,参考配置项或 pagination,设为 false 时不展示和进行分页
	*/
	return (
		<div>
		  <Table
			columns={columns}
			dataSource={dataSource}
			loading={loading}
			rowKey={record => record.id}
			pagination={pagination}
		  />
		</div>
	);
};
export default UserList;
src/routes/Users.jsx中:
import React from 'react';
import PropTypes from 'prop-types';
import {connect} from 'dva';
/**
	关联 Model:
*/
/*
	本项目中 Users Container 的表现为 Route Components(这也是 dva 推荐的结构划分),
	可以理解页面维度的容器.

	采用自顶向上的设计方法;
*/
/*	Users的Presentational Component暂时都没实现*/
import UserList from '../components/Users/UserList';
import UserSearch from '../components/Users/UserSearch';
import UserModal from '../components/Users/UserModal';


console.log("routes/Users.jsx");
/*	对象的扩展运算符(...)用于取出参数对象的所有可遍历属性,拷贝到当前对象之中。*/
function Users({location,dispatch,users}){//创建一个类Users, 接收一些参数,用于类自己使用,后面会通过connect将state联系给这些参数。
	const {
		loading,list,total,current,currentItem,modalVisible,modalType
	}=users;//根据models中的数据定义的;
	console.log("users分子");
	console.log({
		loading,list,total,current,currentItem,modalVisible,modalType
	});
	const userSearchProps={};
	const userListProps={//reducers中没有数据时,模拟静态数据;
		total,
		current,
		loading,
		dataSource:list,
	};
	console.log("{...userListProps}");
	console.log({...userListProps});
	const userModalProps={};
	//className={style.normal}
	return (
		<div>
			{/*用户筛选搜索框*/}
			<UserSearch {...userSearchProps}/>
			{/*用户信息展示列表*/}
			<UserList {...userListProps}/>
			{/*添加用户&修改用户弹出的浮层*/}
			<UserModal {...userModalProps}/>
		</div>
	);
}

Users.propTypes = {
  users: PropTypes.object,
};

/*	指定订阅数据,这里关联了users*/
function mapStateToProps({users}){
	console.log("users");
	console.log(users);//{list: Array(3), total: 3, loading: false, current: 1, currentItem: {…}, …}
	return {users};
};

/*	建立数据关联关系*/
export default connect(mapStateToProps)(Users);
import { Router, Route } from 'dva/router';
import Users from './routes/Users';

/**
	V3 的路由规则是“排他性”的。这意味着只有一条路由将获胜。
	V4 的路由默认为“包含”的,这意味着多个 <Route> 可以同时进行匹配和渲染。
*/

console.log("src/router.js");
function RouterConfig({ history }) {
  return (
	<Router history={history}>
      <Route path="/users" component={Users} />
    </Router>
	/*<Router history={history}>
		<Switch>
			<Route path="/users" component={Users}/>
			<Route path="/" exact component={IndexPage} />
		</Switch>
	</Router>*/
  );
}

export default RouterConfig;

/**
	上面的代码等价于:
	export default function({history}){
		return (
			<Router history={history}>
				<Router path="/users" component={Users}/>
			</Router>
		);
	}

*/
运行结果为:

最终学习链接:https://github.com/dvajs/dva-example-user-dashboard
展示图:


6、第5部分代码运行时出现的问题:
当routes/Users.jsx中 :
import React, {PropTypes}from 'react';
.......
Users.propTypes = {
users: PropTypes.object,
};
时,出现的问题:

更改:
思路:先看react库中(项目的node_module文件夹中react包)有没有export default PropTypes;
如果压根就没有,就需要更换PropTypes的引入包了,即改为:
import React from 'react';
import PropTypes from 'prop-types';


 330
330

 被折叠的 条评论
为什么被折叠?
被折叠的 条评论
为什么被折叠?
 到【灌水乐园】发言


