


第一步 准备工作
安装nginx需要的依赖包
打开 ubutun 终端,执行
sudo apt-get update
sudo apt-get install build-essential
sudo apt-get install openssl libssl-dev
sudo apt-get install libpcre3 libpcre3-dev
sudo apt-get install zlib1g-dev 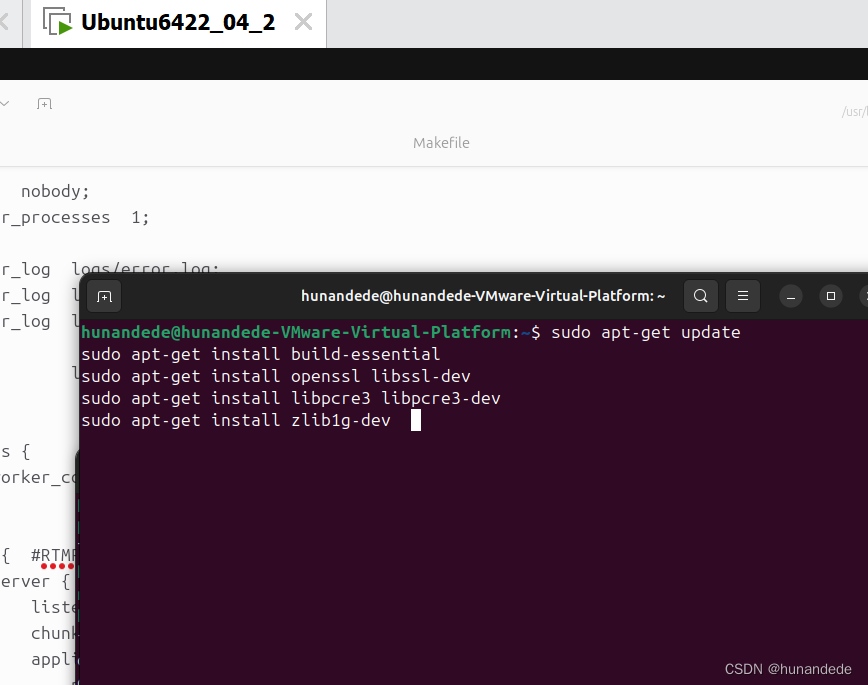
第二步 在用户目录创建rtmp, 下载 nginx 和 nginx-rtmp-module,解压
1.创建放置文件的目录
mkdir ~/rtmp
cd ~/rtmp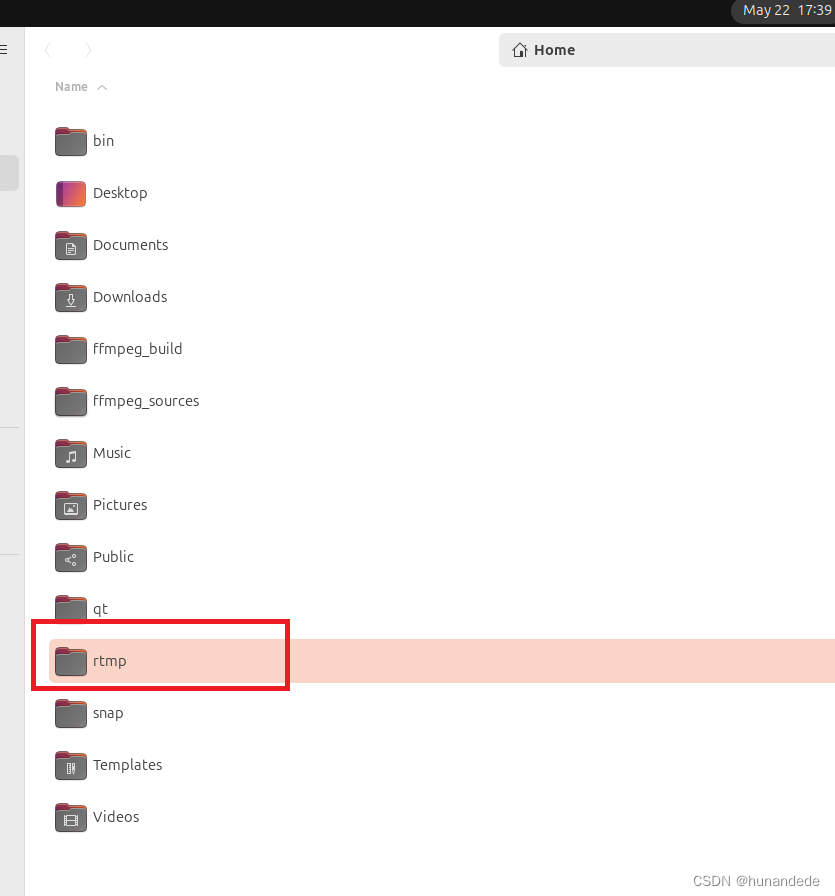
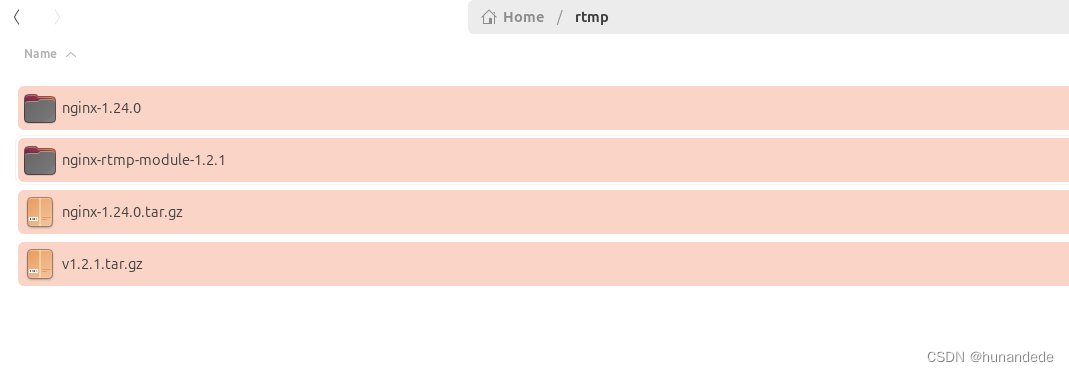
2.下载 nginx
官网:https://nginx.org/en/download.html,可以自行从官网下载
也可以直接使用命令在linux上下载,本次使用的如下命令下载的
wget https://nginx.org/download/nginx-1.24.0.tar.gz3.下载 nginx-rtmp-module
官网:https://github.com/arut/nginx-rtmp-module 可以自行从官网下载
也可以直接使用命令在linux上下载,如下两个命令任何一个都可以下载。
git clone https://github.com/arut/nginx-rtmp-module.git  这个地址一直下载不了
wget https://github.com/arut/nginx-rtmp-module/archive/v1.2.1.tar.gz
本次使用的 wget https://github.com/arut/nginx-rtmp-module/archive/v1.2.1.tar.gz 下载的。
下载 nginx-rtmp-module 的目的是:nginx要支持rtmp模块,做推拉流,这个module是必须下载的
4. 解压到当前目录下:
5 build nginx
进入到/home/hunandede/rtmp/nginx-1.24.0 目录下
cd /home/hunandede/rtmp/nginx-1.24.0config文件,注意的是,配置命令中--add-module=/home/hunandede/rtmp/nginx-rtmp-module-1.2.1中/home/hunandede/rtmp/nginx-rtmp-module-1.2.1 这个目录是你通过git clone下来的nginx-rtmp-module的源码目录,每一个人都不一样,切记。
./configure \
 --with-threads \
 --with-http_stub_status_module \
 --with-http_mp4_module \
 --with-http_v2_module \
 --with-http_flv_module \
 --with-http_ssl_module \
 --with-http_realip_module \
 --with-stream \
 --with-stream_ssl_module \
 --add-module=/home/hunandede/rtmp/nginx-rtmp-module-1.2.1
make -j4
sudo make install# 注意 这里可能会报错
# nginx-rtmp-module/ngx_rtmp_eval.c:160:17: error: this statement may fall through [-Werror=implicit-fallthrough=]
解决方案
# 进入nginx 下载目录的objs 编辑Makefile
vim objs/Makefile
# 第三行 将`-Werror` 删掉
改动的部分:原先为 CFLAGS = -pipe -O -W -Wall -Wpointer-arith -Wno-unused-parameter -Werror -g
# 最终结果为 CFLAGS = -pipe -O -W -Wall -Wpointer-arith -Wno-unused-parameter -g
# 保存 重新make
make && make install
6.安装完成后,注意的是安装路径,配置文件路径,nginx可执行文件路径如下
默认安装到 /usr/local/nginx
配置文件路径:/usr/local/nginx/conf/nginx.conf
可执行文件路径: /usr/local/nginx/sbin/nginx -s reload
第三步:配置nginx -- 点播配置
1. 建立媒体文件夹,这个文件夹下放置你要推流出去的 影音文件
我是放在这个下面的,这个无所谓的,你想放哪里放哪里,我这样放置,是因为我的linux和windows有一个共享文件夹,是放在这里的,主要是为了方便从windows上拷贝 影音文件。
/mnt/hgfs/linuxgongxiang/ffmpeg/videofile
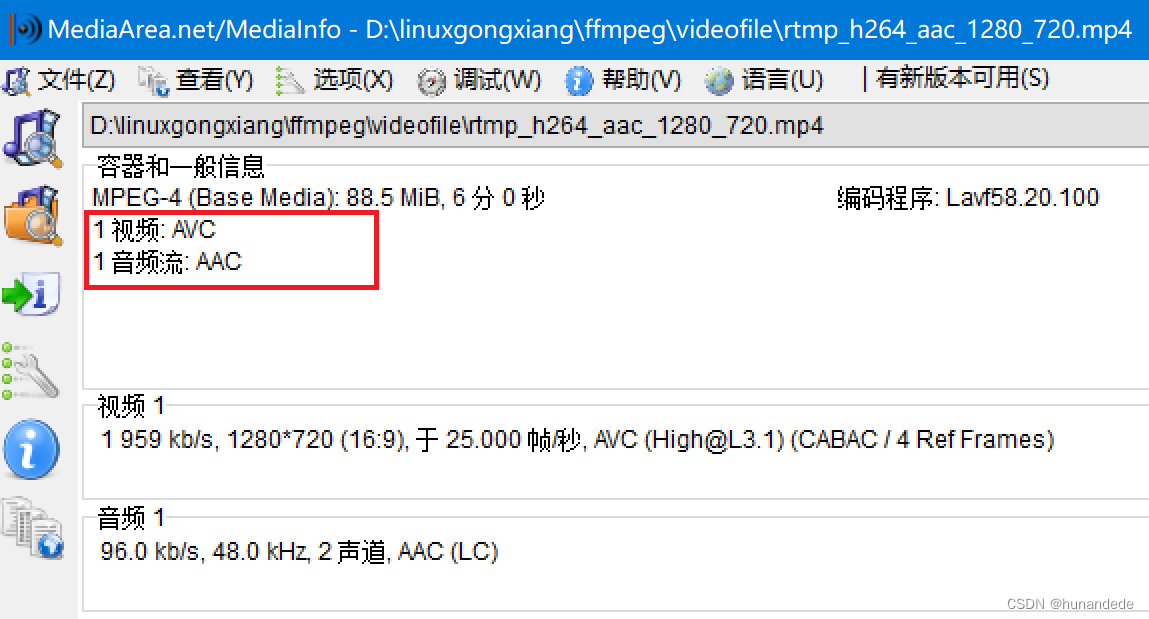
在这个文件夹下面放置了一个 : rtmp_h264_aac_1280_720.mp4文件
该文件是有格式要求的: 符合AAC+H264的格式即可。
2. 在配置文件中,将你的影音文件夹 配置进去
配置文件路径:/usr/local/nginx/conf/nginx.conf
打开 /usr/local/nginx/conf/nginx.conf
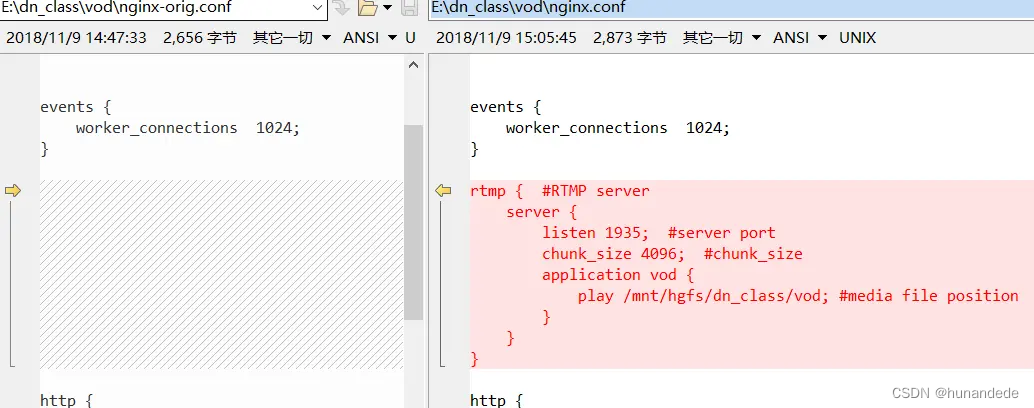
添加 如下的代码,如下的几行代码的意思是,我配置一个 rtmp,是一个server,监听1935端口,组块大小为4096 bytes,名字是vod,对应的文件夹就是 你的video file的文件夹
rtmp {  #RTMP server
    server {
        listen 1935;  #server port
        chunk_size 4096;  #chunk_size
        application vod {
            play /mnt/hgfs/linuxgongxiang/ffmpeg/videofile; #media file position
        }
    }
}
对比改动前和改动后,注意这里只是为了对比,里面的内容 和我这里写的不一样。
3. 重新启动一下nginx
sudo /usr/local/nginx/sbin/nginx -s reload
如果报错

nginx: [error] open() "/usr/local/nginx/logs/nginx.pid" failed (2: No such file or directory)
则说明nginx没有启动,所以需要先启动
4. 在Windows使用ffplay进行播放
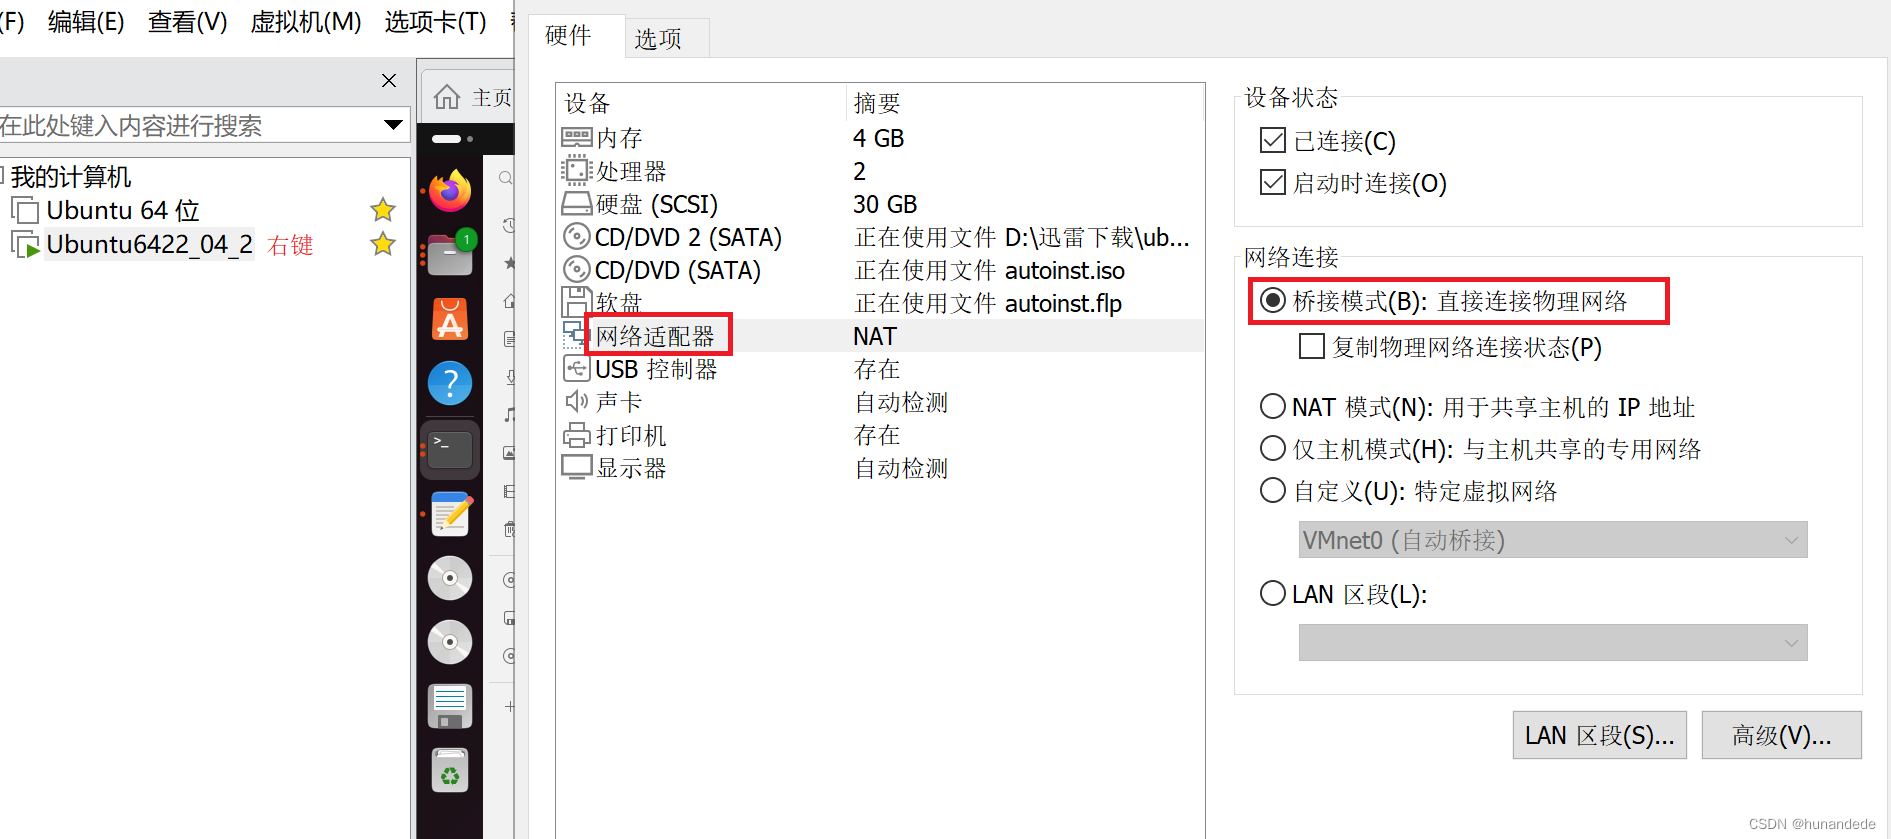
注意的是:虚拟机安装的Ubuntu网络连接需要选择"桥接模式",使得windows和Ubuntu是同一网段的IP。
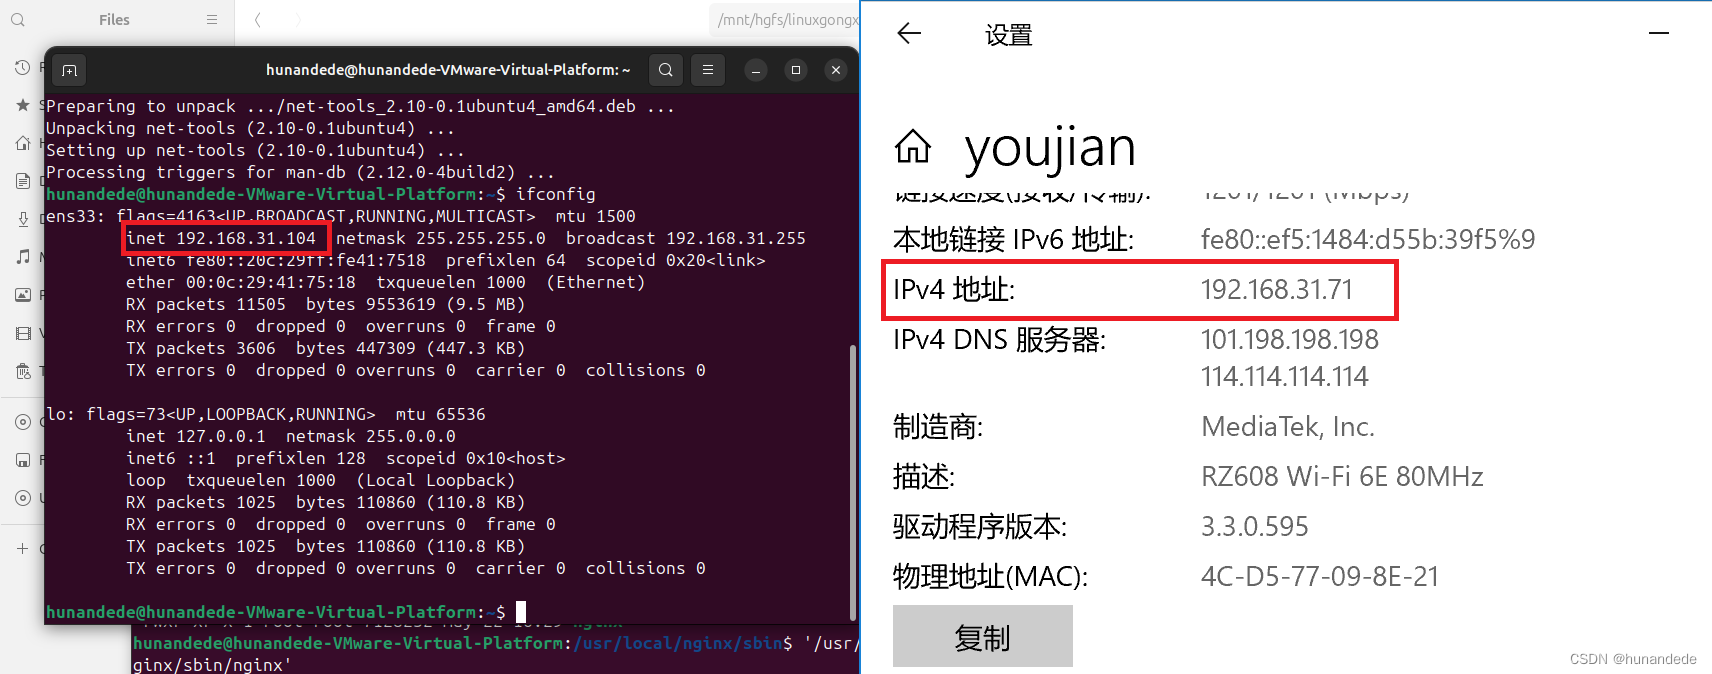
unbutun上 使用ifconfig 查看,IP地址为,192.168.31.104
这里也将windows 的IP 截图了,只是对比查看,在桥接模式下,linux 和windows的IP都是在192.168.31下的
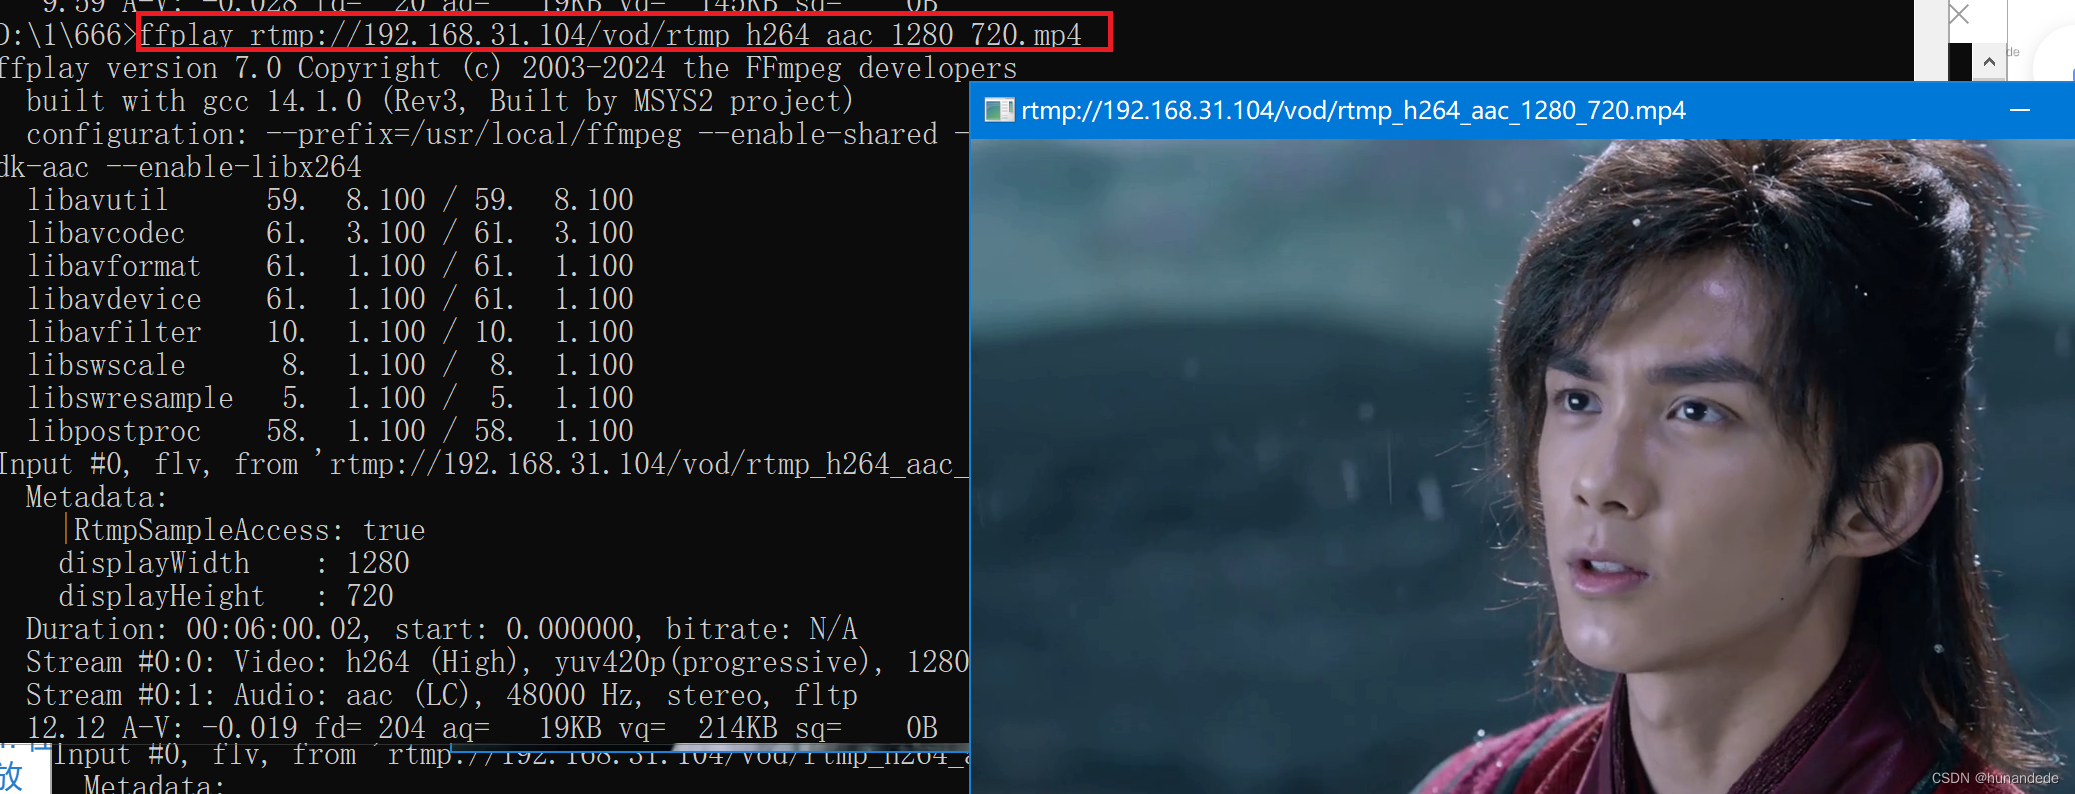
ffplay rtmp://192.168.31.104/vod/rtmp_h264_aac_1280_720.mp4
成功。
第四步 配置nginx -- 直播配置
配置
RTMP服务添加一个application这个名字可以任意起,也可以起多个名字,由于是直播我就叫做它live,如果打算弄多个序列的直播就可以live_cctv。
配置文件路径:/usr/local/nginx/conf/nginx.conf
打开 /usr/local/nginx/conf/nginx.conf
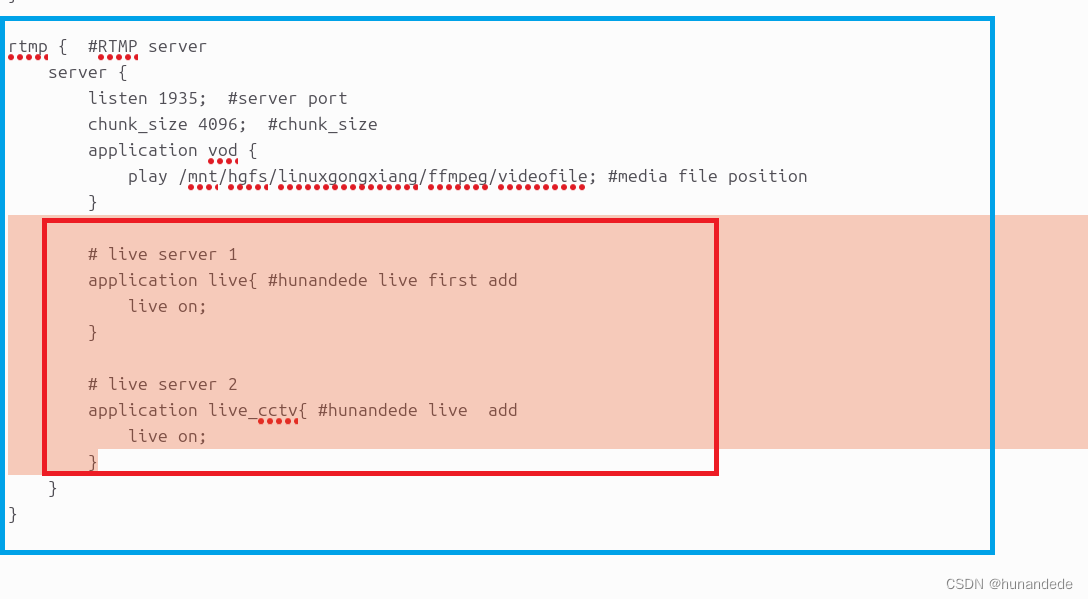
添加的部分为
        # live server 1
        application live{ #hunandede live first add
            live on;
        }

        # live server 2
        application live_cctv{ #hunandede live  add
            live on;
        }
位置在:
rtmp {  #RTMP server
    server {
        listen 1935;  #server port
        chunk_size 4096;  #chunk_size
        application vod {
            play /mnt/hgfs/linuxgongxiang/ffmpeg/videofile; #media file position
        }

        # live server 1
        application live{ #hunandede live first add
            live on;
        }

        # live server 2
        application live_cctv{ #hunandede live  add
            live on;
        }
    }
}
在linux上推流
在Ubuntu端用ffmpeg产生一个模拟直播源,向rtmp服务器推送
注意,源文件必须是H.264+AAC编码的。
ffmpeg -re -i /mnt/hgfs/linuxgongxiang/ffmpeg/videofile/rtmp_h264_aac_1280_720.mp4 -c copy -f flv rtmp://192.168.31.104/live/rtmp_h264_aac_1280_720

ffmpeg -re -i /mnt/hgfs/linuxgongxiang/ffmpeg/videofile/rtmp_h264_aac_1280_720.mp4 -c copy -f flv rtmp://192.168.31.104/live_cctv/35
windows 上拉流
ffplay rtmp://192.168.31.104/live/rtmp_h264_aac_1280_720

ffplay rtmp://192.168.31.104/live_cctv/35


 被折叠的 条评论
为什么被折叠?
被折叠的 条评论
为什么被折叠?
 到【灌水乐园】发言


